Advertisement
Quick Links
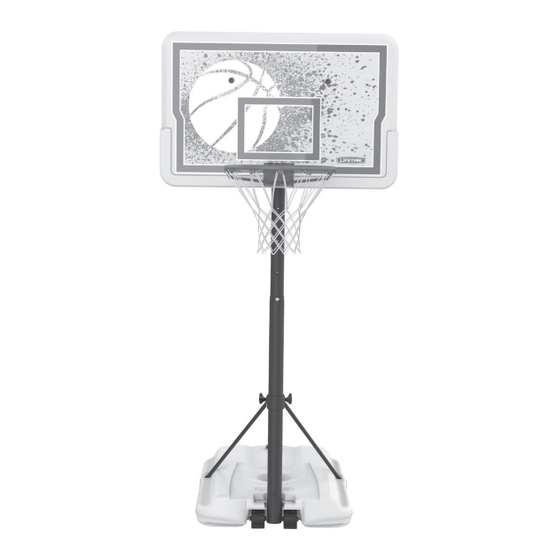
POOLSIDE
BASKETBALL SYSTEM
MODEL 1301
BEFORE ASSEMBLY:
• Decide how you would like to fi ll your base
(sand is recommended).
• At least 2 people recommended for setup.
WATCH
3D ANIMATION
OF THE FULL ASSEMBLY
SCAN THE
CODE
Save this instruction in the event that the manufacturer has
to be contacted for replacement parts.
TOOLS REQUIRED
1/2" (≈13 mm)
(2)
(1)
(1)
QUESTIONS?
CONTACT LIFETIME CUSTOMER SERVICE:
Dial 1-800-225-3865
7:00 am–5:00 pm (M–F) MST
and 9:00 am–1:00 pm (Sat) MST
®
OR SEARCH
1187161
3/16" (≈5 mm)
(2, included)
319 lb (145 kg)
Live Chat:
www.lifetime.com/customerservice
ASSEMBLY INSTRUCTIONS
Pour le français, voir la page 2. Para el español, ver la página 3.
(1)
(1)
(1)
(1)
For Customer Service in Mainland
Europe and the United Kingdom,
E-mail: cs@lifetimeproducts.eu
TABLE OF CONTENTS
Icon Legend................................4
Notices....................................5
Pole Assembly............................6
Pole-to-Base Assembly................9
Backboard-to-Rim Assembly......13
Parts Identifi er..........................i-iv
Final Assembly..........................17
Maintenance Instructions..........24
Warning Sticker........................25
Registration........................26
Warranty................................29
Model Number: 1301
Product ID:
Advertisement

Related Manuals for Lifetime POOLSIDE 1301


Summary of Contents for Lifetime POOLSIDE 1301
- Page 1 Maintenance Instructions..24 Warning Sticker......25 Registration......26 Warranty........29 319 lb (145 kg) Model Number: 1301 QUESTIONS? CONTACT LIFETIME CUSTOMER SERVICE: Product ID: Dial 1-800-225-3865 Live Chat: For Customer Service in Mainland Europe and the United Kingdom, www.lifetime.com/customerservice 7:00 am–5:00 pm (M–F) MST E-mail: cs@lifetimeproducts.eu...
- Page 2 Garantie.......30 319 lb (145 kg) N° de modèle : 1301 ® QUESTIONS ? CONTACTER AUX SERVICES À LA CLIENTÈLE LIFETIME Référence du produit : Composer le 1-800-225-3865 Entretien en direct : Pour nos services à la clientèle du continent européen et au Royaume-Uni, www.lifetime.com/customerservice...
- Page 3 Garantía........31 319 lb (145 kg) Número de modelo: 1301 ¿PREGUNTAS? ® PONERSE EN CONTACTO CON LOS SERVICIOS DE CLIENTES LIFETIME ID del producto: Marcar al 1-800-225-3865 Para nuestros servicios a clientes Chat en vivo: en el continente europeo y el Reino www.lifetime.com/customerservice...
- Page 4 ICON LEGEND / LÉGENDE DES ICÔNES / LEYENDA DE ÍCONOS • Indicates special heed should be taken when reading. • Ceci indique que vous devez faire attention à ce que vous lisez. • Indica que uno debe prestar atención al leer. •...
- Page 5 WARNINGS & NOTICES / AVERTISSEMENTS ET AVIS / ADVERTENCIAS Y AVISOS SAFETY INSTRUCTIONS FAILURE TO FOLLOW THESE WARNINGS MAY RESULT IN SERIOUS INJURY OR PROPERTY DAMAGE AND WILL VOID WARRANTY. Owner must ensure that all players know and follow these rules for safe operation of the system. To ensure safety, do not attempt to assemble this product without following the instructions carefully.
- Page 6 POLE ASSEMBLY / ASSEMBLAGE DU POTEAU / ENSAMBLAJE DEL POSTE HARDWARE REQUIRED / QUINCAILLERIE REQUISE / HERRAJE REQUERIDO Hardware Bag / Sac de quincaillerie / Bolsa de herraje AYT (x1) AOL (x1) DXZ (x1) BTS (x1) EEO (x2) PARTS REQUIRED / PIÈCES REQUISES / PIEZAS REQUERIDAS Metal Parts / Pièces en métal / Piezas de metal...
- Page 7 SECTION 1 (CONTINUED) / SECTION 1 (SUITE) / SECCIÓN 1 (CONTINUACIÓN) TOOLS AND HARDWARE REQUIRED / OUTILS ET QUINCAILLERIE REQUIS / HERRAMIENTAS Y HERRAJE REQUERIDOS 3/16" (4.8 mm) DXZ (x1) BTS (x1) • Slide the Top Pole (ALH) far enough out of the Bottom •...
- Page 8 SECTION 1 (CONTINUED) / SECTION 1 (SUITE) / SECCIÓN 1 (CONTINUACIÓN) TOOLS AND HARDWARE REQUIRED / OUTILS ET QUINCAILLERIE REQUIS / HERRAMIENTAS Y HERRAJE REQUERIDOS 1/2" (13 mm) AOL (x1) AYT (x1) • The crimped side of the Top Pole (ALH) must be on the same side as the Warning Sticker (AMT) on the Bottom Pole. •...
- Page 9 POLE TO BASE ASSEMBLY / ASSEMBLAGE DU POTEAU A LA BASE / ENSAMBLAJE DEL POSTE A LA BASE HARDWARE REQUIRED / QUINCAILLERIE REQUISE / HERRAJE REQUERIDO Hardware bag / Sac de quincaillerie / Bolsa de herraje BKH (x2) AYT (x1) AAO (x2) ABD (x4) ABN (x2)
- Page 10 SECTION 2 (CONTINUED) / SECTION 2 (SUITE) / SECCIÓN 2 (CONTINUACIÓN) TOOLS AND HARDWARE REQUIRED / OUTILS ET QUINCAILLERIE REQUIS / HERRAMIENTAS Y HERRAJE REQUERIDOS 1/2" (≈13 mm) BKH (x2) AAO (x2) ABD (x4) • Attach the fl attened end of a pole brace (ALI) to the base (AJM) with the hardware shown. Only fi...
- Page 11 SECTION 2 (CONTINUED) / SECTION 2 (SUITE) / SECCIÓN 2 (CONTINUACIÓN) TOOLS AND HARDWARE REQUIRED / OUTILS ET QUINCAILLERIE REQUIS / HERRAMIENTAS Y HERRAJE REQUERIDOS ABN (x2) • Slide the Large Axle (AJC) through the Wheels (AMU) and the holes at the end of the Bottom Pole (ALE) as shown. Slide the Small Axle (AJE) through the second set of holes near the end of the Bottom Pole.
- Page 12 SECTION 2 (CONTINUED) / SECTION 2 (SUITE) / SECCIÓN 2 (CONTINUACIÓN) TOOLS AND HARDWARE REQUIRED / OUTILS ET QUINCAILLERIE REQUIS / HERRAMIENTAS Y HERRAJE REQUERIDOS CNA (x1) AYT (x1) • Snap the Slide Collar (CMZ) onto the Bottom Pole (ALE). Then attach the Pole Braces (ALI) to the Bottom Pole (ALE) by securing Hex Knobs (AYU) through the Slide Collar (CMZ) using the hardware shown.
- Page 13 BACKBOARD TO RIM ASSEMBLY / ASSEMBLAGE DU PANNEAU À L’ANNEAU / ENSAMBLAJE DEL TABLERO AL ARO HARDWARE REQUIRED / QUINCAILLERIE REQUISE / HERRAJE REQUERIDO Hardware Bag / Sac de quincailleries / Bolsa de herraje APG (x2) ABK (x4) APN (x2) APJ (x2) AAE (x2) ABD (x4)
- Page 14 SECTION 3 (CONTINUED) / SECTION 3 (SUITE) / SECCIÓN 3 (CONTINUACIÓN) TOOLS AND HARDWARE REQUIRED / OUTILS ET QUINCAILLERIE REQUIS / HERRAMIENTAS Y HERRAJE REQUERIDOS 1/2” (13 mm) (x2) ESZ (x1) APG (x2) APN (x2) • The U-Bolt (ESZ) must rest in the notches of the •...
- Page 15 SECTION 3 (CONTINUED) / SECTION 3 (SUITE) / SECCIÓN 3 (CONTINUACIÓN) TOOLS AND HARDWARE REQUIRED / OUTILS ET QUINCAILLERIE REQUIS / HERRAMIENTAS Y HERRAJE REQUERIDOS AAE (x2) ABK (x4) ABD (x4) • Attach the Rim (ALX) and Backboard (AJI) to the Pole assembly. Insert the U-Bolt (ESZ) through the top holes of the Backboard and the Rim, and secure the U-Bolt with Washers (ABD) and Nylock Flange Nuts (ABK).
- Page 16 SECTION 3 (CONTINUED) / SECTION 3 (SUITE) / SECCIÓN 3 (CONTINUACIÓN) TOOLS AND HARDWARE REQUIRED / OUTILS ET QUINCAILLERIE REQUIS / HERRAMIENTAS Y HERRAJE REQUERIDOS 1/2” (13 mm) (x2) APJ (x2) AAJ (x2) • Bend the Backboard Brackets (AJJ & AJK) outward by hand and position the holes in the Backboard Brackets over the holes in the Backboard.
- Page 17 PARTS IDENTIFIER / IDENTIFICATEUR DE PIÈCES / IDENTIFICADOR DE PIEZAS This page intentionally left blank Cette page est intentionnellement laissée en blanc Esta página ha sido dejada en blanco intencionalmente...
- Page 18 PARTS IDENTIFIER / IDENTIFICATEUR DE PIÈCES / IDENTIFICADOR DE PIEZAS Metal Part / Pièce en métal Pieza de metal ” ALH (x1) ALE (x1) ALI (x2) 7” 15 ” AJC (x1) AJE (x1) AJJ (x1) ALX (x1) AJK (x1)
- Page 19 PARTS IDENTIFIER / IDENTIFICATEUR DE PIÈCES / IDENTIFICADOR DE PIEZAS Plastic Parts / Pièces en plastique Piezas de plástico AKZ (x1) AJI (x1) AJM (x1) CNB (x2) AYU (x3) AMU (x2) AEF (x1) CMZ (x1) FIR (x1) FIQ (x1) HARDWARE REQUIRED / QUINCAILLERIE REQUISE / HERRAJE REQUERIDO...
- Page 20 PARTS IDENTIFIER / IDENTIFICATEUR DE PIÈCES / IDENTIFICADOR DE PIEZAS This page intentionally left blank Cette page est intentionnellement laissée en blanc Esta página ha sido dejada en blanco intencionalmente...
- Page 21 FINAL ASSEMBLY / ASSEMBLAGE FINAL / ENSAMBLAJE FINAL HARDWARE REQUIRED / QUINCAILLERIE REQUISE / HERRAJE REQUERIDO Hardware bag / Sac de quincaillerie / Bolsa de herraje AQQ (x2) CNC (x2) CHQ (x2) AAF (x2) PARTS REQUIRED / PIÈCES REQUISES / PIEZAS REQUERIDAS Plastic parts / Pièces en plastique Piezas de plástico...
- Page 22 SECTION 4 (CONTINUED) / SECTION 4 (SUITE) / SECCIÓN 4 (CONTINUACIÓN) TOOLS AND HARDWARE REQUIRED / OUTILS ET QUINCAILLERIE REQUIS / HERRAMIENTAS Y HERRAJE REQUERIDOS 319 lb (145 kg) 4.1A 4.1B • OPTION A: Fill the base with sand. •...
- Page 23 SECTION 4 (CONTINUED) / SECTION 4 (SUITE) / SECCIÓN 4 (CONTINUACIÓN) TOOLS AND HARDWARE REQUIRED / OUTILS ET QUINCAILLERIE REQUIS / HERRAMIENTAS Y HERRAJE REQUERIDOS 1/2" (x2) (≈13 mm) CNC (x2) • Attach the net (AKZ) to the rim (ALX). •...
- Page 24 SECTION 4 (CONTINUED) / SECTION 4 (SUITE) / SECCIÓN 4 (CONTINUACIÓN) TOOLS AND HARDWARE REQUIRED / OUTILS ET QUINCAILLERIE REQUIS / HERRAMIENTAS Y HERRAJE REQUERIDOS AQQ (x2) • Pull out the end links of the chains (CNC) so they are away from the sides of the base. Mark the location of the last links in the chain and drill a hole 13 mm (1/2 inch) in diameter and 39 mm (1 1/2 inches) deep in the concrete in each spot.
- Page 25 SECTION 4 (CONTINUED) / SECTION 4 (SUITE) / SECCIÓN 4 (CONTINUACIÓN) TOOLS AND HARDWARE REQUIRED / OUTILS ET QUINCAILLERIE REQUIS / HERRAMIENTAS Y HERRAJE REQUERIDOS CHQ (x2) AAF (x2) • Slide a hex bolt (CHQ) through a washer (AAF) and through the end link of the chain. Secure the bolt into the concrete anchor.
- Page 26 SECTION 4 (CONTINUED) / SECTION 4 (SUITE) / SECCIÓN 4 (CONTINUACIÓN) TOOLS AND HARDWARE REQUIRED / OUTILS ET QUINCAILLERIE REQUIS / HERRAMIENTAS Y HERRAJE REQUERIDOS • OPERATING THE HEIGHT ADJUSTMENT SYSTEM. ONLY ADULTS SHOULD ADJUST THE HEIGHT OF THE SYSTEM. •...
- Page 27 SECTION 4 (CONTINUED) / SECTION 4 (SUITE) / SECCIÓN 4 (CONTINUACIÓN) TOOLS AND HARDWARE REQUIRED / OUTILS ET QUINCAILLERIE REQUIS / HERRAMIENTAS Y HERRAJE REQUERIDOS • MOVING THE SYSTEM: • EN DÉPLAÇANT LE SYSTÈME : • DESPLAZANDO EL SISTEMA: WARNING: The system must only be moved by people capable of handling its weight.
- Page 28 Este acto puede dañar el sistema Ne pas mettre quelque chose sur la manivelle, l’anneau, le panneau, ou les y anular la garantía. bras d’élévation car cela endommagera le système et annulera la garantie. www.lifetime.com # 1146874 7/9/2013...
- Page 29 à des tiers, et ne leur permettra pas d’utiliser vos données personnelles à leurs propres fi ns. Nous vous invitons à lire notre politique de confi dentialité à www.lifetime.com (en anglais seulement) ENREGISTRER CE PRODUIT aujourd’hui! REGISTRAR EL PRODUCTO EN LÍNEA EN WWW.LIFETIME.COM...
- Page 30 NOTES / REMARQUES / NOTAS...
- Page 31 NOTES / REMARQUES / NOTAS...
- Page 32 NOTES / REMARQUES / NOTAS...
- Page 33 2. This warranty is nontransferable and is expressly limited to the repair or replacement of defective product. If the product is defective within the terms of this warranty, Lifetime Products, Inc. will repair or replace defective parts at no cost to the purchaser.
- Page 34 6. Cette garantie remplace expressément toutes autres garanties, expresses ou tacites, y compris les garanties de commercialisation ou d’adaptation à un but particulier dans la mesure permise par les lois fédéraux et des états. Ni Lifetime Products, Inc. ni aucun de ses représentants n’assure aucune autre responsabilité concernant ce produit. Cette garantie vous accorde des droits particuliers, et vous aurai peut-être des autres droites qui varient d’un état à...
- Page 35 NO ESTÁN DISPONIBLES O SON OBSOLETAS. 1. El comprador original recibe la garantía de que los sistemas de basquetbol Lifetime estarán libres de defectos de material o de mano de obra por un período de cinco años a contar desde la fecha de la compra original. La palabra “defectos” se defi ne como imperfecciones que perjudican el uso del producto.
- Page 36 Or call: 1-800-424-3865 7:00 am–5:00 pm (M–F) MST and 9:00 am–1:00 pm Saturday MST ® AMÉLIORER L’ACHAT LIFETIME EN AJOUTANT DES ACCESSOIRES OU D’AUTRES PRODUITS Pour acheter des accessoires ou des autres produits Lifetime , visiter le : ® www.lifetime.com (Anglais seulement) Ou composer le 1-800-424-3865 Du lundi au vendredi de 7 h à...
Need help?
Do you have a question about the POOLSIDE 1301 and is the answer not in the manual?
Questions and answers