Table of Contents
Advertisement
Available languages
Available languages
Quick Links
Instruction manual
Originalbetriebsanweisung
Notice d'utilisation
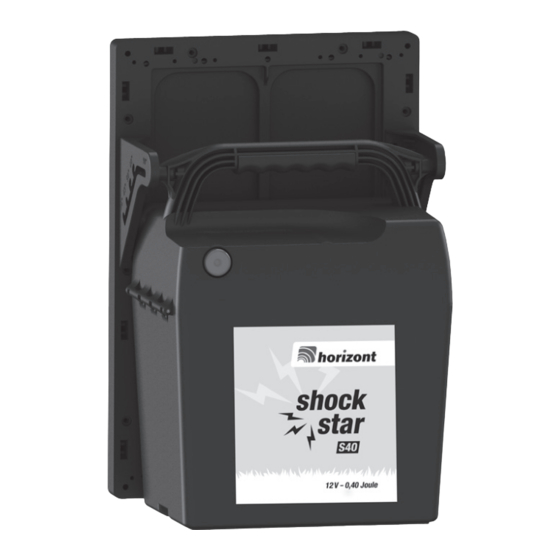
shockstar S40
Type 10914 (10915)
shockstar S70
Type 10916 (10917)
ORIGINALBETRIEBSANLEITUNG
Elektrozaungerät
INSTRUCTION MANUAL
Electric Fencer
NOTICE D'UTILISATION
Électrificateur de clôture
INSTRUCCIONES DE SERVICIO
Valla eléctrica
MANUAL DE INSTRUÇÕES
Cerca Eléctrica
ISTRUZIONI PER L'USO
Apparecchio per recinti elettrici
NÁVOD NA OBSLUHU
pre napájacie zariadenie elektrickej ohradyohrady
BRUGSANVISNING
El-hegnsapparat
BEDIENINGSHANDLEIDING
Schrikdraadinstallatie
Advertisement
Table of Contents

Related Manuals for Horizont S40


Summary of Contents for Horizont S40
- Page 1 Instruction manual Originalbetriebsanweisung Notice d‘utilisation shockstar S40 Type 10914 (10915) shockstar S70 Type 10916 (10917) ORIGINALBETRIEBSANLEITUNG Elektrozaungerät INSTRUCTION MANUAL Electric Fencer NOTICE D‘UTILISATION Électrificateur de clôture INSTRUCCIONES DE SERVICIO Valla eléctrica MANUAL DE INSTRUÇÕES Cerca Eléctrica ISTRUZIONI PER L’USO Apparecchio per recinti elettrici NÁVOD NA OBSLUHU...
- Page 2 Originalbetriebsanleitung shockstar S40 & shockstar S70 in Verbindung mit den Errichtungs- und Sicherheitshinweisen für Elektrozaungeräte SECURA ANIMAL oder SECURA SECURITY (www.horizont.com/securaanimal oder www. horizont.com/securasecurity) Das Weidezaungerät muss vor jedem Eingriff ausgeschaltet werden! Montage und Anschluss: Das Gerät an einer möglichst feuchten Stelle aufstellen. Der mitgelieferte Erdpfahl 83306 oder der optionale 1m-Erdungsstab (Längsstab) 14041-1 muss an einer feuchten Stelle möglichst tief...
- Page 3 Batterie anstelle eines 12 V Akkus zu benutzten. Vorrangig wird das Gerät aus dem Solarpanel betrieben. Kommt über das Solarpanel keine ausrei- chende Leistung, schaltet das Gerät automatisch auf die angeschlossene 9 Volt Batterie oder den 12 Volt Akku um. shockstar S40 & shockstar S70...
- Page 4 2. Ermitteln Sie den korrekten Neigungswinkel für das Solarpanel. Die Position der Sonne über dem Horizont verändert sich im Laufe der Jahreszeiten. Als gene- relle Empfehlung gilt ein Winkel von 50 Grad als optimal für den langfristigen Einsatz in den meisten Teilen Europas.
-
Page 5: Assembly And Connection
Operating instruction for electric fence controller shockstar S40 & shockstar S70 in connection with safety hints SECURA ANIMAL or SECURA SECURITY(www.horizont.com/securaanimal or www.horizont.com/securasecurity) Energizer has to be turned OFF before any intervention! ASSEMBLY AND CONNECTION: Set the device up in as moist a location as possible. The supplied earth post 83306 or the optional 1m earthing rod (longitudinal rod) 14041-1 must be driven as deeply as possible into the ground in a damp area and connected with a high voltage-resistant connecting cable (e.g. -
Page 6: Operating Principle
The rechargeable battery must be recharged by the latest when it has discharged 80 % (only 20 % charge capacity left) to prevent complete discharge. The rechargeable battery indicator (FIG.2a / 1 ) glows: residual capacity flashing light green Rechargeable battery good 40-100 % flashing light red/green... - Page 7 (specifically along gravel paths), leaves and snow, since these can reduce the performance of the module for recharging the rechargeable battery. SERVICE: Repair is only to be made by qualified service personnel. Only by the manufacturer commanded replacement parts must be used. Subject to technical alterations ! shockstar S40 & shockstar S70...
-
Page 8: Montage Et Raccordement
Mode d’emploi pour électrificateur shockstar S40 & shockstar S70 en relation avec les conseils de sécurité SECURA ANIMAL ou SECURA SECURITY (www.horizont.com/securaanimal ou www.horizont.com/ securasecurity) L‘appareil de clôture électrique doit être coupé avant chaque intervention! MONTAGE ET RACCORDEMENT: Installer l’appareil dans un endroit humide si possible. Le pieu de terre avec tête en poteau d’installation 83306 fourni, ou le pieu de terre d’1m (longitudinal) 14041-1 en option, doit être... - Page 9 AVERTISSEMENT : Ne laissez pas l’appareil de clôture électrique éteint au soleil pendant longtemps avec un accu- mulateur ou un panneau solaire. Pourquoi ? Cela pourrait endommager l’accumulateur. shockstar S40 & shockstar S70...
-
Page 10: Principe De Fonctionnement
PRINCIPE DE FONCTIONNEMENT : Le panneau solaire produit du courant dès qu’il est exposé à un rayonnement du soleil utile. L’appareil de clôture électrique nécessite en permanence du courant – tant le jour que la nuit. De cette façon, le courant généré par le panneau est emmagasiné dans un accumulateur 12V rechar- geable, permettant ainsi à... -
Page 11: Montaje Y Conexión
Utiliser uniquement les pièces détachées et composants du fabricant. Sous réserve de changements techniques! Instrucciones de uso shockstar S40 & shockstar 70 en combinación con las indicaciones de instalación y seguridad para dispositivos de valla eléctrica SECURA ANIMAL o SECURA SECURITY (www.horizont.com/securaanimal o www. - Page 12 PUESTA EN SERVICIO CON ACUMULADOR OPCIONAL DE 12 VOLT (FIG.3,4): Colocar los acumuladores cargados hasta 34 Ah en la parte inferior 87100 (12 Aj con placa intermedia 87102). Coloque acumuladores más grandes junto al dispositivo (véase FIG.2b). Conecte entonces el dispositivo al acumulador de 12 V (rojo + / negro -), observe en este caso que los bornes de los polos estén limpios y la polaridad sea la correcta.
- Page 13 Durante el invierno (con excepción del sur de Europa) las horas de sol posiblemente no sean suficientes para cargar completamente el acumulador. Cargue el acumulador externamente en el momento que la indicación de batería verde/roja o roja parpadee o utilice alternativamente shockstar S40 & shockstar S70...
-
Page 14: Colocação Em Funcionamento
Sólo se deben usar piezas de repuesto del fabricante. ¡Modificaciones técnicas reservadas! Manual de instruções para a cerca eléctrica shockstar S40 & shockstar S70 em ligação com os conselhos de segurança SECURA ANIMAL ou SECURA SECURITY (www.horizont.com/securaanimal ou www.horizont.com/securasecurity) A vedação deve ser desligada antes da realização de qualquer intervenção! MONTAGEM E LIGAÇÃO:... - Page 15 No caso de funcionamento com o painel solar, não é possível funcionar com um adaptador de rede. AVISO: Não deixe a vedação desligada ao sol com uma bateria e um painel solar durante um período de tempo prolongado. Porquê? Isso pode danificar a bateria. shockstar S40 & shockstar S70...
- Page 16 PRINCÍPIO DE TRABALHO: O painel solar produz corrente assim que é exposto à luz solar útil. A vedação requer corrente contínua - de dia e de noite. Deste modo, a corrente produzida pelo painel é acumulada numa bateria de 12 V recarregável e o aparelho pode depois trabalhar sem luz solar ou ser diretamente alimentado através de uma pilha de 9 V.
-
Page 17: Montaggio E Collegamento
Reservado o direito a altera ões técnicas! ç Istruzioni per l’uso del recinto elettrico shockstar S40 & shockstar S70 Rispondente alle norme costruttive e di sicurezza per gli apparecchi elettrificatori di recinzioni SECURA ANIMAL o SECURA SECURITY (www.horizont.com/securaanimal o www.horizont.com/securasecurity) È... - Page 18 collegamento opzionale (90501C). Dopo alcuni secondi viene emesso un ticchettio uniforme, ciò significa che l'apparecchio è in funzione. In caso di polarità errata, l'apparecchio non si avvia. Usare solo batterie al piombo da 12V ricaricabili e caricare le batterie ricaricabili con sfiato solo in ambienti ben aerati.
- Page 19 9V con 170 – 200 Ah, che viene consigliata anche a temperature inferiori al punto di congelamento. 3. RIMUOVERE REGOLARMENTE DEPOSITI E SPORCIZIA DAL PANNELLO SOLARE. shockstar S40 & shockstar S70...
-
Page 20: Uvedenie Do Prevádzky
La riparazione deve essere fatta soltanto da personale di servizio qualificato. Utilizzare parti di ricambio originali. Con riserva di modifiche tecniche! Návod na obsluhu napájacích zariadení elektrických ohrád shockstar S40 & shockstar S70 v kombinácii s SECURA ANIMAL alebo SECURA SECURITY (www.horizont.com/securaanimal alebowww.horizont.com/securasecurity) Ograja je treba izklopiti pred vsako delo! MONTÁŽ... - Page 21 – tak cez deň, ako aj v noci. Týmto spôsobom sa prúd vyrobený panelom uloží v dobíjateľnom 12V akumulátore a zariadenie preto môže pracovať bez slnečného svetla alebo môže byť napájané priamo shockstar S40 & shockstar S70...
- Page 22 9V batériou. Je možné, ž solárny panel nebude vždy disponovať dostatočne veľkým výkonom na úplné dobitie akumulátora – najmä počas tmavých, pochmúrnych a hmlistých mesiacov (napr. október až február). Pri teplote 0 stupňov Celzia alebo mínusových teplotách sa beztak odporúča namiesto 12V aku- mulátora použiť...
-
Page 23: Montering Og Tilslutning
Brugsanvisning for spændingsgiver shockstar S40 & shockstar S70 relation til sikkerhedsanvisninger for spændingsgivere SECURA ANIMAL eller SECURA SECURITY(www.horizont.com/securaanimal eller www. horizont.com/securasecurity) Hegnsapparatet skal altid frakobles inden det åbnes! MONTERING OG TILSLUTNING: Opstil apparatet på et fugtigt sted. Det medfølgende jordspyd/pæl 83306 eller det ekstra 1 m-ordspyd (langsgående stang) 14041-1 skal på... - Page 24 Restkapacitet Blinklys grøn Genopladeligt batteri godt 40-100 % Blinklys rød/grøn Oplad genopladeligt batteri 20-40 % Genopladeligt batteri helt tomt: Blinklys rød 0-20 % genoplad straks Vær opmærksom på, at disse værdier kan variere afhængig af temperaturen (kapacitet) og måleafvigelser (spænding). Ved brug med en solcelle må batteriinidkatoren kun kontrolleres ved daggry (uden sollys).
- Page 25 Herved fjernes græs, støv (specielt ved grusveje), blade og sne, fordi de kan reducere modulets ydelse ved opladning af batteriet. SERVICE: Reparation må kun udføres af kvalificerede personer. Der må kun anvendes de reservedel, der anvises af producenten Der tages forbehold mod tekniske ændringer! shockstar S40 & shockstar S70...
-
Page 26: Montage En Aansluiting
Gebruiksaanwijzing van het schrikdraadapparaat shockstar S40 & shockstar S70 In combinatie met veiligheidsinstructies SECURA ANIMAL of SECURA SECURITY (www.horizont.com/securaanimal of www.horizont.com/securasecurity) Het schrikdraadapparaat moet voor elke interventie uitgeschakeld worden! MONTAGE EN AANSLUITING: Stel het apparaat op een zo vochtig mogelijke plek op. De meegeleverde aardstang/opstelpaal 83306 of de optionele 1m-aardstang (lange staaf) 14041-1 moet op een vochtige plaats zo diep mogelijk in de grond worden geslagen en met een hoogspanningsbestendige aansluitkabel (bijv. - Page 27 – met name in donkere, grijze en mistige maanden (bijv. oktober tot februari). Bij temperaturen van 0 °C of lager is het zonder meer aanbevolen om een grote 9V-alkalinebatte- rij te gebruiken in plaats van een 12V-accu. shockstar S40 & shockstar S70...
- Page 28 2. BEREKEN DE CORRECTE HELLINGSHOEK VAN HET ZONNEPANEEL. De stand van de zon boven de horizont verandert tijdens de seizoenen. Doorgaans wordt een hoek van 50 graden als optimaal aanbevolen voor langdurig gebruik in de meeste delen van Europa. Toch kunt u het vermogen van het zonnepaneel om de accu op te laden optimaliseren door de hoek naargelang het seizoen aan te passen (zie afbeelding hieronder).
- Page 29 S40 & shockstar S70...
- Page 30 Reservedele | nl: reserveonderdeel | sk: Náhradné diely | es: repuesto 90676U 90150 Black Ground Terminal Knob: 88128 On/Off Button: 84793 Red Fence PCB: shockstar S40 60798 Terminal Knob: PCB: shockstar S70 60853 88128RT Transformer: 607581 Solar Panel knob 87104...
- Page 31 3. Operate energizer from a 100V-230V outlet instead of with the solar panel/battery. a) battery ON, energiser ON (12V battery recharge) b) battery OFF, energiser ON (230V power supply only) c) battery ON, energiser OFF (recharge) shockstar S40 & shockstar S70...
- Page 32 Fig. 5 de: Bei 230V Betrieb sollte das Gerät und muss der Netzad- 15321, apter in einem vor Feuchtigkeit 14040, geschützten Raum installiert 15956 werden. en: For 230V operation the energi- zer should be and the adapter must be installed in a room protected from moisture.
- Page 33 Solar lead Battery lead 1. Rotate solar panel angle according to diagrams page 6. 2. Secure panel knobs to tighten on both 12V/12Ah sides. 3. When moving the energizer, rotate the solar panel back to 90°. shockstar S40 & shockstar S70...
- Page 34 Required Ground ≥ 0,3 m 250 m 250m 12v DC 1 M Ω 500 Ω 5 k Ω 500 Ω draw Input shockstar S40 9V: 39-51mA ~ 2500 0,4J ~ 10000 V ~ 10000 V ~ 3300 V ~ 1800 V 12V: 19-31mA (10914)
- Page 35 S40 & shockstar S70...
- Page 36 All data is made subject to sentences mistakes and literal mistakes, subject to product changes and falsity. animalcare@horizont.com Reprint, even in extracts and use of the pictures only with written permission by horizont group gmbh. animalcare.horizont.com Alle Angaben erfolgen vorbehaltlich Satz- und Druckfehler. Preisänderungen, Produktänderungen und Irrtum vorbehalten.
Need help?
Do you have a question about the S40 and is the answer not in the manual?
Questions and answers