
Subscribe to Our Youtube Channel
Related Manuals for R-Tech MIG251


Summary of Contents for R-Tech MIG251
- Page 1 Tel: 01452 733933 Fax 01452 733939 R-TECH MIG251 MIG WELDER OPERATION INSTRUCTIONS Version 2023-11...
- Page 3 We want you to take pride in operating our MIG251 Digital as much pride as we have taken in making this product for you. Please read all information in this manual before operation PLEASE EXAMINE CARTON AND EQUIPMENT FOR DAMAGE IMMEDIATELY When this equipment is shipped, title passes to the purchaser upon receipt from the courier.
-
Page 4: Manual Mig Mode
Welding Capability – Duty Cycle The R-Tech MIG251 Digital is rated at 250 Amps at 35% duty cycle on a ten minute basis. If the duty cycle is exceeded a thermal protector will shut machine off until the machine cools. -
Page 5: Safety Precautions
Safety Precautions Read entire section before starting installation. Warning! Electric Shock can kill – Only qualified personnel should perform this installation. Turn off input power at the fuse box before working on this equipment. Do not touch electrically live parts. Always connect the machine to an earthed mains supply as per national recommended standards. -
Page 6: Electrical Installation
Electrical installation WARNING ELECTRIC SHOCK CAN KILL Electric Shock can kill – Only qualified personnel should perform this installation. Turn off input power at the fuse box before working on this equipment. Do not touch electrically live parts. Always connect the machine to an earthed mains supply as per national recommended standards. -
Page 7: Input Connections
Allow machine to sit for 5 minutes minimum to allow the power capacitors to discharge before working inside this equipment. Do not touch electrically live parts The MIG251 Digital MIG Welder requires a 240V 50/60Hz supply. It requires a 32A supply. It comes with a 2.5 metre mains cable attached. -
Page 8: Technical Specifications
Technical specifications Input 240V AC 50/60Hz Input amperage 32A Gross weight 20 KG Dimensions 600L x 270W x 480H (mm) Insulation IP21S Current range MIG 30A - 250A No load voltage 80VDC Duty cycle 35% @ 250A Trigger modes Manual mode 2T,4T MIG EASY SET Wire diameter... -
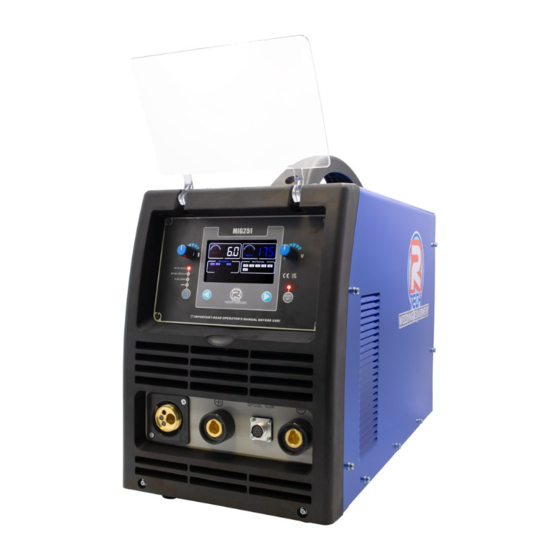
Page 9: Front Panel Connections
Connections Front panel connections MIG mode + positive 7 pin socket for MIG mode - connect connector for earth spool on gun. earth lead (negative) lead for gasless flux when welding with cored wire only. GAS. MMA mode - connect MMA mode - connect electrode holder. - Page 10 Rear panel connections cont.. Gas connector & Extra earth connection On/Off switch 3/8 BSP male connector for gas input Mains input cable - comes with 2.5m cable fitted. Extra earth connection, used if you experience local interference (not normally used)
- Page 11 The MIG251 comes fitted with a dual rollers 0.6/0.8mm & 0.8/1.0mm. 3 - Roller tensioner - This sets the pressure of rollers, the best way to adjust tension is to slacken off pressure so that MIG welding wire does not feed, slowly adjust pressure until wire feeds smoothly, you should be able to stop wire feeding by holding wire and it should slip on rollers.
-
Page 12: Front Panel
Front panel Digital Colour Screen with easy to navigate menu system EASY SET mode - pre-programmed weld settings MIG & MMA 1 - Wire feed speed - Turn to change setting in small steps, press and turn to change in larger steps 2 - Welding voltage - Turn to change setting in small steps, press and turn to change in larger steps 3 - SELECT button - Press to cycle through four welding modes 4 - Left arrow button - use to scroll left in menus... -
Page 13: Controls And Settings
MMA (STICK) in Manual mode MIG EASY MODE - With gas R-Tech Easy mode takes the guesswork out of MIG welding. You normally had to enter wire speed and welding voltage to weld on manual welders, we have done this for you. - Page 14 EASY SET MIG 0.6mm continued Once you have selected 0.6mm wire size and material thickness the suggested wire speed and voltage will be shown in the display, you are now ready to weld. If you want to fine tune the weld characteristics to suit your personal preference. You can trim the wire speed by 1 m/min by turning wire speed knob.
- Page 15 MIG EASY MODE - Gasless wire (Flux cored) Press select button to Flux-Cored indicator. TO ENTER EASY MODE - PRESS EASY SET BUTTON ON FRONT PANEL Press left arrow to switch between 0.8mm,0.9mm & 1.0mm wire diameter, the selected size will flash Now press right arrow to switch between material thickness, the selected size will flash Once you have selected wire size and material thickness the suggested wire speed and voltage will be shown in the display, you are now ready to weld.
- Page 16 MIG Manual mode In manual MIG mode you have full control of welding wire feed speed, welding voltage, 2T/4T trigger options, Burnback control and spool on gun operation. Use select button to select 95% ARG Mode, ensure EASY SET is off, the following screen will be shown. Set wire feed speed using left side knob, adjustable between 1.5 - 15 m/min.
- Page 17 Burnback control Burnback is how long the welding power will continue after wire feed has stopped, this stops the wire from sticking to workpiece when weld finished, if Burnback is set too long you can experience wire burning back to tip. You can adjust Burnback by pressing left or right arrow buttons until Burnback is flashing, then use left knob to adjust from 0s to 2.0s For most applications a setting of 0.3s is advised.
- Page 18 MMA (STICK) EASY R-Tech EASY SET mode takes the guesswork out of MMA welding. You normally had to enter required amperage to weld on manual welders, we have done this for you. You simply select the following from the easy to understand screen.
- Page 19 MMA (STICK) EASY cont.. Note: When in MMA mode the welding terminals are constantly LIVE. Ensure electrode / electrode holder are not touching workpiece / earth when switching to MMA mode. MMA EASY SET SETTINGS. Electrode Type Electrode Size Material thickness 6013 2.5mm 1.5, 2.0, 2.5, 3.0, 3.5, 4.0, 5.0mm...
- Page 20 MMA (STICK) Manual mode Note: When in MMA mode the welding terminals are constantly LIVE. Ensure electrode / electrode holder are not touching workpiece / earth when switching to MMA mode. To enter MMA manual mode, use select button to move indicator to MMA then ensure EASY SET is turned off.
-
Page 21: Troubleshooting
Troubleshooting No output - Display is not lit Check machine on/off switch is in the ‘on’ position Check Input power to machine Check plug wiring Check mains trip / fuses No output - Fan runs - Display is lit Check torch connections are secure and torch switch operation, try replacing MIG torch. No output –...
Need help?
Do you have a question about the MIG251 and is the answer not in the manual?
Questions and answers