
Subscribe to Our Youtube Channel
Related Manuals for Worx Nitro WG751 3 Series


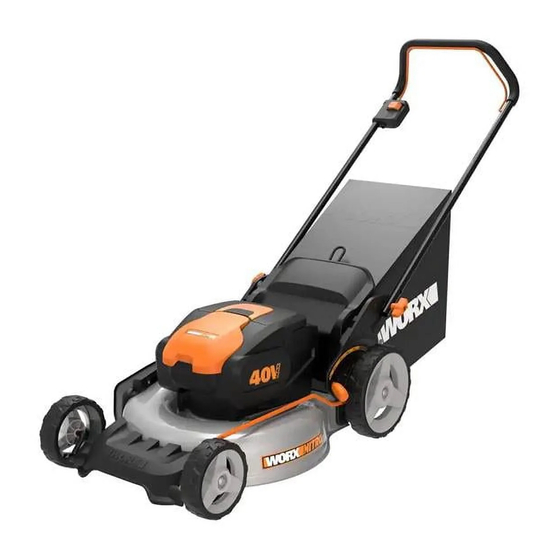
Summary of Contents for Worx Nitro WG751 3 Series
- Page 1 User Manual of Product 1: Worx Nitro WG751.3 40V Power Share PRO 4.0Ah 20" Cordless Push Lawn Mower...
- Page 2 3-in-1 Cordless Lawn Mower Tondeuse à Gazon Sans Fil 3 en 1 Cortacesped de Bateria 3 en 1 WG751 WG751.9...
-
Page 3: Safety Instructions
SAFETY INSTRUCTIONS balance at all times. Stay Alert - Watch what you are doing. Use common sense. Do not operate lawn mower WARNING: Some dust created by power when you are tired. sanding, sawing, grinding, drilling and Store Idle Lawn Mower Indoors - When not other construction activities contains in use, lawn mower should be stored in an chemicals known to the state of California to... -
Page 4: General Safety Warnings For Battery Pack
Recharge only with the charger specified GENERAL SAFETY by WORX Do not use any charger other than that specifically provided for use WARNINGS FOR BATTERY with the equipment. A charger that is suitable... - Page 5 crossing gravel surfaces. IV. SERVICE Do not operate machine without the entire GENERAL SERVICE grass catcher, discharge guard, rear guard, or Keep all nuts and bolts tight to be sure the other safety protective devices in place and equipment is in safe working condition. working.
- Page 6 After striking a foreign object, stop the motor, unplug, thoroughly inspect the mower for any damage, and repair the damage before restarting and operating the mower. If the equipment should start to vibrate abnormally, stop the motor and check immediately for the cause. Vibration is generally a warning of trouble.
- Page 7 SYMBOLS Do not burn. KEEP HANDS AND FEET AW AY CPSC Danger label GARDER MAINS ET PIEDS À DI S TANCE To reduce the risk of injury, user must read instruction manual Severing of toes or fingers-Rotary mower blade Remove the key Thrown objects from mower deck Keep bystanders/children away POSITEC Inc.
- Page 8 3-in-1 Cordless Lawn Mower...
- Page 9 1. OPERATING BAIL 2. SAFETY KEY 3. SAFETY FLAP 4. POWER INDICATOR LIGHT 5. BATTERY PACK COVER 6. CUTTING HEIGHT ADJUSTMENT LEVER 7. HANDLE KNOB 8. GRASS COLLECTION BAG 9. HANDLE BAR 10. SIDE-DISCHARGE COVER 11. SIDE-DISCHARGE CHUTE 12. MULCHING INSERT 13.
-
Page 10: Technical Data
Charger (WA3884) Grass collection bag Mulching insert Side-discharge chute Only use the appropriate accessories intended for this tool. Accessory information can be found on the product packaging, at a WORX dealer or on our website at www.worx.com. 3-in-1 Cordless Lawn Mower... - Page 11 3-in-1 Cordless Lawn Mower...
- Page 12 3-in-1 Cordless Lawn Mower...
- Page 13 100% 3-in-1 Cordless Lawn Mower...
- Page 14 1——1-1/4” (30mm) 2——1-1/2” (38mm) 3——2” (51mm) 4——2-1/2” (64mm) 5——3” (76mm) 6——3-1/2” (89mm) 7——4” (100mm) 3-in-1 Cordless Lawn Mower...
-
Page 15: Assembly And Operation
Removing /fitting the battery pack NOTE: This machine will only run when 2 batteries are installed. It is recommended to use the same two batteries and charge the two batteries See Fig. G1, at the same time. When you use two batteries with different power, the machine will only run to the lower common denominator. - Page 16 For best mulching performance, set the cutting • During operation, the battery capacity will be height to remove about one third of the grass indicated automatically by the battery power blade length, ideally no more than 1.5” inches indicator. The indicator constantly senses and at one time.
-
Page 17: Maintenance
MAINTENANCE STORAGE (SEE FIG. M1, WARNING: Stop the mower and remove the safety key before removing the grass Stop the mower and always remove the Safety Key. collection bag. Clean the exterior of the machine thoroughly using NOTE: To ensure long and reliable service, perform a soft brush and cloth. -
Page 18: Troubleshooting
TROUBLE SHOOTING Problem Solution 1. Mower doesn’t run when A. Check to make sure safety key has been installed and is fully seated and switch lever is activated. that button on switch housing is being completely pushed. B. Release switch lever to turn mower off. Remove safety key, turn mower over and check that blade is free to turn.
Need help?
Do you have a question about the Nitro WG751 3 Series and is the answer not in the manual?
Questions and answers
Need a a Resource for parts. From wheel hub came off can’t find a replacement.