Table of Contents
Advertisement
Quick Links
Advertisement
Table of Contents

Related Manuals for Grunbeck safeliQ:EB


Summary of Contents for Grunbeck safeliQ:EB
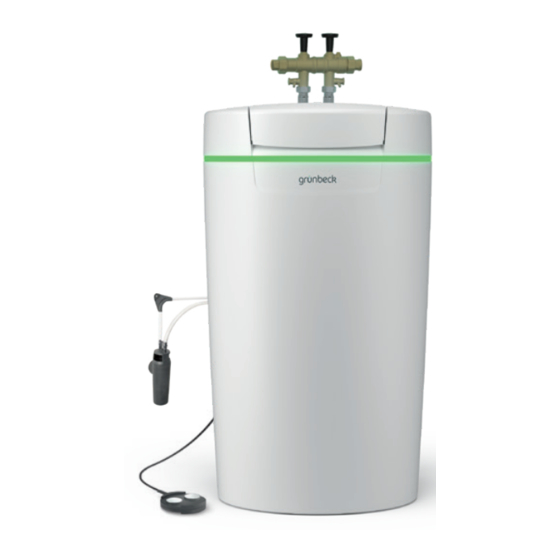
- Page 1 We understand water. Hygiene system | safeliQ:EB Operation manual...
- Page 2 General Contact Germany International Sales Phone +49 9074 41-145 Technical Service Phone +49 9074 41-333 Fax +49 9074 41-120 Availability Monday to Thursday 7:00 am - 6:00 pm Friday 7:00 am - 4:00 pm We reserve the right to technical modifications. ©...
-
Page 3: Table Of Contents
Table of contents Table of contents Table of contents ..............3 Operation/handling ..........25 Introduction ............... 4 Touchscreen .............25 Menu structure ............28 Validity of the manual ..........4 Connection to the Grünbeck Cloud ......30 Product identification ..........4 Refilling salt tablets ...........32 Symbols used ............ -
Page 4: Introduction
Introduction Introduction This manual is intended for owners/operators/operating companies, users as well as qualified specialists and ensures the safe and efficient handling of the product. The manual is an integral part of the product. ► Carefully read this manual and the included manuals on the components before you operate your product. -
Page 5: Symbols Used
Introduction The type plate is located on the inside of the brine tank lid. Designation Designation Obey the operation manual Rated input Disposal information Protection/protection class EAC test mark Product designation CE mark QR code Nominal pressure Data matrix code Ambient temperature Order no. -
Page 6: Depiction Of Warnings
Introduction Depiction of warnings This manual contains information and instructions that you must obey for your personal safety. The information and instructions are highlighted by a warning symbol and are structured as shown below: 1.4.1.2 SIGNAL WORD 1.4.1.3 Type and source of hazard 1.4.1.1 ●... - Page 7 Introduction 1.5.3 Authorisations of personnel The table below describes which tasks may be carried out by whom. User Owner/ Qualified Technical operator/ specialist service operating company Transport and storage Installation and mounting Start-up/commissioning Operation and handling Exception: Replacing the hygiene elements Cleaning Inspection Maintenance...
-
Page 8: Safety
Safety Safety Safety measures ● Only operate your product if all components are installed properly. ● Obey the local regulations on drinking water protection, accident prevention and occupational safety. ● Do not make any changes, alterations, extensions or program changes on your product. -
Page 9: Product-Specific Safety Instructions
Safety 2.1.4 Groups of persons requiring protection ● Children must not play with the product. ● This product is not designed to be used by persons (including children) with reduced capabilities, lack of experience or lack of knowledge. Unless they are supervised, have been instructed on the safe use of the product and understand the resulting hazards. -
Page 10: Product Description
Product description Product description Intended use ● The hygiene system safeliQ:EB must only and exclusively be used for the reduction of germs in microbiologically contaminated, cold drinking water. ● The hygiene system safeliQ:EB features a hygiene unit to reduce micro-organisms. -
Page 11: Product Components
Product description Product components Designation Designation Connection block Sieve bottom Raw water shut-off valve Brine tank Shut-off valve for hygienically treated water Connection for hygienically treated water Sampling valve for hygienically treated water Raw water connection Sensor of salt supply indicator Drain connection DN 50 acc. -
Page 12: Functional Description
Product description ● Lights up during water treatment ● Lights up during operation of the control unit ● Intermittent flashing in case malfunctions do occur ● Intermittent flashing in case of pre-alarm salt supply The illuminated LED ring can be set to continuous illumination or be deactivated completely. Water sensor The water sensor detects water at the installation site of the safeliQ, reports this via the control unit of the safeliQ or via Grünbeck’s myProduct app and triggers an audio signal (if... -
Page 13: Accessories
Product description You can register your product as indicated below: ● Registration on Grünbeck’s website (www.gruenbeck.com). ● Registration using Grünbeck’s myProduct app (refer to chapter 7.3). ● Registration via the enclosed postcard. Accessories You can retrofit your product with accessories. Please contact your local Grünbeck representative or Grünbeck’s headquarters in Hoechstaedt/Germany for details. -
Page 14: Inputs And Outputs Of The Control Unit
Product description Illustration Product Order no. 90° connection angle - 1" (2 pieces) 187 865 To direct the connection hoses closer along the safeliQ in case of confined installation conditions. Installation kit softliQ 188 865 Space-saving combined connection of hygiene system and filter. Inputs and outputs of the control unit The control unit features voltage-free inputs and outputs (refer to chapter 7.8) 3.7.1... - Page 15 Product description Water sensor (digital input) Pin configuration ● Upper terminal + middle terminal = Water sensor ● Lower terminal + middle terminal = Disinfection release or disinfection lock ► Do not apply voltage signals to any of the 3 terminals. iQ Comfort interfaces The iQ Comfort interfaces are designed for interconnecting Grünbeck products such as exaliQ, for instance.
-
Page 16: Transport, Set-Up And Storage
Transport, set-up and storage Transport, set-up and storage Shipping/Delivery/Packaging The system is fixed on a pallet at the factory and secured against tipping. ► Upon receipt, immediately check for completeness and transport damage. ► In case of visible transport damage, proceed as follows: •... -
Page 17: Installation
Installation Installation The installation of a hygiene system represents a major intervention into the drinking water system and must be performed by a qualified specialist only. Designation Designation Safety device protectliQ Water withdrawal point Drinking water filter pureliQ Dosing system exaliQ Garden water pipe Requirements for the installation site ●... -
Page 18: Checking The Scope Of Supply
Installation ● For electrical connection, a Schuko socket is required within a distance of approx. 1.2 m. The socket outlet requires permanent power supply and must not be coupled with light switches, emergency heating switches or the like. ● A drain connection (DN 50) must be available to discharge the disinfection water. ●... -
Page 19: Installing The Product
Installation Installing the product WARNING Contaminated drinking water due to stagnation ● Infectious diseases ► Do not connect the product to the drinking water system until immediately before start-up/commissioning. ► Only carry out the leak test during start-up/commissioning. Do not install the connection block until immediately before start-up/commissioning or bypass it with a hose. - Page 20 Installation 5.3.2 Installing the connection hoses 1. Loosen both screws on the side of the upper part of the housing for the technical equipment. 2. Remove the upper part of the housing for the technical equipment. 3. Respect the flow direction indicated by arrows on the connection block and on the control valve.
- Page 21 Installation 5.3.3 Establishing the waste water connection NOTE Waste water backing up due to kinked hoses. ● Water damage ► Run the hoses to the drain with a downward slope and without any kinks. 1. Shorten the flushing water hose (Ø 12 mm) to the required length. 2.
-
Page 22: Start-Up/Commissioning
Start-up/commissioning Start-up/commissioning Putting the product into operation The start-up program assists you in starting up the product. The display guides you step-by- step. Input is required at some points, however. ► Follow the instructions on the touchscreen (refer to chapter 7.1). ●... - Page 23 Start-up/commissioning Venting program The venting program runs automatically in 11 steps. 11. Start the venting program. 12. Visually check the connection points for leaks. Test disinfection The test disinfection takes approx. 33 minutes. 13. Start the test disinfection » After conclusion of the test disinfection, the start-up program is completed. ►...
-
Page 24: Handing Over The Product To The Owner/Operator/Operating Company
Start-up/commissioning 6.1.3 Manual start of the start-up program The start-up program cannot be started while the disinfection process is in progress. Menu level>Start-up ► Press and hold for 2 seconds. ► Follow the instructions on the display. The sequence of the steps is analogous to the automatic start-up-program. Handing over the product to the owner/operator/operating company ►... -
Page 25: Operation/Handling
Operation/handling Operation/handling NOTE The valves of the system are operated electrically. ● Water can flow to the drain if there is a power failure during disinfection. ► In the event of a power failure, check your product and shut off the water supply, if necessary. - Page 26 Operation/handling Illustration Explanation Information This menu offers useful information on the hygiene system. Manual system disinfection In this menu, you can start a system disinfection manually (refer to chapter 7.6). Settings In this menu, you can adapt your hygiene system individually (refer to chapter 7.2). Start-up/commissioning In this menu, you can start the automatic start-up program (refer to chapter 6.1 7.1.3...
- Page 27 Operation/handling Illustration Explanation Yellow symbol The salt supply will be used up soon. The expected time for the salt to last is displayed in days. ► Fill salt tablets into the brine tank. … days Red symbol The hygiene system is not working properly. ►...
-
Page 28: Menu Structure
Operation/handling Menu structure Values that can be selected or changed are shown in italics. Menu Menu items Values/settings Information Basic display Refer to chapter 7.1.1 System data System flow rate Service life of hygiene unit Remaining water volume Counter readings, Disinfection date and time Perform maintenance in xx days... - Page 29 Operation/handling Menu Menu items Values/settings Illuminated LED ring – Water treatment + operation + malfunction function setting Operation + malfunction Malfunction Permanent illumination Deactivated Illuminated LED ring – Deactivated Activated Illuminated LED ring flashes in the event of a signal …% Illuminated LED ring Brightness...
-
Page 30: Connection To The Grünbeck Cloud
Operation/handling Connection to the Grünbeck Cloud The use of the Grünbeck Cloud and app functionalities depends on the service availability of the required Azure services in the data centre region of the respective country. Geopolitical changes or restrictions in the respective country can limit or prevent the availability of the services of the data centre currently located in the EU. - Page 31 Operation/handling ► Download Grünbeck’s myProduct app and install it on your mobile device. ► Create your personal user account. ► In Grünbeck’s myProduct app add your safeliQ to your user account using + ► Follow the instructions of Grünbeck’s myProduct app. Product registration Using Grünbeck’s myProduct app, you can conveniently register your product.
-
Page 32: Refilling Salt Tablets
Operation/handling Refilling salt tablets The salt supply in the brine tank must always be higher than the water level. Normally, the water level is approx. 1 cm above the sieve bottom. 1. Open the brine tank lid. The sensor of the salt supply indicator is located in the brine tank lid. This sensor does not work with laser light and thus is safe for the eyes. -
Page 33: Starting The Manual Disinfection
Operation/handling Starting the manual disinfection Menu level>Manual disinfection/Disinfection A manual disinfection is required in the cases below: ● If the product is put into operation again after a longer period of standstill. ● After maintenance or repair work has been performed. ●... - Page 34 Operation/handling Menu structure Menu items Settings/remarks Wi-Fi access point Page 1/2 Activate (Can only be selected in Deactivate connection with Grünbeck’s Page 2/2 IP address complementary mySetting app SSID for qualified specialists.) Password Line 1 Page 1/2 System flow rate, l/h Remaining capacity, m³...
- Page 35 Operation/handling Menu items Settings/remarks Function Fault signal contact Normally closed Contact normally closed. (N.C. = normally Open in the event of a fault signal. closed) (factory setting) Normally open Contact normally open. (N.O. = normally open) Closed in the event of a fault signal. Function Programmable input Leak detection If the water sensor detects a leak at the...
-
Page 36: Maintenance And Repair
Maintenance and repair Maintenance and repair Maintenance and repair includes cleaning, inspection and maintenance of the product. WARNING Contaminated drinking water ● Infectious diseases ► Pay attention to hygiene when working on the product. The responsibility for inspection and maintenance is subject to local and national requirements. -
Page 37: Inspection
Maintenance and repair Inspection You as owner/operator/operating company can carry out the regular inspections yourself. Regular inspections increase the operational reliability of your product. ► Carry out an inspection at least every 2 months. To carry out an inspection, proceed as follows: 1. - Page 38 Maintenance and repair 8.4.2 Annual maintenance Carrying out annual maintenance work requires specialist knowledge. This kind of maintenance work must be carried out by technical service personnel only. In addition to semi-annual maintenance, the work below must be carried out as well: Operating values 1.
-
Page 39: Consumables
Maintenance and repair Consumables Product Quantity Order no. Regeneration salt tablets as per DIN EN 973 type A 127 001 Hygiene element for safeliQ:EB30 525 604e Spare parts For spare parts and consumables, please contact your local Grünbeck representative who you may find on the internet at www.gruenbeck.com. - Page 40 Maintenance and repair ● Brine valve: Seals and electrodes Designation Designation Seal Electrodes 40 | 56...
-
Page 41: Troubleshooting
Troubleshooting Troubleshooting WARNING Risk of contaminated drinking water due to stagnation. ● Risk of infectious diseases. ► If malfunctions do occur, have them rectified immediately. The hygiene system safeliQ:EB30 indicates malfunctions on the display. As soon as a fault appears, the touchscreen changes to the basic display and remains active until the condition has been rectified. - Page 42 Troubleshooting Display Explanation Remedy ► Check whether water is leaking. If Water sensor has electrical connection. necessary, close the main valve of the building installation. Leak at safeliQ installation site Salt supply low. ► Fill salt tablets into the brine tank. ►...
- Page 43 Troubleshooting Display Explanation Remedy Connecting cable defective. ► Check water supply. ► Contact technical service. Water meter for hygienically treated water defective Connecting cable defective. ► Check water supply. ► Contact technical service. Disinfection water meter defective! ► Contact technical service. Minimum contact during Salting not reached.
-
Page 44: Other Observations
Troubleshooting Display Explanation Remedy Chlorine monitoring has ► Fill salt tablets into the brine tank. tripped during test disinfection. ► Acknowledge with Rectify. ► Repeat start-up/commissioning. Error during start-up (Chlorine current too low) Step monitoring of disinfection ► Acknowledge with Rectify. motor or connecting cable ►... -
Page 45: Decommissioning
Decommissioning Decommissioning 10.1 Temporary standstill Your hygiene unit will disinfect after 4 days, even if the capacity has not been exhausted. The stagnation of water is prevented. It is not necessary to temporarily shut down your product. ► Leave your product connected to the power and water supply. If you still want to temporarily shut down your product, proceed as follows: ►... -
Page 46: Dismantling And Disposal
Dismantling and disposal Dismantling and disposal 11.1 Deleting personal data To protect your personal data, it must be deleted before disposal. ► Please contact Grünbeck’s technical service on this. 11.2 Dismantling The work described here represents an intervention into your drinking water system. Have this work carried out by qualified specialists only. -
Page 47: Disposal
Dismantling and disposal 11.3 Disposal ► Obey the applicable national regulations. Packaging ► Dispose of the packaging in an environmentally sound manner. NOTE Danger to the environment due to incorrect disposal ● Packaging materials are valuable raw materials that can be reused in many cases. -
Page 48: Technical Specifications
Technical specifications Technical specifications Dimensions and weights safeliQ:EB30 A System width B System height C System depth D Connection height of control valve (hygienically treated water; outlet) E Connection height of control valve (raw water; inlet) F Height of safety overflow of brine tank G Height with open lid 1290 H Installation length without screw connection... - Page 49 Technical specifications Performance data safeliQ:EB30 Nominal pressure 2.0 – 8.0 (4.0) Operating pressure (recommended) Nominal flow at a pressure loss of 1.0 bar m³/h Disinfection time (per hygiene unit) Disinfection time (both hygiene units) Replacement interval of hygiene elements (recommended) years <...
-
Page 50: Operation Log
Operation log Operation log ► Document the initial start-up/commissioning and all maintenance activities. ► Copy the maintenance report. Hygiene system safeliQ:EB30 Serial no.: ________________ 13.1 Start-up/commissioning log Customer Name: Address: Installation/Accessories safeliQ connected to Cloud Wi-Fi Drinking water filter (make/type): Drain connection acc. - Page 51 Operation log Maintenance no.: ___ ► Enter the measured values and operating data. ► Confirm the checks with OK or record any repairs carried out. Operating values Operating pressure Domestic water meter reading m³ Total water meter reading (Info level 3) m³...
- Page 52 Operation log Documentation of salt consumption 1. Read the counter reading for the hygienically treated water volume in the control unit. Information>Counter readings, date and time>Hygienically treated water volume 2. Enter the value read. 3. Enter the amount of salt refilled. 4.
- Page 53 European guidelines in terms of its design, construction and execution. This certificate becomes void if the system is modified in any way not approved by us. Hygiene system safeliQ:EB System no.: Refer to type plate The aforementioned system also complies with the following directives and provisions: •...
- Page 54 Notes Notes 54 | 56...
- Page 55 Publisher's information Technical documentation Should you have any questions or suggestions regarding this operation manual, please contact Grünbeck Wasseraufbereitung GmbH’s Department for Technical Documentation directly. Email: dokumentation@gruenbeck.de...
- Page 56 Grünbeck Wasseraufbereitung GmbH Josef-Grünbeck-Str. 1 89420 Hoechstaedt GERMANY +49 9074 41-0 +49 9074 41-100 info@gruenbeck.com For more information go www.gruenbeck.com to www.gruenbeck.com...
Need help?
Do you have a question about the safeliQ:EB and is the answer not in the manual?
Questions and answers