
Subscribe to Our Youtube Channel
Related Manuals for Chino JW Series


Summary of Contents for Chino JW Series
- Page 1 INST.No.INE-821 Three-Phase Thyristor Regulator JW Series Communication Interfaces Instruction Manual CHINO...
-
Page 3: Table Of Contents
- CONTENTS - INTRODUCTION..............1 □ 1 OUTLINE ..............2 1.1 RS-422A/485 Communication Interfaces................... 2 1.2 Communication Protocol ......................2 1.3 Communication Specifications ....................2 □ COMMUNICATION PARAMETER SETTING...3 2.1 Communication Protocol (PtCL) Setting..................4 2.2 Address (AdrS) Setting ........................ 4 2.3 Transmission Rate (rAtE) Setting....................4 2.4 Character (CHAr) Setting...................... -
Page 4: Introduction
(RS-422A/RS-485) of the setting communication unit for the JW Series. Reference manuals This instruction manual describes the “Communication Interfaces ” instructions only on the JW Series. For the descriptions on the thyristor regulators and the setting communication unit, refer to the separate manuals. -
Page 5: Outline
□ 1 OUTLINE When these communication interfaces are added to the JW series communication setting unit, the setting of parameters including the manual output, slope and elevation and information including the load voltage value, current value, power value, resistance value and alarm can be collected from a master unit (PC, PLC, etc.). Two communications interfaces, RS-422A and RS-485 are provided and can be selected by terminal connections. -
Page 6: Communication Parameter Setting
□ 2 COMMUNICATION PARAMETER SETTING Set the four communication parameters of the communication protocol, address, transmission rate and character following the flowchart shown below. Measured value display mode * Set to “Lock” for performing various settings via a master unit. ... -
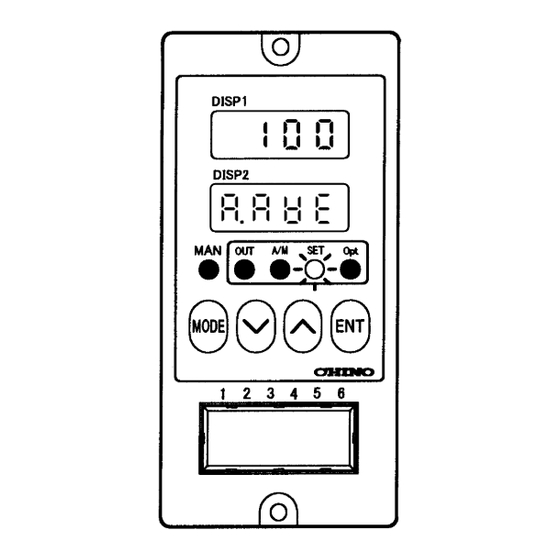
Page 7: Communication Protocol (Ptcl) Setting
2.1 Communication Protocol (PtCL) Setting (1) Press the key to show in DISP2. (2) Press the key to select the protocol, and then press the key to enter it. Option Protocol Default MODBUS RTU MODBUS ASCII ... -
Page 8: Connections
When using the RS-422A/485 communication, attach a 100-Ω resistor to the setting communication unit or another unit placed at the termination end. (See Section 3.3 for details.) (An ordinary metal film resistor can be used. It is also available from CHINO.) 3.1.5 Number of Setting Communication Units Max. -
Page 9: Communication Cables
3.2 Communication Cables The exclusive communication cables should be prepared before proceeding to make a connection. These cables are also available from CHINO. 3.2.1 RS-422A communication cable (1) Connection between line converter and setting communication unit Cable O-shaped crimp terminal... - Page 10 3.2.2 RS-485 communication cable (1) Connection between line converter and setting communication unit Cable O-shaped crimp terminal Twisted wire RS-485 cable (for line converter) RDA(Black) (Black)SA RDB(White) (White)SB SG (Green) (Green)SG O Cut tips and expose conductors. Design Line converter side Set.
- Page 11 3.2.3 RS-232C communication cable (Reference) (1) Connection between PC (9-pin) and line converter Cable 9-pin connector O-shaped crimp terminal RS-232C cable Design RS-232C cable (M ax. length 15 m ) 9-pin connector Line converter side on PC side Internal wiring RZ-CRS6□□...
-
Page 12: Connection Of Rs-422A/485
3.3 Connection of RS-422A/485 The following example is the connection of the RS-422A/485 communication interface and a PC using the line converter (model SC8-10). Since the connection between the line converter and the PC uses only 3 signal lines for the sending, the receiving and the signal ground and does not use other control signals, a wiring arrangement inside the connectors is required like the connection of the RS-232C (For its details, refer to the instruction manual for the line converter). -
Page 13: Modbus Protocol
□ 4 MODBUS PROTOCOL Basic Communication Procedure and Precautions CAUTION 1. Set the Key Lock before setting (writing) a parameter. The setting communication unit is ready for communication and can output the response to a data request from a master unit (PC, PLC, etc.). However, for the setting of parameters from the master unit, the setting communication unit should be set to the key lock status in advance. -
Page 14: Message Transmission Modes
4.1 Message Transmission Modes The RTU (Remote Terminal Unit) or ASCII mode can be selected according to the front key setting. (Table 1. Comparison between RTU and ASCII modes) Items RTU mode ASCII mode Interfaces RS-422A, RS-485 Communication type Half duplex asynchronous type Transmission rate 9600, 19200 bps Transmission code... -
Page 15: Data Time Interval
4.2 Data Time Interval RTU mode: 28-bit time or less (9600 bps: 2.9 ms. 19200 bps: 1.4 ms.) ASCII mode: 1 second or less When sending a message, the time interval between data in a single message should not exceed the above time limits. - Page 16 4.3.3 Data part The configuration of data varies depending on the function code. A request from the master unit is composed of the code number of the data to be read or written (the relative number calculated from the reference number described below) and the quantity of data, etc. A response from the slave unit is composed of the data corresponding the request, etc.
- Page 17 Example) When data is 02H 07H , the CRC-16 calculation result is 1241H, so the error check data becomes 41H 12H Reference 1: CRC-16 calculation program (C-language) /***** CRC-16 Calculation Program *****/ #include <stdio.h> #include <conio.h> void main(void) /*** Internal variable declaration ***/ unsigned int iLoopCnt;...
- Page 18 Reference 2: CRC-16 calculation program (Microsoft Visual Basic.NET) '***** CRC-16 Calculation Function *****/ Function fncCalcCrc(ByVal sCharData As String) As String '*** Variable declaration *** Dim intLoopCnt1 As Integer ' Loop counter 1 Dim intLoopCnt2 As Integer ' Loop counter 2 Dim intLoopCnt3 As Integer ' Loop counter 3 Dim intSdChrCnt As Integer...
- Page 19 End If Next intLoopCnt2 ' (For Loop) Next intLoopCnt1 ' (For Loop) '*** Creation of a message in the sequence from low to high orders of the calculated 16-bit data (X) '* Setting by adding 0 at the head of the 4-byte data * strWorkBuf = "0000"...
- Page 20 4.3.5.2 LRC calculation method The calculation is performed from the slave address until the end of the data in accordance with the following procedure. 1) Creation of message in the RTU mode 2) Addition from the start (slave address) to end of the data → X 3) Calculation of the complement (bit inversion) of X →...
- Page 21 Reference 2: LRC calculation program (Microsoft Visual Basic.NET) '***** LRC Calculation Function *****/ Function fncCalcLrc(ByVal sCharData As String) As String '*** Variable declaration *** Dim intLoop As Integer ' Loop counter Dim intStrSize As Integer ' String size Dim intLRC As Integer ' LRC value Dim sRtnLrc As String ' LRC for return value...
-
Page 22: Message Creation Method
4.3.6 Notes on data processing (1) The decimal place of each data is specified in the reference tables. The decimal place is fixed for some data, determined according to the measuring range or determined according to the linear decimal point setting. - Page 23 (4) Error check: CRC-16 calculation result 1FB1H ( B1H 1FH The e rror check in the RTU mode uses the CRC-16 calculation (Ref. Section 4.3.5.1). According to (1) to (3) above, the data in the basic part of message is , and the CRC-16 result is 1FB1H.
-
Page 24: Function Codes
4.5 Function Codes The response to each function code is described below (Ref. “Function code list” in Section 4.3.2). Note) For the response in case of errors, see Section 4.6. 4.5.1 Read digital parameter (read coil status) [Function code: 01(01H)] The specified quantity of "digital (ON/OFF) parameters”... - Page 25 4.5.3 Read analog parameter (read buffer register) [Function code: 03(03H)] The specified quantity of "analog parameters (2 bytes: 16 bits)” are read out consecutively commencing with the designated Reference No. The data is split into high-order 8 bits and low-order 8 bits arranged sequentially in number to constitute a data of response message.
- Page 26 4.5.5 Write digital parameter (change single coil status) [Function code: 05(05H)] The digital parameter of the specified number is set to the specified status (ON/OFF). Example) Setting the slave unit 2 to the manual output type (using the manual output parameter of the setting communication unit) (Setting the digital parameter Ref.
- Page 27 4.5.7 Loop-back test [Function code: 08(08H)] The transfer between the master and slave is checked. A response is returned according to the specified diagnostic code. With the setting communication unit, a “return check by transmitting the same data as the received data”...
-
Page 28: Error Processing
4.5.9 Write multiple analog parameters (write multiple buffer registers) [Function code: 16(10H)] The specified quantity of analog parameters commencing are set to the specified values consecutively commencing with the designated Reference No. The data is split into high-order 8 bits and low-order 8 bits to be sent sequentially in number. - Page 29 4.6.2 Error message response When the message from the master unit does not contain an error as described in section 4.6.1 but contains one of the troubles listed below, the code indicating the error content is returned as the “error message.”...
-
Page 30: Reference Tables
4.7 Reference Tables Digital parameters Reference Function Write Data name Setting range Default Note code / Read Valid when the priority (MODE 0) is Read 0 / 1 on the set. com. unit Output type Write [0000h / ff00h] when 1001 0: Auto Auto / Manual... - Page 31 Digital input data Reference Function Write Data name Details code / Read JW internal communication error 0: Normal 11001 Read 1: No response from JW thyristor regulator JW internal communication error 0: Normal 11002 Read 1: JW thyristor regulator – set. com. unit communication error JW internal communication error 0: Normal 11003...
- Page 32 Reference Function Write Data name Setting range Default Note code / Read Valid when the priority (MODE 0) is on the set. com. unit and the phase angle control is used. The setting is possible even during zero-cross control. Read Feedback control 0: OFF / 1: Voltage / 41013...
- Page 33 Analog input data Reference Function Write Data name Details code / Read Voltage Measured voltage, The decimal point is added according to the 31101 Read (Average value) decimal place below. Voltage decimal place 31102 Read Determined by the rated voltage (200 to 440 V= 1 digit) (Average value) Voltage status 0: Normal...
- Page 34 Reference Function Write Data name Details code / Read Current status 0: Normal 31136 Read 1: + over-range (When the current exceeds 9999) Load resistance Load resistance value, The decimal point is added according to 31137 Read the decimal place below. Load resistance decimal 31138 Read...
- Page 36 CHINO CORPORATION 32-8, KUMANO-CHO, ITABASHI-KU, TOKYO 173-8632 Telephone : 81-3-3956-2171 Facsimile : 81-3-3956-0915 Printed in Japan (...
Need help?
Do you have a question about the JW Series and is the answer not in the manual?
Questions and answers