Table of Contents
Advertisement
Quick Links
Advertisement
Table of Contents

Related Manuals for Uwatec GALILEO 3


Summary of Contents for Uwatec GALILEO 3
- Page 1 GALILEO 3 USER MANUAL...
- Page 2 GALILEO 3 USER MANUAL...
- Page 3 Hereby, Uwatec AG declares that the radio equipment type PAN1740 is in compliance with Directive 2014/53/EU. The combination of SCUBAPRO Galileo 3 dive computer and SCUBAPRO high pressure transmitter is a personal protective equipment of category III, in compliance with the essential safety requirements of the European Union Regulation 2016/425.
-
Page 4: Table Of Contents
1 .10 No-fly time ............................13 1 .11 SOS ..............................13 1 .12 SCUBAPRO Human Factor Diving™ ....................13 2 . GALILEO 3 SETTINGS AND MENUS ON THE SURFACE ..............13 2 .1 O settings ............................16 2 .1 .1 Recreational (factory setting) .................... - Page 5 2 .16 .1 Wake-up alarm ........................49 2 .16 .2 Time ............................. 49 2 .16 .3 Time zone ..........................50 2 .16 .4 Time zone 2 .......................... 50 2 .16 .5 Watch style ........................... 50 2 .16 .6 Smartwatch settings ......................51 GALILEO 3 USER MANUAL...
- Page 6 2 .17 .2 Notifications by category ....................... 52 2 .17 .3 Notifications by app ......................52 2 .17 .4 Player ............................ 52 3 . Diving with the Galileo 3 ........................53 3 .1 Dive mode at the surface ........................53 3 .1 .1 Recreational (factory setting) ....................
- Page 7 4 .2 SCUBAPRO Digital Heart Rate Monitor ....................77 4 .3 Bluetooth USB dongle ........................78 5 . INTERFACES FOR THE GALILEO 3 AND AN INTRODUCTION TO LOGTRAK ......... 78 5 .1 Establishing Bluetooth communication ....................78 5 .2 SCUBAPRO LogTRAK ........................79 5 .2 .1...
-
Page 8: Introduction To The Galileo 3
Galileo 3 accessories. This section briefly describes the extras of the Galileo 3 that you can purchase to get the most out of your dive computer in all conditions. Interfaces for the Galileo 3 and an introduction to LogTRAK. -
Page 9: The Watch Screen
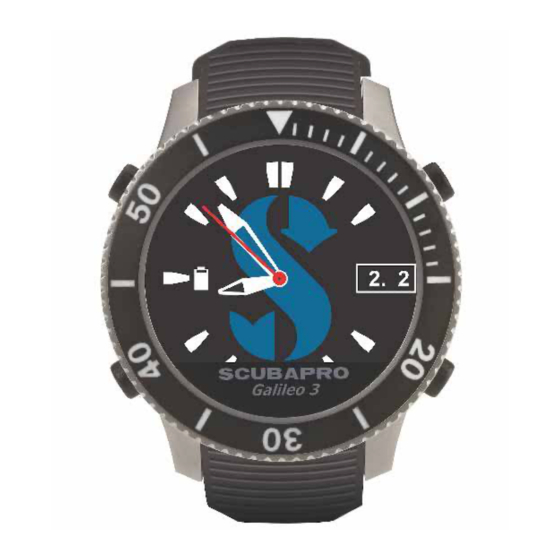
1 .2 The watch screen When the Galileo 3 is switched on the first time the display shows the time and date. Time and date settings, along with the format, can be changed to your liking. You can choose between two watch layouts: analog or digital. -
Page 10: Button Lock
1 .4 Button lock 1 .5 Rotating bezel To lock the Galileo 3’s buttons long-press the lower left The Galileo 3 features a stainless steel unidirectional and right buttons at the same time. rotating bezel with self-luminescent markings. Another long-press of both lower left and right buttons It can be rotated counter-clockwise. - Page 11 Starting the dive with a weak battery may lead to a situation has reached a safe level for a startup. If this occurs, where the Galileo 3 shuts off during the dive. In case of such do not disconnect the USB, and do not try to turn an event you should always have a backup instrument with the Galileo 3 on by pressing a button.
-
Page 12: Li-Ion Battery Safety Instructions
1 .9 No-dive warning way. • Do not carry or store batteries together with any conductive If the Galileo 3 detects a situation of increased risk (due metal objects. to potential microbubble accumulation from previous • Do not expose the battery to excessive sunlight or heat. -
Page 13: Fly Time
Galileo 3 will switch into SOS mode. Once Dr. T. Dräger, Dr. U. Hoffmann, 2012, www.scubapro.com. in SOS mode, the Galileo 3 will lock up and will be NOTE: Refer to chapter Workload to learn how to inoperable as a decompression dive computer for 24 enable the Galileo 3’s heart rate monitor function. - Page 14 – and + (enabling you to edit the current selection). The lower left arrow button moves your selection to the next field and SAVE stores the entered values. The Galileo 3’s menu structure is divided into the following four menus: Sport menu Apnea dive...
- Page 15 *menu point will appear according to the algorithm selected. **menu point only available when the ZH-L16D ADT MB PMG algorithm is selected. Clock settings Wake-up alarm Time Time zone Time zone 2 Watch style Smartwatch settings GALILEO 3 USER MANUAL...
-
Page 16: Settings
Saving or canceling a setting Pressing the lower left button (SAVE) after making changes to a setting in the Galileo 3 will confirm the changes and the message “CHANGES SAVED” will be displayed: 2 .1 .2... -
Page 17: Trimix Settings
2 .1 .3 Trimix settings value. If the alarm depth is shallower than 0.8m/3ft which is the dive start depth for the Galileo 3, the alarm will not If trimix is enabled, the O setting will appear as follows. activate before a 0.8m/3ft depth is reached! This situation is See chapter Activating Trimix to learn how to activate dangerous and may lead to death by drowning. -
Page 18: Dive Settings
Dive mode Your Galileo 3 allows you to choose between Scuba, Gauge and Apnea modes. When the Galileo 3 has not been submerged for a while the display appears as shown below: NOTE: See chapter Diving with CCR mode to learn more about this feature. -
Page 19: Safety Stop Timer
Desaturation reset to learn how to manually reset the desaturation. NOTE Apnea mode is only available as a selectable dive mode if you have enabled it in the Galileo 3’s 6.11. Feature upgrade menu. By default, Apnea mode is disabled, and the menu 2.2 Dive mode will appear as 2.2 Gauge mode. -
Page 20: Nitrox Reset Time
If you are generally diving with air and want to return and Diving with GF settings to this setting after the occasional nitrox dive, you can preset a default time that will enable your Galileo 3 to 2 .2 .9 Shallow stops reset back to air. -
Page 21: Desaturation Reset
Any tissue saturation information from recent reset the desaturation. The Galileo 3 stores tissue dives can be reset to zero, allowing the Galileo 3 to treat saturation information in a non-volatile memory. the next dive as a non-repetitive dive. This function is... -
Page 22: All-Silent Mode
PMG as well. 2 .2 .14 Activating CCR The Closed-Circuit Rebreather mode can be activated in this menu if the feature is enabled in the Galileo 3’s feature upgrade menu. Activating CCR changes the default open circuit gas content settings to setpoint settings. Also, the dive... -
Page 23: Activating Trimix
CCR or Sidemount modes. 2 .3 Apnea settings If the Apnea feature is enabled in the Galileo 3’s 6.11. Feature upgrade menu, the following settings for the Apnea mode can be changed: 1. Maximum depth 2. -
Page 24: Setting The Depth Incremental Warning
(shown as Way up), or for both directions. NOTE: After 15 minutes on the surface, the Galileo 3 automatically ends the dive session and saves the dive in the logbook. The depth increment can be set from 5m to 100m/20- 330ft. GALILEO 3 USER MANUAL... -
Page 25: Low Heart Rate Alarm
2 .3 .5 Low heart rate alarm in Scuba and Gauge modes the Galileo 3 allows you to define whether you are diving in fresh or salt water. The Galileo 3 can trigger an alarm if your heart rate A decompression calculation is based on absolute drops below a set level. -
Page 26: Digital Compass
The SIF can be set from 5 to 20 or it can be disabled NOTE: You can also launch the compass from the by selecting OFF. Galileo 3’s sport menu 5. Use compass. During diving the compass screen shows information 2 .4 Digital compass about depth, dive time, tank pressure, and no-stop In the menu 4. -
Page 27: Auto-Off Time
It is expressed in NOTE: Do not use the Galileo 3’s compass close degrees, from 0 to 359. 0 degrees is North, 90 degrees to a magnet, as the magnetic force may cause the is East, 180 degrees is South, 270 degrees is West, compass calibration to reset. -
Page 28: Warning Settings
NOTE: The Galileo 3’s compass does not normally need recalibration. If you note a significant permanent offset in compass direction, contact your authorized SCUBAPRO dealer. 2 .5 Warning settings Warnings represent situations that require the diver’s attention but ignoring them does not represent an immediate risk. -
Page 29: Cns O
= 75% 2 .5 .5 Maximum dive time warning The Galileo 3 tracks your oxygen uptake via the CNS O You can set your Galileo 3 to warn you when the clock. If the calculated value of CNS O reaches 75%, maximum dive time you set in this menu is reached. -
Page 30: Rbt = 3Min
When diving with a microbubble (MB) level different spend at the current depth and still have enough gas than L0, the Galileo 3 can warn you when you are no supply to make a safe ascent and reach the surface longer in the MB no-stop phase. -
Page 31: Gf Stop Ignored
When diving with GF setting other than 100/100 and in When diving with GF setting other than 100/100 and the presence of GF stops, the Galileo 3 can warn you if in the presence of GF stops, if you ascend more than you reach a depth shallower than the deepest required 1.5m/5ft above the deepest required GF stop, the... -
Page 32: 100/100 No-Stop Time = 2Min
L0 information is not directly visible on the display (though it is accessible as alternate information). You can choose to have your Galileo 3 warn you when you are about to enter a decompression obligation while diving with an active MB level higher than L0. -
Page 33: Gas Integration
2.6.2.4 Gas summary before reaching the surface increases. The gas summary table provides a fast overview of the paired tank pressures and their content. GALILEO 3 USER MANUAL... -
Page 34: Mounting And Pairing The High Pressure Transmitter
Transmitter position for the right hand. In order for the Galileo 3 to display the pressure signal from a Smart transmitter, a coded, interference-free line of communication must first be established. This step needs to be performed only once for each transmitter. -
Page 35: Backlight Duration
BAR or PSI. the automatic dimming function (push on/push off). If tank T1 has not been paired, the Galileo 3 will show NO P instead of a pressure value. If T1 has been paired but the Galileo 3 is not receiving any signal, it will show - - - instead of a pressure value. -
Page 36: Display Off Delay
Display off delay 2 .6 .7 Button beeps In this menu you can set your Galileo 3’s display to In this menu the general button feedback beeps can be turn off in order to save battery life. You can select the enabled or disabled. -
Page 37: Factory Settings
Galileo 3’s battery is too weak. In that case you must first charge your Galileo 3’s battery then install the new software version manually by entering the menu 6.12 Software update and selecting the newest software version. -
Page 38: Pair Heart Rate Belt
In this menu a SCUBAPRO heart rate monitor can be In this menu you can personalize your Galileo 3 to paired with your Galileo 3. While you are in this menu fully suit your needs and preferences. You can select... -
Page 39: Setting User Preferred Units
If the Galileo 3 detects a sufficient increase in workload, the same but in reverse during off-gassing. As such, it no-stop times can suddenly shorten and decompression is obvious that the single most important parameter in stops can quickly grow. -
Page 40: Show Owner Info
NOTE: To enable the workload settings, you must introduction to LogTRAK to learn how to write your first pair your Galileo 3 with your Heart Rate Monitor. emergency information in your Galileo 3. NOTE: The workload setting is only available when 2 .7 .7... -
Page 41: Stop Plan
• Observance of the prescribed ascent rates. CNS% and OTU values appear on the screen when 1% would be reached for that depth with maximum no- NOTE: When the Galileo 3 is set to Gauge or Apnea stop time. mode the dive planner is disabled. -
Page 42: Bluetooth
2 .10 Bluetooth Dive statistics contain the following data. In this menu you can enable Bluetooth communication between your Galileo 3 and a handheld device or desktop computer. To learn how to establish Bluetooth communication refer to the chapter Establishing Bluetooth communication. - Page 43 NOTE: For dives with multiple gases there will be additional log pages after the 5th logbook page. Apnea logs The Galileo 3 organizes the Apnea dive log by grouping the individual immersions into a dive session. On the first three pages the session data is shown.
-
Page 44: Step Counter Statistics
In this menu you can make changes to your swim and step counter settings. The following pages provide detailed information of a specific immersion of the session (the number of the immersion is shown at the bottom of the display; for example, iteration #1, #2, etc.). GALILEO 3 USER MANUAL... -
Page 45: Swim Settings
— how much depth difference is counted as a stroke cycle, as well as the distance per cycle (distance factor) — in order to achieve proper results. The following illustration shows the parameters: Distance Factor Stroke threshold Dive mode GALILEO 3 USER MANUAL... -
Page 46: Step Counter
In this submenu you may enable or disable the step counter that runs in the background. This will not be logged in the Galileo 3’s logbook but instead the statistics will be displayed in menu 11.2. Step counter. NOTE: Having this function enabled will drain the battery of your Galileo 3. -
Page 47: Pedometer
3 meters. This allows flip turns in pool and horizontal dives. An immersion deeper than 3 meters will start a dive in the mode which is selected in the Galileo 3. 2 .13 .3 Pedometer In this menu you can start a step counter exercise. -
Page 48: Use Compass
Using the arrow buttons, toggle to Stopwatch and press ENTR. 2 .13 .5 Use compass In this menu you can launch and use your Galileo 3’s digital compass on the surface. START will start running the time, STOP will pause it. -
Page 49: Clock Settings
In this menu you can change settings related to: • Wake-up alarm, • date / time format and current time, • time zones, • watch style and • smartwatch. GALILEO 3 USER MANUAL... -
Page 50: Time Zone
(with hands) or digital (numbers). actual time itself, in this menu you can define a number When you return to the watch face the Galileo 3’s of hours to add to or to subtract from the currently screen appears as follows. -
Page 51: Smartwatch Settings
Bluetooth symbol, the Smartwatch menu will be enabled in your Galileo 3. Open LogTRAK app on your iPhone ® , go to menu 10. Bluetooth in your Galileo 3 and establish connection. Enter the pin code shown on the Galileo 3’s display. GALILEO 3 USER MANUAL... -
Page 52: Connection Information
NOTE: To be able to receive and display notifications on the Galileo 3, you need to enable the following settings in your smartphone. • Allow notifications • Show previews 2 .17 .1 Connection information 2 .17 .2 Notifications by category Here you can view notifications by category. -
Page 53: Diving With The Galileo 3
Recreational (factory setting) In Trimix mode the gas content is shown in the tank If you have not been diving with your Galileo 3 for a pressure & content window in the Oxygen/Helium while (no desaturation remaining) the current dive format. -
Page 54: Display Configuration In Ccr Mode
Display configuration in GF mode 3 .1 .6 NOTE: The Galileo 3 can be set to three dive modes: If Gradient Factor mode is selected in your Galileo 3 the Scuba, Apnea and Gauge. Due to the operational display appears as shown below. -
Page 55: Function Of The Rotating Bezel During Diving
3 .3 Function of the rotating bezel during The Galileo 3 in the above image shows a dive time of 3 minutes, meaning that the diver has just started the diving dive. To use the Galileo 3’s time-lapse bezel first set the dive... -
Page 56: Altitude And The Decompression Algorithm
In a manner similar to no-fly time, the Galileo 3 advises you the safe WARNING altitude classes to reach after a dive, and those which are not safe. -
Page 57: Decompression Dives In Mountain Lakes
MOD alarm set for a user-defined ppO max. As you The Galileo 3 has an altitude warning. If you reach an enter the oxygen concentration for the dive, the altitude that the Galileo 3 considers incompatible with Galileo 3 shows you the corresponding MOD for the... -
Page 58: Technical Diving
If your plan and the computer with you. At the same time, the Galileo 3 can also show show different schedules, follow the more conservative you what the decompression schedule would be if you one. -
Page 59: Switching Gas Mixture During The Dive
Get the proper training and certifications to make multi-gas dives prior to making them by yourself. The Galileo 3 enables you to use up to 8 gas mixtures during the dive. • For oxygen concentrations of 80% and higher, the max is fixed at 1.6bar and cannot be changed. -
Page 60: Switching Back To A Gas Mixture With Lower Oxygen Concentration
(PMG) and assuming only the The Galileo 3 will display the text “SWITCH TO GAS current gas would be used (1G). Also, currently selected T1 SUCCESSFUL” and adapt the decompression MB levels or GF stops as well as MB level 0 schedules schedule accordingly. -
Page 61: Diving With Trimix Mode
Computer technology is never a substitute for knowledge and training. WARNING Before performing trimix dives with the Galileo 3 you should practice no-stop recreational diving to become accustomed to the interface and functions of the dive computer. -
Page 62: Gas Selection
PMG mode as well. Pair two sidemount The gas summary table is practical when handling tanks with equal oxygen mixture to your Galileo 3 and multiple gas mixtures. It can be called up on a pre-dive you are ready to go. -
Page 63: Diving With Ccr Mode
Diving with CCR mode NOTE: For technical diving you can pair 6 additional The CCR (Closed Circuit Rebreather) system is probably tanks and the Galileo 3 will guide you through your older than the Open Circuit Scuba system because the dive. -
Page 64: Warnings
See chapter No-stop = 2 • When the Galileo 3 is set to all-silent mode, all audible min to learn how to set this warning. warnings are muted. -
Page 65: Dive Time
3 .6 .6 Dive time minutes. See chapter RBT = 3 min to learn how to set this warning. The Galileo 3 can warn you when the set dive time is reached and will display the message TIME LIMIT WARNING REACHED. -
Page 66: Entering Level Stops
3 .6 .10 Entering level stops When diving with a microbubble (MB) level other than L0, the Galileo 3 can warn you when you are no longer in the MB no-stop phase. For more information, see chapter Diving with MB-levels. -
Page 67: Gf Increased
L0 information is not directly visible on the display (though it is accessible as alternate information). You can choose to have your Galileo 3 warn you when you are about to enter a decompression obligation while diving with an active MB level higher than L0. See chapter Entering deco at L0 to learn how to set this 3 .6 .16 L0 no-stop = 2 min... -
Page 68: Alarms
• When diving in Gauge mode, all alarms are OFF except for the low battery and tank reserve alarms. • When the Galileo 3 is set to all-silent mode, all audible For ascent rates higher than 140%, the ASCENT alarms are muted. -
Page 69: Absolute Minimum Depth (Amd)
If, when conducting a required decompression stop, you ascend more than 0.5m/2ft above the required stop, the Galileo 3 will trigger an alarm. The value of the current depth and the message MISSED DECO STOP! 3 .7 .4... -
Page 70: Rbt = 0 Min
It also gives you the total ascent time. During the dive, the Galileo 3 alerts you of precarious battery situations in two ways: WARNING 1. -
Page 71: Display Configuration During The Dive
CNS% WARNING CNS% After a PRESSURE SIGNAL LOST warning the Galileo 3 is no A long-press of the top right button displays the dive longer able to compute the RBT. In such a case, the LIGHT profile (or gas/deco summary displays depending on configuration shows the no-stop time, but this does not MB/PMG settings). -
Page 72: Setting Bookmarks
If any warning or alarm is triggered while viewing alternate screens, the Galileo 3 will immediately revert to the normal dive screen. The following display shows a list of pictures stored in 3 .8 .2... -
Page 73: Stopwatch Timer
SCUBAPRO has equipped the Galileo 3 with technology to help protect divers from these microbubbles. With the Galileo 3, you can choose – according to your specific needs – a MB level that will provide a level of protection from microbubbles. Diving with MB levels includes additional ascent stops (level stops);... -
Page 74: Diving With Gf Settings
Galileo 3 software – in addition to the MB-level settings and the surface (or the lowest decompression stop). – uses the GF settings. -
Page 75: How Does Pdis Work
The mathematical decompression model in the Galileo 3, called ZH-L16 ADT MB PMG, tracks your NOTE: The PDI stop is not a mandatory stop, and decompression status by dividing your body into 16... -
Page 76: Diving With Pdis
2. as described above. MB levels, however, introduce In case of a missed gas switch, the Galileo 3 reverts to stops earlier and deeper than the L0 base algorithm. As the PDI stop for the actively breathed mix. -
Page 77: Diving In Apnea Mode
During a dive in Gauge mode, the Galileo 3 displays a stopwatch. This can be reset and restarted by pressing the SW button which also sets a bookmark. -
Page 78: Bluetooth Usb Dongle
The heart rate monitor must be paired with your Galileo the connection. At this point, the Galileo 3 is ready for 3 before the first use. After this initial pairing, the heart Bluetooth communication. rate monitor will be on standby and ready to send data. -
Page 79: Scubapro Logtrak
Establishing Bluetooth communication 2. Launch LogTRAK on your desktop computer. 3. Check that the Galileo 3 is detected by LogTRAK in Extras -> Options -> Download. To establish connection with your Galileo 3, you need 4. -
Page 80: Maintenance
• Avoid dropping or jarring your Galileo 3. • Do not expose your Galileo 3 to intense, direct sunlight. • Do not store your Galileo 3 in a sealed container; always ensure free ventilation. • If there are problems with the water contacts, use soapy water to clean your Galileo 3 and dry it thoroughly. -
Page 81: Replacing The Battery In The High Pressure Transmitter
• Insert the new battery. Note the polarity, “+” is stage regulator. marked on the body. Do not touch poles or contacts • Dry the transmitter with a soft towel. with bare fingers. • Remove the lock ring with a pair of ring pliers. (f) GALILEO 3 USER MANUAL... -
Page 82: Warranty
7 .1 .4 EU Electromagnetic Compatibility Directive 6 .6 Warranty The GALILEO 3 dive instrument is also compliant with the European Union directive 2014/30/EU. The Galileo 3 has a 2-year warranty covering defects in workmanship and functioning. The warranty only 7 .1 .5... -
Page 83: Can Ices-3 (B) / Nmb-3 (B)
Module C2 7 .3 Date of manufacture • yymmddxxxxxxx - Serial number The manufacturing date can be determined from your • Galileo 3 - Product name device’s serial number. The serial number is always 13 characters long: YYMMDDXXXXXXX. •... -
Page 84: Glossary
The depth at which the diver plans to switch to a higher oxygen concentration mix while using the point multi-gas option Total Ascent Time. It is the time it should take the diver to get to the surface from their present depth Universal Time Coordinated, refers to time zone changes when traveling GALILEO 3 USER MANUAL...
Need help?
Do you have a question about the GALILEO 3 and is the answer not in the manual?
Questions and answers