
Subscribe to Our Youtube Channel
Related Manuals for Broyhill CALCOLO MARBLE 7276B


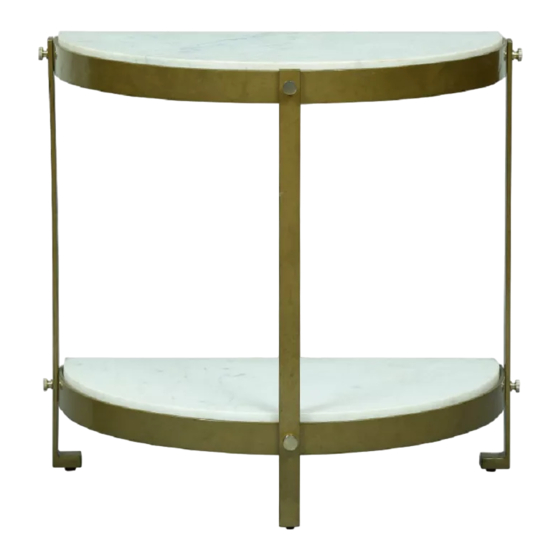
Summary of Contents for Broyhill CALCOLO MARBLE 7276B
- Page 1 ASSEMBLY INSTRUCTION ITEM#:7276B SKU# 810530876 CALCOLO MARBLE END TABLE Need help? We are here for you! www.biglots.com/help/contact-us...
-
Page 2: Maintenance
GENERAL BEST PRACTICES FOR ASSEMBLY: Read all instructions before starting. Clear an area for assembly and assemble on a soft surface such as cardboard or carpet to protect finish. WARNINGS: Caution: Adult assembly required. Assembly will require 2 people. Assemble on soft surfaces to prevent damage to the product finish. -
Page 3: Helpful Hints
HELPFUL HINTS DO NOT place your furniture too close to window, heaters, or vents. DO NOT SMOKE WHEN DROWSY. Immediately remove any glowing or lit cigarette which falls on furniture. Clean any spills immediately using a clean, slightly dampened cloth and dabbing the area until the spill is removed. -
Page 4: Parts List
PARTS LIST Legs x3 pc Top x1pc Washer x6 pc Base x1pc Allen Screw x6pc Allen Key x1pc Decorative Bolt x6pc... - Page 5 STEP 1 1. Secure Legs (B) to Top (A) with Washer (D) and Allen Screw (F) using Allen Key (E). Fully tighten screws. Assembled View:...
- Page 6 STEP 2 1. Align the holes of Base (C) with the holes in Legs (B) and secure in place with Washer (D) and Allen Screw (F) using Allen Key (E). Assembled View:...
- Page 7 STEP 3 1. Fully tighten all Allen Screws with Allen Key so legs do not move. Assembled View:...
- Page 8 STEP 4 1. Turn the table to the upright position. Insert Decorative Bolt (G) into the holes of Leg (B). Hand tighten until tight. DO NOT use tools. Assembly is now complete. Assembled View: PRINTED IN INDIA...
Need help?
Do you have a question about the CALCOLO MARBLE 7276B and is the answer not in the manual?
Questions and answers