
Subscribe to Our Youtube Channel
Related Manuals for Sony SPP-IM 982


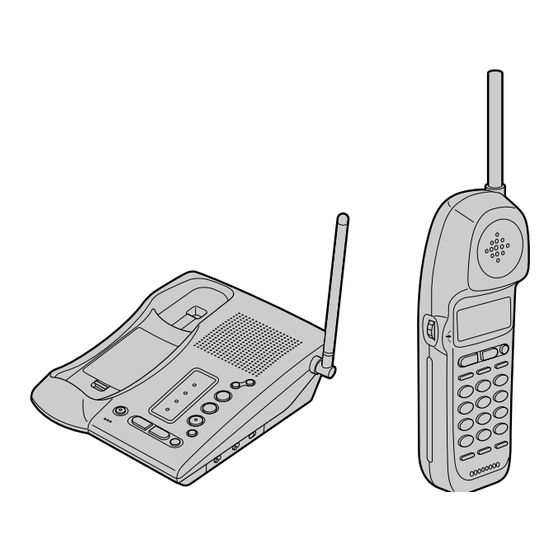
Summary of Contents for Sony SPP-IM 982
- Page 1 3-223-744-11 (1) 2-Line Cordless Telephone Operat ing Inst ruct ions SPP-IM 982 ©2000 Sony Corporation Downloaded from: https://www.usersmanualguide.com/...
- Page 2 The model and the serial numbers are located at the bottom of the unit. Record the serial number in the space provided below. Refer to these numbers whenever you call upon your Sony dealer regarding this product. Model No. SPP-IM982 Serial No. ________________ Downloaded from: https://www.usersmanualguide.com/...
- Page 3 IM PORTANT 8. Do not allow anything to rest on the power cord. Do not locate this SAFETY product where the cord will be abused by persons walking on it. INSTRUCTIONS 9. Do not overload wall outlets and extension cords as this can result in When using your telephone equipment, the risk of fire or electric shock.
- Page 4 The battery or conductor may overheat and (SPP-IM982), for repair or warranty cause burns. information, please contact Sony Direct 5. Charge the battery pack provided with or Response Center: Tel 1-800-222-7669. If the identified for use with this product only in...
- Page 5 Caution You are cautioned that any changes or modifications not expressly approved in this manual could void your authority to operate this equipment. Note This equipment has been tested and found to comply with the limits for a Class B digital device, pursuant to Part 15 of the FCC Rules.
-
Page 6: Table Of Contents
Table of cont ent s Get t ing St art ed To switch from the handset to the base unit 8 Read this first 40 Talking between the phones 9 Step 1: Checking the package (Intercom) contents To talk from the handset to 10 Step 2: Setting up the base unit the base unit 14 Step 3: Preparing the battery... - Page 7 51 Using the Caller ID list Calling back a number from the Caller ID list Storing a number of the Caller ID list into the Phone Directory To change the number of digits of the phone number 55 Using “Caller ID with call waiting”...
-
Page 8: Get T Ing St Art Ed
Get t ing St art ed Read t his f irst Before you use your phone, you must first set it up. Here’s a quick way to set up your phone: Steps 1, 2, 3 and 4. St ep 1 (page 9) First, unpack the phone and the supplied accessories. - Page 9 St ep 1 Checking t he package cont ent s Make sure you have received the following items in the package. If anything is missing, contact your local Sony dealer. Base unit AC pow er adaptor (AC-T128) Handset Telephone line cords (3)
- Page 10 St ep 2 Set t ing up t he base unit Do the following steps: • Choose the best location • Connect the base unit • Choose the dialing mode Choose t he best locat ion Where you place the base unit affects the reception quality of the handset.
- Page 11 Connect t he base unit If you want to hang the base unit on the wall, see page 58. To connect the base unit to a single outlet having tw o lines Hook the cord. To an AC outlet To DC IN 9V AC pow er adaptor DATA jack (supplied AC-T128)
-
Page 12: Step 2: Setting Up The Base Unit
St ep 2: Set t ing up t he base unit (cont inued) To connect the base unit to tw o separate outlets Hook the cord. To an AC outlet To DC IN 9V AC pow er adaptor DATA jack (supplied AC-T128) To the telephone outlets... - Page 13 To L1/ L1+L2 You can connect a computer or FAX, etc. to the and/ or L2 DATA jack. SPP-IM 982 Notes • L2 jack is used for receiving or sending To DATA computer or FAX data in addition to making or receiving calls.
- Page 14 St ep 3 Preparing t he bat t ery pack Charge the battery pack for more than 12 hours before you start using your phone. Slide open the battery compartment lid of the handset. Insert the battery pack (with contacts facing down) into the BP-T23 battery compartment.
- Page 15 If the battery lasts only a few minutes even after 12 hours of charging, the usable life of the battery has expired and needs replacement. Contact your local Sony authorized dealer or service center, and ask for a Sony BP-T23 rechargeable battery pack.
-
Page 16: Step 3: Preparing The Battery Pack
St ep 3: Preparing t he bat t ery pack (cont inued) Handset spare bat t ery usage As only one battery pack is supplied with this unit, it is necessary to purchase an additional battery pack (optional) for use as a handset spare battery pack. - Page 17 St ep 4 Ent ering t he area code When you use this phone for the first time, or move to an area that has a different area code, you must enter your home area code. Otherw ise, you cannot use some functions of this phone and the Caller ID functions. This is also necessary because the phone must be able to select an area code to properly dial call from the Caller ID list.
-
Page 18: Step 4: Entering The Area Code
St ep 4: Ent ering t he area code (cont inued) Enter three digits of your home area code using the dialing keys. Press (PGM). You will hear a long confirmation beep. Notes • If the home area code is already entered, it appears on the display in step 4. To enter a different home area code, see “To change the home area code”... - Page 19 Select the number (”#1“ to ”#5“) to enter the local area code by turning Jog Dial. Press Jog Dial. ”ENTER AREA CODE“ appears on the display. Enter three digits of the local area code using the dialing keys. Press (PGM). You will hear a long confirmation beep.
-
Page 20: Identifying The Parts
Ident if ying t he part s Refer to the pages indicated in parentheses for details. Base Unit 1 NEW CALL lamp (p. 48) 0 Speaker qa VOL +/ – buttons (p. 30) Flashes when there is a “NEW” data in the Caller ID list. Adjusts the speaker volume. - Page 21 qk OFF button (p. 29) Allows you to disconnect the call. ql Hook for AC pow er adaptor cord (p. 11) w; DC IN 9V jack (p. 11, 58) wa L1/ L1+L2 jack (p. 11, 58) ws L2 jack (p. 12, 58) wd DATA jack (p.
- Page 22 Ident if ying t he part s (cont inued) Handset 1 Antenna 9 CONF (conference) button (p. 44) 2 Speaker Lets you talk with two parties at the 3 Jog Dial (p. 17, 32, 48) same time. 4 LINE buttons (1, 2) (p. 24, 28) q;...
- Page 23 qg REDIAL/ PAUSE button (p. 26, 33) Redials the last number called/ inserts a pause in the dialing sequence. qh PGM (program) button (p. 17, 32) Used to store numbers in Phone Directory. qj M icrophone qk I (HEADSET) jack (p. 24, 28, 59) ql VOL (volume) sw itch (p.
-
Page 24: Basics
Basics M aking calls Pick up the handset from the base unit. Press (LINE 1) or (LINE 2) to select the line. The corresponding line button lights up. I (HEADSET) “TALK” appears on the display jack and the display also shows the VOL sw itch talk time in hours, minutes and (HOLD) - Page 25 Additional tasks Do this Adjust the handset volume Set the VOL switch to H (high), M (middle) or L (low). Press (HOLD). Put a call on hold The LINE 1 or LINE 2 button will flash slowly. Press (LINE 1) or (LINE 2) to resume the conversation.
-
Page 26: Redialing
M aking calls (cont inued) If you have a spare battery You can replace the battery pack without disconnecting the call during a conversation. To replace the battery pack, perform the following procedure. Press (HOLD) on the handset. The call is on hold and “HOLD” appears on the display. Replace the battery pack. -
Page 27: Making Another Call While Talking
M aking anot her call w hile t alking Example: M aking a call on line 2 w hile talking on line 1 Press (HOLD) while talking. The line 1 is put on hold and the LINE 1 button flashes slowly. -
Page 28: Receiving Calls
Receiving calls When you hear the phone ring, press (LINE 1) or (LINE 2) whichever button is flashing. The corresponding line button lights “TALK” appears on the display and the display also shows the talk time in I (HEADSET) hours, minutes and seconds. jack The line button on the base unit VOL sw itch... - Page 29 Additional tasks Do this Adjust the handset volume Set the VOL switch to H (high), M (middle) or L (low). Press (HOLD). Put a call on hold The LINE 1 or LINE 2 button will flash slowly. Press (LINE 1) or (LINE 2) to resume the conversation.
- Page 30 Receiving calls (cont inued) Additional tasks Do this Adjust the speaker volume During speakerphone conversation, press (VOL)(+) or (--). Each press of (VOL)(+) or (--) switches the speaker volume by one of 8 levels. Adjust the ringer volume of You can adjust the ringer volume of line 1 and 2 the base unit respectively.
-
Page 31: Receiving A Call While Talking
Receiving a call w hile t alking If another call comes in while talking on the other line, the corresponding line button will flash. Example: Receiving a call on line 2 w hile talking on line 1 Press (HOLD) while talking. The line 1 is put on hold and the LINE 1 button flashes slowly. -
Page 32: Telephone Feat Ures
J t K t L t 5 right. M t N t O t 6 Example : to enter “SONY”, press (7) P t Q t R t S t 7 four times (S), press (6) three times (O), turn Jog Dial up to move the... - Page 33 Press (PGM). “ENTER NUMBER” appears. SONY Enter the phone number. 1234567 You can enter up to 32 digits, including a tone and a pause, each of which is counted as one digit. When the phone number of 17 digits or more...
-
Page 34: Changing A Stored Name And/Or Phone Number
Phone Direct ory (cont inued) Changing a st ored nam e and/or phone num ber Display the name and phone number you want SONY to change by doing steps 1 and 2 in “Making 1234567 calls from the Phone Directory” on page 35. -
Page 35: Erasing A Memory Location
Erasing a m em ory locat ion SONY Display the name and phone number you want 1234567 to erase by doing steps 1 and 2 in “Making calls from the Phone Directory”. DIAL EDIT ERASE Press Jog Dial. 1234567 Turn Jog Dial up to make “ERASE” flash and ERASE NO YES press Jog Dial. - Page 36 • Alphabetical order: ABC...XYZ y symbols y * y # y 0 - 9 • Initial character: To search for “SONY” for example, press (7) and then turn Jog Dial to search through the names starting with P, Q, R, S or 7.
-
Page 37: Setting The Ringer Type
Set t ing t he ringer t ype You can select a ringer type of the handset from four type. Press (PGM). Turn Jog Dial up to make “RINGER” Turn Press flash. DIRECTORY AREA RINGER Press Jog Dial. LINE1 LINE2 Turn Jog Dial to choose the line you want to set the ringer type. -
Page 38: Turning Off The Ringer Of The Handset
Set t ing t he ringer t ype (cont inued) Turning of f t he ringer of t he handset Perform steps 1 to 5 on page 37. Press (0). RINGER OFF SELECTED You will hear a confirmation beep. Press (OFF). When “RINGER”... -
Page 39: Switching The Phones During A Call
Sw it ching t he phones during a call You can easily switch between the handset and speakerphone on the base unit without disconnecting the call. The call on line 1 will be switched to line 1 on another phone and that on line 2 is switched to line 2. -
Page 40: Talking Between The Phones (Intercom)
Talking bet w een t he phones (Int ercom ) You can converse using the base unit and the handset. You can start the intercom from either phone. To t alk f rom t he handset t o t he base unit Press (INTERCOM) on the handset. -
Page 41: Receiving A Call While Using The Intercom
Note While conversing with an outside caller via the base unit or handset, you cannot make an intercom call. If you press (INTERCOM), you will hear a busy tone. Tips • You can receive an intercom call on the handset even when “RINGER” is set to “RINGER OFF”. -
Page 42: Transferring A Call
Transf erring a call You can transfer a call between the handset and base unit without disconnecting the call. To t ransf er f rom t he base unit t o t he handset Press (INTERCOM) to page the handset. The call is put on hold on the base unit and the handset rings. -
Page 43: To Transfer From The Handset To The Base Unit
To t ransf er f rom t he handset t o t he base unit Press (INTERCOM) to page the base unit. The call is put on hold on the handset. After the base unit rings twice, you will be connected automatically. -
Page 44: Having A Conference Call
Having a conf erence call You can talk on two lines at the same time and you can also talk on one line, the handset and the base unit at the same time. M aking anot her call w hile t alking You can talk with two parties at the same time using both line 1 and line 2. -
Page 45: Receiving A Call While Talking
Receiving a call w hile t alking If another call comes in while talking, the LINE 1 or LINE 2 button on which another call is coming will flash. Press (HOLD). The line in use is put on hold. Press (LINE 1) or (LINE 2), on which another call is coming. Press (CONF) (conference). -
Page 46: Switching Conference From The Handset To The Base Unit
Having a conf erence call (cont inued) Sw it ching conf erence f rom t he handset t o t he base unit Press (HOLD) on the handset to put both lines on hold. The LINE 1 and LINE 2 buttons on the handset and the base unit flash. -
Page 47: Caller Id Feat Ures
Caller ID Feat ures Underst anding t he Caller ID service Caller ID allows the caller’s phone number to be shown on the display before the call is answered. In order to use this feature, you must first subscribe to the Caller ID service. The name of this service may vary depending on your telephone company. -
Page 48: Looking At The Caller Id List
Looking at t he Caller ID list The phone stores the data of the last 20 calls received including “OUT OF AREA” and “PRIVATE” calls. It keeps track of all calls received; even if they were not answered. View ing t he Caller ID list You can look through the Caller ID list to check the phone number and/or name of the calls received. -
Page 49: Erasing Data From The Caller Id List
About the “ * ” mark “*” appears if there are more than two calls SMITH JOHN from the same phone number. The older data 1-201-123-4567 will be replaced by the new data, so the calls are counted as only one call. Erasing dat a f rom t he Caller ID list Old data will be erased automatically when a 21st call comes in, but you can also manually erase unnecessary data one by one or erase the... - Page 50 Looking at t he Caller ID list (cont inued) To erase the entire list at once SMITH JOHN Display any Caller ID data. 1-201-123-4567 Press Jog Dial. DIAL PGM ERASE 1-201-123-4567 Turn Jog Dial up to make “ERASE” flash and ERASE NO YES ALL press Jog Dial.
-
Page 51: Using The Caller Id List
Using t he Caller ID list By using the Caller ID list, you can call back a phone number from the Caller ID list easily, or store numbers from the Caller ID list into the Phone Directory. Calling back a num ber f rom t he Caller ID list Display the phone number you want to call from the Caller ID list (see page 48). -
Page 52: Storing A Number Of The Caller Id List Into The Phone Directory
Using t he Caller ID list (cont inued) St oring a num ber of t he Caller ID list int o t he Phone Direct ory Display the name and phone number you want SMITH JOHN to store from the Caller ID list (see page 48). 1-201-123-4567 Confirm the number and press Jog Dial. -
Page 53: To Change The Number Of Digits Of The Phone Number
To change t he num ber of digit s of t he phone num ber If the number of digits of the phone number in the Caller ID list is different from the actual phone number, you need to adjust the number of digits of the phone number to call back or store into the Phone Directory . - Page 54 Using t he Caller ID list (cont inued) When the local area code matches SMITH JOHN SMITH JOHN 1-123-4567 201-123-4567 SMITH JOHN SMITH JOHN 1-201-123-4567 123-4567 Continue the operation to call or store the phone number with the correct number of digits (pages 51 and 52). Notes •...
-
Page 55: Using "Caller Id With Call Waiting" Service
Using “ Caller ID w it h call w ait ing” service This telephone is compatible with the “Caller ID with call waiting” service. Make sure that your telephone company offers this service. Like the basic Caller ID service, you need to subscribe to “Caller ID with call waiting”... -
Page 56: Using Visual Message Waiting Service
Using visual m essage w ait ing service If you subscribe to your telephone company’s message service which includes this feature, the display will show that you have messages waiting to be retrieved. M ESSAGES lamp If you have m essages The MESSAGES lamp on the base unit flashes. - Page 57 Using visual m essage w ait ing service (cont inued) If you move or change your telephone company Message waiting signals are sent in one of two ways: FSK signaling or “stutter” signaling (Your telephone company can provide you with more information about your service).
-
Page 58: Addit Ional Inf Orm At Ion
Addit ional Inf orm at ion M ount ing t he base unit on a w all Hang-up tab Raise the hang-up tab. Plug the telephone line cord(s) to the L1/L1+L2, and/or L2, DATA jack(s) and the AC power adaptor to the DC IN 9V jack, and hook the cords. -
Page 59: Carrying The Handset By The Belt Clip
Remove the belt clip carefully to avoid breaking your fingernails. Using the headset You can talk on handset without using your hands by connecting Sony TL-HD1 headset (optional) to the I (HEADSET) jack on the handset. Additional Information Downloaded from:... -
Page 60: Notes On Power Sources
Not es on pow er sources On battery pack For the customers in the USA • Store the battery pack at a RECYCLING NICKEL-CADM IUM temperature between 41°F (5°C) and BATTERIES 95°F (35°C) for best performance. Nickel-Cadmium batteries are recyclable. You can help •... -
Page 61: Maintenance
• If the charge terminals of the base unit and handset are soiled, wipe them with a soft cloth. If you have any questions or problems concerning your phone, please consult your nearest Sony dealer. Additional Information Downloaded from: https://www.usersmanualguide.com/... -
Page 62: Troubleshooting
Troubleshoot ing If you’ve experienced any of the following difficulties while using your phone, use this troubleshooting guide to help you remedy the problem. Should any problem persist, consult your nearest Sony dealer. Symptom Remedy You hear five short error •... - Page 63 Symptom Remedy • Move the handset closer to the base unit. You hear interference during • Place the base unit away from noise sources conversation. (page 10). • This is the out-of-range alarm. Move the handset Your conversation is muted closer to the base unit within one minute.
- Page 64 Troubleshoot ing (cont inued) Symptom Remedy • Make sure you have subscribed to Caller ID service. The caller’s name and/or • Caller ID service may not work when the phone is phone number does not appear connected to a Private Branch Exchange (PBX). on the display.
-
Page 65: Specifications
Specif icat ions General Base unit Frequency band Power source 902 - 928 MHz DC 9V from AC power adaptor Operating channel AC-T128 30 channels Battery charging time Dial signal Approx. 24 hours Tone, 10 PPS (pulse) selectable Dimensions Supplied accessories Approx. -
Page 66: Index
Index Adjusting volume Headset 24, 28, 59 Setting up handset volume 25, 29 Hold 25, 29 base unit 10 speaker volume 30 Home area code 17 handset 14 Area code 17 Spare battery 16 I, J, K Speakerphone 29, 30 Storing Caller ID data in Identifying the parts 20 Phone Directory 52... - Page 67 Additional Information Downloaded from: https://www.usersmanualguide.com/...
- Page 68 Additional Information Downloaded from: https://www.usersmanualguide.com/...
- Page 69 Additional Information Downloaded from: https://www.usersmanualguide.com/...
- Page 70 Additional Information Downloaded from: https://www.usersmanualguide.com/...
- Page 71 Additional Information Downloaded from: https://www.usersmanualguide.com/...
- Page 72 For the customers in the USA Be sure to save the receipt and attach it to your WARRANTY card when having your equipment repaired at an authorized Sony service station. Sony Corporation Printed in China Downloaded from: https://www.usersmanualguide.com/...
- Page 73 This file has been downloaded from: www.UsersManualGuide.com User Manual and User Guide for many equipments like mobile phones, photo cameras, monther board, monitors, software, tv, dvd, and othes.. Manual users, user manuals, user guide manual, owners manual, instruction manual, manual owner, manual owner's, manual guide, manual operation, operating manual, user's manual, operating instructions, manual operators, manual operator, manual product, documentation manual, user maintenance, brochure, user reference, pdf manual Downloaded from:...
Need help?
Do you have a question about the SPP-IM 982 and is the answer not in the manual?
Questions and answers