Table of Contents
Advertisement
Quick Links
Advertisement
Table of Contents
Troubleshooting

Related Manuals for Keysight 6610 A Series


Summary of Contents for Keysight 6610 A Series
- Page 1 Keysight 6610xA Power Modules Service Guide...
- Page 3 Export price). If Keysight Technologies is unable, within a reasonable time to repair or replace any product to condition as warranted, the Customer shall be entitled to a refund of the purchase price upon return of the product to Keysight Technologies.
- Page 4 Failure to comply with these precautions or with specific warnings elsewhere in this guide violates safety standards of design, manufacture, and intended use of the power module. Keysight Technologies assumes no liability for the user's failure to comply with these requirements.
- Page 5 This document contains proprietary information protected by copyright. All rights are reserved. No part of this document may be photocopied, reproduced, or translated into another language without prior consent of Keysight Technologies. The information contained in this document is subject to change without notice.
-
Page 6: Table Of Contents
Table of Contents Overview....................................7 About This Manual ................................7 Related Documents ................................8 Revisions and Updates................................8 Manual....................................8 Firmware................................... 8 Safety Considerations ................................9 Electrostatic Discharge ................................. 9 Service Tools and Equipment ............................... 9 Verification and Performance Tests............................ 11 Operation Verification Tests............................... - Page 7 Installing the Power Board ............................. 58 Installing the Bias Board ..............................58 Installing the Front Panel Board and Front Panel Assembly ..................59 Installing the Fan ................................59 Installing the Cover................................. 59 Theory of Operation................................61 AC Input and Bias Supplies..............................61 Microprocessor Circuits..............................
-
Page 8: Overview
Overview About This Manual This manual is a complete guide for servicing the Keysight 6610xA Power Modules. Troubleshooting information for the Keysight 66000A MPS Mainframe is provided in the mainframe service manual (see "Related Documents"), which should be used with this manual. -
Page 9: Related Documents
Manual Keysight Technologies instruments are identified by a 10-digit serial number. The format is described as follows: first two letters indicate the country of manufacture. The next four digits are a code that identify either the date of manufacture or of a significant design change. -
Page 10: Safety Considerations
The Keysight 6610xA Power Modules are Safety Class 1 instruments that connect to a protective earth terminal when properly installed in a Keysight 66000A MPS Mainframe. Refer to the Safety Summary page at the beginning of this manual for general safety procedures and the meaning of safety symbols appearing in the manual and on the module. - Page 11 The following equipment is required to verify and troubleshoot the Keysight 6610xA Power Modules: Table 1-1. Service Test Equipment Equipment Required Critical Specifications Recommended Model GPIB Controller Full GPIB capabilities HP Series 200/300 computer Oscilloscope Sensitivity: 1mV Keysight 54504A Bandwidth Limit: 20MHz...
-
Page 12: Verification And Performance Tests
Verification and Performance Tests This chapter contains test procedures to check the operation of the Keysight 6610xA Power Modules. The required test equipment is specified in Chapter 1. Sample performance test record sheets are included at the end of the chapter. -
Page 13: Measurement Techniques
Measurement Techniques Setup for Most Tests Most tests are performed at the rear terminals as shown in the following figure. Measure the dc voltage directly at the + S and - S terminals. Set the connector sense switch for local sensing and use adequate wire gauge for load leads as described in Chapter 2 of the Power Module User's Guide. -
Page 14: Constant Voltage (Cv) Tests
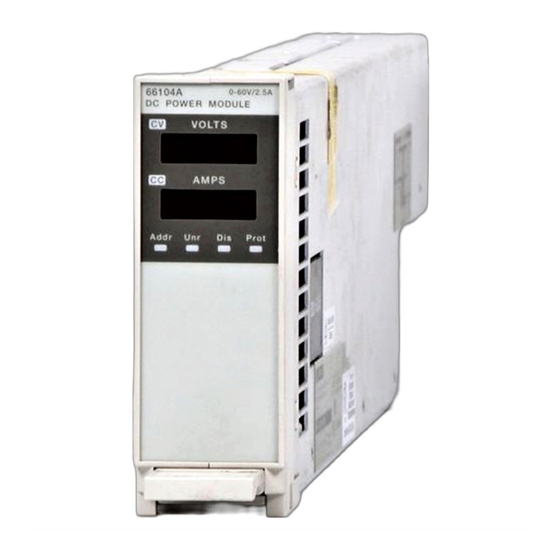
Table 2-1. Power Module Voltage and Current Values Keysight Full-Scale Max. Prog. Full-Scale Max. Prog. Max. Prog. Model Voltage Voltage Current Current Overvoltage 66101A 8.190V 16.380A 66102A 20.475V 7.5A 7.678A 66103A 35.831V 4.5A 4.607A 66104A 61.425V 2.5A 2.559A 66105A 120V 122.85V... -
Page 15: Cv Source Effect
Turn off the module and connect the output as shown in Figure 2-1 to an oscilloscope (ac coupled) between the + and-- terminals. Set the oscilloscope's bandwidth limit to 20MHz (30MHz on the Keysight 54504A) and use an RF tip on the oscilloscope probe. -
Page 16: Constant Current (Cc) Tests
unloading transients by triggering on the positive and negative slope. Figure 2-2. Transient Response Waveform Constant Current (CC) Tests CC Setup Follow the general setup instructions in the Measurement Techniques paragraph and the specific instructions given in the following paragraphs. Current Programming/Readback Accuracy This test verifies that the current programming and readback are within specification. -
Page 17: Cc Load Effect
The following steps show how to set up a Keysight 3458A System Voltmeter from its front panel to take a statistical average of 100 readings. represents the unlabeled shift key in the FUNCTION/RANGE group. Program 10 power line cycles per sample by pressing... -
Page 18: Cc Noise (Pard)
Note You may want to use the average reading program described previously. Adjust the transformer to the HIGH line voltage (e.g., 132Vac for a 115Vac nominal input, or 250Vac for a 230Vac nominal input), and record the output current reading. The difference in the current readings in steps (6) and (7) is the CC source effect and should not exceed the values listed in the Performance Test Record Tables under CC SOURCE EFFECT, for the particular model being tested. - Page 19 Table 2-2. Performance Test Record for Model Keysight 66101A (8V, 16A) Pre Cal_____________Post Cal______________ Model Keysight 66101A Temperature___________________________Test Performed By_______________________ Serial Number_______________________Humidity________________________Date__________________________ Test Description Specification Actual CV PROGRAMMING @ 0 volts 0 3mV Output Accuracy (DVM Reading) ________ DVM 2mV...
- Page 20 Table 2-3. Performance Test Record for Model Keysight 66102A (20V, 7.5A) Pre Cal_____________Post Cal______________ Model Keysight 66102A Temperature___________________________Test Performed By______________________ Serial Number_______________________Humidity________________________Date__________________________ Test Description Specification Actual CV PROGRAMMING @ 0 volts 0 8mV Output Accuracy (DVM Reading) ________ DVM 5mV...
- Page 21 Table 2-4. Performance Test Record for Model Keysight 66103A (35V, 4.5A) Pre Cal_____________Post Cal______________ Model Keysight 66103A Temperature___________________________Test Performed By______________________ Serial Number_______________________Humidity________________________Date__________________________ Test Description Specification Actual CV PROGRAMMING @ 0 volts 0 13mV Output Accuracy (DVM Reading) ________ DVM 8mV...
- Page 22 Table 2-5. Performance Test Record for Model Keysight 66104A (60V, 2.5A) Pre Cal_____________Post Cal______________ Model Keysight 66104A Temperature___________________________Test Performed By______________________ Serial Number_______________________Humidity________________________Date__________________________ Test Description Specification Actual CV PROGRAMMING @ 0 volts 0 27mV Output Accuracy (DVM Reading) ________ DVM 16mV...
- Page 23 Table 2-6. Performance Test Record for Model Keysight 66105A (120V, 1.25 A) Pre Cal_____________Post Cal______________ Model Keysight 66105A Temperature___________________________Test Performed By______________________ Serial Number_______________________Humidity________________________Date__________________________ Test Description Specification Actual CV PROGRAMMING @ 0 volts 0 54mV Output Accuracy (DVM Reading) ________ DVM ...
- Page 24 Table 2-7. Performance Test Record for Model Keysight 66106A (200V, 0.75A) Pre Cal_____________Post Cal______________ Model Keysight 66106A Temperature___________________________Test Performed By______________________ Serial Number_______________________Humidity________________________Date__________________________ Test Description Specification Actual CV PROGRAMMING @ 0 volts 0 90mV Output Accuracy (DVM Reading) ________ DVM 54mV...
-
Page 26: Troubleshooting
Troubleshooting This chapter provides troubleshooting and repair information for the Keysight 6610xA Power Modules. Before attempting to troubleshoot the modules, ensure that the problem is not with an external circuit or application, the mainframe, the GPIB controller, the application program, or the input power line. -
Page 27: If You Experienced A Selftest Failure Or Runtime Error Message
Figure 3-5 - Troubleshooting No Output Figure 3-6 - Troubleshooting High Output Figure 3-7 - Troubleshooting Will Not Overvoltage Figure 3-8 - Troubleshooting CV Accuracy Figure 3-9 - Troubleshooting CC Accuracy Figure 3-10 - Troubleshooting Downprogrammer ... - Page 28 Figure 3-1. Overall Troubleshooting (Sheet 1 of 3) Troubleshooting 27...
- Page 29 Figure 3-1. Overall Troubleshooting (Sheet 2 of 3) 28 Troubleshooting...
- Page 30 Figure 3-1. Overall Troubleshooting (Sheet 3 of 3) Troubleshooting 29...
- Page 31 Figure 3-2. Troubleshooting Microprocessor Circuits (Sheet 1 of 2) 30 Troubleshooting...
- Page 32 Figure 3-2. Troubleshooting Microprocessor Circuits (Sheet 2 of 2) Troubleshooting 31...
- Page 33 Figure 3-3. Troubleshooting Error Messages 32 Troubleshooting...
- Page 34 Figure 3-4. Troubleshooting Overvoltage at Turn-On (Sheet 1 of 2) Troubleshooting 33...
- Page 35 Figure 3-4. Troubleshooting Overvoltage at Turn-On (Sheet 2 of 2) 34 Troubleshooting...
- Page 36 Figure 3-5. Troubleshooting No Output (Sheet 1 of 5) Troubleshooting 35...
- Page 37 Figure 3-5. Troubleshooting No Output (Sheet 2 of 5) 36 Troubleshooting...
- Page 38 Figure 3-5. Troubleshooting No Output (Sheet 3 of 5) Troubleshooting 37...
- Page 39 Figure 3-5. Troubleshooting No Output (Sheet 4 of 5) 38 Troubleshooting...
- Page 40 Figure 3-5. Troubleshooting No Output (Sheet 5 of 5) Troubleshooting 39...
- Page 41 Figure 3-6. Troubleshooting High Output 40 Troubleshooting...
- Page 42 Figure 3-7. Troubleshooting Will Not Overvoltage Troubleshooting 41...
- Page 43 Figure 3-8. Troubleshooting CV Accuracy 42 Troubleshooting...
- Page 44 Figure 3-9. Troubleshooting CC Accuracy Troubleshooting 43...
- Page 45 Figure 3-10. Troubleshooting Downprogrammer 44 Troubleshooting...
- Page 46 Figure 3-11. Troubleshooting DAC Circuit Troubleshooting 45...
- Page 47 Figure 3-12. Troubleshooting Readback Circuits (Sheet 1 of 2) 46 Troubleshooting...
- Page 48 Figure 3-12. Troubleshooting Readback Circuits (Sheet 2 of 2) Troubleshooting 47...
-
Page 49: Test Points
Test Points The following test points are referenced in the troubleshooting flowcharts. Refer to the component locations diagram in Chapter 6 for the actual location of the test points on the pc board. Table 3-1. Test Points Test Point Description Output circuit common (located on inboard side of R303) TP 0 TP 1... - Page 50 Table 3-2. S3 Test Settings S3 Setting Test Description 8 7 6 5 4 3 2 1 0 0 0 0 0 0 0 0 Start with blank front panel 0 0 0 1 0 0 0 0 Front panel with all segments on 0 0 0 0 0 0 0 1 VDAC minimum (TP16 = 0V) 0 0 0 1 0 0 0 1...
- Page 51 Figure 3-13. S3 Switch Setting Waveforms 50 Troubleshooting...
-
Page 52: Eeprom Troubleshooting And Initialization
EEPROM Troubleshooting and Initialization Troubleshooting The power module can detect an EEPROM checksum error. This error is not identified by number, but causes the following symptoms: The power module starts up with both the VOLTS and AMPS full-scale programming and metering ranges accepting values up to 1000. - Page 53 ! Program to initialize EEPROM or move factory preset data in 66101A, 66102A, 66103A, 66104A, 66105A and 66106A power supply modules. Rev A.00.00 dated May 27, 1993 DIM Init_data(1:39),Model$[6],Idn$[21],Cal_data$[40] INTEGER Addr(1:39),Length(1:39) ASSIGN @Ps TO 70500 ! Supply must be at address 70500 CLEAR SCREEN 100 Eprom_data_addr: ! Data address...
- Page 54 RESTORE Eprom_data_104a CASE "66105A" RESTORE Eprom_data_105a CASE "66106A" RESTORE Eprom_data_106a CASE ELSE PRINT "Model number not found. Program is for Keysight models" PRINT "66101A through 66106A ONLY" STOP END SELECT FOR I=l T0 39 ! Read model dependent data 1000 READ Init_data(I) Figure 3-14.
- Page 55 1010 NEXT I 1020 1030 OUTPUT @Ps;"*CLS" ! Clears power supply registers 1040 1050 OUTPUT @Ps;"CAL;STATE ON," ! Turn on cal mode, "0" passcode 1060 1070 GOSUB Ps_error ! Error if passcode is not "0"! 1080 IF Err THEN 1090 OUTPUT @Ps;"*IDN?"...
- Page 56 1510 OUTPUT @Ps;"DIAG:EEPR '';Addr(I);'','';Length(I);'','';Init_data(I) 1520 NEXT I 1530 GOTO Cal_off 1540 1550 Fact_preset: 1560 CLEAR SCREEN PRINT "This program should ONLY be completed if your power supply” 1570 1580 PRINT "EEPROM has been replaced or a component that will effect" 1590 PRINT "the calibration AND the alignment of voltage, overvoltage"...
-
Page 57: Disassembly Procedures
Figure 3-14. EEPROM Initialization Program (Sheet 5 of 5) Disassembly Procedures This section describes how to disassemble and reassemble the Keysight 6610xA Power Modules. Refer to Chapter 5 for the component descriptions. Refer to Chapter 1 for the tools required to disassemble and reassemble the unit. -
Page 58: Removing The Front Panel Assembly
Removing the Front Panel Assembly Carefully unplug the front panel cable from the J3 connector on the Power board. Spread the bottom of the chassis away from the front panel assembly and lift the assembly out of the chassis. Removing the Power Board Carefully unplug the front panel cable from the J3 connector, the bias board cables from the J301 and J302 connectors, and the fan cable from the J102 connector on the Power board. -
Page 59: Installing The Power Board
Figure 3-15. Front Panel Assembly Locking Tabs Installing the Power Board Insert the tabs along the bottom edge of the board in the corresponding slots on the bottom of the chassis and carefully install the board in the chassis. Use the T10 driver and insert the four screws (two toward the back and two near the center) that attach the Power board to the chassis. -
Page 60: Installing The Front Panel Board And Front Panel Assembly
Installing the Front Panel Board and Front Panel Assembly Install the front panel, the front panel board, and the latch assembly in one of the front assembly halves. Make sure that the front panel board is positioned in the slot closest to the front panel. Carefully snap the other half of the front panel assembly together. -
Page 62: Theory Of Operation
Theory of Operation This chapter provides a brief theory of operation for the Keysight 6610xA Power Modules. Figure 4-1 is a block diagram of the primary circuit functions of the power modules. The diagram references the schematic sheets where the circuits are located. - Page 63 Figure 4-1. Block Diagram 62 Thoery Of Operation...
-
Page 64: Cv Amplifier
CV Amplifier The CV amplifier controls the output of the power module when the module is operating in constant voltage mode. The CV amplifier consists of two stages: an error amplifier stage and a voltage monitor stage. The calibrated CVPROG* signal from the CV DAC pulls current out of the negative input of the error amplifier at a rate determined by the DAC's programmed value. -
Page 65: Pulse-Width Modulator, Fets, And Isolation Transformer
Pulse-Width Modulator, FETS, and Isolation Transformer The pulse-width modulator controls the FETS. The FETS are arranged in an "H" bridge configuration with the + and - dc rail at the top and bottom of the H. The 4 FETS are located on each leg of the "H", and the isolation transformer is located on the horizontal bar of the H. -
Page 66: Ov Circuit
OV Circuit The OV circuit consists of a comparator that compares the output voltage of the module with an overvoltage reference signal and shuts down the output when the output of the supply exceeds the overvoltage reference level. The microprocessor generates the overvoltage reference by putting out a pulse-width modulated signal that is filtered to produce a 0 to 4 volts reference (OVREF). -
Page 68: Replacement Parts
Keysight Technologies part number Description of part You can order parts from your local Keysight Technologies sales office. A list of the regional sales offices is given at the back of this manual. When ordering parts, include the following information: ... - Page 69 Table 5-1. Keysight 6610xA Power Modules Parts List - Electrical Reference Model Part Number Description Designators 66101A 66101-61022 ASSEMBLY-POWER BOARD 66102A 66102-61022 ASSEMBLY-POWER BOARD 66103A 66103-61022 ASSEMBLY-POWER BOARD 66104A 66104-61022 ASSEMBLY-POWER BOARD 66105A 66105-61022 ASSEMBLY-POWER BOARD 66106A 66106-61022 ASSEMBLY-POWER BOARD...
- Page 70 Table 5-1. Keysight 6610xA Power Modules Parts List - Electrical (continued) Reference Model Part Number Description Designators C303 66101A 0180-4398 CAP 470uF 63V 66102A 0180-4400 CAP 220uF 63V 66103A 0180-4397 CAP l00uF 63V 66104A 0180-3649 CAP 47uF l00VDC 66105A 0180-3648...
- Page 71 Table 5-1. Keysight 6610xA Power Modules Parts List - Electrical (continued) Reference Model Part Number Description Designators C332, C333 All Models 0160-5422 CAP .047uF 20% C334 All Models 0160-4807 CAP 33pF 5% 100V C335 66101A 0160-4831 CAP 4700pF 10% 66102A-66106A...
- Page 72 Table 5-1. Keysight 6610xA Power Modules Parts List - Electrical (continued) Reference Model Part Number Description Designators C433 All Models 0160-4791 CAP l0pF 5% 100V C434, C435 All Models 0160-5422 CAP .047uF 20% D201-D204 All Models 1901-1087 DIODE-PWR RECT D205, D206...
- Page 73 Table 5-1. Keysight 6610xA Power Modules Parts List - Electrical (continued) Reference Model Part Number Description Designators L302, L303 All Models 5080-2219 CHOKE-OUTPUT L304 66101A-66103A 9140-1064 CHOKE-OUTPUT 66104A-66106A 5080-2252 CHOKE-OUTPUT L305, L306 66101A 5080-2251 BEAD-FERRITE 66102A-66106A Not Used L307 66101A...
- Page 74 Table 5-1. Keysight 6610xA Power Modules Parts List - Electrical (continued) Reference Model Part Number Description Designators All Models 0698-0082 RES 464 1% .125W R201, R202 All Models 0764-0045 RES 22K 5% 2W Mo R203 All Models 0698-3430 RES 21.5 1% .125W...
- Page 75 Table 5-1. Keysight 6610xA Power Modules Parts List - Electrical (continued) Reference Model Part Number Description Designators R305 66101A 0757-0441 RES 8.25K 1% 66102A 0757-0449 RES 20K 1% .125W 66103A 0757-0123 RES 34.8K 1% 66104A 0698-3572 RES 60.4K 1% 66105A...
- Page 76 Table 5-1. Keysight 6610xA Power Modules Parts List - Electrical (continued) Reference Model Part Number Description Designators R316 All Models 0698-8827 RES lM 1% .125W R317 All Models 0757-0472 RES 200K 1% R318 All Models 0757-0349 RES 22.6K 1% R319, R320...
- Page 77 Table 5-1. Keysight 6610xA Power Modules Parts List - Electrical (continued) Reference Model Part Number Description Designators R334 66101A-66103A 0698-7933 RES 3.83K .1% 66104A 0698-8607 RES 4.5K .1% 66105A 0698-7933 RES 3.83K .1% 66106A 0698-8607 RES 4.5K .1% R336 66101A-66103A 0699-3417 RES 3.85K .lW...
- Page 78 Table 5-1. Keysight 6610xA Power Modules Parts List - Electrical (continued) Reference Model Part Number Description Designators R348 66101A, 66102A 0757-0441 RES 8.25K 1% 66103A, 66104A 0757-0444 RES 12.1K 1% 66105A 0698-3136 RES 17.8K 1% 66106A 0698-3159 RES 26.1K 1%...
- Page 79 Table 5-1. Keysight 6610xA Power Modules Parts List - Electrical (continued) Reference Model Part Number Description Designators R420 66101A, 66102A 0698-6358 RES 100K .1% 66103A 0699-2248 RES 47.5K .05% 66104A 0698-6358 RES 100K .1% 66105A, 66106A 0699-2246 RES 25K .05%...
- Page 80 Table 5-1. Keysight 6610xA Power Modules Parts List - Electrical (continued) Reference Model Part Number Description Designators U203 All Models 1826-2075 IC UC3825N U204 All Models 1990-1502 OPTO ISOLATOR U205 All Models 1858-0069 TRANSISTOR ARRAY 18P-DIP U206 All Models 1826-0175...
- Page 81 Table 5-1. Keysight 6610xA Power Modules Parts List - Electrical (continued) Reference Model Part Number Description Designators R501 All Models 1810-0405 NETWORK RES SIP R502 All Models 1810-0405 NETWORK RES SIP R503 All Models 1810-0405 NETWORK RES SIP R504 All Models...
- Page 82 Table 5-3. Output Connector Assembly Parts List Reference Part Number Description Designators 5060-3470 ASSEMBLY-OUTPUT CONNECTOR BOARD C602, C603 0160-5422 CAP .047uF 20% C604 0160-4281 CAP 2200pF 20% C605 1810-1379 NETWORK-CAP SIP J601 1251-8410 CONNECTOR, TO POWER BOARD J602, J603 1252-4311 CONNECTOR, TO CONNECTOR BOARD R601 0757-0442...
-
Page 84: Diagrams
Diagrams This chapter contains test point and component location diagrams and schematics for troubleshooting the Keysight 6610xA Power Modules. SHOCK HAZARD Hazardous voltages are present throughout the Power and Bias board assemblies. Ac line voltage is present on some connectors even when the module is not turned on. The dc rail voltage to the module is 310 volts when the unit is turned on. -
Page 85: Schematic Notes
Schematic Notes Notes that apply to all schematic sheets are as follows: All resistors are in ohms +/-1%, 1/8 W, unless otherwise specified. All capacitors are in microfarads unless otherwise specified. Refer to the parts list (Table 5-1) for the values of the resistors and capacitors that are enclosed by a heavy rectangle on the schematic. - Page 88 L305 L306 R309 L308 L307...
- Page 91 53 74 R501 I/O79 I/O78 D505 D506 D507 D508 R501 470.0 5% I/O77 HDSP-A103 HDSP-A103 HDSP-A103 HDSP-A103 1810-1979 I/O76 R501 470.0 5% I/O75 1810-1979 I/O73 R507 R507 470.0 5% R501 I/O72 1810-1979 MODE I/O71 4.7K 470.0 5% 4.7K 1810-1670 1810-1979 R507 1810-1670 R502...
- Page 96 Main Board Component Coordinates C220 C331 12.7 C435 L301 R201 R303 10.6 R348 11.5 C221 C332 13.7 C436 15.5 L302 R202 R304 R349 11.5 C222 C333 13.4 C437 15.7 L303 13.4 R203 R305 R350 C223 C334 13.2 D201 L304 R204 R306 R351 12.7...
-
Page 98: Manual Backdating
This section describes changes that must be made to the manual so that it applies to power modules with older serial number formats. Look for the serial number of your module on the table and make only those changes listed for that serial number. Keysight Prefix... - Page 99 On page 67, change R204, R214 to 61.8 ohms, part number 0757-0397. On page 65, delete D216, CHANGE 9: D217, part number 1901-1214. CHANGE 10: Indicate that software revision A.00.01 applies to these and earlier models. CHANGE 11: In the parts list on page 63, change C311 from 0160-4831 to 2200pF, part number 0160-4830. On page 68, change R311 from 0757-0349 to 51.1K part number 0757-0458.
-
Page 100: Index
Index backdating ................................... 89 component locator ............................... 83 constant current (cc) tests ............................15 constant voltage tests ..............................13 current monitoring ............................... 12 disassembly bias board ................................57 cover ..................................56 fan..................................56 front panel ................................57 front panel board ..............................57 modules ................................ - Page 101 performance tests ................................. 11 programming values - modules ............................ 12 revision number ................................8 run-time error message ..............................26 S3 switch settings ................................ 49 schematic notes ..................................84 schematics ................................... 83 bias board ................................83 connector board ..............................83 front panel board ..............................83 power board ................................
- Page 102 cv accuracy ................................42 DAC ..................................45 downprogrammer ..............................44 error messages ..............................32 flowcharts ................................25 high output ................................40 microprocessor ..............................30 no output ................................35 no overvoltage ..............................27 overall................................... 27 overvoltage ................................33 readback ................................46 Troubleshooting EEPROM ................................
- Page 103 This information is subject to change without notice. © Keysight Technologies 1993, 2000, 2014 Edition 2, December 2014 5959-3364 www.keysight.com 102 Index...
Need help?
Do you have a question about the 6610 A Series and is the answer not in the manual?
Questions and answers