Table of Contents
Advertisement
Quick Links
Advertisement
Table of Contents

Related Manuals for Diamond DFV-511/TS


Summary of Contents for Diamond DFV-511/TS
- Page 1 03/2017 Mod: DFV-511/TS Production code: P8 RDT-105E DR 10DI 51...
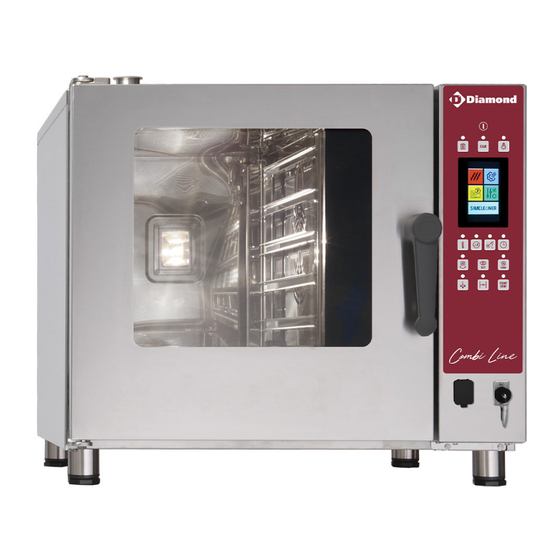
- Page 2 CONVECTION - STEAM OVEN INSTRUCTIONS FOR THE INSTALLATION, USE AND MAINTENANCE READ CAREFULLY THE INSTRUCTIONS BEFORE USING THE APPLIANCE C OMBI DIRECT 1 05/110 /11 5 60 5 /6 10 PROGR AMM ABLE TO UCH SCREEN...
- Page 3 5 - 10 - 15 x 1/1 GN - 5 - 10 x 60x40 PROGRAMMABLE WARNING ! Before making any type of connection of this equipment (electrical or hydraulic), carefully read the instructions in this manual. The installation must be carried out only by qualified technical personnel.
- Page 4 5 - 10 - 15 x 1/1 GN - 5 - 10 x 60x40 PROGRAMMABLE INDEX 0.0A Dimensions 5 x 1/1 GN 0.0B Dimensions 10 x 1/1 GN 0.0C Dimensions 15 x 1/1 GN 0.0D Dimensions 5 x 60x40 0.0E Dimensions 10 x 60x40 INSTALLATION Declaration of Conformity...
- Page 5 5 - 10 - 15 x 1/1 GN - 5 - 10 x 60x40 PROGRAMMABLE 59,5 70,8 161,9 563,2 101,9 31,9 646,2 31,1 709,2 A- Electrical connection B- Water inlet Ø 3/4” C- Water drainage Ø 40 mm D- Cooking chamber relief valve Ø 50 mm R- Rinsing tablet container S- Detergent tablet container 5 x 1/1 GN...
- Page 6 5 - 10 - 15 x 1/1 GN - 5 - 10 x 60x40 PROGRAMMABLE A- Electrical connection B- Water inlet Ø 3/4” C- Water drainage Ø 40 mm D- Cooking chamber relief valve Ø 50 mm R- Rinsing tablet container S- Detergent tablet container 10 x 1/1 GN 0.1B Dimensions mod.
- Page 7 5 - 10 - 15 x 1/1 GN - 5 - 10 x 60x40 PROGRAMMABLE 59,5 787,5 161,9 583,2 101,1 31,9 686,2 31,1 846,2 749,2 A- Electrical connection B- Water inlet Ø 3/4” C- Water drainage Ø 40 mm D- Cooking chamber relief valve Ø 50 mm R- Rinsing tablet container S- Detergent tablet container 15 x 1/1 GN...
- Page 8 5 - 10 - 15 x 1/1 GN - 5 - 10 x 60x40 PROGRAMMABLE A- Electrical connection B- Water inlet Ø 3/4” C- Water drainage Ø 40 mm D- Cooking chamber relief valve Ø 50 mm R- Rinsing tablet container S- Detergent tablet container 5 x 60x40 0.1D Dimensions mod.
- Page 9 5 - 10 - 15 x 1/1 GN - 5 - 10 x 60x40 PROGRAMMABLE 59,5 161,9 633,2 101,9 31,9 736,2 31,1 799,2 A- Electrical connection B- Water inlet Ø 3/4” C- Water drainage Ø 40 mm D- Cooking chamber relief valve Ø 50 mm R- Rinsing tablet container S- Detergent tablet container 10 x 60x40...
-
Page 10: Installation
5 - 10 - 15 x 1/1 GN - 5 - 10 x 60x40 PROGRAMMABLE INSTALLATION 1.0 DECLARATION OF CONFORMITY The Manufacturer declares that the appliances conform to the EEC norms. They must be installed in accordance with current standards, especially regarding aeration of the prem- ises and the exhaust gas evacuation system. - Page 11 5 - 10 - 15 x 1/1 GN - 5 - 10 x 60x40 PROGRAMMABLE 1.6 TECHNICAL DATA FOR ELECTRICAL CONNECTION Power loading no. and motor Heating Absorbed Feed cable Model and voltage power power current section 6 kW 5 x 1/1 GN 380 - 415 V 3N~ 1 x 250 W 5.8 kW...
-
Page 12: Installing The Appliance
5 - 10 - 15 x 1/1 GN - 5 - 10 x 60x40 PROGRAMMABLE 2.0 INSTALLING THE APPLIANCE The water, electricity and the premises on which the appliances are installed comply with the relative installation and safety standard. Install the oven on aerated premises and level with the adjustable feet. For table top models keep at least 6 cm between the bottom of the oven and the supporting surface on which the feet stand. -
Page 13: Electrical Connection
5 - 10 - 15 x 1/1 GN - 5 - 10 x 60x40 PROGRAMMABLE 2.2 ELECTRICAL CONNECTION When the appliance is delivered it is set to work at the voltage given on the rating plate affixed on the right side of the appliance. -
Page 14: Hydraulic Connection - Water Inlet
5 - 10 - 15 x 1/1 GN - 5 - 10 x 60x40 PROGRAMMABLE 2.3 HYDRAULIC CONNECTION – WATER INLET The ovens have a water inlet coupling at the back. Always install an on-off valve between the appliance and the water mains, making sure it is easy to operate. We also suggest installing a cartridge filter on the water inlet pipe. - Page 15 5 - 10 - 15 x 1/1 GN - 5 - 10 x 60x40 PROGRAMMABLE The water must be suitable to human use with the following characteristics: Temperature: included between 15 – 20°C Total hardness: included between 4 and 8 °f (French degrees), it is advisable to install a softener up- stream from the appliance that will maintain the hardness level at the mentioned values.
-
Page 16: Plumbing - Water Drainage
5 - 10 - 15 x 1/1 GN - 5 - 10 x 60x40 PROGRAMMABLE 2.4 PLUMBING – WATER DRAINAGE Drainage for the water is at the back of the oven and must be connected directly to the end of the stain- less steel drainpipe (Fig. -
Page 17: Control And Safety Devices
5 - 10 - 15 x 1/1 GN - 5 - 10 x 60x40 PROGRAMMABLE 3.0 CONTROL AND SAFETY DEVICES The ovens are equipped with a set of control and safety devices for the electric and hydraulic circuits. 3.0A 2A fuse: it is in the auxiliary circuit to protect against short circuiting of the electrical system and is inside its own support on the contactor’s fixing bracket. -
Page 18: Replacing Spare Parts
5 - 10 - 15 x 1/1 GN - 5 - 10 x 60x40 PROGRAMMABLE 3.0H Oven relief valve: its job is to adjust humidity inside the cooking chamber (Fig. 3.0H). The valve is manually activated acting on button in the control pannel. - Page 19 5 - 10 - 15 x 1/1 GN - 5 - 10 x 60x40 PROGRAMMABLE IMPORTANT: Before the operator turns the oven on and uses it for any cooking or washing cycle, it is necessary that the installer or a qualified technician checks all the connections have been done up to the instructions stated in our manual.
-
Page 20: Use And Maintenance
5 - 10 - 15 x 1/1 GN - 5 - 10 x 60x40 PROGRAMMABLE USE AND MAINTENANCE INSTRUCTIONS FOR A SAFE USE OF THE OVEN • Ensure the oven is on a stable position and safety devices installed upstream are efficient. •... - Page 21 5 - 10 - 15 x 1/1 GN - 5 - 10 x 60x40 PROGRAMMABLE For a correct comprehension of the terminology used in the following paragraphs, we underline that cooking phase is the period of time in which the oven carries out one of the following cooking modes: Convection hot forced air (temperature range between 20 - 270°C)
- Page 22 5 - 10 - 15 x 1/1 GN - 5 - 10 x 60x40 PROGRAMMABLE 4.1 STARTING OF THE OVEN Switch on the water interception valves and the protection electric switch, installed upstream. Press the ON/OFF key and wait few seconds for the lighting of the display. ATTENTION! Turning the oven off through the button ON/OFF does not interrupt the power supply to the electronic boards.
- Page 23 5 - 10 - 15 x 1/1 GN - 5 - 10 x 60x40 PROGRAMMABLE 4.3 SELECTION OF A MANUAL COOKING IN CONVECTION MODE To configure a manual cooking in convection mode, in the home page press the icon with the symbol on the side. The display and the buttons on the control panel visualize the following info: 3 rectangular icons indicate the parameters used to control cooking pro-...
- Page 24 5 - 10 - 15 x 1/1 GN - 5 - 10 x 60x40 PROGRAMMABLE To modify the cooking chamber temperature set, press the rectangular icon with the symbol shown on the side. The display shows the numeric keyboard to select the new temperature value (Fig.4.3C).
- Page 25 5 - 10 - 15 x 1/1 GN - 5 - 10 x 60x40 PROGRAMMABLE To modify the cooking time, press the rectangular icon with the symbol shown on the side. The display shows the numeric keyboard to select the new cooking time (Fig.
- Page 26 5 - 10 - 15 x 1/1 GN - 5 - 10 x 60x40 PROGRAMMABLE To effect a cooking process with core probe, press the but- ton shown on the side, under the display. The lighted led next to the cooking time button switches off and the one of the core probe switches on.
- Page 27 5 - 10 - 15 x 1/1 GN - 5 - 10 x 60x40 PROGRAMMABLE To effect a cooking process with Delta T device, press the button shown on the side under the display. This control can be activated only if previously cooking mode with core probe has been selected.
-
Page 28: Very Important
5 - 10 - 15 x 1/1 GN - 5 - 10 x 60x40 PROGRAMMABLE Setting a temperature value for Delta T, the cooking chamber temperature is directly related to the one detected by the probe. For example, if you choose for Delta T a value of 100 °C, cooking chamber temperature will always re- main 100 °C higher than the temperature detected by the probe. - Page 29 5 - 10 - 15 x 1/1 GN - 5 - 10 x 60x40 PROGRAMMABLE 4.4 SELECTION OF A MANUAL COOKING IN STEAM MODE To configure a manual cooking in steam mode, in the home page press the icon with the symbol shown on the side.
-
Page 30: Additional Functions
5 - 10 - 15 x 1/1 GN - 5 - 10 x 60x40 PROGRAMMABLE 4.5 ADDITIONAL FUNCTIONS In both cooking modes (convection with humidification adjustment and steam) it’s possible to activate one or more additional functions, in order to improve cooking quality. The activation of these functions is effected by pressing some buttons above and under the display. - Page 31 5 - 10 - 15 x 1/1 GN - 5 - 10 x 60x40 PROGRAMMABLE 4.6 STARTING A MANUAL COOKING After you have selected cooking parameters, it is nec- essary to effect pre-heating of the cooking chamber, to achieve good cooking results. Pressing Start button, the oven begins the pre-heating phase (Fig.
- Page 32 5 - 10 - 15 x 1/1 GN - 5 - 10 x 60x40 PROGRAMMABLE After 10 seconds from starting of any cooking cycle, the display will modify the way to visualize cooking parameters. The oven switches from operative screen to a simplified view. (Fig.4.6C). The purpose of the simplified view is to make visible and instantly interpret- able the working parameters of the oven, also at a bigger distance than the one used for operative phases.
-
Page 33: End Of Cooking
5 - 10 - 15 x 1/1 GN - 5 - 10 x 60x40 PROGRAMMABLE Also in this case, after 10 seconds, the display switches to simplified view (Fig. 4.6E). (Fig. 4.6E) At the end of cooking cycle you will hear an acoustic sig- nal. -
Page 34: Fast Cooling
5 - 10 - 15 x 1/1 GN - 5 - 10 x 60x40 PROGRAMMABLE 4.7 FAST COOLING Pressing the button shown on the side, you start the fast cooling of the cooking chamber (Fig. 4.7A). The starting of cooling cycle is confirmed by the led of the corresponding button. - Page 35 5 - 10 - 15 x 1/1 GN - 5 - 10 x 60x40 PROGRAMMABLE 5.0 AUTOMATIC COOKING PROGRAM From the home page, by pressing the icon shown on the side, you can access the groups of automatic cooking programs. The corresponding screen is the one shown on the side (Fig.5.0A).
- Page 36 5 - 10 - 15 x 1/1 GN - 5 - 10 x 60x40 PROGRAMMABLE Select a program from the list, the screen will visualize the info shown on the side (Fig.5.0C). The info visualized in this screen are the following: 1.5 KG ROAST CHICKEN •...
- Page 37 5 - 10 - 15 x 1/1 GN - 5 - 10 x 60x40 PROGRAMMABLE When you press one among the phases of the program and then the button “see set” the control panel shows the info on the side. (Fig.5.0E). •...
- Page 38 5 - 10 - 15 x 1/1 GN - 5 - 10 x 60x40 PROGRAMMABLE 5.1 STARTING OF AN AUTOMATIC COOKING PROGRAM To start an automatic cooking program, you just need to select it from the list and press the start/stop button to start pre-heating of the cooking chamber (Fig.5.1A).
- Page 39 5 - 10 - 15 x 1/1 GN - 5 - 10 x 60x40 PROGRAMMABLE At the end of pre-heating phase, you will hear the buzzer. Pressing the icon here on the side, you can interrupt the buzzer. At the same time, the display shows a message that warns you to intro- ATTENTION! duce the cooking products to start cooking phase.
- Page 40 5 - 10 - 15 x 1/1 GN - 5 - 10 x 60x40 PROGRAMMABLE At the end of cooking cycle, you will hear the buzzer. Pressing the icon on the side, the buzzer will be inter- rupted. At the same time, the display shows a message indicating the end of ATTENTION! cooking process (Fig.5.1E).
- Page 41 5 - 10 - 15 x 1/1 GN - 5 - 10 x 60x40 PROGRAMMABLE 5.2 MODIFICATION OF AN AUTOMATIC COOKING PROGRAM It’s possible to modify temporarily or permanently both factory programs and also the ones created by the user. 1.5 KG ROAST CHICKEN After you have selected an automatic program (Fig.5.2A), the possible modifications are the following:...
- Page 42 5 - 10 - 15 x 1/1 GN - 5 - 10 x 60x40 PROGRAMMABLE After you have selected a program, if you press the number correspond- ing to a phase of the program, you will visualize the set parameters for the selected phase (Fig.
- Page 43 5 - 10 - 15 x 1/1 GN - 5 - 10 x 60x40 PROGRAMMABLE Besides the cooking parameters, it’s possible to activate or deactivate one or more additional functions. The eventual additional functions activated in the selected phase are indicated by the lighted leds next to the buttons: 1.5 KG ROAST CHICKEN •...
- Page 44 5 - 10 - 15 x 1/1 GN - 5 - 10 x 60x40 PROGRAMMABLE The button “+” shows the first free phase after the config- ured ones for the selected programs (Fig.5.2C). Pressing this button, you will visualize the message shown on the side (Fig 5.2G) where the user is asked if he wants to add a new phase to the program.
- Page 45 5 - 10 - 15 x 1/1 GN - 5 - 10 x 60x40 PROGRAMMABLE Selecting for example convection mode, the oven proposes the default parameters of this mode (Fig.5.2I). It’s possible to modify these parameters as previously described. 1.5 KG ROAST CHICKEN In the example shown on the side you can see the default parameters of convection mode: •...
-
Page 46: New Program
5 - 10 - 15 x 1/1 GN - 5 - 10 x 60x40 PROGRAMMABLE 5.3 STORAGE OF A NEW AUTOMATIC COOKING PROGRAM To store a new automatic cooking program, select among the 6 available groups of programs the one where you want to add a new program. Press the icon NEW here below on the left side. - Page 47 5 - 10 - 15 x 1/1 GN - 5 - 10 x 60x40 PROGRAMMABLE The display now visualizes the name of the new program and the 6 phases it’s possible to configure. Phase 1 has a green background to indicate that the user is configuring NEW PROGRAM The other phases are at the moment on a grey background (unused).
- Page 48 5 - 10 - 15 x 1/1 GN - 5 - 10 x 60x40 PROGRAMMABLE 5.4 CANCELLATION OF AN AUTOMATIC COOKING PROGRAM To definitively cancel an automatic cooking program (both a factory one or the one created by the user), scroll the list of the programs using the icon “more”...
- Page 49 5 - 10 - 15 x 1/1 GN - 5 - 10 x 60x40 PROGRAMMABLE 5.5 CANCELLATION OF A PHASE OF AN AUTOMATIC PROGRAM It’s possible to cancel one or more phases of an automatic cooking pro- gram. This operation can be useful for example for a program where the first phase is used to seal the product but the chef prefers to effect this opera- tion on the fire.
- Page 50 5 - 10 - 15 x 1/1 GN - 5 - 10 x 60x40 PROGRAMMABLE 6.0 AUTOMATIC WASHING SYSTEM SIMCLEANER To access automatic washing programs, from the home page, press the icon shown on the side. The display shows the available programs (Fig.
- Page 51 5 - 10 - 15 x 1/1 GN - 5 - 10 x 60x40 PROGRAMMABLE In all ovens of this series, the containers for the detergent and sparkling aid are located above the oven. After a cooking process, the oven front panel and the top panel could be very hot. It’s necessary to be very careful to avoid any contact with very hot surfaces and we suggest you to use protection gloves.
- Page 52 5 - 10 - 15 x 1/1 GN - 5 - 10 x 60x40 PROGRAMMABLE After you have introduced in the suitable receptacle detergent and spar- kling aid tabs, according to the measuring shown by the oven, press the pop –up message (Fig.6.0C) to know the duration of the selected cycle. SHORT WASHING In the example shown on the side, the selected program has a duration of 1 hour and 31 minutes.
- Page 53 5 - 10 - 15 x 1/1 GN - 5 - 10 x 60x40 PROGRAMMABLE If the chamber is too hot to start a washing cycle, the oven will show a message like the one shown on the side (Fig 6.0E). The cooling cycle before the washing cycle can be effected both with open (in a shorter time) and with closed door (in a longer time).
- Page 54 5 - 10 - 15 x 1/1 GN - 5 - 10 x 60x40 PROGRAMMABLE 7.0 ALARMS The alarms are the oven protection system, they are activated automatically and are visualized as a white color pop-up with white-red frame. Very important: in case of an alarm intervention, take note of the code here below on the right side, be- fore closing the message and communicate it to the technical service.
- Page 55 5 - 10 - 15 x 1/1 GN - 5 - 10 x 60x40 PROGRAMMABLE Description Code A010 There is a communication problem between the display and the mother- board that controls the different components. ATTENTION! Oven functioning NO CONNECTION BETWEEN KEYBOARD AND BASE The oven is locked.
- Page 56 5 - 10 - 15 x 1/1 GN - 5 - 10 x 60x40 PROGRAMMABLE Description Code A030 Intervention of motor thermal protection probe. Oven functioning If the oven is cooking, it stops. ATTENTION! It’s possible to move from one screen to the other one, but the rotation of MOTOR FAN the fan (and consequently the cooking chamber heating) is off.
- Page 57 5 - 10 - 15 x 1/1 GN - 5 - 10 x 60x40 PROGRAMMABLE Description Code A090 The temperature inside electronic components compartment (on the right hand side of the oven) is too high and can damage the integrity of the com- ponents.
- Page 58 5 - 10 - 15 x 1/1 GN - 5 - 10 x 60x40 PROGRAMMABLE 8.0 ADJUSTMENTS From the home page, pressing the icon shown on the side, you access the area dedicated to adjustments and con- figuration of the oven. On the screen visualized by the oven, you have 3 accesses: Area for manufacturer adjustments This area, protected by password, is reserved to the...
- Page 59 5 - 10 - 15 x 1/1 GN - 5 - 10 x 60x40 PROGRAMMABLE The list here on the side shows different types of adjustments: • Oven model. The user can only visualize some data concerning the typology of the oven (direct steam or with boiler..) Oven model •...
- Page 60 5 - 10 - 15 x 1/1 GN - 5 - 10 x 60x40 PROGRAMMABLE Accessing HACCP area you can download the data stored by the oven. 2 available options are the following: HACCP Download & cancel In this case the data transferred on the flash drive are removed from the HACCP Download &...
-
Page 61: Maintenance
5 - 10 - 15 x 1/1 GN - 5 - 10 x 60x40 PROGRAMMABLE 9.0 MAINTENANCE It is compulsory to turn the main switch off and close the water on-off valve, both installed upstream from the oven before servicing it. The oven should be cleaned at the end of each working day, using specific products only. - Page 62 5 - 10 - 15 x 1/1 GN - 5 - 10 x 60x40 PROGRAMMABLE 9.1 WHAT TO DO IN CASE OF A BREAKDOWN AND/OR EXTENDED PERIOD OF NON USE When the appliance is not used for long periods of time : 1 - Turn the main switch off 2 - Close the water on-off valve (both installed upstream from the oven);...
-
Page 63: Cooking Tips
5 - 10 - 15 x 1/1 GN - 5 - 10 x 60x40 PROGRAMMABLE 10.0 COOKING TIPS To obtain the best results, we advise to use GASTRONORM trays, available in different models and materials accord- ing to the type of cooking. It’s fundamental always to leave an in- terspace of 3 cm at least between the food to be cooked and the upper tray... -
Page 64: Remedies To Cooking Hitches
5 - 10 - 15 x 1/1 GN - 5 - 10 x 60x40 PROGRAMMABLE 10.1 REMEDIES TO COOKING HITCHES If cooking is uneven: Check that there is at least 3 cm between the food cooking and the tray above it: if there is less space it will not allow correct ventilation of the food to be cooked.
Need help?
Do you have a question about the DFV-511/TS and is the answer not in the manual?
Questions and answers