
Related Manuals for horsch Maestro 12 SW


Summary of Contents for horsch Maestro 12 SW
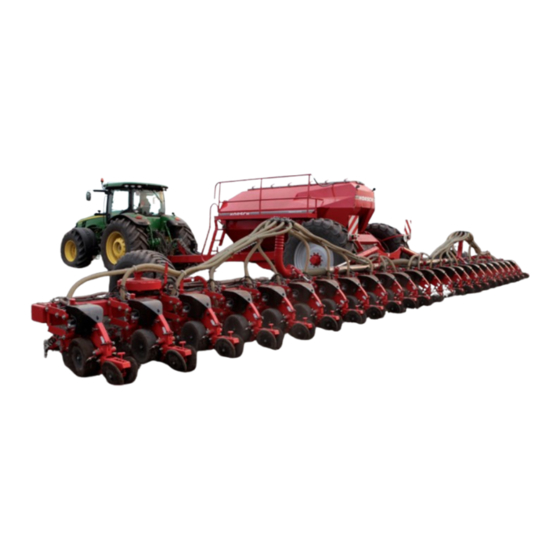
- Page 1 01/2013 Maestro 12 / 24 SW Operating Instructions Read carefully prior to starting up! Keep operating instructions in a safe place! Art.: 80430208 en...
- Page 2 EC Declaration of Conformity In accordance with EC Directive 2006/42/EC HORSCH Maschinen GmbH Sitzenhof 1 D-92421 Schwandorf do solely declare that the product HORSCH Maestro 12 SW from serial no. 24551250 HORSCH Maestro 24 SW from serial no. 24581250 which is the subject of this declaration, fully conforms with the pertinent safety and health requi- rements specified in EC Directive 2006/42/EC.
- Page 3 I hereby confirm receipt of the operating instructions for the above mentioned machine. I have been instructed by a HORSCH service technician or authorised dealer in the operation and functions of the machine, as well as in the safety requirements.
- Page 5 ..............Road: ..............Town/City: ..............Tel.: ..............Customer No.: Retailer: ..............Address of HORSCH: HORSCH Maschinen GmbH 92421 Schwandorf, Sitzenhof 1 92401 Schwandorf, Postbox 1038 Tel.: +49 (0) 9431 / 7143-0 Fax: +49 (0) 9431 / 41364 E-mail: info@horsch.com Customer No.: HORSCH: ..............
-
Page 6: Table Of Contents
Maestro 12.70 - 75 SW.........15 Fan Seed on Demand - Maestro 24 SW ..46 Maestro 24.70 - 75 SW.........15 Fan Seed on Demand - Maestro 12 SW ..47 Assembly groups Maestro 12 SW ....16 Assembly groups Maestro 24 SW ....16 Single grain metering .........48... - Page 7 Inspection in the field ........59 Changing the setting ........59 Possible faults - remedy ......60 Downpipe............61 Trap roller .............62 Setting the drilling depth .......64 Adjusting the coulter pressure ......65 Parallel guide ..........65 Single grain coulter discs......66 Depth guidance wheels ......67 Press rollers..........67 Clearing stars ..........68 Trouble shooting Maestro ......69 Optional equipment ........70...
-
Page 8: Introduction
Introduction Warranty claims Warranty claim forms must be submitted through Foreword your local HORSCH dealer to the HORSCH Service Department in Schwandorf. Before operating the machine, read and strictly Only claims, which have been correctly completed comply with the operating instructions. In doing... -
Page 9: Intended Use
Genuine spare parts and accessories from Therefore, it is crucial to always check your HORSCH have been specially designed for this machine before and during operation for correct machine. operation and adequate application accuracy. -
Page 10: Retrofits
Authorised operators In these operating instructions Only those persons who have been authorised The operating instructions distinguish between and instructed by the operator may operate the three different types of warning and safety in- machine. Operators must be at least 16 years structions. -
Page 11: Safety And Accident Prevention
Safety and accident prevention The following warnings and safety instructions apply to all sections in these operating instruc- tions. Safety symbols Switch the engine off and pull out Watch out for fluids spraying out the key before starting maintenance under high pressure, follow the and repair work. - Page 12 Do not climb on rotatable parts. Attention: For road travel the axle must be re- Use mounting steps provided for tracted to transport width. this purpose. 00380598 00380299 The accumulator is charged with Always plug in all hydraulic lines. Otherwise gas or oil pressure.
- Page 13 5000 1/min 00385481 3.11.08 do Format: 60 x 60 (R5) mm Attach the scales here when calibrating. Druck: schwarz Lfd. Nr. Stück Benennung HORSCH Maschinen GmbH Allgemein- Sitzenhof 1 toleranz 92421 Schwandorf ISO 2768 - m Landwirtschaft aus Leidenschaft www.horsch.com Datum 11.07.2011...
- Page 14 Follow the operating Display of pressure ap- Pre-tension for notes for pneumatics, Display of coulter plied to the tractor link folding cylinders! pressure fertiliser and seed place- arms ment! 0-150 bar 4000 1/min min. 1bar 50 bar ≈ ≈ max. 5000 1/min P = min.
- Page 15 00110681 00110682 Operating button for parking brake: Identification marks on hydraulic hoses Upper position released, lower position for The symbol is always found on the hose requir- parking. ing pressure to bring the machine to transport position (raising, folding, etc.). 00110683 00110684 Hydraulic valve block...
-
Page 16: Operational Safety
The valid road traffic regulations are to be ob- after receiving instructions by employees of the served when travelling on public roads, paths authorized dealer or a HORSCH employee. The and areas. machine registration form has to be completed Observe permissible transport widths and and returned to HORSCH. -
Page 17: Accident Prevention
Accident prevention On the hydraulic system ¾ Do not connect hydraulic hoses to the tractor, In addition to the operating instructions, it is before both hydraulic systems on machine important to observe the accident prevention and tractor are de-pressurised. regulations specified by agricultural trade as- ¾... -
Page 18: Changing Implements
Service and maintenance Changing implements ¾ Secure the machine against unintended ¾ Ensure that regular tests and inspections are rolling! always carried out to schedule, as specified ¾ Secure lifted frame parts, under which you will in the operating instructions. be working, with suitable supports! ¾... -
Page 19: Technical Data
Technical data Maestro 12.70 - 75 SW Maestro 24.70 - 75 SW Transport width (m): .........3.00 Transport width (m): .........3.00 Transport height (m): ........4.00 Transport height (m): ........4.00 Length (m): ..........9.20 Length (m): ..........9.20 Weight from (kg): ........6,940 Weight from (kg): ........11,830 Coulter pressure (kg): .......125 - 300 Coulter pressure (kg): .......125 - 300 Tyre size: .......... -
Page 20: Assembly Groups Maestro 12 Sw
Assembly groups Maestro 12 SW Assembly groups Maestro 24 SW Maestro assembly groups Support wheel Fertiliser distributor tower Hopper for seed Hopper for fertiliser Access steps Support leg Coupling device Fan fertiliser / Seed on Demand - 12 SW Fertiliser metering unit 10. - Page 21 Maestro assembly groups Single grain metering unit Hydr. cylinder coulter pressure Hoses for fertiliser Hoses for seed / Seed on Demand Fan vacuum 24 SW Clod deflector Coulter discs for fertilizer equipment Coulter discs single grain placement Depth guidance wheels 10.
-
Page 22: Transport / Installation
Transport / installation Installation Instruction of the operator and initial installation Higher danger of accidents can happen during of the machine will be carried out by our service initial installation. Please pay attention to the engineers or distributors. notes in the corresponding chapters. Delivery Using the machine before the instruc- tion session is not permitted! -
Page 23: Adjusting The Bout Markers (12 Sw)
8,40 / 9,00 m Setting the bout markers The setting length of the bout markers is half the machine width plus half the row spacing, measured from the centre of the outermost row. Maestro 12 SW Working Length of feb 03 spacing (cm) -
Page 24: Hydraulics Maestro 12 Sw
Hydraulics Maestro 12 SW Hydraulics Maestro 12 SW 16. Pressure accumulator Hydr. control unit with flow control valve 17. Hydraulic cylinder - lift Hydraulic coupling 18. Pressure gauge Hydr. fan drive motor 19. Hydr. lock valve Fan vacuum 20. Hydraulic cylinder - sliding axle Hydr. -
Page 25: Hydraulics Maestro 24 Sw
Hydraulics Maestro 24 SW A3.2 A3.1 B3.1 1 - 12 13 - 24 Hydraulics Maestro 24 SW Zeichnung Zeichnungsnummer Dateiname Hydr. control unit with flow control valve 16. Hydr. valve block hydr 24581400 Hydraulic coupling 17. Hydraulic cylinder - sliding axle Hydr. -
Page 26: Hydraulic Function
Maestro SW hitching / Hydraulic function Tractor mounted control units must be unhitching secured or locked when not in use or in transport position. No persons are to remain between the People must not remain in the op- tractor and the machine during hitching. erating range of fold-able machine components. -
Page 27: Parking The Machine
Connecting the hydraulic system Parking the machine Connect the hydraulic system only after it has When manoeuvring the machine, been depressurized on machine and implement pay attention to the surroundings. No side. persons (children) are to remain in the The hydraulic system is under high pressure. manoeuvring area of the machine. -
Page 28: Cleaning
Parking the Maestro 12 SW Cleaning Always wear the required protective equipment In a shed / under roof when cleaning. Harmful dusts may have deposit- The machine can be parked in folded condition. ed in the area of pneumatics and metering units. -
Page 29: Folding The Maestro 12 Sw
Folding the Maestro 12 SW Folding the Maestro 24 SW The Maestro 24 SW comes with its own menu Folding Hitch the machine. for the folding process in the E-Manager control. ¾ Switch on the E-Manager and select hydrau- The menu guides you automatically through the ¾... -
Page 30: Menu "Folding
Menu “Folding” If the folding process “Unfold or fold” is aborted, this warning will be displayed for a few seconds. The warning will remind you that the transpirt width will not be correct if the folding process is aborted. You should therefore not drive on public roads. - Page 31 Press the button to confirm that the ¾ railing has been unfolded to trans- port position. The warning disappears and the button ¾ changes to green. Lift the attached block. ¾ A 50° both seed boxes are automat- ¾ ically folded in. At 80°...
- Page 32 From 87° the axle adjustment is enabled. ¾ The note for driving with a speed of ¾ 2 - 10 km/h appears. When driving with this speed, the symbol for ¾ the axle adjustment changes to black. The note for the speed disappears. Press the axle adjustment button.
-
Page 33: Unfolding
Unfolding Hitch the machine. ¾ Switch on the E-Manager. ¾ Switch on the hydraulic “Folding” ¾ function in the display. The display reminds you of the speed of ¾ 2 - 10 km/h when extending the axle. Once the speed is reached, the warning dis- ¾... - Page 34 The symbol for lifting and unfolding the wings ¾ changes to black. Press the key. The symbol appears in fron of ¾ a green background. Lift both wings out of the transport brackets ¾ and completely unfold the wings. At 80° the symbol to lower the attachment ¾...
-
Page 35: Pneumatic System
They only differ by equipment and ¾ arrangement. The fan is directly driven by the tractor hydraulics. In the Maestro 12 SW a fan generates the re- Hopper quired air flow for the fertiliser equipment, the air The hopper has been designed as pressurized flow for the Seed on Demand system is taken hopper. - Page 36 Venturi area Distributor In the Venturi area the metering unit injects the The Maestro 12 SW is equipped with a tower fertiliser into the air flow. for fertiliser distribution, the Maestro 24 SW has The Venturi area is fitted with a flexible cover two distributor towers for this purpose.
-
Page 37: Fan - Fertiliser
Fan - fertiliser The fan speed should therefore be set as high as possible. Direct drive Depending on the number of drill units a fan speed of min. 4500 rpm is recommended in The hydraulic fan is directly driven by the tractor order to achieve uniform transverse distribution. -
Page 38: Fan Speeds
The speed of 4500 rpm must only be fallen short of if a measurement of the transverse distribution revealed correct distribution at a lower speed. For measuring the transverse distribution you should contact your HORSCH Service Department. Fertiliser quantity / fan speeds Maestro 12 SW: Travel speed... -
Page 39: Fan With Pto-Shaft Pump
Fan with PTO-shaft pump Maintenance Lubricate the propshaft every day. ¾ Both the fertiliser and vacuum fans can alter- Check gearbox and double-pump for leaks ¾ natively also be driven by a PTO-shaft pump. every day. Check the gear oil at regular intervals (min. ¾... -
Page 40: Adapting The Pto Shaft
Adapting the PTO shaft Shortening the PTO shaft PTO shafts as well as overload and overrunning clutches depend on equipment and power. These items must never be replaced by other equipment. Install the PTO shaft only with the engine stopped and the PTO-shaft switched off. Use only PTO shafts with proper safety protec- tions! The PTO shaft locks must click into place. - Page 41 Function Fan speed adjustment The two PTO-shaft pumps drive the hydraulic The rotary speeds of both fans are adjusted with motors for the fertiliser fan and the two vacuum a hand wheel. fans. The flow control valves (1 / 2) are used to regu- late the oil flow and thus the fan speed.
- Page 42 The radiator fins must be cleaned at Coulter pressure regular intervals, as otherwise the cool- The coulter pressure is hydraulically generated by the Seed on Demand fan. ing and fan air flow will be reduced. The hydraulic oil could overheat and cause For this reason the fan must be switched on when adjusting the coulter pressure.
-
Page 43: Fan Speeds
For measuring the transverse distribution you same time. should contact your HORSCH Service Depart- ment. This delay is factory set to “0”. The delay can be set in 0.1 second steps up to a value of max. -
Page 44: Retightening The Fan Flange
Retightening the fan flange The clamping taper on the fan drive of the hy- draulic motor can come loose on the fan wheel because of temperature fluctuations and settling of material. The fan wheel may then move along the drive shaft and destroy the fan. Therefore retighten the clamping taper af- ter 50 hours, then check once every year. -
Page 45: Fertiliser Coulter
Fertiliser coulter Adjusting the placement depth to 0 or 55 mm Secure the machine against rolling, lift it and ¾ With the solid fertiliser equipment the fertiliser support it with proper jacks. can be placed together with the seed. Loosen the two top screws for depth 0 mm, ¾... -
Page 46: Metering Unit
Metering unit Rotor selection The HORSCH metering unit consists of only a few individual parts and can be dismantled without tools. Size cm³ Colour Stainless steel yellow Stainless steel Absolute leak tightness of components must be assured with all work on the metering unit. -
Page 47: Rotor Change
Towards the bottom the metering unit is com- pleted by the Venturi area. In the Venturi area the seed is picked up by the air flow. During calibration the seed is taken out of the metering unit through the opening in the Venturi area. -
Page 48: Adjusting The Sealing Lip
Adjusting the sealing lip Servicing the metering unit The metering unit does not require any specific A defective sealing lip or an incorrectly maintenance. assembled supporting plate causes In order to avoid repair related downtimes, both metering errors during sowing. the metering unit and the drive motor should be cleaned and subjected to a function test after the The sealing lip must not be torn or damage... -
Page 49: Fan - Vacuum
In the Maestro 12 SW the vacuum fan is centrally installed in the seed wagon and in the Maestro 24 SW both vacuum fans are mounted directly on the main frame of the lateral wings. -
Page 50: Seed On Demand System
Increase the fan speed or, in the Maestro 12 SW, In the Maestro 12 and 24 SW the drill units there- adjust the gate valve towards “1”. -
Page 51: Fan Seed On Demand - Maestro 12 Sw
When the hopper is full a gate valve can be Maestro 12 SW pushed into the outlet funnel. Then the distribu- In the Maestro 12 SW the required air flow is tor can be opened by the two handle screws for taken from the fertiliser fan. -
Page 52: Single Grain Metering
Single grain metering With the container open: dust and dirt may fall in. This increases wear ¾ Any changes and settings made on and results in metering errors. assemblies of the drill unit, which Foreign objects can block or destroy the me- ¾... -
Page 53: Single Grain Metering Unit
Single grain metering unit The metering unit is the main part of each drill unit. The metering unit is electrically driven and indi- vidually controlled by a computer in the adapter housing. All parts inside the metering unit are high preci- sion parts. -
Page 54: Opening The Metering Unit
/ slots. ¾ The choice of discs is continually adapted and extended. Before starting drilling you should ask your HORSCH Service for further metering discs. When reassembling make sure that both hous- ing halves and the seal on the downpipe are If metering discs are to be disassem- correctly seated. -
Page 55: Vacuum Adjustment
Overview of metering discs Vacuum adjustment The possible vaccum range is specified in the Seed Metering disc Bore/slot (mm) E-Manager in the fruit parameter menu. Article number Maize 95100486 Depending on grain shape, weight, metering Maize 24018931 disc and application conditions an adaptation is required. -
Page 56: Backing Disc
The sliding bridge is available in versions A Backing disc and B. A backing disc has been assembled under the In assembled condition these can be identified metering disc. by the corner. 2. Backing disc Sliding bridge A and B The backing disc stabilises the metering disc. -
Page 57: Grain Feed Cover
Grain feed cover Grain feed cover Soy In the grain feed cover seed grains are fed from For soy we have a special grain feed cover the hopper (“CC”-version) or the Seed-On- available. It is part of the Soy-Kit and must be Demand fan (“SW”-version) to the metering unit. -
Page 58: Outside Scraper
Number of notches Aufkleber Maize Lfd. Nr. Stück Benennung Rohmaß Werkstoff Sun flower 1 : 1 Maßstab: HORSCH Maschinen GmbH Allgemein- Werkstück- Sugar beet Sitzenhof 1 toleranz kanten Urheberschutz: Für diese technische Unterlage 92421 Schwandorf DIN 6784 Maschinen behalten wir uns alle Rechte vor. -
Page 59: Inside Scraper
Inside scraper Wear and inspection of inside scraper The inside scraper wears off in the area of the The inside scraper cannot be adjusted. marking and must be replaced in case of visible Versions A, B and C are available for the differ- signs of wear. -
Page 60: Grain Feed Gate
Adjusting the metering unit Grain feed gate The grain feed gate regulates the grain filling Before starting drilling some adjustments must level in the metering unit. be made to the metering unit, these may need It can be adjusted in 9 stages. to be adapter later during work. -
Page 61: Metering Disc Tsw Maize
Maize 65 - 90 A Standard 95100486 Maize 65 - 90 A Standard 24018931 Maize 65 - 90 A Standard 24018910 Sun flower 2-2.5 40 - 80 A Standard 24018933 Sun flower 2-2.5 40 - 80 A Standard 24018934 Sun flower 2-2.5 40 - 80 A Standard 24018935... -
Page 62: Checking The Setting
Checking the setting The test results and thus the seed quality depend on: Before filling in seed, you should check the set- ting on the metering unit. Metering disc ¾ Setting of outside scraper ¾ Does the metering disc match the seed and ¾... -
Page 63: Inspection In The Field
Inspection in the field Changing the setting Seed problems and faults may be encountered in grain pick-up (1), on the scraper (2) and in Besides the setting in the metering unit, the plac- grain trasfer (3). ing quality depends on further factors. It can be adversely affected by external influences: by the speed of the metering disc. -
Page 64: Possible Faults - Remedy
Possible faults - remedy Problem Cause Remedy too many faults Too aggressive scraper adjust- Adjust the outside scraper more ment in direction 9. Feed gate incorrectly adjusted Adjust the grain feed gate Vacuum too low Increase the vacuum setting Increase the fan speed Check lines and connections for leaks Protective suction grid dirty... -
Page 65: Downpipe
The downpipe must not be damaged or dirty. watch the downpipe and change it, if required Dust deposits in the sensor window can ad- (if necessary consult your HORSCH Service). versely affect the signals on the sensor. This can be the reason for incorrect data (faults) in the computer. -
Page 66: Trap Roller
Trap roller Reminder every 20 hours In order to prevent faults caused by soiled sen- sors in the downpipes and to avoid impairments Once the grain exits the downpipe, it is imme- in the placement of grains, the message “Clean diately picked up by the trap roller and pushed downpipes every day and check function of trap gently into the ground. - Page 67 With a gap of approx. 8, 18 and 28 mm the trap Please note when parking the machine roller must be adjusted one bore up per step. The trap rollers must not rest on the ground. Disassemble the trap rollers, the machine can then rest on the coulter discs.
-
Page 68: Setting The Drilling Depth
Setting the drilling depth Set the drilling depth equally on all drill units. Check the seed placement whenever The drilling depth of the coulter discs is limited changing the depth setting. by the depth guidance wheels. The drilling depth can be adjusted in 12 steps from approx. 1.5 If the seed placement is adjusted deeper, you cm to 9 cm. -
Page 69: Adjusting The Coulter Pressure
Adjusting the coulter The open spring end must face to the rear. pressure During drilling the weight of the frame presses the coulter discs into the ground, so that the depth guidance wheels rest on the ground. The coulter pressure is additionally increased by applying fan drive pressure to the coulter pres- sure cylinders - see hydraulic diagram. -
Page 70: Single Grain Coulter Discs
Single grain coulter discs Scraper There is a scraper arranged between the With their wedge shaped arrangement the coulter discs. This scraper prevents sticking and coulter discs open the seed channel for the seed blocking of the coulter discs. placement. In order to avoid blockage and uneven wear of The scraper can be moved in its bracket. -
Page 71: Depth Guidance Wheels
Press rollers Depth guidance wheels During sowing the depth guidance wheels must With their rest against the coulter disc and clean these. V-shaped arrangement the press rolls close The position of the wheels to the coulter discs the seed channel and press the soil against the can be changed, if required. -
Page 72: Clearing Stars
Clearing stars The clearing stars clear stones and larger lumps of soil out of the drilling range. The clearing stars work directly at field surface level. They can also submerge slightly into the ground. Adjusting the height Lift the machine and support it with ap- propriate means. -
Page 73: Trouble Shooting Maestro
Trouble shooting Maestro Maestro Malfunction Possible cause Remedy One row does not drill Foreign objects in seed hopper or Clean seed hopper and metering metering unit unit Vacuum connection interrupted Check vacuum connection and hose Motor defective Replace the motor The drill unit stops Foreign object in metering unit Clean the metering unit... -
Page 74: Optional Equipment
Optional equipment Adjustment and operation Micro granulate facility Depending on the granulate quantity, the meter- ing unit can be fitted with two different augers. The theoretical displacement of the augers is 38 With the micro granulate facility additional gran- cm³ or 66 cm³ per revolution. ulate, e.g. -
Page 75: Seed Calibration
Seed calibration For "low" granulate quantities install the 38 ¾ cm³ auger. For high quantities or high working speed install the 66 cm³ auger. The calibration sequence and the input on Fill the hopper with granulate. ¾ the terminal is identical with the calibration Run the metering auger for a moment so that ¾... -
Page 76: In Operation
In operation Transverse distribution The effect of insufficient air and poor transverse During drilling the required amount of air is taken distribution is difficult to recognized, or only after from the fan air. the seed has come up. You should therefore always use rather more than not enough air. -
Page 77: Pneumatic Brake
Pneumatic brake Hitching The tractor must therefore always be secured with the parking brake. The seed wagon may be equipped with a When hitching up connect the pneumatic brake pneumatic dual-circuit brake system with spring hose coupling "Brake" (yellow) first and then the brake cylinder or with a hydraulic brake system. - Page 78 However, the machine must be hitched End of the season up beforehand or secured against roll- For functional safety of the valves, anti-freeze ing by other suitable means. agent should be mixed to the compressed air Driving without brake on public roads (follow the operating instructions of the tractor is prohibited.
-
Page 79: Hydraulic Brake
Hydraulic brake The pressure accumulator for emergency brak- ing must be filled before starting to drive during initial commissioning or after longer periods of The hydraulic line controls the brake power to standstill. the brake cylinders. Fully kick down the brake pedal on the tractor for The brake inlet pressure should not exceed this purpose. -
Page 80: Filling Auger
Filling auger Operation Do not reach with your hand into the The filling device consists of a fixed and a move- rotating auger! able auger half. For road travel the auger must be fold- ed in and locked in place. The auger It enables simple and quick filling of the seed could otherwise swing out and cause hopper. - Page 81 Unfolding Filling When opening the lock hold the swiv- Switch on the hydraulic drive on the tractor. ¾ elling section in place. Otherwise you Run the tractor engine with raised speed. ¾ could be hurt by the dead weight of tube Switch on the hydraulic motor by the three- ¾...
-
Page 82: Service And Maintenance
Service and maintenance Maintenance intervals The maintenance intervals are determined by many different factors. Please observe the safety notes on The differences in operating conditions, weather care and maintenance. influences, driving and working speeds, dust conditions and type of soil as well as the seed, Your machine has been designed and built to fertiliser and dressing etc. -
Page 83: Lubricating The Machine
Service Lubricating the machine The machine should be lubricated at regular The company HORSCH would be pleased, if intervals and after washing with a pressure your machine and our services would meet your cleaner. expectations. This ensures operability and reduces repair costs and downtimes. -
Page 84: Maintenance Schedule Maestro Sw
Maintenance schedule Maestro SW Maintenance schedule Maestro SW Retighten all screw and plug-in Due to material settlements or e.g. paint residues between connections as well as the hydraulic screw connections even properly tightened screw connections connections can become loose, resulting in loose screw connections and leaking hydraulic connections. - Page 85 Fan - fertiliser Fan - fertiliser and Seed on Demand Check for leaks, function, speed setting Protective fan grid Clean from dirt Impeller wheel Check condition and fastening, clean of dirt deposits Tighten the drive flange (first time 50 hrs) Leak oil return flow Return flow pressure max.
- Page 86 Wheels / brakes Undercarriage SW Check state and fastening Re-tighten the wheel nuts - see above Check the air pressure 20.8 1.8 bar 10.0/75 - 15.3 6.0 bar 520/85 R42 3.0 bar 550/60 - 22.5 2.8 bar Brake lines and hoses Check for damage, squashing and kinks Air reservoir drain...
-
Page 87: Lubrication Points
Lubrication points Sliding axle Ball-head connector Bolt wing mounting Filling auger Parallel guide and depth guidance... - Page 88 Lubrication points Maestro 24 SW Lift arm - 24 SW Propshaft for fan drive with PTO-shaft - 24 SW Lubrication points Maestro 12 SW Bolt on lift arm - 12 SW Wheel hub support wheel - 24 SW Bearing support wheel - 24 SW...
-
Page 89: Bolt Tightening Torques - Metric Bolts
Bolt tightening torques - metric bolts These tightening torques only serve as a guideline and are generally valid. Screws and nuts must thereby not be treated with lubricants, because this would change their coefficient of friction. Bolt tightening torques - metric bolts in Nm Size Pitch Type of bolt - property classes... -
Page 90: Bolt Tightening Torques - Imperial Bolts
Bolt tightening torques - imperial bolts These tightening torques only serve as a guideline and are generally valid. Screws and nuts must thereby not be treated with lubricants, because this would change their coefficient of friction. Bolt tightening torques - imperial bolts in Nm Bolt diameter Strength 2 Strength 5...
Need help?
Do you have a question about the Maestro 12 SW and is the answer not in the manual?
Questions and answers