Table of Contents
Advertisement
Quick Links
Advertisement
Table of Contents

Subscribe to Our Youtube Channel
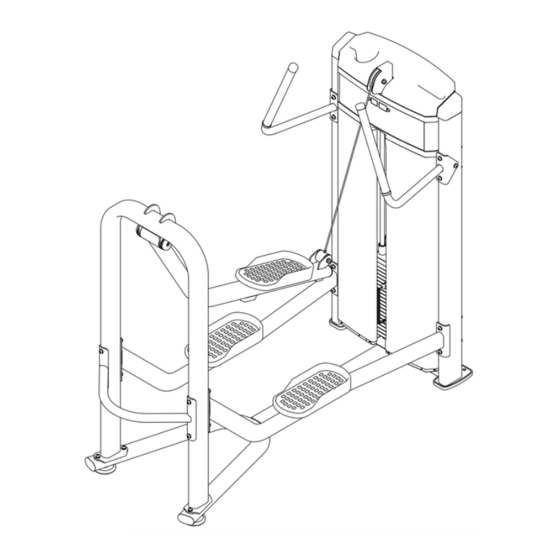
Summary of Contents for ABS GLUTE COASTER ABS1020
- Page 1 Owners Manual Model #ABS1020 Warranty information inside...
-
Page 2: Table Of Contents
TABLE OF CONTENTS Important Safety Instructions......pg. 03 pg. 03 Instructions............pg. 04 pg. 04 Parts List..............pg. 05 pg. 05 Exploded View............pg. 06 pg. 06 Hardware Kit............pg. 07 pg. 07 Measurement Guide..........pg. 08 pg. 09 Assembly Instruction.........pg. 09 pg.10 Assembly..............pg. 10 pg.11 General Maintenance Schedule....pg. -
Page 3: Important Safety Instructions
IMPORTANT SAFETY INSTRUCTIONS Before beginning any fitness program, you should obtain a complete physical examination from your physician. When using exercise equipment, basic precautions should always be taken, including the following: 1. Read all instructions before using the equipment. These instructions are written to ensure your safety and to protect the unit. -
Page 4: Instructions
INSTRUCTIONS Before beginning assembly, please take the time to read instructions thoroughly. Please use the various lists in this manual to make sure that all parts have been included in your shipment. If parts are found to be missing, please contact either your authorized dealer or us directly and reference the part name and number from the parts list. -
Page 5: Parts List
PARTS LIST NOTE: SOME OF THESE PARTS MAY COME PRE-INSTALLED... -
Page 6: Exploded View
EXPLODED VIEW... -
Page 7: Hardware Kit
HARDWARE KIT... - Page 8 HARDWARE KIT...
-
Page 9: Measurement Guide
HARDWARE KIT MEASUREMENT GUIDE... -
Page 10: Assembly Instruction
ASSEMBLY INSTRUCTION Assembly of the equipment takes professional installers about 1.5 hours. If this is the first time you have assembled this type of equipment, plan to spend more time. If you are in doubt about any part of this assembly, we recommend you contact a professional installer to complete the assembly. -
Page 11: Assembly
ASSEMBLY STEP 1 Install Left Hand Stand Assembly (#18), Right Hand Stand Assembly (#19), and the Weight Stack Frame ASSY (#1) together using: Two Socket Head Cap Screw M10*25 (#36) Two Spring Washer φ10 (#37) Ten Flat Washer φ11*φ20*2 (#32) Four Socket Head Cap Screw M10*125 (#38) Four Nylon Lock Nut M10 (#34) Attach Two Floor Mat (#51) to the Weight Stack Frame ASSY (#1). - Page 12 ASSEMBLY STEP 1 (CONT.) Note: Tighten all connections from Step 1.
- Page 13 ASSEMBLY STEP 2 Install Left Foot Stand ASSY (#13), Right Foot stand ASSY (#14), Rear Support Frame Assembly (#16), Safety Shelf(#15) and the Weight Stack Frame ASSY (#1), Floor Frame ASSY (#12) together using: Four Socket Head Cap Screw M10*125 (#38) Four Socket Head Cap Screw M10*120 (#39) Eight Nylon Lock Nut M10(#34) Twenty Flat Washer φ11*φ20*2(#32)
- Page 14 ASSEMBLY STEP 3 Attach Two Weight Rubber Bumper (#27), 200LBS Choose Iron (#52) Top Plate (#8), Two Guide Rod (#9), Two Spring φ15.5*φ1.5*36 (#31), Two Guide Rod Fixing Sleeve φ25*φ19*45 (#30) to the Weight Stack Frame ASSY (#1). Install Movable Pulley Frame Assembly (#11), 4.5” Pulley (#22), Cable ASSY (#21), Top Plate (#8) and the Weight Stack Frame ASSY (#1) together using: Two Flat Washer φ11*φ20*2 (#32) One Socket Head Cap Screw M10*50 (#42)
- Page 15 ASSEMBLY STEP 4 Attach Top Cover(#2), Right Plug (#3), Left Plug (#4), Top Rear Shroud (#6), Rear Shroud (#50), Training Placard Cover (#7), Two Front Shroud (#49) to the Weight Stack Frame ASSY (#1) using: Fourteen Cross Recessed Pan Head Screw M6*20 (#35) Four Cross Recessed Pan Head Screw M6*10 (#40) Four Cross Disc Self Tapping Screw ST4.2*16 (#48) Machine is now ready to be moved into place and used safely.
-
Page 16: General Maintenance Schedule
GENERAL MAINTENANCE SCHEDULE A fitness facility should have a regular maintenance schedule in place that this equipment can be added into. For personal, in home use, please follow the home maintenance schedule listed above. -
Page 17: General Maintenance Information
GENERAL MAINTENANCE INFORMATION Links, Pull-Pins, Snap Hooks, Swivels, Weight Stack Pins: • Check all pieces for signs of visible wear or damage. • Check springs in snap hooks and pull-pins for proper tension and alignment. • If the spring sticks or has lost its rigidity, replace it immediately. Upholstery: •... -
Page 18: Training Tips
TRAINING TIPS Use this manual to guide you through the basic exercises you can perform on your equipment. To gain maximum results and avoid possible injury, consult a fitness professional to develop your complete exercise program. Always consult your physician before starting any exercise program. To be successful in your exercise program, it is important to develop an understanding of the basic principles of strength training. - Page 20 • Proof of Purchase • Product Model Number • Serial Number The Abs Company, 8429 Lorraine Rd, Lakewood Ranch, FL 34202 1-866-219-5335 - www.TheAbsCompany.com © 2022 The Abs Company. All Rights Reserved. Protected under US and INTERNATIONAL Patents. Patent information available upon request.


Need help?
Do you have a question about the GLUTE COASTER ABS1020 and is the answer not in the manual?
Questions and answers