Advertisement
Quick Links
Advertisement

Subscribe to Our Youtube Channel
Related Manuals for ABS AbSolo


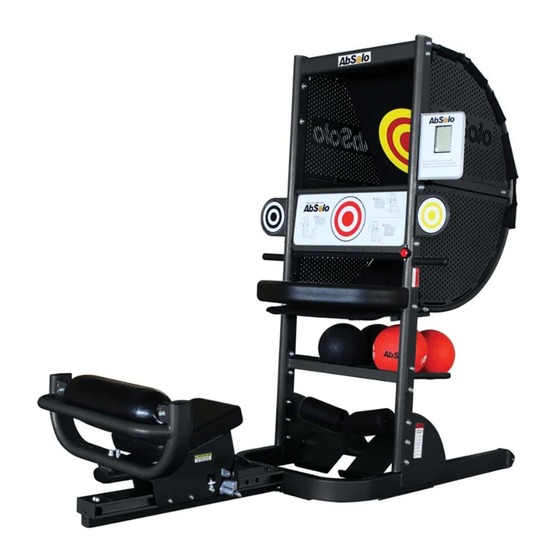
Summary of Contents for ABS AbSolo
-
Page 2: Exploded View
: EXPLODED VIEW 19a/b 40a/b 23 21 92 56 54 55 80 81... -
Page 3: Parts List
PARTS LIST Part name and description Part name and description Base assembly Bladder support assembly Leg assembly M8*25*S6 Hex screw M10*60*S8 Hex screw Cover d10 Spring Wahser Seat pad Plastic washer Φ8.5*Φ16*2 d10*Φ20*2 Washer Spacer Φ30*Φ20*57 Left Upright assembly Right Upright assembly SpacerΦ30*Φ20*67 Nylon Nut M10*H9.5*S17 Fixed tube 1... - Page 4 Button support 64*39*23 Hex screw M8*28*12*S5 Button coverФ31*3.8 Adjustable bolt M6*52*Φ10*2.5 Hex screw M6*20*S5 U-shaped support 30*10*1.5 Washer d6*Φ12*1.2 Nylon nutM6*H6*S10 Nylon nut M6*H6*S10 BladderΦ160*615*555 Spring Φ1.8*Φ14*39.4*N7 FoamΦ20*5*140 Oval End cap PT80*40*20 Pop PinΦ15*119 Nut Φ25*6*M18*12*Φ10.5 Rubber pad t5*350*40 Rubber Pad t5*75*75 Hex bolt M5*28*10*S4 Screw ST4.2*10 Washer d5*Φ16*1.5...
-
Page 5: Assembly Steps
Assembly Steps Step 1: #3 M10*60*S8 2PCS #4 d10 2PCS #5 d10*Φ20*2 2PCS Attach the leg assembly to the base assembly. - Page 6 Step 2: #3 M10*60*S8 6PCS #5 d10*Φ20*2 12PCS #7 M10*H9.5*S17 6PCS Attach the Left/Right Upright assembly to the base assembly.
- Page 7 Step 3: #42 M10*65*S8 4PCS d10*Φ 20*2 8PCS M10*H9.5*S17 4PCS Attach Ball rack to the left/right Upright assembly.
- Page 8 Step 4: #3 M10*60*S8 4PCS #5 d10*Φ20*2 8PCS #7 M10*H9.5*S17 4PCS Attach Lower Chute to the left/right Upright assembly.
- Page 9 STEP 5: #10 M5*20*S4 8PCS #11 d5*Φ13*1 16PCS #13 M5*H5.5*S10 8PCS #34 Φ8.5*Φ16*2 8PCS Attach Upper chute to the left/right Upright assembly.
- Page 10 Step 6: 5 4 15 15 4 5 #35 Φ30*Φ20*57 2PCS #36 Φ30*Φ20*67 2PCS #15 M10*45*S8 2PCS #5 d10*Φ20*2 4PCS #4 d10 4PCS #3 M10*60*S8 2PCS Attach the Chute cover to the Upper and Lower chute. Attach bull’s eyes baffle to the Left/Right Upright assembly.
- Page 11 Step 7: #3 M10*60*S8 4PCS #4 d10 4PCS #5 d10*Φ20*2 4PCS Attach Horizontal bar to the Left/Right Upright assembly.
- Page 12 Step 8: #22 M10*100*18*S17 2PCS #5 d10*Φ 20*2 2PCS #4 d10 2PCS Attach Ball block to the Left/Right Upright assembly.
- Page 13 Step 9: # 4 2 M 1 0 * 6 5 * S 8 4 P C S d 1 0 * Φ 2 0 * 2 4 P C S d 1 0 4 P C S 1 9 a 4 0 b 4 0 a Connect the wires from Left/Right Upright assembly to the wires from center...
- Page 14 Step 10: # 2 8 d 4 * Φ 9 * 1 4 P C S # 2 3 d 8 6 P C S # 2 1 d 8 * Φ 2 2 * 2 6 P C S # 2 0 M 8 * 1 6 * S 6 6 P C S # 2 5 M 4 * 1 2 * Φ...
- Page 15 Step 11: #42 M10*65*S8 3PCS M8*25*S6 4PCS d8*Φ 20*2 4PCS M10*H9.5*S17 2PCS d10*Φ 20*2 5PCS 1PCS Attach the seat to the seat mount assembly rail. Next attach the seat support assembly to the base assembly.
- Page 16 Step 12: # 4 2 M 1 0 * 6 5 * S 8 2 P C S d 1 0 * Φ 2 0 * 2 2 P C S d 1 0 2 P C S Attach the back support cushion assembly to the seat support assembly.
- Page 18 You can also send us an email, or visit our website For additional customer service information. Prior to calling or emailing, Please have the following information with you: ·Customer Name and Address ·Telephone Number ·Proof of Purchase ·Product Model Number © 2013 The Abs Company - All rights reserved.
Need help?
Do you have a question about the AbSolo and is the answer not in the manual?
Questions and answers