Table of Contents
Advertisement
Quick Links
Advertisement
Table of Contents

Related Manuals for MONDEX Tahko 6.6


Summary of Contents for MONDEX Tahko 6.6
- Page 1 INSTALLATION AND OPERATING INSTRUCTIONS Tahko M, E2 and O Types 12/2022...
-
Page 2: Table Of Contents
Contents 1 General safety instructions 2 Tahko heater M and E2 types 3 Heater assembly and installation Stacking the stones 4 Technical specifications Heater power and voltage Heater dimensions Required amount of stones Minimum distances to inflammable material 5 General instructions for users of Tahko heaters Note Installation cable Additional connection options... -
Page 3: General Safety Instructions
Electrical connections may only be made by an electrician with a valid installation authorisation according to the current regulations. The Mondex electric heater is suitable for use in a family sauna, one (1) heater per sauna room. Retain the installation and operating instructions for further reference. -
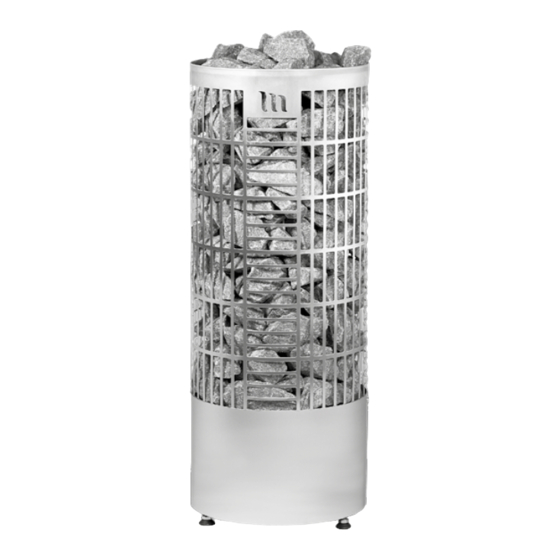
Page 4: Tahko Heater M And E2 Types
2. Tahko heater models M type heater Heater type E2 3. Heater assembly and installation Heater assembly 1) Keep the heater in its original package in an upright position in a warm and dry location until it is installed. 2) The package includes the heater, as well as for type E2, the thermostat sensor, electronic controller and required cables. -
Page 5: Stacking The Stones
Do not use the heater without the stones! Dents caused by the user or others are not covered by Mondex’s warranty or other product liability. When stacking the stones, be careful not to dent the heater’s metal surfaces to avoid damaging them. -
Page 6: Technical Specifications
4. Technical specifications Heater Tahko 6.6 Tahko 9.0 Tahko 10.5 Power kW 10.5 Voltage 400 V 3N 400 V 3N 400 V 3N Connecting cable 5 x 1,5 mm² 5 x 2,5 mm² 5 x 2,5 mm² Fuse 3 x 10 A... -
Page 7: Minimum Distances To Inflammable Material
Minimum distances to inflammable material (mm) Type Volume Tahko 6.6 1900 6–9 m³ Tahko 9.0 1900 8-15 m³ Tahko 10.5 2000 12-22 m³ Table 4.4 Minimum distances to inflammable material (mm) Installation and Operating Instructions Tahko... -
Page 8: General Instructions For Users Of Tahko Heaters
5. General instructions for users of Tahko heaters Note Electrical connections may only be made by an electrician with a valid installation authorisation according to the current regulations. The Tahko electric heater is suitable for use in a family sauna, one (1) heater per sauna room. -
Page 9: Sauna Room Construction
Sauna room structure The sauna and its ceiling, in particular, should have good thermal insulation, as heat tends to escape through the ceiling. Due to the moisture, we recommend that you use aluminium paper. The size of the heater should be selected according to the size of the sauna (in cubic metres). In addition to calculating the power need for the regular sauna structure (glass wool–foil–wood), the following should be taken into consideration. -
Page 10: Time Switch And Thermostat Operation M Type
8. Time switch and thermostat operation M type Time switch Thermostat Overheat protector reset switch The time switch (4+8 h) is also the heater’s main switch. After a set time, the time switch automatically switches the heater off. With the timer function, the heater can be set to switch on in 1–8 hours. The maximum warm-up time is 4 hours. -
Page 11: Installation Instructions E2 Type
9. Installation instructions E2 type Changing room Sensor Utility room Controller Heater Sauna Fuse Supply cable 5 x 1.5 mm / 5 x 2.5 mm Sensor on 10 cm 10 cm the ceiling Sensor on the wall min. 1 m Controller The controller must be placed at a minimum distance of 1 m from the heater... -
Page 12: Installation Of Controller And Sensor
Installation of external control and sensor The type E2 heater package includes: Controller Temperature sensor The temperature sensor can be placed either on the wall or on the ceiling. It must be installed in a Reinforcing plate place where it cannot be affected by the inlet air. On the wall, place the sensor 10 cm from the Plastic clip ceiling vertically at the centreline of the heater... -
Page 13: Wiring Diagram E2 Type
10. Wiring diagram E2 type F2/5A RLY1, RLY3, RLY5 RLY2, RLY4, RLY6 OVERHEATING PROTECTOR Controller card wiring, controller Controller card wiring, heater Heater: Display: 1 White Note! The terminal 2 Brown screws must face 3 Green 4 Yellow the wall. 5 Grey 6 Pink Sensor:... -
Page 14: Heater Control And Operation, Type E2
11. Heater control and operation, E2 type ON/OFF MENU DOWN Switching on the heater The right-hand decimal point on the display is The heater is switched on by pressing the lit as an indication of the fact that the timing ON/OFF button. -
Page 15: Stopping The Heating Or Timing Process
The heating process can be started by The target temperature can be pressing again the MENU button. adjusted by using the UP and DOWN buttons. When the target temperature has been adjusted, the current temperature will again be Parental control displayed after a while. -
Page 16: Heater Control And Operation, O Type
12. Heater control and operation, O type (without controller) Using the heater Type O heaters are operated from a separate control unit. Read the operating instructions delivered with the control unit. Sauna room Do not place the inlet air valve so that the air flow cools the temperature sensor (for installation instructions of the temperature sensor, see the instructions for the control unit)! Overheating protector Installation and resetting of the overheating protector, type O: See the installation instructions for the... -
Page 17: Troubleshooting
In case of a fault that cannot be solved, please contact the store where you purchased the heater or email info@mondex.fi. Spare parts can be purchased from Mondex distributors and the manufacturer. When purchasing spare parts, please refer to the name, power, serial number and manufacturing date of the heater to ensure you receive the correct parts. -
Page 18: Service History
Heater maintenance history We recommend changing the heater stones at one-year intervals. Change them more regularly if the heater is used often. Date Action Premec Oy Kettukallionkatu 4 84100 Ylivieska, Finland info@mondex.fi Technical support: info@mondex.fi www.mondex.fi...
Need help?
Do you have a question about the Tahko 6.6 and is the answer not in the manual?
Questions and answers