Table of Contents
Advertisement
Available languages
Available languages
Quick Links
IB50533722
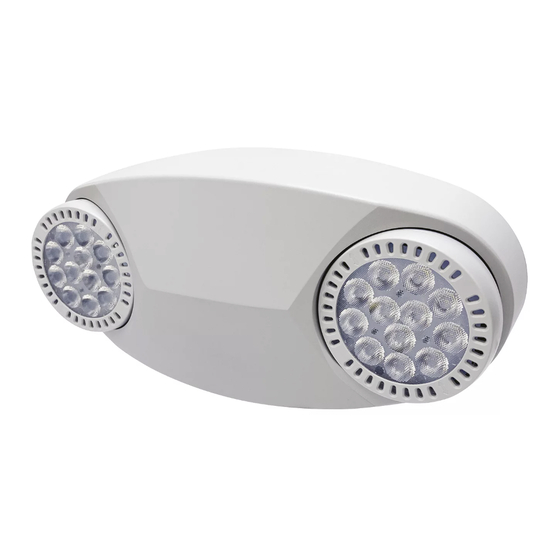
Installation Instructions - SELHP100R3/SELHP100R3SD EMERGENCY LIGHT
Instructions d'installation - SELHP100R3/SELHP100R3SD LUMIÈRE
D'URGENCE
Instrucciones de instalación - LUZ DE EMERGENCIA SELHP100R3/
SELHP100R3SD
Important Safeguards
Read and follow all safety instructions
SAVE THESE INSTRUCTIONS AND DELIVER TO OWNER AFTER INSTALLATION
WARNING: RISK OF ELECTRIC SHOCK- NEVER CONNECT TO, DISCONNECT FROM, OR SERVICE WHILE EQUIPMENT IS ENERGIZED.
WARNING: FAILURE TO FOLLOW THESE INSTRUCTIONS AND WARNINGS MAY RESULT IN DEATH, SERIOUS INJURY OR SIGNIFICANT
PROPERTY DAMAGE - For your protection, read and follow these warnings and instructions carefully before installing or maintaining this
equipment. These instructions do not attempt to cover all installation and maintenance situations.
All service shall be performed by qualified service electrician. This product must be installed and maintained in accordance with the
•
applicable installation codes by a person familiar with the construction & operation of the product and the hazards involved.
This product must be installed in accordance with the applicable installation codes and ordinances.
•
Before wiring to power supply, turn off electricity at fuse or circuit breaker.
•
Disconnect AC power and unplug battery before servicing.
•
Consult your local building code for approved wiring and installation.
•
Do not let power supply cord touch hot surfaces.
•
Do not mount near gas or electric heater.
•
Equipment should be mounted in locations and at heights where it will not readily be subjected to
•
tampering by unauthorized personnel.
The use of accessory equipment not recommended by the manufacturer may cause an unsafe condition.
•
Do not use this equipment for other than intended use.
•
Connect to an AC voltage as recommended on the product label of this equipment.
•
Risk of Fire, Electrical Shock or other Casualty Hazards- Installation and maintenance of this product must be performed
by a qualified electrician. This product must be installed in accordance with the applicable installation code by a person
familiar with the construction and operation of the product and hazards involved.
Risk of Fire and Electric Shock- Make certain power is OFF before starting installation or attempting any maintenance.
Disconnect power at fuse or circuit breaker.
Risk of Burn- Disconnect power and allow fixture to cool before handling or servicing.
Risk of Personal Injury- Due to sharp edges, handle with care.
DISCLAIMER OF LIABILITY: Cooper Lighting Solutions assumes no liability for damages or losses of any kind that may arise from the
improper, careless, or negligent installation, handling or use of this product.
Note: Specifications and dimensions subject to change without notice.
NOTICE: Fixture may become damaged and/or unstable if not installed properly.
ATTENTION Receiving Department: Note actual fixture description of any shortage or noticeable damage on delivery receipt. File claim
for common carrier (LTL) directly with carrier. Claims for concealed damage must be filed within 15 days of delivery. All damaged
material, complete with original packing must be retained.
WARNING
Sure-Lites
Advertisement
Table of Contents

Related Manuals for Cooper SELHP100R3


Summary of Contents for Cooper SELHP100R3
- Page 1 Risk of Personal Injury- Due to sharp edges, handle with care. DISCLAIMER OF LIABILITY: Cooper Lighting Solutions assumes no liability for damages or losses of any kind that may arise from the improper, careless, or negligent installation, handling or use of this product.
-
Page 2: Installation Instructions
Installation Instructions – Sure-Lites SELHP100R3 / SELHP100R3SD Emergency Light Wiring Diagram: ote: Use 18-22 AWG stranded wire to connect remote lamp heads. CAUTION: DO NOT connect YELLOW and BLUE remote leads together. Please also ensure remote head positive (+) lead is connected to Emergency unit’s yellow lead (+) and remote head negative (-) lead is connected to Emergency unit’s blue lead (-). -
Page 3: Operation
Installation Instructions – Sure-Lites SELHP100R3 / SELHP100R3SD Emergency Light J-BOX MOUNTING INSTALLATION Before starting installation, make sure AC power is turned OFF . Remove the unit’s backplate by pushing through the two oval shaped locking tabs at the bottom using a narrow screwdriver. -
Page 4: Led Indicator Status
Installation Instructions – Sure-Lites SELHP100R3 / SELHP100R3SD Emergency Light Instruction for Self-Diagnostic Test: Once the unit is properly installed according to the installation instruction sheet and AC power supplied, the dual color LED indicator will come ON and the self-diagnostic test function will automatically initiate. The Unit will switch into a load calibrating mode for 5-10 seconds to record the connected load. -
Page 5: Mesures De Protection Importantes
Risque de blessures – à cause des arêtes tranchantes, manipulez ce produit avec précaution. EXONÉRATION DE RESPONSABILITÉ : Cooper Lighting Solutions n’assume aucune responsabilité pour les dommages ou pertes de quelque nature que ce soit pouvant découler d’une installation, d’une manipulation ou d’une utilisation inappropriée, imprudente ou négligente de ce produit. -
Page 6: Instructions D'installation
Instructions d’installation – Lampe d’urgence série Sure-Lites SELHP100R3/SELHP100R3SD Schéma de câblage : Utilisez un fil toronné de 18-22 AWG pour connecter les têtes de lampe distantes. ote: MISE EN GARDE : Ne connectez PAS les fils de télécommande JAUNE et BLEU ensemble. Veuillez également vous assurer que le fil positif (+) de la tête à... - Page 7 Instructions d’installation – Lampe d’urgence série Sure-Lites SELHP100R3/SELHP100R3SD INSTALLATION DE MONTAGE DE BOÎTIER J Avant de commencer l’installation, assurez-vous que le courant alternatif est éteint. Retirez la plaque arrière de l’appareil en enfonçant les deux languettes de verrouillage ovales situées en bas à l’aide d’un tournevis étroit.
- Page 8 Instructions d’installation – Lampe d’urgence série Sure-Lites SELHP100R3/SELHP100R3SD Instructions pour le test d’autodiagnostic : Une fois que l’appareil est correctement installé conformément à la feuille d’instructions d’installation et que le courant alternatif est fourni, le voyant DEL bicolore s’allume et la fonction de test d’autodiagnostic se lance automatiquement.
-
Page 9: Precauciones Importantes
Riesgo de lesiones personales: maneje el producto con cuidado debido a sus bordes filosos. EXENCIÓN DE RESPONSABILIDAD: Cooper Lighting Solutions no asume ninguna responsabilidad por daños o pérdidas de ningún tipo que puedan surgir de la instalación, el manejo o el uso incorrectos, descuidados o negligentes de este producto. -
Page 10: Instrucciones De Instalación
Instrucciones de instalación: Luz de emergencia SELHP100R3/SELHP100R3SD de Sure-Lites Diagrama de cableado: Utilice un cable trenzado de calibre 18-22 AWG para conectar los cabezales de lámpara remotos. ote: PRECAUCIÓN: NO conecte juntos los cables AMARILLO y AZUL de la conexión remota. Asegúrese también de que el cable positivo (+) del cabezal remoto esté... - Page 11 Instrucciones de instalación: Luz de emergencia SELHP100R3/SELHP100R3SD de Sure-Lites INSTALACIÓN PARA MONTAJE EN LA CAJA DE CONEXIONES Antes de comenzar la instalación, asegúrese de que la alimentación de CA está desconectada. Retire la placa posterior de la unidad destrabando las dos lengüetas ovaladas de la parte inferior con un destornillador pequeño.
- Page 12 Instrucciones de instalación: Luz de emergencia SELHP100R3/SELHP100R3SD de Sure-Lites Instrucciones para realizar la prueba de autodiagnóstico: Una vez que la unidad esté instalada correctamente de acuerdo con la hoja de instrucciones de instalación y la alimentación de CA suministrada, el indicador LED de dos colores se encenderá y la función de autodiagnóstico se iniciará...
- Page 13 Veuillez consulter le site www.cooperlighting.com pour obtenir les conditions générales. Garantías y Limitación de Responsabilidad Visite www.cooperlighting.com para conocer nuestros términos y condiciones. Cooper Lighting Solutions 1121 Highway 74 South Cooper Lighting Solutions is a registered trademark. Peachtree City, GA 30269 P: 770-486-4800 All trademarks are property www.cooperlighting.com...
Need help?
Do you have a question about the SELHP100R3 and is the answer not in the manual?
Questions and answers