Mitsubishi Electric TC-24A Instruction Book
Air-conditioner control system touch controller
Hide thumbs
Also See for TC-24A:
- Setting manual (8 pages) ,
- Installation manual (9 pages) ,
- Setting manual (2 pages)
Table of Contents
Advertisement
Quick Links
Air-conditioner Control System
TOUCH CONTROLLER
MODEL
TC-24A
INSTRUCTION BOOK
Before using the controller, read this
Instruction Book carefully to ensure
proper operation.
Retain this Instruction Book for future
reference.
Make sure that this manual, Installation
Manual, and Initial Setting Manual are
passed on to any future air condition
system users.
To ensure safety and proper operation of
the unit, the unit should only be installed
by qualified personnel.
Safety Precautions ............................................................ 2
Function List ...................................................................... 4
Names and Functions of Controller Components ............. 8
Screen Configuration [HOME screen] ............................... 10
Buttons [HOME screen]..................................................... 12
Icon Displays [HOME screen] ........................................... 14
Basic Operations ............................................................... 18
Screen selection ........................................................................ 18
Group selection.......................................................................... 19
Operating the Air conditioning unit group .................................. 20
ON/OFF operation ........................................................................ 20
Mode............................................................................................. 20
Temperature setting ..................................................................... 21
Hold Function Setting ................................................................... 24
Operating the LOSSNAY group................................................. 24
...................................................................................... 24
.................................................................... 24
Operating the General equipment group ................................... 24
................................................................... 24
Multiple group selection screen ................................................. 25
Disabling functions..................................................................... 25
Menu Screen [Button Settings].......................................... 26
Usage - Main Menu Settings ............................................. 28
Time and Schedule screen ................................................... 28
Restrictions Settings ............................................................. 36
Control Panel ........................................................................ 42
System Management ............................................................ 50
Maintenance ...................................................................... 54
Touch Panel Cleaning screen.................................................... 54
Troubleshooting................................................................. 55
...... 23
Advertisement
Table of Contents

Subscribe to Our Youtube Channel
Related Manuals for Mitsubishi Electric TC-24A


Summary of Contents for Mitsubishi Electric TC-24A
-
Page 1: Table Of Contents
Air-conditioner Control System TOUCH CONTROLLER MODEL TC-24A INSTRUCTION BOOK Safety Precautions ............2 Function List ..............4 Names and Functions of Controller Components ..... 8 Screen Configuration [HOME screen] ....... 10 Buttons [HOME screen]............. 12 Icon Displays [HOME screen] ........... 14 Basic Operations ............... -
Page 2: Safety Precautions
Safety Precautions WARNING CAUTION All electric work must be performed by qualified personnel. General precautions WARNING CAUTION Precautions during installation WARNING... - Page 3 To avoid damage to the controller, do not overtighten install, inspect, or repair the controller. the screws. TC-24A is designed for exclusive use with the Building To avoid discoloration, do not use benzene, thinner, or Management System by Mitsubishi Electric. The use of this chemical rag to clean the controller.To clean the controller,...
-
Page 4: Function List
Function List The table below summarizes the functions that are available on the TC-24A. Refer to the pages listed for details. Function Description Switches the ON/OFF operation of the units such as air conditioning units. The LED on the Collective ON/OFF button... - Page 5 Screen Page Screen/Button name Main Home Menu HOME screen (GRID screen, LIST screen, GROUP screen, Multiple group selection screen), Set Schedule screen, Collective ON/OFF button GROUP screen, Multiple group selection screen, Set Schedule screen SETBACK button (only when enabling/disabling the SETBACK mode) GROUP screen, Multiple group selection screen , Set Schedule screen , SETBACK button GROUP screen, Multiple group selection screen, Set Schedule screen GROUP screen, Multiple group selection screen, Set Schedule screen...
- Page 6 Volume Control Sets the sound volume and screen brightness. If an error occurs on the TC-24A controller or the units and controllers it controls, the LED on the Collective ON/OFF button will blink. If an error occurs on the indoor or LOSSNAY units,...
- Page 7 Screen Page Screen/Button name Main Home Menu Lock Buttons screen Set Temperature Range Limit screen Set Schedule screen, Prohibit Remote Controller screen Display Format screen Setback Button Setting screen, Hold Button Setting screen, Collective Operation Button setting screen Group Icon Setting screen Volume control screen HOME screen (GRID screen, LIST screen, GROUP screen), Status List screen HOME screen (GRID screen, LIST screen, GROUP screen), Status List screen...
-
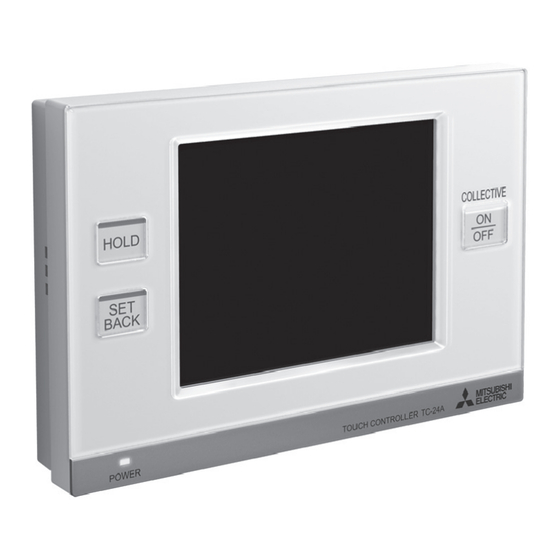
Page 8: Names And Functions Of Controller Components
Names and Functions of Controller Components Product features The TC-24A described in this manual is a centralized controller with color LCD touch panel for air conditioning units, LOSSNAY, and general equipment using the Mitsubishi Electric DIDO controller (PAC- YG66DCA). TC-24A can control up to 24 units/24 groups. (*1) TC-24A controls and monitors the air conditioning units of each group. - Page 9 Touch panel / Buttons ① Display/Touch panel TC-24A features a 5"-wide color LCD touch panel. Touch panel displays the operation status of the units. Function settings such as week schedule settings are accessed through the touch panel. The backlight lights up when the panel is touched, and lights off after certain period of time.
-
Page 10: Screen Configuration [Home Screen]
Screen Configuration [HOME screen] GRID screen 1. How to switch the HOME screen Touch tubs to change the display format. Zoom-out screen : Displays the GRID screen : Displays the GRID (zoom-out) screen. : Displays the GRID (zoom-in) screen. : Displays the LIST screen. - Page 11 HOME screen GROUP screen To the GROUP screen To the GRID screen To the GROUP To the LIST screen screen LIST screen To the LIST screen To the GRID screen [Main Menu screen] To the Main Menu screen To the HOME screen...
-
Page 12: Buttons [Home Screen]
Buttons [HOME screen] HOME screen GRID (zoom-out) screen GRID (zoom-in) screen Displays the operation status of all groups. Displays the detailed operation status of each group. (10 groups on 3 pages maximum) ① ② ③ ④ ⑤ ⑤ ⑦ ⑧ ⑥... - Page 13 • Scheduled operation is enabled. • Hold function is enabled. Note : Depending on the units to be controlled and TC-24A settings, available button operations and displays vary. : While the icon is displayed on the button, the operation is locked.
-
Page 14: Icon Displays [Home Screen]
Icon Displays [HOME screen] (1) GRID (zoom-out) screen [ON (BG Color: blue)] Group No. •Filter sign •Check mark [OFF (BG Color: black)] [Error (BG Color: yellow)] Error display Communication error at startup [Air conditioning ] (2) GRID (zoom-in) screen [ON (BG Color: blue)] [OFF (BG Color: black)] •Check mark •ON/OFF operation... - Page 15 (3) LIST screen Display selection button Display selection button [ON (BG Color: blue)] [OFF (BG Color: black)] [ON (BG Color: blue)] [OFF (BG Color: black)] Group No. Room (Group) name Schedule/Hold Schedule/Hold Interlocked ventilation (LOSSNAY) operation Room Room Interlocked •Check mark temperature temperature temperature...
- Page 16 Icon Displays [HOME screen] (cont'd) GROUP screen Group name [Air conditioning unit group] During operation Group No. Mode Error Room temperature Startup (communication) Set temperature error Filter sign Scheduled operation /HOLD HOLD-ON Fan speed Louver HOLD-OFF Air direction Interlocked ventilation (LOSSNAY) SETBACK mode Set maximum/minimum limit temperature...
- Page 17 [LOSSNAY group] During operation While the unit is stopped Fan speed display [General equipment group] During operation While the unit is stopped General equipment icon Remaining OVERRIDE time Interlocked ventilation (LOSSNAY) Displays the remaining time before the setback Displays the operation status of the ventilation control resumes to the original set temperature that is interlocked with the air conditioning when the maximum/minimum limit temperature...
-
Page 18: Basic Operations
Basic Operations Screen selection GRID (zoom-out) screen appears at the initial startup. Select the desired screen. GRID (zoom-out) screen ① ② ③ GRID (zoom-in) screen LIST screen ① ① ② ② ③ ③... -
Page 19: Screen Selection
Stops or starts the operation of the air conditioning units through Group icon ① *ON/OFF operation lock When TC-24A restricts its own ON/OFF operation, the icon above will appear. The ON/OFF operation will be disabled. *During receiving the external input signal The ON/OFF function cannot operate when the following displays appear. -
Page 20: Operating The Air Conditioning Unit Group
Basic Operations (cont'd) Operation Screen (Group screen) Operating the Air conditioning unit group Basic operations (GROUP screen) ① ② ⑤ ③ ④ ON/OFF operation Touching ③ allows the indoor units in the displayed group to start/stop. When interlocked ventilation units (LOSSNAY) are connected, the ventilation units work in conjunction with indoor units. -
Page 21: Temperature Setting
The setback function automatically switches the operation mode between cooling Setback mode and heating to maintain the room temperature within the set temperature range. The following figure shows the operation patterns of the unit that the setback operation is executed. Sample) When occupants are away from home During setback operation Night... - Page 22 Basic Operations (cont'd) While the setback operation is performed • To change the setback maximum/minimum limit temperature Touch the set temperature button to display the screen for setback maximum/minimum limit temperature. (2) Then, one of the screens on the right appear. Touch the OVERRIDE button (2) to switch (2)...
-
Page 23: Interlocked Ventilation Units(Lossnay)/Fan Speed/Air Direction/Louver Settings
Interlocked ventilation units (LOSSNAY)/ Fan speed/Air direction/Louver settings ④ Touch ④ to show the Interlocked ventilation units (LOSSNAY)/Fan speed/Air direction/Louver settings screen. A : Interlocked ventilation units (LOSSNAY). *When interlocked ventilation units are not connected, [A] does not appear. Stop High B : Fan speed (useable only while the unit is in operation) * [B] does not appear when the model does not have this function. -
Page 24: Hold Function Setting
Basic Operations (cont'd) Hold Function Setting HOLD-ON HOLD-OFF Touch ⑤ to enable/disable the hold function. * When the hold function is enabled, the current operation status is retained until the hold function is disabled. * When this function is enabled, the scheduled operation will be prohibited as well as the following remote controller operations: Stop, operation mode change, preset temperature change. -
Page 25: Multiple Group Selection Screen
Disabling functions Lock Buttons When TC-24A locks its own functions for ON/OFF, Mode, Temperature, Fan speed, Hold, the icon above will appear on the corresponding buttons, and the functions will be disabled. When the ON/OFF function is locked, the Collective ON/OFF button will be disabled. -
Page 26: Menu Screen [Button Settings]
Menu Screen [Button Settings] The Main Menu screen allows the user to configure the basic settings. To access the [Main Menu] screen, touch the icon at the right top corner of the [HOME] or the [Menu] screen. Main Menu screen (Top screen) ①... - Page 27 Displays the operation schedule settings. Restrictions Settings (1) Lock Buttons Locks the buttons on the TC-24A. (2) Set Temperature Range Limit Sets the temperature range for the local remote controllers. (3) Prohibit Remote Controller Locks the buttons* on the local remote controllers.
-
Page 28: Usage - Main Menu Settings
Usage - Main Menu Settings Time and Schedule screen Main Menu > Time and Schedule Main Menu > Time and Schedule > Date and Time Setting the date, time, and display format ① ② ④ ③ ⑤ Date tab Time tab Date and Time button on the [Time and Schedule] screen. - Page 29 Main Menu > Time and Schedule > Set Schedules Setting the operation schedule Types of schedules * Number of operation patterns * Use to assign an operation pattern for each day of the week to be Weekly Maximum 12 patterns executed every week.
- Page 30 Usage - Main Menu Settings Time and Schedule screen (cont'd) Schedule Setting Procedures 1. Touch the [Set Schedules] button on the [Time and Schedule] screen to access the Select Group and Days/Dates screen. [One Day] tab [Weekly] tab On the 1-day tab, a 7-day schedule (Sunday through Saturday) including today will be displayed. Current date Day (Date) grid •...
- Page 31 ① To configure a new pattern using a blank pattern Touch a blank pattern number, then touch the button to access the Edit Pattern screen. ⇒ See Step 5. If one or more patterns have been configured and saved, the message "When copying other setting patterns to edit, select the pattern to be copied, and touch the OK button."...
- Page 32 Usage - Main Menu Settings Time and Schedule screen (cont'd) 6. Set the time and the actions for the selected event number. Change values with the buttons. Touch the icons repeatedly to select the desired one. * Functions that can be included in each event are as follows: Execution Time, ON/OFF, Mode, Fan Speed, Air Direction, Set Temperature, and Local Remote Controller Operation Prohibition settings.
- Page 33 Copying and pasting the existing settings 1. Touch the item to be copied. * Items that can be copied include the weekly schedule for a group, the pattern assigned to a specific day, or the event that is scheduled to take place at a certain time. * A red checkmark will appear on the selected item(s).
- Page 34 Usage - Main Menu Settings Time and Schedule screen (cont'd) Change values with the buttons. Touch the icons repeatedly to select the desired one. Inserting an event 1. Touch a row to insert an event above it. * A red checkmark will appear on the selected row. 2.
- Page 35 Main Menu > Time and Schedule > Check Current Settings Checking the Weekly/One Day Schedule Settings 1. Touch the [Check Current Settings] button on the [Time and Schedule] screen. [One Day] tab Day (Date) grid Displays scheduled patterns [Weekly] tab •...
-
Page 36: Restrictions Settings
Usage - Main Menu Settings Restrictions Settings Main Menu > Restrictions Settings Main Menu > Restrictions Settings > Lock Buttons Locking or unlocking access to the ON/OFF, Mode, Set Temperature, Fan Speed, and HOLD settings from the HOME screen ① Enable/Disable Lock button Enables or disables the Lock buttons. - Page 37 To lock or unlock buttons 1. Touch the Lock Buttons button on the [Restrictions Settings] screen. 2. Enter the Login password on the [Login] screen, and touch the Login button. Refer to below for the details on log in. If the correct password is entered, the [Lock Buttons] screen will appear. 3.
- Page 38 Usage - Main Menu Settings Restrictions Settings (cont'd) Main Menu > Restrictions Settings Main Menu > Restrictions Settings > Set Temperature Range Limit Setting the temperature ranges within which the operating temperatures can be set from the local remote controllers ①...
- Page 39 • Operation from the local remote controllers that are connected to Mr. SLIM® cannot be prohibited from the TC-24A. Use the button lock function on the controllers instead. • If the temperature limits are set too high or low, the system changeover function may not work properly and the units may not operate in the expected mode (Cooling or Heating).
- Page 40 Usage - Main Menu Settings Restrictions Settings (cont'd) Main Menu > Restrictions Settings Main Menu > Restrictions Settings> Prohibit Remote Controller Locking or unlocking access to the ON/OFF, Mode, Set Temperature, and Filter Sign Reset settings from the local and other system controllers. ①...
- Page 41 3. Click on the ② Group button on the [Prohibit Remote Controller] screen to select the groups and change their settings. 4. Touch the ③ Edit button. 5. Use the buttons labeled ④ in the pop-up window at right to lock or unlock access to each item.
-
Page 42: Control Panel
Usage - Main Menu Settings Control Panel Main Menu >Control Panel Main Menu > Control Panel > Display Format Setting the basic display settings on the HOME and MENU screens Display Format button on the [Control Panel] screen. Touch the buttons to flip ・... - Page 43 To show or hide the room temperature Touch the ③ Room Temperature button on the [Display Format] screen (1/3) to switch between Show and Hide . Display Format screen : 2/3 ⑦ ⑧ ⑤ To show or hide the Cooling/Heating mode icon (during Auto mode) when the operation mode is enabled Touch the ⑦...
- Page 44 Usage - Main Menu Settings Control Panel (cont'd) Main Menu >Control Panel Main Menu > Control Panel > Display Format Display Format screen : 3/3 ⑪ ⑩ ⑨ ⑫ ⑤ Group Name Setting screen To change the group name 1. Touch the ⑨ Jump to the group name setting screen button on the [Display Format] screen (3/3). 2.
- Page 45 Character input screen ① ④ ⑤ ③ ② ⑥ To enter character strings such as group names (maximum 16 characters), perform the following procedure. To enter a character string 1. Touch ① [ABC], [abc], or [1( )] to select upper case alphabets, lower case alphabets, or numerical and other symbols.
- Page 46 Usage - Main Menu Settings Control Panel (cont'd) Main Menu >Control Panel Main Menu > Control Panel > Button Settings Controller button settings ① ② ③ ④ To select the groups on which to execute the SET BACK function ⑤ ⑧...
- Page 47 To select the groups on which to execute the Show Group Name List button HOLD function Shows a list of group names in a pop-up window. 1. Touch the ② Hold Button Setting button on the [Button Setting] screen. 2. Read the pop-up message, and touch the OK button to confirm. 3.
- Page 48 Usage - Main Menu Settings Control Panel (cont'd) Main Menu >Control Panel Main Menu > Control Panel > Volume Control Adjusting the volume and brightness Volume Control button on the [Control Panel] screen. Touch the ① ② ③ To adjust the volume 1.
- Page 49 Main Menu > Control Panel > Touch Panel Calibration Calibrating the touch panel ④ Touch Panel Calibration button on the [Control Panel] screen. 1. Touch the Touch the OK button on the confirmation screen. 2. Touch the white squares ( ④ ) in the order they appear, starting from the top left corner. 3.
-
Page 50: System Management
Usage - Main Menu Settings System Management Main Menu > System Management Main Menu > System Management > Status List Checking or resetting the Error or Filter Sign Status List button on the [System management] screen. Touch the Error source address ①... - Page 51 ③ Number of Filter Signs detected Displays the number of Filter ④ Signs that have been detected. ⑤ To check the information about the units whose Filter Signs are turned on 1. Touch the ③ [Filter Sign] tab, and check the number of units whose Filter Signs are turned on, the names of the groups they belong to, and their addresses.
- Page 52 Usage - Main Menu Settings System Management (cont'd) Main Menu > System Management Main Menu > System Management > System-changeover Using the System-Changeover function Use the System-Changeover mode to automatically change a group of indoor units that are connected to the same outdoor unit over between the Cooling and Heating modes according to temperature changes.
- Page 53 ② Block No. ③ Displays the block number. All units in each group are operated in the same operation mode. The TC-24A automatically creates blocks based Group list on the refrigerant pipe connection information and the group setting Displays the number assigned to the indoor unit groups that are connected to information on each unit.
-
Page 54: Maintenance
Maintenance Touch Panel Cleaning screen To clean the touch panel This screen allows the user to wipe the touch screen without accidentally changing the settings. 1. Touch the icon on the [Main menu] screen to bring up the screen shown above. 2. -
Page 55: Troubleshooting
If the external input interface receives an emergency stop signal, all indoor units and the LOSSNAY that are controlled by the TC-24A will stop. The TC-24A controller, low-level system controllers, or local remote controllers will not respond until the emergency stop signal input is removed. - Page 56 Specifications Receives power from the power supply unit for transmission line or 30VDC *1 Power source from outdoor units via the M-NET transmission cable. The power (for connection to M-NET only) consumption coefficient * of Touch Controller is "4." Operating temperature range 0~40˚C [32˚F~104˚F] Temperature Operating conditions...
Need help?
Do you have a question about the TC-24A and is the answer not in the manual?
Questions and answers