Table of Contents
Advertisement
Quick Links
Advertisement
Table of Contents

Related Manuals for Bosch HBG636E 1 Series


Summary of Contents for Bosch HBG636E 1 Series
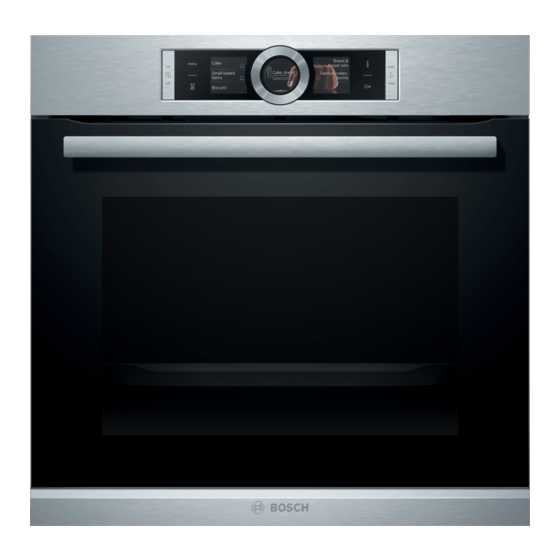
- Page 1 Oven HBG636E.1 User manual and installation instructions [en]...
-
Page 2: Table Of Contents
en Safety Futher information and explanations are available online: Table of contents 1 Safety Observe the following safety instructions. 1.1 General information INFORMATION FOR USE ¡ Read this instruction manual carefully. Safety .............. 2 ¡ Keep the instruction manual and the Preventing material damage ....... 4 product information safe for future refer- ence or for the next owner. -
Page 3: Safety
Safety en 1.4 Safe use WARNING ‒ Risk of scalding! Always place accessories in the cooking com- The accessible parts of the appliance become partment the right way round. hot during operation. → "Accessories", Page 9 ▶ Never touch these hot parts. ▶ Keep children at a safe distance. WARNING ‒ Risk of fire! Hot steam may escape when you open the Combustible objects that are left in the cook-... - Page 4 en Preventing material damage WARNING ‒ Risk of electric shock! WARNING ‒ Risk of suffocation! Incorrect repairs are dangerous. Children may put packaging material over ▶ Repairs to the appliance should only be their heads or wrap themselves up in it and suffocate. carried out by trained specialist staff. ▶...
-
Page 5: Environmental Protection And Saving En- Ergy
Environmental protection and saving energy en Objects on the cooking compartment floor at over Leaving the appliance to cool down with the door open 50 °C will cause heat to build up. The baking and will damage the front of neighbouring kitchen units over roasting times will no longer be correct and the enamel time. -
Page 6: Familiarising Yourself With Your Appliance
en Familiarising yourself with your appliance Note: Allow frozen food to defrost before cooking. The appliance requires: ¡ This saves the energy that would otherwise be re- ¡ A maximum of 1 W when the appliance is in opera- quired to defrost it. tion with the display switched on ¡... - Page 7 Familiarising yourself with your appliance en ¡ Heating line 4.4 Touch displays Once operation has started, the white line below the The touch displays act as both displays and controls. temperature turns red as the cooking compartment The touch displays are divided into several text fields. heats up.
- Page 8 en Operating modes For most operating modes, the lighting is switched on To ensure that the appliance cools down more quickly during operation. The lighting switches off again when after operation, the cooling fan continues to run for a the operation ends. certain period afterwards.
-
Page 9: Accessories
Accessories en Symbol Type of heating Temperature What it's used for and how it works range Possible additional options Grill, large area Grill settings: Grill flat items such as steak and sausages, or make toast. Grat- 1 = low inate food. 2 = medium The entire area below the grill element becomes hot. -
Page 10: Before Using For The First Time
You will find a comprehensive range of products for your appliance in our brochures and online: www.bosch-home.com Accessories vary from one appliance to another. When Baking tray Slide the tray in with the sloping purchasing accessories, always quote the exact E.g. -
Page 11: Basic Operation
Press to switch the appliance on. ▶ a The Bosch logo appears in the display. The types of Requirement: The operating mode "Types of heating" heating then appear. has been selected. Press the type of heating that you want to use. -
Page 12: Rapid Heating
en Rapid heating Use the control ring to scroll through longer pas- sages of text. 9 Rapid heating To save time, you can shorten the preheating time for Set a suitable type of heating and a temperature of set temperatures of 100 °C and higher. at least 100 °C. -
Page 13: Meat Probe
Meat probe en The cooking time can be set in one-minute incre- ¡ Food will spoil if you leave it in the cooking com- ments up to one hour, and then in five-minute incre- partment for too long. ments. The end time is calculated automatically. Requirements Press ... - Page 14 en Meat probe The meat probe has three measuring points. Ensure 11.3 Setting the meat thermometer that at least the middle measuring point is inserted The meat probe measures the temperature inside the in the food. food between 30 °C and 99 °C. Thin Insert the meat probe into the thickest Requirements pieces...
- Page 15 Assist en 11.4 Core temperatures of different foods Beef Core temperature in °C Here you can find the suggested core temperatures of Tenderloin or sirloin, medium rare 55 - 62 various different foods. These suggestions depend on the quality and the size/ Tenderloin or sirloin, well done 65 - 75 shape of the food.
- Page 16 en Assist appears in the display. You do not have to imple- Category Food/dishes ment any further settings. Cakes, Cakes Observe the information about the baking sensor. bread ¡ Cakes in tins → "Dishes with baking sensor", Page 16 ¡ Cakes on a baking tray ¡...
-
Page 17: Childproof Lock
Childproof lock en Note: During operation with the baking sensor, do If you do not want to continue cooking, press "End" not open the appliance door. The baking result and switch off the appliance using . would no longer be correct and the baking sensor To continue cooking the dish, press "Continue cook- mode is terminated. -
Page 18: Sabbath Mode
en Basic settings 15 Basic settings You can configure the appliance to meet your needs. Basic setting Selection Pull-out system Not retrofitted (if shelf sup- 15.1 Overview of the basic settings ports and a single set of pull-out rails are fitted) Here you can find an overview of the basic settings Retrofitted (if two or three and factory settings. -
Page 19: Cleaning And Servicing
Cleaning and servicing en Using oven cleaner in a hot cooking compartment New sponge cloths contain residues from production. damages the enamel. Wash new sponge cloths thoroughly before use. ▶ Never use oven cleaner in the cooking compartment ▶ when it is still warm. Remove all food remnants from the cooking com- ▶... - Page 20 en Cleaning and servicing Area Suitable cleaning agents Information Glass cover for ¡ Hot soapy water Use oven cleaner to remove very heavy soiling. the oven light Rails ¡ Hot soapy water Soak any heavily soiled areas and use a brush or steel wool. Note: To clean thoroughly, detach the rails.
- Page 21 Cleaning assistance en 17 Cleaning assistance The cleaning assistance is a quick alternative for occa- a The appliance starts to heat and the cooking time sionally cleaning the cooking compartment. The clean- counts down. ing assistance softens dirt by vaporising the soapy wa- a When the time has elapsed, a signal sounds.
- Page 22 en Appliance door 19 Appliance door To clean the appliance door thoroughly, you can disas- When the hinges are not secured, they can snap shut with great force. semble the appliance door. Make sure that the locking levers are always either ▶...
- Page 23 Appliance door en Clean the appliance door. 19.3 Removing the door panes → "Suitable cleaning agents", Page 19 Dry the door panes and refit them. WARNING ‒ Risk of injury! The hinges on the appliance door move when the door is opened and closed, which could trap your fingers. 19.4 Fitting the door panes Keep your hands away from the hinges.
-
Page 24: Troubleshooting
en Troubleshooting 20 Troubleshooting You can rectify minor faults on your appliance yourself. WARNING ‒ Risk of electric shock! Read the troubleshooting information before contacting Incorrect repairs are dangerous. after-sales service. This will avoid unnecessary costs. Repairs to the appliance should only be carried out ▶... - Page 25 Next time, set lower or higher values. ▶ Tip: A lot of information about the food preparation and corresponding setting values can be found on our website www.bosch-home.com. 20.2 Replacing the oven light bulb Requirements ¡ The appliance is disconnected from the power sup- If the light in the cooking compartment fails, change ply.
- Page 26 en Disposal Depending on the appliance model, the glass cover Screw the glass cover on. may have a sealing ring. Put the sealing ring in posi- Take the tea towel out of the cooking compartment. tion. Connect the appliance to the power supply. 21 ...
-
Page 27: How It Works
How it works en General information about roasting in cookware Baking on one level Shelf position ¡ Use heat-resistant, ovenproof cookware. Tall baked items and tins/dishes on ¡ Place the cookware on the wire rack. the wire rack ¡ Glass cookware is best. Shallow baked items/baking trays ¡... - Page 28 en How it works 23.6 List of foods Recommended settings for a variety of foods, sorted into food categories. Recommended settings for various types of food Food Accessory/cookware Shelf pos- Heating Temperature in Cooking time in ition function °C mins → Page 8 Sponge cake, 2 levels Ring-shaped tin ...
- Page 29 How it works en Food Accessory/cookware Shelf pos- Heating Temperature in Cooking time in ition function °C mins → Page 8 Chicken, 1 kg, unstuffed Wire rack 200 - 220 60 - 70 Small chicken portions, 250 g Wire rack 220 - 230 30 - 35 each Goose, unstuffed, 3 kg...
- Page 30 en How it works Recommended settings for slow cooking Food Accessory/cook- Shelf pos- Searing Heating function Temperature Cooking ware ition time in → Page 8 in °C time in mins mins Duck breast, medium Uncovered cook- 6 - 8 45 - 60 rare, 300 g each ware Fillet of pork, whole...
-
Page 31: 24.1 General Installation Instructions
Installation instructions en Recommended settings for baking Food Accessory/cookware Shelf pos- Heating Temperature in Cooking time in ition function °C mins → Page 8 Viennese whirls Baking tray 140 - 150 25 - 40 Viennese whirls Baking tray 140 - 150 25 - 40 Viennese whirls, on 2 levels Universal pan... - Page 32 en Installation instructions ¡ Check the appliance for damage after un- WARNING ‒ Risk of fire! packing it. Do not connect the appliance if It is dangerous to use an extended power it has been damaged in transit. cord and non-approved adapters. ¡ Before starting up the appliance, remove ▶...
- Page 33 Installation instructions en ¡ Observe different national installation instructions for the hob. 24.4 Installation underneath a hob If the appliance is installed under a hob, the following The minimum worktop thickness a is based on the minimum dimensions must be adhered to (including required minimum clearance ...
- Page 34 en Installation instructions ¡ Ensure that air exchange is guaranteed in accord- ¡ Contact protection must be guaranteed by the in- ance with the diagram. stallation. Electrically connect the appliance with the protective contact plug Note: The appliance must only be connected to a pro- tective contact socket that has been correctly installed.
- Page 35 Installation instructions en Screw the appliance into place. For handleless kitchens with vertical bar handle strips: Attach a suitable filling piece in order to cover ‒ any sharp edges and to guarantee a safe install- ation. Pre-drill aluminium profiles to establish a screw ‒...
- Page 36 Expert advice for your Bosch home appliances, help with problems or a repair from Bosch experts. Find out everything about the many ways Bosch can support you: www.bosch-home.com/service Contact data of all countries are listed in the attached service directory.
Need help?
Do you have a question about the HBG636E 1 Series and is the answer not in the manual?
Questions and answers