Table of Contents
Advertisement
Advertisement
Table of Contents

Related Manuals for Bosch HBG634B.1B


Summary of Contents for Bosch HBG634B.1B
- Page 1 Oven HBG634B.1B [en] Instruction manual...
-
Page 3: Table Of Contents
Basic settings......17 www.bosch-home.com and in the online shop Changing the basic settings ....17 www.bosch-eshop.com... -
Page 4: Intended Use
Intended use 8Intended use (Important safety information Read these instructions carefully. Only then I n t e n d e d u s e will you be able to operate your appliance General information safely and correctly. Retain the instruction i n f o r m a t i o n I m p o r t a n t s a f e t y manual and installation instructions for future... -
Page 5: Halogen Lamp
Important safety information Halogen lamp Warning – Risk of injury! Scratched glass in the appliance door may ■ Warning – Risk of electric shock! develop into a crack. Do not use a glass When replacing the cooking compartment scraper, sharp or abrasive cleaning aids or bulb, the bulb socket contacts are live. -
Page 6: Causes Of Damage
Causes of damage ]Causes of damage 7Environmental protection General information Your new appliance is particularly energy-efficient. Here C a u s e s o f d a m a g e t e c t i o n E n v i r o n m e n t a l p r o you can find tips on how to save even more energy Caution! when using the appliance, and how to dispose of your... -
Page 7: Getting To Know Your Appliance
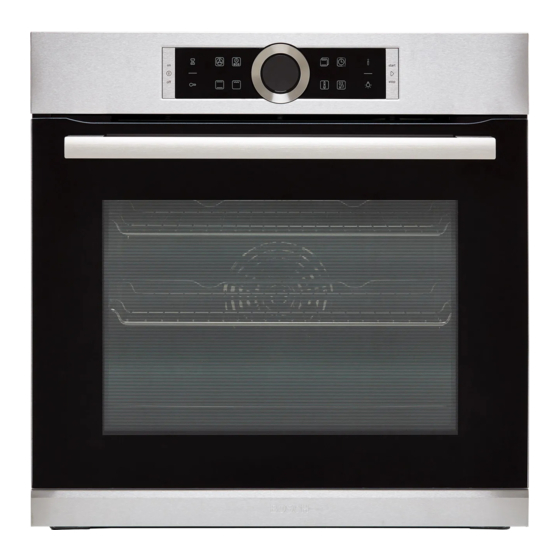
Getting to know your appliance Control panel *Getting to know your In the control panel, you can use the various buttons, appliance touch fields and the rotary selector to set the different appliance functions. The current settings are shown on the display. -
Page 8: Display
Getting to know your appliance Rotary selector Display ring You can use the rotary selector to change the The display ring can be found around the outside of the adjustment values shown on the display. display. In most selection lists, such as the temperature, you If you change a value, the display ring shows you where have to turn the rotary selector back the other way if you are in the selection list. -
Page 9: Further Information
Getting to know your appliance Hot air grilling 30-300 °C For roasting poultry, whole fish and larger pieces of meat. The grill element and the fan switch on and off alternately. The fan circulates the hot air around the food. Grill, large area Grill settings: For grilling flat items for grilling, such as steaks and sausages, for making toast,... -
Page 10: Accessories
Accessories Locking function _Accessories The accessories can be pulled out approximately halfway until they lock in place. The locking function Your appliance is accompanied by a range of prevents the accessories from tilting when they are A c c e s s o r i e s accessories. -
Page 11: Optional Accessories
Accessories Optional accessories Glass roasting dish (5.1 litres) HEZ915001 For stews and bakes. You can buy optional accessories from the after-sales service, from specialist retailers or online. *You will find Particularly suitable for the "Meals" operating a comprehensive range of products for your appliance mode. -
Page 12: Before Using For The First Time
Before using for the first time Switch off the appliance after the indicated cooking time KBefore using for the first using the ÿ On/Off button. time After the cooking compartment has cooled down, clean the smooth surfaces with soapy water and a dish cloth. Before you can use your new appliance, you must Cleaning the accessories t h e f i r s t t i m e... -
Page 13: Operating The Appliance
Switching on the appliance Press the ÿ On/Off button to switch on the appliance. All touch fields light up red. The Bosch logo appears on the display, and then the first heating type in the selection list. -
Page 14: Rapid Heating
Time-setting options To change the type of heating, first press the l Start/ OTime-setting options Stop button to interrupt the operation and then touch the ! field. The first type of heating appears with the corresponding default temperature. Use the rotary Your appliance has different time-setting options. -
Page 15: Setting The End Time
Time-setting options Press the l Start/Stop button to start. Before starting, touch the s field again once. The cooking time counts down on the display. The end time is highlighted white in the display. Set a later end time using the rotary selector. The appliance begins to heat up. -
Page 16: Setting The Timer
Childproof lock Setting the timer AChildproof lock The timer runs alongside other settings. You can set it at any time, even if the appliance is switched off. It has Your appliance is equipped with a childproof lock so its own audible signal so that you can tell whether it is C h i l d p r o o f l o c k that children cannot switch it on accidentally or change the timer or a cooking time which has elapsed. -
Page 17: Basic Settings
Basic settings QBasic settings Fan run-on time Recommended* Minimum Pull-out system Not retrofitted* (for rails and single pull- There are various settings available to you in order to B a s i c s e t t i n g s out system) help use your appliance effectively and simply. -
Page 18: Sabbath Mode
Sabbath mode FSabbath mode DCleaning agent With the Sabbath mode, a cooking time of up to 74 With good care and cleaning, your appliance will retain S a b b a t h m o d e C l e a n i n g a g e n t hours can be set. -
Page 19: Surfaces In The Cooking Compartment
Cleaning agent Cleaning enamel surfaces Door panels Hot soapy water: Clean the smooth enamel surfaces with a dish cloth Clean with a dish cloth and then dry with a soft and hot soapy water or a vinegar solution. Then dry with cloth. -
Page 20: Rails
Rails Attaching the rails pRails The rails only fit on the right or the left side. For both rails, ensure that the curved rods are at the front. With good care and cleaning, your appliance will retain R a i l s First, insert the rail in the middle of the rear socket ‚, its appearance and remain fully functional for a long until the rail rests against the cooking compartment... -
Page 21: Appliance Door
Appliance door Fitting the appliance door qAppliance door Reattach the appliance door in the opposite sequence to removal. With good care and cleaning, your appliance will retain A p p l i a n c e d o o r When attaching the appliance door, ensure that both its appearance and remain fully functional for a long hinges are inserted straight into the opening (figure... -
Page 22: Removing And Installing The Door Panels
Appliance door Clean the stainless steel inlay in the cover with Note: Warning – Risk of injury! stainless steel cleaner. Clean the rest of the door Scratched glass in the appliance door may develop ■ cover with soapy water and a soft cloth. into a crack. -
Page 23: Trouble Shooting
Trouble shooting Rectifying faults yourself 3Trouble shooting You can often easily rectify technical faults on the appliance yourself. If a fault occurs, there is often a simple explanation. T r o u b l e s h o o t i n g If a dish does not turn out exactly as you wanted, you Before calling the after-sales service, please refer to the can find many tips and instructions for preparation at... -
Page 24: Replacing The Bulb In The Top Of The Cooking Compartment
Customer service Replacing the bulb in the top of the cooking 4Customer service compartment If the cooking compartment light bulb fails, it must be Our after-sales service is there for you if your appliance replaced. Heat-resistant, 40 watt, 230 V halogen bulbs C u s t o m e r s e r v i c e needs to be repaired. -
Page 25: Tested For You In Our Cooking Studio
Tested for you in our cooking studio Baking on two levels JTested for you in our Use 4D hot air. Baked items that are placed into the cooking studio oven on trays or in baking tins/dishes at the same time will not necessarily be ready at the same time. - Page 26 Tested for you in our cooking studio If you wish to follow one of your own recipes when Types of heating used: baking, you should use a similar baked item in the table < 4D hot air ■ as a reference. You can find additional information in % Top/bottom heating ■...
-
Page 27: Roasting And Braising
Tested for you in our cooking studio Tips on baking You want to find out whether the cake Push a cocktail stick into the highest point on the cake. If the cocktail stick comes out clean with no dough res- is completely cooked in the middle. - Page 28 Tested for you in our cooking studio Very hot steam may escape when opening the lid after Roasting and braising in cookware cooking. Lift the lid at the rear, so that the hot steam It is more convenient to roast and braise meat in can escape away from you.
- Page 29 Tested for you in our cooking studio Dish Accessories/cookware Shelf po- Type of Temperature in Cooking time in sition heating °C mins. Belly wire rack 160-170* 30+25 < Gammon joint wire rack 160-170* 30+30 < Poultry Chicken, whole wire rack 170-180* 25+25 <...
-
Page 30: Grilling
Tested for you in our cooking studio Grilling Roasting in cookware It is more convenient to roast and braise meat in Here, you can find information on grilling poultry, meat cookware. You can take the joint out of the cooking and fish, as well as toast. - Page 31 Tested for you in our cooking studio Grilling flat pieces Recommended setting values Flat pieces of poultry, meat and fish, such as steaks, In the table, you can find the ideal heating type for your drumsticks and burgers, can be prepared well using the poultry, meat and fish, in addition to toast.
-
Page 32: Convenience Products
Tested for you in our cooking studio Dish Accessories Shelf po- Type of Temperature in °C / Cooking time sition heating Grill setting in mins. Pork Steaks, height 2 cm wire rack 1st side 10-12 2nd side 5-7 Chops, height 2-3 cm wire rack 1st side 10-12 2nd side 9-10... - Page 33 Tested for you in our cooking studio Shelf positions Recommended setting values Use the indicated shelf positions. In the table, you can find the ideal heating type for various dishes. Temperature and cooking time depend Baking on one level on the quantity and composition of the product. Setting When baking on one level, use the following shelf ranges are indicated for this reason.
-
Page 34: Yogurt
Tested for you in our cooking studio Dish Accessories/cookware Shelf po- Type of Tempera- Cooking sition heating ture in °C time in mins. Food, chilled Lasagna, 400 g ovenproof dish on wire rack 190-210 30-35 Lasagna, 1,2 kg ovenproof dish on wire rack 180-200 30-40 Food, frozen... -
Page 35: Acrylamide In Foodstuffs
Tested for you in our cooking studio Types of heating used: . Hotair Eco ■ # Top/bottom heating Eco ■ Dish Accessories/cookware Shelf po- Type of Tempera- Cooking sition heating ture in °C time in mins. Baking Victoria Sponge Cake 2x Ø20 cm tins 170-180 30-40... -
Page 36: Slow Cook
Tested for you in our cooking studio Slow cook Cookware Use shallow cookware, e.g. a glass/porcelain serving Slow cooking is a technique for cooking food over a dish. Place the cookware into the cooking compartment long period at low temperatures. For this reason, it is to preheat it. -
Page 37: Drying
Tested for you in our cooking studio Dish Cookware Shelf posi- Type of Searing time Tempera- Cooking tion heating in mins. ture in °C time in mins. Lamb Saddles of lamb, boneless, 200 g each Cookware, uncovered 120-180 Leg of lamb, boned, medium, 1 kg, tied Cookware, uncovered 150-210 * Preheat Tips for slow cooking... -
Page 38: Preserving
Tested for you in our cooking studio Preserving with clamps. Place the jars into the universal pan so that they do not touch each other. Pour 500 ml hot You can preserve fruit and vegetables using your water (approx. 80 °C) into the universal pan. Use the appliance. -
Page 39: Proving Dough
Tested for you in our cooking studio Proving dough Final fermentation Place your baked item into the oven at the shelf position You can prove yeast dough in your appliance more indicated in the table. quickly than at room temperature. Use the top/bottom If you want to preheat the oven, the final fermentation heating type. -
Page 40: Test Dishes
Tested for you in our cooking studio Test dishes Double-crusted apple pie on two levels: position dark- coloured springform cake tins above each other so that These tables have been produced for test institutes to they are offset. facilitate the inspection of the appliance. Cakes in tinplate springform cake tins: bake on one In accordance with EN 60350-1:2013 and IEC level with top/bottom heating. - Page 41 Tested for you in our cooking studio Type of heating used: Grilling ( Grill, large area Also slide in the universal pan. The liquid will be caught ■ and the cooking compartment stays cleaner. Dish Accessories Shelf posi- Type of Grill Cooking tion...
- Page 44 *9001028834* 9001028834 941217...
Need help?
Do you have a question about the HBG634B.1B and is the answer not in the manual?
Questions and answers