Table of Contents
Advertisement
Quick Links
Advertisement
Table of Contents

Related Manuals for Omni International Bead Ruptor 4


Summary of Contents for Omni International Bead Ruptor 4
- Page 1 Bead Ruptor Bead Mill Homogenizer User Manual...
- Page 3 This product is warranted to be free from defects in material and workmanship for a period of ONE YEAR from the date of delivery. OMNI International will repair or replace and return free of charge any part which is returned to its factory within said period, transportation prepaid by user, and which is found upon inspection to have been defective in materials or workmanship.
- Page 4 AVERTISSEMENT : Les cordons d’alimentation endommagés ou usés doivent être réparés ou remplacés immédiatement par un électricien qualifié. AVERTISSEMENT : Une connexion incorrecte de l’équipement peut entraîner un risque d’électrocution. AVERTISSEMENT : N’utilisez que des cordons fournis par OMNI International ou ceux approuvés par OMNI International.
- Page 5 Unpacking Lift foam from box. Lift unit up and off of the box bottom. DO NOT LIFT THE UNIT BY HOLDING THE LID. Remove Tool Kit and Power Cord Remove the 2 screws from the bottom of the unit. Place the unit on a stable surface. Connect power cord...
-
Page 6: Preventative Maintenance
This manual is published by OMNI International 935 Cobb Place Blvd, Kennesaw, GA 30144 USA. Copyright 2021, OMNI International, Inc. All rights reserved, including but not limited to those rights to reproduce this publication or parts thereof. Reproduction of this publication or parts thereof, or the products it describes, by any means or in any form is expressly prohibited without the written permission of OMNI International. -
Page 7: Specifications
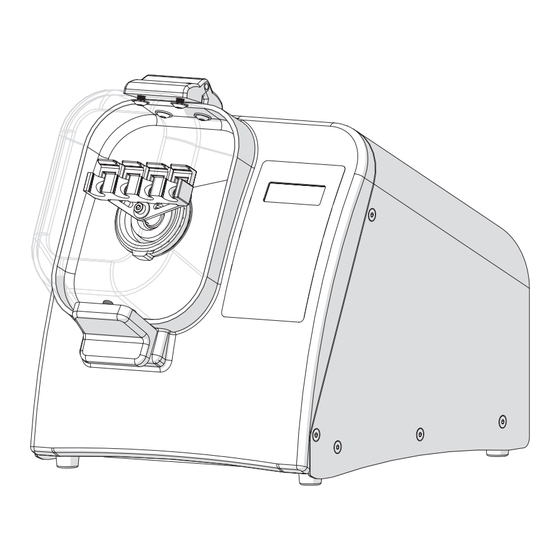
Specifications Input Voltage 19-042E 115V, 50-60Hz USA & Canada Input Voltage 19-042E 220V, 50-60Hz International Input Current 4A max Power Connector IEC 60320 C13 Fuse 6x30 mm / 4A max Overvoltage Category Pollution Degree Altitude Up to 2000 m For Indoor Use Only. Preventative Maintenance: Replace Tube holders once a year at a minimum Table of Symbols Symbol... - Page 8 Overview Speed: 5 Time: 30 1. Lid 6. Speed Control 2. Keypad 7. Timer Control 3. Lid Latch 8. Run Button 4. ON/Off Switch 9. Stop Button 5. Power Cord Port The Bead Ruptor 4 consists of the following: Description Quantity Bead Ruptor Power Cord...
-
Page 9: General Operation
General Operation Speed: 5 Time: 30 (Back of Unit) 1. Digital Display 5. Speed Setting 2. Timer 6. Run Button 3. Speed Control 7. Stop Button 4. Timer Control 8. On/Off switch 1. Power - Plug in the power cord and move the On/Off switch on back of the unit to the ON position. 2. -
Page 10: Loading Sample Tubes
Loading Sample Tubes 1.5 mL & 2 mL Tubes 7 mL Tube Carriage 7 mL Tubes OMNI Bead tubes should be used exclusively with OMNI Bead Ruptor Homogenizers. - Page 11 Changing the Tube Holder Use the supplied 3 mm Turn unit off and unplug Use the supplied 3 mm allen allen wrench to loosen tube power cord. wrench to tighten tube carriage holder screw carriage holder screw Changing the Neck Gasket Turn unit off and unplug the Slide the new neck gasket onto Use the supplied 3 mm allen...
-
Page 12: Troubleshooting
WARNING: Any service must be performed by a qualified service technician. This can be either an OMNI Technician or an end user resource. All parts need to be sourced from the OMNI International service department ADVERTISEMENT : Tout entretien doit être effectué par un technicien d’entretien qualifié. Il peut s’agir d’un technicien OMNI ou d’une ressource utilisateur final. - Page 13 Transporting the Bead Ruptor The Bead Ruptor 4 must be shipped in its original packaging. Before transporting please follow this steps. Remove all tubes, cover the unit in its plastic bag. The tube carriage will slide back. Lift the tube carriage to align the motor mount holes to the holes in the base plate.
- Page 14 Notes...
- Page 15 Notes...
- Page 16 935 Cobb Place Blvd. Kennesaw, GA 30144 800.776.4431 • 770.421.0058 www.omni-inc.com PN: 03-225-01 Rev N...
Need help?
Do you have a question about the Bead Ruptor 4 and is the answer not in the manual?
Questions and answers