Table of Contents
Advertisement
Quick Links
Advertisement
Table of Contents

Subscribe to Our Youtube Channel
Related Manuals for Grundig GT541023CW


Summary of Contents for Grundig GT541023CW
- Page 1 Dryer User Manual GT541023CW GT5410231CW 2960313001/ EN/ / 18/07/2023 11:56...
-
Page 2: Table Of Contents
11 Troubleshooting ......30 4 Technical Specifications ....12 12 Product Information Voucher..33 5 General Appearance..... 13 13 GRUNDIG UK AND IRELAND STANDARD MANUFACTURER Scope of Delivery......13 GUARANTEE TERMS AND CON- 6 First Operation ......14 DITIONS.......... -
Page 3: Please Read This Guide Before
1Please read this guide before! Dear Customer, Thank you for choosing Grundig product. We hope you get the best efficiency from this product which has been manufactured with high quality and state of the art technology. Please make sure you read and understand this guide and supplementary documentation fully before using the product. -
Page 4: Safety Instructions
2 Safety Instructions • This section includes the in- fects. Water frozen in the formation necessary to pre- pump or the hoses may cause vent the risk of personal injury damages. or material damage. Our com- • Product can only be used to pany shall not be held respons- dry and ventilate laundry which ible for damages that may oc-... -
Page 5: Electrical Safety
• Keep the loading door of the • Power cord should not be product closed even when not kinked, pinched and should not operated. come in contact with any heat • Cleaning and user mainten- source. ance operations should not be •... -
Page 6: Installation Safety
• Take required precautions • Do not ever remove the ad- against the risks of falling and justable legs. tipping of the product. Do not • Place the product on a clean, crash or drop the product level and hard surface and bal- when transporting. - Page 7 • Install the product in a place Do not use the product without where periodic maintenance a grounding conforming with and cleaning can be done with regional/national regulations. ease. • Plug the product in a grounded • Place the product with its back socket that conforms with the surface facing the wall.
-
Page 8: Usage Safety
the manufacturer, an author- • When the product is placed on ized service centre or a person the washing machine, their specified by the importer. combined weight when full • Do not use the product without could be around 180 kg. Place fixing it on floor-high ground, the products on a sturdy floor such as on a table or cabinet... - Page 9 the drying process. Check the and your machine's drying per- seams of the laundry you are formance may be adversely af- going to dry. fected. • The items with hair spray, with • Clean the fiber filters after residue of hair product or sim- each drying process.
-
Page 10: Maintenance And Cleaning Safety
immediately after the comple- • The fiber filter should be fre- tion of drying (For models with quently cleaned. After each heating). drying cycle, clean the fiber fil- • Do not touch the inner surface ter and the inner surface of the of the drum while adding or re- loading door. -
Page 11: Environmental Instructions
3 Environmental instructions 3.1 Compliance with the WEEE Regu- 3.3 Standard Conformity and Test In- lations and Waste Disposal formation EU Declaration of Con- formity This product does not contain The development, manufacturing the dangerous and prohibited and sales phases of this product is materials indicated in the "Reg- conducted in conformity with the ulation on The Control of... -
Page 12: Technical Specifications
4 Technical Specifications Height (adjustable) (cm) 84,6 * / 86,6 ** Width (cm) 59,8 Depth (cm) 60,7 Capacity (max.) (kg) 10 *** Net weight (±10%) (kg) Voltage Power See the type label**** Main Model Code * Min. height: Height with the adjustable legs closed. ** Max. -
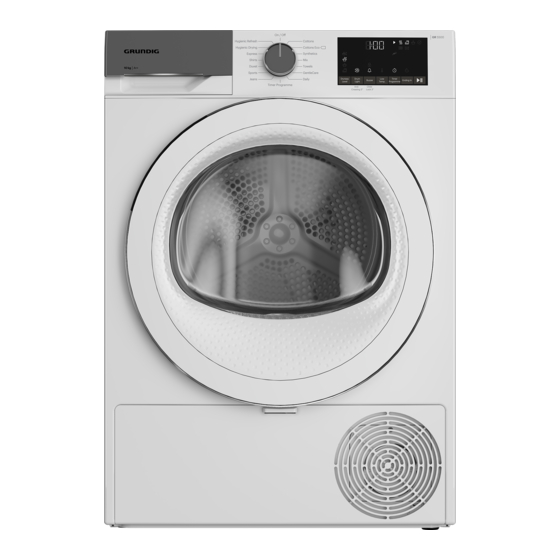
Page 13: General Appearance
5 General Appearance 1 Upper table 2 Control Panel 3 Type label 4 Kickplate opening handle 5 Ventilation grills 6 Adjustable legs 7 For the models with tank located at 8 Fiber filter the bottom, the water tank is inside the kickplate 9 Loading door 10 Power cord... -
Page 14: First Operation
6 First Operation Remove the protective foil and adhesive ad- After the device is installed vertising label if available in your product. • operate the machine for the first time ac- cording to user’s manual. However, please do not remove the labels (e.g. -
Page 15: Removing The Shipping Safety Group
Ignore this warning if the product system does not contain R290*. The dryer has R290 refrigerant gas. R290 is an environmentally friendly but flammable cooling gas. Make sure the air intake of the dryer is open and well ventilated. Keep pos- sible flame sources away from the dryer. -
Page 16: Adjusting The Legs
7.5 Moving the Drying Machine Fix the water discharge hose at a maximum height of 80 cm. • Drain the water in the drying machine Ensure that the water discharge completely. hose does not get kinked, collapsed • If the product is connected via direct dis- or pressed on between the dis- charge, remove the hose connections. -
Page 17: Electrical Connection
lamps used in this appliance should be res- This appliance must be earthed If istant to inappropriate physical conditions the fitted moulded plug is not suit- such as temperatures over 50 °C. able for your socket, then the plug should be cut off and an appropri- 7.8 Electrical Connection ate plug fitted. -
Page 18: Preparation
Washer/dryer combination Do not stack washing machine on top of the tumble dryer. This would damage both appliances and guarantees would become void. It is also unsafe to stack an appliance on top of another without using a suitable and approved stacking kit obtained from specialist retailers. -
Page 19: Correct Load Capacity
• Make sure the filters are clean. Refer to 8.5 Correct Load Capacity maintenance and cleaning section for de- tails. • For models with flue, follow the flue con- nection rules specified in the guides and clean the flue. • During drying session, properly ventilate the environment where the drying ma- chine is located. -
Page 20: Running The Product
9 Running the Product 9.1 Control Panel 1 On/Off/Programme selection button. 2 Dryness level selection button. 3 Drum light and wrinkle prevention se- 4 Audible warning and child lock selec- lection button. tion button. 5 Low temperature selection button. 6 Time program selection button. 7 End time selection button. -
Page 21: Program Selection And Consumption Chart
• Ensure that no laundry is jammed to the loading door. • Do not close the loading door with force. • Select the desired program by using On/ Off program selection button and the ma- chine will turn on. • Selecting the program with the On/Off program selection button does not mean that the program will get started. -
Page 22: Auxiliary Functions
You can dry your feather filled and fiber filled textiles that are drying machine safe in one piece. In this program you can dry double size Duvet quilts, pillows and coats in single piece. Turn clothes such as coats, jackets inside out for drying. -
Page 23: Warning Indicators
Audible Warning 2. Select the desired program and repeat the End Time selection process. Drying machine makes an audible warning when the program is completed. Press the Cancelling the End Time Function “Audible Warning” button if you do not want If you want to cancel the end time count- audible warning. -
Page 24: Starting The Program
9.7 Starting the Program 9.9 Changing the Program After It Is Started Press the Start/Standby button to start the program. You can change the program you selected Start/Standby and Drying indicators turn on to dry your laundry with a different program to show that program has started. -
Page 25: Cancelling The Program
Adding laundry after the drying op- The inside of the drying machine eration starts may cause the dried shall be extremely hot when you laundry inside the drying machine cancel the program during machine to mix with wet laundry and leave operation, so run the refreshing pro- the laundry damp at the end of op- gram to allow it to cool down. - Page 26 3. Remove the second part (outer filter) by pulling it upwards. 5. Clean both filters under running water in reverse direction of fiber accumulation with your hand or with a soft brush. Dry the filters before placing them back. Ensure that hair, fiber and cotton balls do not fall into the open slot where the filters are installed.
-
Page 27: Cleaning The Sensor
3. Clean the metal surfaces of the sensor with a soft cloth dampened with vinegar and then dry. 4. Clean the metal surfaces of the sensor 4 times a year. NOTE: Do not use metal tools to clean the sensor’s metal surfaces. Due to fire and explosion hazard, do not use solutions, cleaning ma- terials or similar materials to clean... -
Page 28: Cleaning The Condenser
If the condenser cleaning icon is blinking, check the metal surface. Clean the fiber, if there is any. It must be checked at least every 6 months. 1. Open the kickplate by pulling its handle. 2. Remove the water in the water tank. 2. - Page 29 After the cleaning process is completed, Clean the fiber on the metal surface of the place the air deflector cover to its place, condenser with damp cloth or with the close the latches by moving them and brush on the air deflector in up - down dir- close the kickplate.
-
Page 30: Troubleshooting
Do not use abrasive materials or steel wool to clean the drum. Do not put weight on the kickplate when it is open. 11 Troubleshooting Drying operation takes too long. • Fiber filter (interior and exterior filters) pores may be clogged. >>> Wash the fil- •... - Page 31 • There might be a power outage. >>> • A layer may be formed in the fiber filter Press the Start / Standby / Cancel button pores that leads to clogging. >>> Wash to start the program. the filters with warm water and dry. •...
- Page 32 Steam programs aren't starting. (In • If you are using the eco-friendly filter fea- products with steam function) ture, make sure that the filter cloth is at- tached to the plastic part. >>>Insert the • There may not be enough water in the filter cloth into the plastic part if it is not machine for the program >>>...
-
Page 33: Product Information Voucher
12 Product Information Voucher It complies with the Statutory Commission Regulation (EU) No 392/2012. Supplier name or trademark GRUNDIG 7188235930-GT541023CW /7188237470- Model name GT5410231CW Normal capacity (kg) With flue Drying Machine type With con- • denser Energy efficiency class (1) Annual Energy Consumption (kWh) (2) 281.9... -
Page 34: Grundig Uk And Ireland
13GRUNDIG UK AND IRELAND STANDARD MANUFACTURER GUARAN- TEE TERMS AND CONDITIONS Your new Grundig product is guaranteed against faulty materials, defective components or manufacturing defects. The standard guarantee starts from the date of original purchase of the product, and lasts for a period of twenty four (24) months unless Beko plc (the “Manufacturer”) agrees to extend the guarantee for the product in writing. - Page 35 11. Optional extras, where available (i.e. extendable feet) are supplied on a chargeable basis only. Does Grundig offer replacements? This is a repair-only guarantee. On occasion, the Manufacturer may at its sole discretion, replace your product with a new product instead of carrying out a repair. Where a replace- ment is offered, this would normally be an identical model but when this is not possible, a model of similar specification will be provided.
-
Page 36: Guarantee Terms And Con
60 months parts and labour guarantee by register- ing within 90 days of the original purchase date. To make a claim against your Grundig Eco Inverter Motor Guarantee (the “Guarantee”), all customer and product details must be registered with Beko plc using the procedure out- lined below. - Page 37 Data Protection Laws and General Data Pro- tection Regulations (GDPR). You can opt into this service during the registration process. Further details are available at http://www.Grundig.co.uk/cookie-and-privacy. • These Terms and Conditions are governed by the laws of England and Wales; manufac- turer: Beko plc, Beko House, 1 Greenhill Crescent, Watford WD18 8QU.
- Page 38 UK Mainland & Northern Ireland: 0333 207 9920 Landline or mobile calls to 0333 numbers cost no more than calls to geographic numbers 01 or 02, and are charged at the basic rate. Calls from landlines and mobiles are included in free call packages but please check with your telephone service provider for exact call charges.
Need help?
Do you have a question about the GT541023CW and is the answer not in the manual?
Questions and answers