Table of Contents
Advertisement
Quick Links
Advertisement
Table of Contents

Subscribe to Our Youtube Channel
Related Manuals for Grundig GT 56824 CW


Summary of Contents for Grundig GT 56824 CW
- Page 1 Dryer User Manual GT 56824 CW 2960313012_EN/ 28-05-21.(11:18)
- Page 2 If you have any questions or concerns, please call our contact centre or find help and information online at www.grundig.co.uk Explanation of symbols used throughout this User Manual The following symbols are used in the user guide: Danger that may cause death or injury Read the manual.
-
Page 3: Table Of Contents
Table Of Contents 1 Safety Instructions ................5 1.1 Intended use .....................5 1.2 Safety of children, vulnerable persons and pets ..........5 1.3 Electrical Safety ....................6 1.4 Transporting safety ....................7 1.5 Installing safety ....................7 1.6 Usage safety .....................9 1.7 Maintenance and cleaning safety ..............11 1.8 Lighting safety ....................11 1.9 Steam program safety ..................12 1.10 UV Function safety... - Page 4 6 Running the product ................21 6.1 Control Panel ....................21 6.2 Symbols ......................21 6.3. Preparation of drying machine ................21 6.4 Program selection and consumption chart ............22 6.5 Auxiliary functions ....................24 6.6 Warning indicators ...................25 6.7 Starting the program ..................25 6.8 Child Lock .......................25 6.9 Changing the program after it is started ............25 6.10 Cancelling the program ..................26 6.11 End of program .....................26...
-
Page 5: Safety Instructions
1 Safety Instructions This section includes the safety instructions necessary to prevent the risk of personal injury or material damage. • Our company shall not be held responsible for damages that may occur if these instructions are not observed. • Installation and repair operations shall always be performed by Authorized Service. -
Page 6: Electrical Safety
• Electrical products are dangerous for children and pets. Children and pets shall not play with the product, climb on or get inside the product. • Keep the product door closed even when not operated. Children or pets could be locked inside the product and suffocate. •... -
Page 7: Transporting Safety
1.4 Transporting safety • Unplug the product prior to transport, empty the water tank and if any, remove the water drain connections. • This product is heavy, do not handle it by yourself. • Take required precautions for the product against falling and tipping. Do not crash or drop the product when transporting. - Page 8 • Install the product where periodic maintenance and cleaning can be done with ease. • Place the product with its back surface to the wall (for heater models). • After placing the product, ensure that the back wall does not come in contact with any extrusion (a water tap, electrical outlet etc.).
-
Page 9: Usage Safety
Suitable Instalment Table for Washing Machine and Drying Machine Depth Measurement (DM: Drying Connection Kit Type Machine, WM: Washing Machine) DM ≤ WM Plastic - 54/60 cm (with/without arch) DM - WM = max. 10 cm DM ≤ WM Plastic - 46cm (with/without arch) DM - WM = max. - Page 10 • Laundry softeners or similar products shall be used in align with the laundry softener instructions. • Do not use the drying machine without the fibre filter. • Do not allow fibre accumulation around the drying machine. • To prevent back draft of gas in the room from the devices that consume other fuels, including open fire, appropriate ventilation shall be provided (for models with flue).
-
Page 11: Maintenance And Cleaning Safety
• Do not use materials such as household cleaning agents, soaps, detergents, gas, gasoline, alcohol, wax, etc. to clean the product. • The fibre filter shall be regularly cleaned. After each drying cycle, clean the fibre filter and the inner surface of the loading door. •... -
Page 12: Steam Program Safety
1.9 Steam program safety • Applicable to products with steam program. • Steam programs only use distilled water or condensed water in the water vessel of the machine. Do not use mains water or additives. When using condensed water in the water vessel, it should be filtered and cleared of fibres. - Page 13 • Keep children away while using any programs that the UV-C lamp turned on. • It can cause allergies, don’t breathe directly. • This product contains a lamp that emits UV-C rays. Do not look directly to the light source as the bulb is turned on with naked eyes. •...
-
Page 14: Environmental Instructions
: < 100mW Conformity declaration for CE Arcelik A.S. hereby declares that this appliance complies with Directive 2014/53/EU. The complete text of the EU declaration of conformity is available in the following internet address: – Products, from :support.grundig.com Dryer / User manual... -
Page 15: Your Drying Machine
3 Your drying machine 3.1 Technical specifications Height (Min. / Max.) 84,6 cm / 86,6 cm* Width 59,8 cm Depth 60,7 cm Capacity (max.) 8 kg** Net weight (± %10) 44 kg Voltage Rated power input See type label*** Model code * Min. -
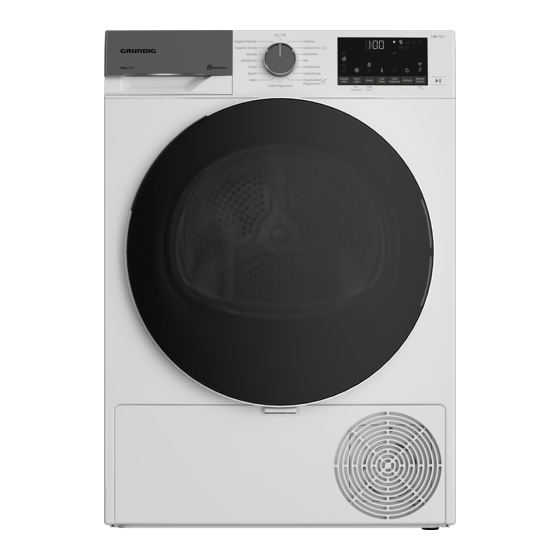
Page 16: General Appearance
3.2 General appearance 3.3 Scope of delivery 1. Water 6. Water discharge filling cap* hose* 2. Filter drawer 7. Pure spare Water* sponge* 8. Odour 3. User Capsule Manual Group* 4. Drying 9. Brush* basket* 5. Drying 1. Upper table 10. -
Page 17: Installation
4 Installation • Once the drying machine is installed, the connections must stay stable. After Read the “Safety Instructions” first! placing the drying machine, ensure that the back wall does not come in contact Before consulting the nearest Authorized with any extrusion (a water tap, electrical Service for installing the drying machine, see outlet etc.). -
Page 18: Water Connection
4.3 Water connection 4.4 Adjusting the stands Instead of periodically draining the water accumulated in the water tank, you can Until the drying discharge via the water discharge hose machine stands level supplied with the drying machine. and sturdy, adjust the stands by turning Connecting the water drainage hose them left and right. -
Page 19: Preparation
5.3 Preparing the laundry to be dried 5 Preparation Items such as coins, metal parts, needles, nails, screws, stones etc. may damage the drum group of the product or may cause functional Read the “Safety Instructions” first! operation issues. Therefore check all laundry that will be loaded to the product. -
Page 20: Correct Load Capacity
• If you are using environment friendly filter, you are not required to clean the filter after every cycle. When the environment friendly icon is lit on the screen, change the filter cloth. 5.5 Correct load capacity NOTICE If the laundry in the product exceed maximum load capacity, it may not... -
Page 21: Running The Product
6 Running the product 6.1 Control Panel 1. On/Off/Program Selection button. 6. Low temperature sellection button. 2. Start / Stand-by button. 7. Audible warning and child lock selection button. 3. Remote Control. 8. Wrinkle prevention selection button and 4. End time selection button. Drum light button. -
Page 22: Program Selection And Consumption Chart
6.4 Program selection and consumption chart Programmes Programme Description You can dry your heat-resistant cotton textiles with this programme. A drying setting suitable for the thickness Cottons 1000 of the products to be dried and the desired level of dryness should be selected. It dries single layer, casual cotton textiles in the most Cottons Eco 1000... - Page 23 It is the programme that you can dry your washed products you want to provide with extra hygiene (baby Hygienic Drying clothes, underwear, towels, etc.). It provides high hygiene for your textiles via heat effect. You can use this programme for your dry clothes and laundry that you want to provide with hygiene without Hygienic Refresh washing them.
-
Page 24: Auxiliary Functions
6.5 Auxiliary functions You can add or remove laundry Dryness level within end time. Displayed time is Dryness level button is used for adjusting to the sum of normal drying time and desired dryness. Program time may change end time. End Time LED turns off at depending on the selection. -
Page 25: Starting The Program
6.7 Starting the program 6.9 Changing the program after it is started Press the Start/Stand-by button to start the program. You can change the program you selected to dry your laundry with a different program after Start/Stand-by and Drying indicators turn on to the drying machine starts running. -
Page 26: Cancelling The Program
If the Wrinkle Prevention mode is active and the laundry is not Adding laundry after the drying removed after the program is operation starts may cause the completed, the wrinkle prevention dried laundry inside the drying function activates for 2 hours to machine to mix with wet laundry prevent the laundry inside the and leave the laundry damp at the... - Page 27 Getting the Homewhiz Application Using the remote connection: You can get the Homewhiz application from the Switch the product to Download program application stores of your device. You can use mode, observe that the Wifi icon is illuminated if the below QR codes to access the applications the Wifi is turned on in the product.
-
Page 28: Maintenance And Cleaning
7 Maintenance and cleaning Ensure that hair, fibre and cotton balls do not fall into the slot where the filters are installed. Read the “Safety Instructions” first! • Open both of the fibre filters (outer and inner) and remove the fibres with your hands or 7.1 Fibre Filters (internal and with the brush on the air deflector. -
Page 29: Cleaning The Sensor
• Insert the fibre filters on one another and 7.2 Cleaning the sensor place it back in its place. The drying machine has humidity sensors that detect whether the laundry is dry. To clean the sensors: Open the drying machine loading door. If the machine is hot due to drying operation, wait until it cools. -
Page 30: Emptying The Water Tank
7.3 Emptying the water tank 7.4 Cleaning the condenser During drying, the moisture is removed from The hair and the fibre that are not collected by the laundry and condensed, then the water the fibre filter accumulates on the metal surface is accumulated in the water tank. - Page 31 Clean the fibre on the metal surface of the condenser with damp cloth or the brush on the air deflector in up - down direction. Do not clean with left - right direction since it will damage the metal plates of the condenser.
-
Page 32: Troubleshooting
8 Troubleshooting Drying operation takes too long. Fibre filter (interior and exterior filter) pores may be clogged. >>> Wash the fibre filters with warm water and dry. Condenser front side may be clogged. >>> Clean the front side of the condenser. The ventilation grills in front of the machine may be closed. - Page 33 The lighting inside the drying machine does not turn on. (In models with lamp) The drying machine might not have been turned on using On/Off button. >>> Check that the drying machine is turned on. Lamp might be malfunctioning. >>> Contact Authorized Service to replace the lamp. Wrinkle prevention icon or light is lit.
-
Page 34: Electrical Connection
9. Electrical Connection manufacturer, its service agent or similarly qualified people. Make sure that you have an earthed power Do not operate without the top outlet socket rated at 13 amps (minimum). cover fitted. Risk of injury. 9.1 Attention! When installed, the socket must be Important reachable after installation, or a separate switch (which can disconnect the two poles) - Page 35 Accidental damage, misuse or abuse of a product. An attempted repair of a product by anyone other than a Grundig Approved Engineer (the “Engineer”). Installation or use of a product where such installation or use fails to meet the requirements contained in this guarantee or the User Instructions Booklet.
- Page 36 11. Optional extras, where available (i.e. extendable feet) are supplied on a chargeable basis only. Does Grundig offer replacements? This is a repair-only guarantee. On occasion, the Manufacturer may at its sole discretion, replace your product with a new product instead of carrying out a repair.
- Page 37 60 months parts and labour guarantee by registering within 90 days of the original purchase date. To make a claim against your Grundig Eco Inverter Motor Guarantee (the “Guarantee”), all customer and product details must be registered with Beko plc using the procedure outlined below.
- Page 38 Please take a few moments to complete the details below, as you will need this information when you call us, or to use our online services. When you call us you may be required to input your serial number into your telephone keypad. For help please visit grundig.co.uk/support/model-finder •...
- Page 39 PRODUCT FICHE Complying Commission Delegated Regulation (EU) No 392/2012 GRUNDIG Supplier name or trademark GT56824CW Model name 7188236060 Rated capacity (kg) Air Vented Type of Tumble Dryer Condenser A+++ Energy efficiency class 176,8 Annual Energy Consumption (kWh) Automatic Type of Control...
Need help?
Do you have a question about the GT 56824 CW and is the answer not in the manual?
Questions and answers