Hama 00054873 Operating Instructions Manual
Hide thumbs
Also See for 00054873:
- Operating instructions manual (25 pages) ,
- Quick manual (82 pages) ,
- Quick manual (99 pages)
Table of Contents
Advertisement
Quick Links
00054873
(DIR3020BT)
Digital Radio
Digital-Radio
Operating Instructions / Bedienungsanleitung / Mode d'emploi / Instrucciones de uso /
Руководство по эксплуатации / Istruzioni per l'uso / Gebruiksaanwijzing / Οδηγίες χρήσης / Instrukcja obsługi /
Használati útmutató / Návod k použití / Návod na použitie / Manual de instruções / Kullanma kılavuzu /
Manual de utilizare / Bruksanvisning / Käyttöohje / Работна инструкция / Betjeningsvejledning / Manuelt stasjonssøk
V3
Advertisement
Table of Contents

Related Manuals for Hama 00054873


Summary of Contents for Hama 00054873
- Page 1 00054873 (DIR3020BT) Digital Radio Digital-Radio Operating Instructions / Bedienungsanleitung / Mode d‘emploi / Instrucciones de uso / Руководство по эксплуатации / Istruzioni per l‘uso / Gebruiksaanwijzing / Οδηγίες χρήσης / Instrukcja obsługi / Használati útmutató / Návod k použití / Návod na použitie / Manual de instruções / Kullanma kılavuzu /...
-
Page 2: Table Of Contents
TABle Of cONTeNTS 1. Table of contents 1. Table of contents ............2 2. - Page 3 TABle Of cONTeNTS 11.4 Countries..............18 11.5 Popular .
- Page 4 TABle Of cONTeNTS 17. Screen settings ............35 17.1 Display illumination .
-
Page 5: Introduction
INTRODUcTION 2. Introduction Thank you for choosing a Hama product. Take your time and read the following instructions and information completely. Please keep these instructions in a safe place for future reference. If you sell the device, please pass these operating instructions on to the new owner. -
Page 6: Safety Instructions
SAfeTy INSTRUcTIONS 3. Safety instructions • The product is intended for private, non-commercial use only. • Protect the product from dirt, moisture and overheating and use it in dry rooms only. • As with all electrical products, this device should be kept out of the reach of children. •... -
Page 7: Information And Notes Before Getting Started
Note on the UNDOK app A detailed description of the UNDOK app and all of its functions can be found in our UNDOK Guide at: www.hama.com - > 00054873 - > Downloads Note – Optimising reception • For best reception, ensure that the antenna is fully extended and vertical. -
Page 8: Setting Up The Radio And Accessories
SeTTING UP THe RADIO AND AcceSSORIeS 5. Setting up the radio and accessories 5.1 Rear view Designation function Mains connection Connection of the enclosed mains adapter to the power supply Analogue connection with wired headphones with 3.5 mm jack Headphones connection (3.5 mm) connection Update port USB-B connection for updating the firmware... -
Page 9: Front View
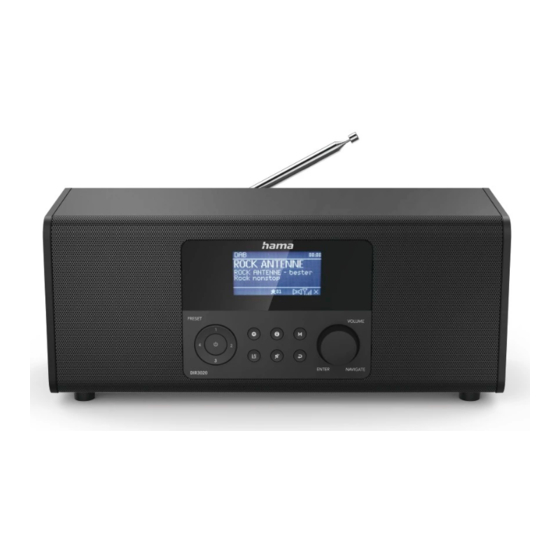
SeTTING UP THe RADIO AND AcceSSORIeS 5.2 front view Button Designation 1/2/3/4 Button 1-4 Power button List of favourites Settings Mute Information Back Mode Navigation/OK/Volume... -
Page 10: Operating Concept
OPeRATING cONcePT 6. Operating concept 6.1 General operation Icon Designation function Hand symbol Press once Hand symbol Press multiple times Hand symbol Press repeatedly Hand symbol Hold for 3 seconds Button Designation function • Navigation forwards in the current menu Rotary knob •... -
Page 11: Managing Favourites
OPeRATING cONcePT 6.3 Managing favourites Button Designation function • Short key press: Access favourite storage space 1 for current playback mode [PReSeT 1] button • long key press: Save the current station to favourite storage space 1 • Short key press: Access favourite storage space 2 for current playback mode [PReSeT 2] button... -
Page 12: Getting Started
• The power supply unit is suitable for mains voltages between 100 and 240 V, and is thus operable on almost any AC power grid. Please note that a country-specific adapter may be necessary. • You can find an appropriate selection of Hama products at www.hama.com. Once the product has been connected to mains power, initialisation takes place. -
Page 13: Prepare The Network Connection/Internet Connection
GeTTING STARTeD 7.2 Prepare the network connection/Internet connection You can integrate this radio into a local network. To receive internet radio or access non-local media (streaming, such as Spotify Connect), the network must be connected to the internet. 7.3 WlAN/Wi-fi connection (wireless network) •... -
Page 14: Navigation And Controls
NAVIGATION AND cONTROlS 8. Navigation and controls Once the radio has been initialised for the first time, switch it on using the button (Power button) if required to start the product setup process. Below, the relevant steps are explained in brief. Further information can be found in the relevant detailed sections. -
Page 15: Keep Network Connected
3 - Rockantenne 4 - Bayern 1 5 - ... 6 - ... 7 - ... 12:35 12:35 Antenne Bayern Antenne Bayern Artist: Hama Artist: Hama NAVIGATe Song: Hama Song: Hama 12:35 RECALL FROM PRESET Antenne Bayern 1 - Antenne Bayern... -
Page 16: Menu Structure
MeNU STRUcTURe 9. Menu structure This device has a variety of reception methods and additional functions. These are summarised in the radio's main menu and divided into several sections. The following overview should help you to find the desired function in the menu structure quickly. The exact explanations are gone into in more detail in the following section and each operation is illustrated graphically. -
Page 17: Dab Radio
DAB RADIO 10. DAB radio This radio receives all common digital radio frequencies in the range of 174 MHz to 240 MHz (band III, channels 5A to 13F). The automatic DAB station search starts automatically when DAB mode is started for the first time. -
Page 18: Internet Radio & Podcasts
INTeRNeT RADIO & PODcASTS 11. Internet radio & podcasts This radio has the ability to play radio stations and podcasts from around the world via Internet radio. When you first enter this mode, the radio displays the possible search and narrowing filters. These can be called up later via the corresponding mode menu. By calling up the Internet Settings menu, you can access the following settings options and functions. -
Page 19: Popular
INTeRNeT RADIO & PODcASTS 11.5 Popular If the search filter "Popular" is selected, you will receive a selection of popular stations from the platform provider based on user figures. 11.6 Discover This function gives you further filter options to refine the selection of suitable search results. Origin You can limit the search to the whole world, continents or individual countries. -
Page 20: Calling Up The Administration Interface
INTeRNeT RADIO & PODcASTS 11.8 calling up the administration interface To access the administration interface, you must first determine the radio's IP address on the local network. To do this, open the Network settings display, which you will VIEW SETTINGS find under System Settings - Network &... -
Page 21: Add Your Own Stations
INTeRNeT RADIO & PODcASTS 11.9 Add your own stations To add or edit a favourite, click Change. The storage spaces of the web administration correspond to those of the radio. Changes on the radio or in the web interface are adopted accordingly. To edit or add a new station, complete the "Name"... -
Page 22: Delete Stations
INTeRNeT RADIO & PODcASTS The added station is now displayed in the radio's favourites list and on the overview page of the web portal. To access the station from the overview page, press "Play". 11.10 Delete stations To delete a saved station, press the "change" button and then "Remove". Note Please note that only stations that offer transmission in AAC or MP3 format are supported. -
Page 23: Ukw Radio
UKW RADIO 12. UKW radio This radio has a software-based VHF receiver that can receive and play analogue radio. It covers the frequency range from 87.5 MHz to 108 MHz. 12.1 Automatic station search – – OR – – The radio automatically searches for stations that can be played back with sufficient quality. As soon as a station is found, the search stops automatically and playback starts. -
Page 24: Bluetooth® Playback (Rx)
BlUeTOOTH® PlAyBAcK (RX) 13. Bluetooth playback (RX) ® This radio has a Bluetooth receiver which allows you to transfer audio content to the radio. The ® transmitting device, for example a smartphone, is connected to the radio for this purpose and the audio content is transmitted directly to the radio. -
Page 25: Routines
ROUTINeS 14. Routines This radio has comfort functions which are available in addition to traditional radio playback. 14.1 Sleep The snooze function provides you with predefined time intervals from which you can choose. Based on the selection, set a time period after which the radio is automatically switched off. MAIN MeNU Note •... -
Page 26: Timer
ROUTINeS 14.3 Timer The timer can be configured to a value of 1-99 minutes. Select the desired runtime for the timer and then confirm the selection to start the timer. When the timer expires, a signal tone sounds. TIMER TIMER TIMER 29 min ENTER... -
Page 27: System Settings - Overview
SySTeM SeTTINGS - OVeRVIeW 15. System settings - Overview The system settings are divided into four main categories under which the other settings are located. Network & Sound Submenus Network wizard WPS Setup SySTeM SeTTINGS View settings Manual settings Network settings NetRemote PIN Setup Network profile Clear network settings... -
Page 28: Network & Audio
NAVIGATe • More information is available in the free UNDOK guide from Hama. 16.1.1 Network wizard • The network wizard guides you through setting up the radio's network and Internet connection. • Immediately after starting the network wizard, all available connection points in the vicinity are Network &... -
Page 29: Pre-Shared Key (Psk)
NeTWORK & AUDIO 16.1.3 Pre-Shared Key (PSK) If you have selected "Skip WPS", you will be taken to the input mask for the pre-shared key (PSK), i.e. the password for the WLAN you are trying to connect to. Navigate between the letters (lowercase/ uppercase), numbers and special characters to enter your password in the input mask. -
Page 30: Wps Setup
NeTWORK & AUDIO 16.1.5 WPS setup • If this menu item is selected or if you want to establish a connection by pressing a button via the network wizard, the radio display shows "Press WPS button on remote station" after selecting this function. - Page 31 NeTWORK & AUDIO Wireless connection - DHcP inactive IP ADRESS Select the "Wireless connection" option and then "DHcP IP adress 2 - Bayern 3 inactive". Now enter the necessary network information such 192.168.2.100 as IP address, subnet mask, gateway address, primary DNS and Subnet mask secondary DNS in the input fields.
- Page 32 NeTWORK & AUDIO Network profile The radio automatically saves all successful network connections (profiles). This means that re- establishing these connections (for example, after the radio was disconnected from the power supply) does not require you to re-enter the network access information. To remove individual network profiles, select the corresponding network profile and confirm the selection and subsequent prompt with "yeS".
-
Page 33: Bluetooth ® Receiver (Bt Rx)
NeTWORK & AUDIO 16.2 Bluetooth receiver (BT RX) ® This radio has an integrated Bluetooth function that allows streaming (e.g. from a smartphone) on the ® radio. 16.2.1 Bluetooth receiver ® You can pair your terminal devices with the radio using Bluetooth and use this as a playback device. -
Page 34: Equaliser
NeTWORK & AUDIO 16.3 equaliser The equaliser allows you to adjust the sound of the radio to suit your preferences by amplifying or reducing the amount of bass or treble in the audio . You can choose from preconfigured profiles, adjusted to suit a variety of music genres, or create your own custom profile. -
Page 35: Screen Settings
ScReeN SeTTINGS 17. Screen settings 17.1 Display illumination 17.1.1 Operating mode The Display illumination setting refers to regular operation of the radio with the twilight sensor/auto dimmer deactivated. You can choose between "High", which corresponds to maximum intensity, SySTeM "Medium" a reduction of the illumination to approx. 60%, and "low", which corresponds to very low SeTTINGS intensity. -
Page 36: System
SySTeM 18. System The radio's general settings are summarised under the System item. 18.1 Setup wizard We recommend using the setup wizard for quick and easy first-time setup (setting of the time, date, Internet connection, etc.). SySTeM The settings included in the setup wizard can of course also be made or adjusted separately. The wizard SeTTINGS contains the settings: "Time format", "Time synchronisation", "Time zone", "Summer and winter time"... -
Page 37: Time Display
SySTeM 18.2.3 Time display You can choose between the display formats of 24 or 12 hours (am/pm) and adjust this at any time. 18.2.4 Setting the time zone You can freely choose between the available time zones of Coordinated Universal Time (UTC) and use time zones from -12 hours to +14 hours. -
Page 38: About - System Information
19.1 Info A summary of the radio's software and hardware. You can find the current software version of your device SySTeM in this information, should you require support from Hama's product advice team. SeTTINGS 19.2 Privacy Policy The data protection policy is provided by the provider of the web-based applications. -
Page 39: Technical Data
Czech, English, Danish, Dutch, German, Finnish, French, Italian, Norwegian, supported Polish, Portuguese, Slovak, Spanish, Swedish, Turkish Packaging contents Hama DIR3020BT, Power Supply, Quick Start Manual connectivity Wifi 2.4 GHz (b/g/n) / 5 GHz (a/n) Bluetooth receiver (RX): 4.2, class 1, A2DP, AVRCP ®... - Page 40 Bluetooth SIG, Inc. and ® any use of such marks by Hama GmbH & Co KG is under license. Other trademarks and trade names are those of their respective owners. All listed brands are trademarks of the corresponding companies. Errors and omissions excepted,...
Need help?
Do you have a question about the 00054873 and is the answer not in the manual?
Questions and answers