Table of Contents
Advertisement
Quick Links
Advertisement
Table of Contents

Related Manuals for Quanmax QDSD-4700


Summary of Contents for Quanmax QDSD-4700
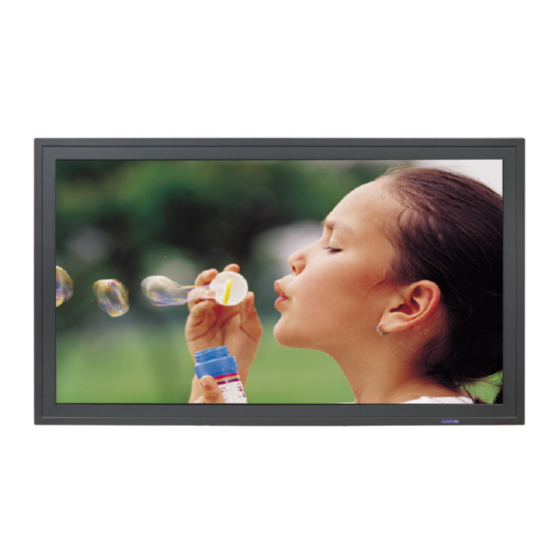
- Page 1 QDSD-4700 47" High-Definition LCD Display User’s Guide...
-
Page 2: Table Of Contents
Contents IMPORTANT SAFETY INSTRUCTIONS ...........................2 AFETY RECAUTIONS .................................2 ) ......3 NSTALLATION WHEN INSTALL THE MONITOR PLEASE FOLLOW THE INSTRUCTION ON THE MANUAL .......................................4 LEAN ....................................5 WARNING FOR USE ................................5 FEATURES ....................................6 PACKAGE CONTENTS.................................6 IMENSION ....................................8 NSTALLATION ..................................9 OWER NPUT ..................................9 OWER NTERFACE ................................9... -
Page 3: Important Safety Instructions
※ Please read this user’s manual cautiously and completely before operating this monitor. Important Safety Instructions Before using the monitor, please read this user’s manual thoroughly to help protect against damage your own and other people’s property from potential damage and ensure your own and other people personal safety. -
Page 4: Installation (When Install The Monitor, Please Follow The Instruction On The Manual )
If the power cord or plug is damaged or becomes hot, turn off the main power switch of the monitor, make sure the power plug has cooled down and remove the power plug from the outlet . If the monitor is still used in this condition, it may cause a fire or an electrical shock. Contact your dealer for replacement. -
Page 5: Use
When getting problem at installation, please contact your distributor to install for you. Don’t repair or open the monitor by yourself. It may cause a fire or an electric shock. The monitor repair, please ask your distributor. Protect and correctly use the power cord/ plug. Don't heavy press the power cord/ plug, don't step on the power cord/plug. -
Page 6: Clean
This product contains, including lead (it cause birth defects or other reproductive harm.) After handing, please wash the hands. Precautions for the remote control batteries.. Please only use the specified battery type AAA. Please be sure to insert batteries by matching the ┼ and─. Don’t recharge, heat, disassemble, short or throw batteries into a fire. -
Page 7: Features
Package Contents Unpacking QDSD-4700 is packed by the carton box. During transportation, in order to protect the monitor, QDSD-4700 is packed by cushions to be safe protect and package. Before unpacking your monitor, prepare a stable, level, and clean surface near a wall outlet for your monitor. - Page 8 Top cushion & Accessories Box The Monitor Bottom cushion Packing list Q’ty Item Q’ty Item 1 set QDSD-4700 1 pcs DVI-D 24 pin cable 1 pcs Power cord 1 pcs D-SUB 15pin cable 1 pcs User's manual 1 pcs S-VIDEO Mini Din 4 pin cable...
-
Page 9: Dimension
Dimension Dimension without stand (standard) -
Page 10: Installation
Installation Environmental state Operating temperature︰ 5℃ ~ 40℃ (Fahrenheit : 41℉ ~ 104℉) Humidity︰ max. 85% Power Input Power Cord AC Power cord This power cord is used to connect the side controls of the LCD monitor and the wall outlet. ○... -
Page 11: Connectors
Connectors Video (RCA ) input S-Video input Component Y Pb/Pr input DVI (DVI-D) input RGB(VGA) input RS-232C/RS485 input (option) Single Source Input Input Interface Name Remarks Video-IN input connecter S-video input connecter Mini Din 4 pin Y-Pb-Pr (Y-Cb-Cr) inputs Mini Din 8 pin DVI input connecter DVI-D 24 pin RGB input connecter... -
Page 12: Operating The Monitor
Operating The Monitor The Side Controller Of The Monitor Button Function Press button to turn your LCD Monitor on and off. POWER SOURCE Press button to select an input source (sequence of inputs varies when input modules are different) VGA DVI AV S-Video YPbPr (cyclical) ▲/▼... -
Page 13: Change The Rcu Battery (Rcu Option)
Change The RCU Battery (RCU option) Take out the back cover as picture (1). Replace with the new batteries as picture (2), 2 batterys( AAA, DC 3V) make sure the polarities of batteries are correct. iii. Place the back cover as picture(3). Used batteries needed to follow the city rule to be discarded. -
Page 14: Display Mode
Display Mode Main Source mode The main source mode will be changed in the sequence as follows: VGA/DVI/ Composite (AV) / S-Video/ Component (YPbPr) by remote control or press “MENU”->” ” by the side controller of the monitor. PIP(sub source) mode PIP &... -
Page 15: Osd (On Screen Display) Menu Function
OSD (On Screen Display) Menu Function Main Menu Sub-Menu Description Setting Contrast Adjust the contrast of the screen 0~60 Brightness Adjust the brightness of the screen 0~60 Adjust the picture hue of the screen Picture 0~60 (Video mode) Saturation Adjust the picture saturation of the screen 0~60 Sharpness Adjust the picture sharpness of the screen... - Page 16 Main Menu Sub-Menu Description Setting POP Function Open POP function OFF,ON Information Display Resolution OFF,ON Key Lock Select the OSD key pad lock on the monitor OFF,ON Recall Reset to the factory default setting OFF,ON Language Language setting ENGLISH(Only) H-Position Adjust the OSD menu horizontal position LEFT, MIDDLE, RIGHT V-Position...
-
Page 17: Osd Operating
OSD Operating Structure of OSD Menus Press “ ”or ” ” to adjust Press”▼” to select the value OSD menu item Press” ” to enter OSD Press “ ”or ” ” to select submenu. “On”,” Off” the setting Press “MENU/EXIT” to enter or exit OSD menu Picture Press “MENU/EXIT”... - Page 18 Advanced Press “MENU/EXIT” to enter the OSD menu Press”▼” twice and then press “ ”to select Advanced setting. Press”▼” to select the Color-Temp, Color-R,Color-G,Color-B, Auto Adjust, Auto Color, Recall setting Press“ ” or “ ”to adjust the value or select Auto Adjust, Auto Color, Recall the setting.
-
Page 19: Default Setting
Default Setting Item Default Power switch Brightness Contrast Color temp. Cool Language English Auto Adjust... -
Page 20: Supported Timing
Supported Timing Sync H-parameters V-parameters A: Total period O: Total period B: Sync. width P: Sync. width C: Back porch Q: Back porch D: Active video R: Active video E: Front porch S: Front porch Sync Horizontal (dot) Vertical (line) polarity Video Mode 31.469... -
Page 21: Specification
Specification ITEMS SPECIFICATION Screen Size 47” TFT-LCD Panel 16:9 Aspect Ratio Resolution 1920 x 1080 (HDTV) Display Area (opening) H x V 1039.68mm x 584.82 mm Pixel Pitch 0.5415(H)mm x 0.1805(V) mm Panel Display colors 16.7 M colors (8bit) Contrast Ratio 1500 : 1 (typical) Brightness 500 cd / m... -
Page 22: Troubleshooting
Troubleshooting Before calling service personnel, please check the following chart for a possible cause to the trouble you are experiencing. Perform the adjustments according to page 10 “Operation The Monitor” Refer to the following items if you can’t find a proper item listed in the Operating the Monitor or if the problem remain. -
Page 23: Appendix
Appendix Moving Notice: Moving the monitor requires at least two people. If not, it may drop and a serious injury may result. Moving/shopping the monitor, please hold the white handles and be sure to make the bundle. If not, it may drop and a serious injury may result. -
Page 24: Installation Wall Mount Kit
Installation Wall Mount kit The installation, please follow this manual instructions and refer all servicing to qualified service personnel. Moving the monitor requires at least two people.if not, it may drop and a series injury may result. Before installing, Please check the installing manual in wall mount kit box. Before installing, Please make sure the wall is strong enough ex.
Need help?
Do you have a question about the QDSD-4700 and is the answer not in the manual?
Questions and answers