
Related Manuals for Quanmax QTM-1500


Summary of Contents for Quanmax QTM-1500
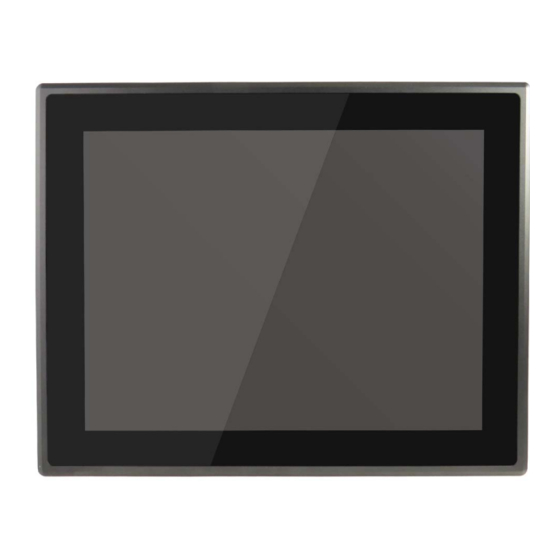
- Page 1 QTM-1500/1700/1900 15"/17"/19" Multi-touch Bezel-Free Flat Panel Monitor User’s Guide QTM-1500/1700/1900 User’s Manual...
- Page 2 © 2016 Quanmax Inc. All rights reserved. The information in this user’s guide is provided for reference only. Quanmax does not assume any liability arising out of the application or use of the information or products described herein. This user’s guide may contain or reference information and products protected by copyrights or patents and does not convey any license under the patent rights of Quanmax, nor the rights of others.
-
Page 3: Table Of Contents
Chapter 2 Getting Started ..................21 Setting up your monitor ................21 VESA Mounting ..................23 Panel Mounting..................24 Chapter 3 OSD Functions ..................27 Control Buttons..................27 Setting Instruction..................28 Function Instruction ................... 29 Chapter 4 Driver Installation..................32 QTM-1500/1700/1900 User’s Manual... -
Page 4: Figures
Figures Figure 1 I/Os ....................16 Figure 2 Control Panel Keypad ..............17 Figure 3 Mechanical Dimensions of QTM-1500 ......... 18 Figure 4 Mechanical Dimensions of QTM-1700 ......... 19 Figure 5 Mechanical Dimensions of QTM-1900 ......... 20 Figure 6 HDMI / DVI-D / VGA ..............21 Figure 7 Connect touch panel .............. -
Page 5: Tables
Tables Tables Table 1 QTM-1500/1700/1900 product specifications ........ 15 Table 2 OSD Control Button............... 27 Table 3 “Picture” Menu................29 Table 4 “Image Setting” Menu ..............29 Table 5 “Color” Menu ................. 29 Table 6 “Signal Source” Menu..............30 Table 7 “Audio” Menu................. 30 Table 8 “OSD Menu”... -
Page 6: Safety Instructions
Use extreme caution when installing or removing components. Refer to the installation instructions in this user’s guide for precautions and procedures. If you have any questions, please contact Quanmax Post-Sales Technical Support. WARNING High voltages are present inside the chassis when the unit’s power cord is... -
Page 7: Preventing Electrostatic Discharge
Static electricity can harm system boards. Perform service at an ESD workstation and follow proper ESD procedure to reduce the risk of damage to components. Quanmax strongly encourages you to follow proper ESD procedure, which can include wrist straps and smocks, when servicing equipment. - Page 8 Handle components and boards with care. Don’t touch the components or contacts on a board. Hold a board by its edges or by its metal mounting bracket. Do not handle or store system boards near strong electrostatic, electromagnetic, magnetic, or radioactive fields. QTM-1500/1700/1900 User’s Manual...
-
Page 9: Preface
Remove all items from the box. If any items listed on the purchase order are missing, notify Quanmax customer service immediately. Inspect the product for damage. If there is damage, notify Quanmax customer service immediately. Refer to “Warranty Policy” for the return procedure. -
Page 10: Warranty Policy
Quanmax or its authorized agent; or if the failure is caused by accident, acts of God, or other causes beyond the control of Quanmax or the manufacturer. Neglect, misuse, and abuse shall include any installation, operation, or maintenance of the product other than in accordance with the user’s guide. -
Page 11: Maintaining Your Computer
Quanmax. Limitation of Liability In no event shall Quanmax be liable for any defect in hardware, software, loss, or inadequacy of data of any kind, or for any direct, indirect, incidental, or consequential damages in connection with or arising out of the performance or use of any product furnished hereunder. - Page 12 Line conditioners keep a system’s AC power source voltage at a fairly constant level and, therefore, can handle brownouts. Because of this added protection, line conditioners cost more than surge protectors. However, line conditioners cannot protect against a complete loss of power. QTM-1500/1700/1900 User’s Manual...
- Page 13 Surge protectors should be used with all UPS systems, and the UPS system should be Underwriters Laboratories (UL) safety approved. QTM-1500/1700/1900 User’s Manual...
-
Page 14: Chapter 1 Introduction
Chapter 1 Introduction Overview The QTM-1500/1700/1900 is a 15" / 17" / 19" multi-touch bezel-free flat panel monitor. It features 10-point PCT multi-touch panel and enables fast / intuitive operation. Besides, it comes with a variety of display ports, including 1x HDMI, 1x DVI-D and 1x VGA, for various viewing options, and 1x USB 2.0 for touch functionality. -
Page 15: Product Specifications
Operation Temperature: 0°C ~ 50°C / 32°F ~ 122°F Storage Temperature: -20°C ~ 70°C / -4°F ~ 158°F Humidity: 0% ~ 95% Mounting VESA Mount, Panel Mount Certification CE, FCC Class A Table 1 QTM-1500/1700/1900 product specifications QTM-1500/1700/1900 User’s Manual... -
Page 16: System Tour
D-Sub 15 pin VGA connector for display output Line-Out (Green) The stereo headphone jack is used to connect the system’s audio out signal to amplified speakers or headphones. Line-In (Blue) The Line-in jack is designed to take input from a higher-powered sound source. QTM-1500/1700/1900 User’s Manual... -
Page 17: Figure 2 Control Panel Keypad
To move to the previous item, to display the previous setting function, or to decrease the setting value Exit Button To turn off the OSD menu or to move from a sub-menu to main menu and save the changes made in the sub-menu QTM-1500/1700/1900 User’s Manual... -
Page 18: Mechanical Dimensions
Chapter 1 Mechanical Dimensions 381.7 x 305.6 x 69.3 mm (W x H x D) Figure 3 Mechanical Dimensions of QTM-1500 QTM-1500/1700/1900 User’s Manual... -
Page 19: Figure 4 Mechanical Dimensions Of Qtm-1700
Chapter 1 413.0 x 343.9 x 73.3 mm (W x H x D) Figure 4 Mechanical Dimensions of QTM-1700 QTM-1500/1700/1900 User’s Manual... -
Page 20: Figure 5 Mechanical Dimensions Of Qtm-1900
Chapter 1 447.3 x 372.1 x 68.4 mm (W x H x D) Figure 5 Mechanical Dimensions of QTM-1900 QTM-1500/1700/1900 User’s Manual... -
Page 21: Chapter 2 Getting Started
Getting Started Setting up your monitor Connecting the PC Connect the HDMI / DVI-D / VGA cable from your PC to the HDMI / DVI-D / VGA port. HDMI DVI-D Figure 6 HDMI / DVI-D / VGA QTM-1500/1700/1900 User’s Manual... -
Page 22: Figure 7 Connect Touch Panel
Figure 7 Connect touch panel Turning on the monitor 1. Connect the power adapter cable to the DC jack (DC In) of QTM-1500/1700/1900 2. Connect the power cable to the power adapter 3. Connect the power cable to a power outlet 4. -
Page 23: Vesa Mounting
Use 4 screws with the appropriate length for your mounting bracket. Figure 9 VESA Mounting Hole Locations NOTE To fasten the metal shelf, your monitor must comply with VESA75 or VESA100 standard. The VESA mounting kit is optional. QTM-1500/1700/1900 User’s Manual... -
Page 24: Panel Mounting
The Panel PC can be panel mounted and comes with brackets and screws for this purpose. The required cutout for panel mounting and maximum panel thickness is shown below. Figure 10 Panel Mount Cut-out hole and maximum panel thickness (QTM-1500) Figure 11 Panel Mount Cut-out hole and maximum panel thickness (QTM-1700) -
Page 25: Figure 12 Panel Mount Cut-Out Hole And Maximum Panel Thickness
Chapter 2 Figure 12 Panel Mount Cut-out hole and maximum panel thickness (QTM-1900) QTM-1500/1700/1900 User’s Manual... -
Page 26: Figure 13 Panel Mounting (Qtm-1500)
Bracket into each by tightening the screws Bracket Openings with Bracket Opening Phillips Screwdriver (2 on top edge, 2 on each side) Figure 13 Panel Mounting (QTM-1500) Step 1 Step 2 Step 3 Remove 10 Bracket Insert a Panel Mount... -
Page 27: Chapter 3 Osd Functions
3. To display the previous setting option 4. To decrease the setting 1. To turn off the OSD menu 2. To move from a sub-menu to the <Exit> main menu and save the changes made in the sub-menu Table 2 OSD Control Button QTM-1500/1700/1900 User’s Manual... -
Page 28: Setting Instruction
Use <Up> and / or <Down> button to display the next or previous setting option or increase or decrease the setting value and then press <Menu / Enter> or <Exit> button to confirm the selection and save the setting. The frame will disappear when the setting is complete. QTM-1500/1700/1900 User’s Manual... -
Page 29: Function Instruction
Options: 0 ~ 100 Phrase Options: 0 ~ 100 Table 5 “Color” Menu Color Color Temp. Options: Cool, Warm, User Color Effect Options: Standard, Game, Movie, Photo, Vivid, User Options: 0 ~ 100 Saturation Options: 0 ~ 100 QTM-1500/1700/1900 User’s Manual... -
Page 30: Table 6 "Signal Source" Menu
OSD Timer Options: 5 ~ 60 OSD H.Position Options: 0 ~ 100 OSD V.Position Options: 0 ~ 100 OSD Transparency Options: 0 ~ 7 Language Options: English, Français (French), Deutsch (German), Español (Spanish), (Chinese) Reset Options: N/A QTM-1500/1700/1900 User’s Manual... -
Page 31: Table 9 "Information" Menu
Chapter 3 Table 9 “Information” Menu Information Options: N/A QTM-1500/1700/1900 User’s Manual... -
Page 32: Chapter 4 Driver Installation
Chapter 4 Chapter 4 Driver Installation You can download the Touch-Screen drivers for the QTM-1500/1700/1900 from our website and install as instructed there. QTM-1500/1700/1900 User’s Manual...
Need help?
Do you have a question about the QTM-1500 and is the answer not in the manual?
Questions and answers