
Subscribe to Our Youtube Channel
Related Manuals for Anova RC800


Summary of Contents for Anova RC800
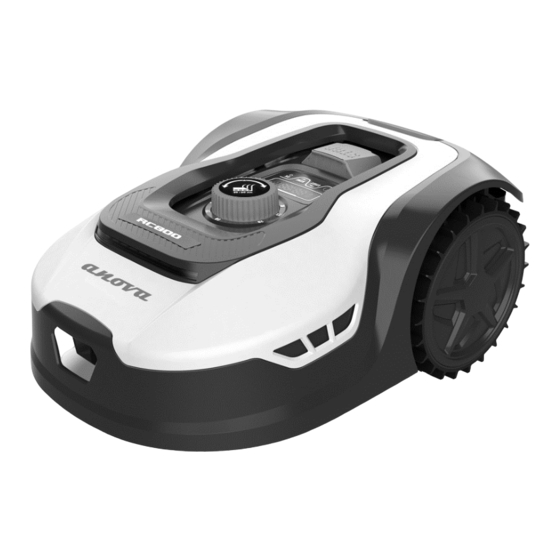
- Page 1 Instructions - User Manual ROBOT LAWNMOWER RC800 Millasur, SL. Rúa Eduardo Pondal, nº 23 - Pol. Ind. Sigüeiro 15688 - Oroso - A Coruña - 981 696 465 - www.millasur.com...
-
Page 2: Information About This Manual
ANOVA thanks you for choosing one of our products and guarantees the assistance and cooperation that has always distinguished our brand over time. This machine is designed to last for many years and to be of great use if used in accordance with the instructions contained in the user manual. - Page 3 INDEX CONTENT 1. SAFETY RULES AND PRECAUTIONS 2. SAFETY SYMBOLS 3. PRODUCT DESCRIPTION 4. TECHNICAL DATA 5. INSTALLATION 6. SETTINGS 7. TROUBLESHOOTING - ERROR CODES 8. SOFTWARE UPDATE 9. MAINTENANCE 10.CONNECT APP 11. ENVIRONMENT 12. WARRANTY CONDITIONS 13. EXPLODED 14.CE CERTIFICATE...
-
Page 4: Safety Rules And Precautions
1. SAFETY RULES AND PRECAUTIONS General • This annex presents safe operating practices for this type of machines which comply with the regulations. • It should also include information on noise levels and necessary warnings, along with the following points. Important: Please read the manual carefully before using the machine. -
Page 5: Battery Pack And Charger
condition. • Check the robotic lawnmower frequently to see if it is worn or damaged. • Replace worn or damaged parts for safety. • Be sure to charge the battery with the correct charger recommended by the manufacturer. Improper use may lead to electric shock, overheating, or leakage of corrosive liquid from the battery. -
Page 6: Safety Symbols
2. SAFETY SYMBOLS General Warning: Read the user instructions before using the product. Warning: Deactivate the product before working or lifting the machine. Warning: Keep a safe distance from the machine when it is in operation. Keep hands and feet away from rotating blades. Warning: Do not climb on the machine. -
Page 7: Symbols On The Charger
Symbols on the charger Read the user instructions. SMPS (Switch Power Supply Unit) Double insulation. SMPS (power supply unitswitched) that incorporates a switching power supply with short-circuit proof safety isolation. Disposal of this battery pack as normal household waste is not permitted. Make sure the battery is recycled in accordance with local legal requirements. -
Page 8: Technical Data
4. TECHNICAL DATA Model RC800 (RMA801M20V) Cutting area 800m Voltage 20V max. No load speed 2800rpm±100rpm Cutting diameter 180mm Cutting height 20-60mm Height-of-cut positions Maximum angle for the work area 36% (20°) Narrowest passage possible 0.8m Battery type/model 5.0Ah Li-Ion... -
Page 9: Installation
you the tool. See the accessory packaging for details. The store staff can help you and offer advice. Label: 5. INSTALLATION charging cradle charging cradle... -
Page 10: Perimeter Wire Installation
Installation of the charging base • The charging base can be placed near the house. When laying the perimeter wire, leave at least 1m of straight wire without obstacles in front of the charging base. Note: The front of the perimeter wire of the charging base must be straight for 1m without corners or obstacles to ensure proper docking of the product. - Page 11 • If an obstacle is level with the ground and it is safe for the robotic lawnmower to drive over it, such as a driveway or sidewalk, only 8 cm of space is needed between it and the perimeter wire. •...
- Page 12 • Slopes: Your robotic lawnmower has the ability to safely climb slopes up to 35% (20°), so areas steeper than this should be avoided. How to calculate the slope of your lawn: Lay the perimeter wire on slopes as shown in figures 12 and 13.
-
Page 13: Installation Check
LED light status Possible meaning Action Confirm that the power cord is properly connected to the charger It does not turn on no current and that the charger is connected to a suitable power source. The perimeter wire is connected Green light on to the right;... -
Page 14: Change Pin Code
6. SETTINGS Robotic lawnmower quick setup guide 1. Date settings icon 2. Password setting icon 3. Power on/off 4. Start work/ Upload 5.Bluetooth 6. Wi-Fi 7. Battery icon 8. Confirm (OK) 9. Return to the station / Get off 1) After the installation of the perimeter wire, you can start using the robotic lawnmower. 2) Press the on/off button (3) until the robotic lawnmower turns on. - Page 15 desired PIN code (in this example, 1234). • Then it will appear on the screen. Your PIN code has been changed successfully. *Note: For reference only Set year, date and time Setting the year, date, and time are required setup items. If you do not set these items, it will influence the scheduling time in the following settings.
- Page 16 Change the default cutoff time per day The default cutoff time is 8 hours per day, you can change it to 1-24 hours. • Hold down the buttons for 3 seconds • For example, if you want to change to 06h, when blink, use either to select the...
-
Page 17: Troubleshooting Error Codes
7. TROUBLESHOOTING – ERROR CODES Display Meaning Actions Rain delay on No action is required Robotic 1. Check if the robot is inside the work area, if it was: lawnmower 2. Check if the charging base is properly connected to the charger and if the outside the charger is connected to a suitable power source;... -
Page 18: Software Update
• When the mowing blades become dull and worn, they should be replaced with the replacement blades supplied with your robotic lawnmower. • Replacement blades are also available from your official Anova dealer. Important: After screwing the blades to the cutting deck, make sure the blade can rotate freely. -
Page 19: Replacing The Battery
Replacing the battery Warning: Power off before attempting any adjustments, replacements, or repairs. Before replacing blades, turn off your mower and put on protective gloves. If you need to replace the battery, follow these steps: • Turn your robotic lawnmower upside down. •... -
Page 20: Connect App
10.CONNECT APP The robotic lawnmower is an IOT (Internet Of Things) device. To get the full functionality of your robotic lawnmower and to always keep it up to date with the latest software, it must be connected to the Internet via your Wi-FI or Bluetooth 4.0. Download the Check your Wi-Fi Make sure you... - Page 21 • Make sure the distance between your robotic lawnmower, phone and router is as close as possible during connection. NOTE: When the robot moves to an area of your lawn with poor or no WIFI signal, the instructions sent from the app will only be executed when the mower returns to an area with a good signal.
- Page 22 2. Add your robot using the QR code 1. Register your account you have on the sticker 3. Enter the default pinof your robot 4. Network connection (Wi-Fi) (0000)
- Page 23 APP commands: Access to sending reports and contact with the manufacturer. Access to event log and work history. Explanatory tutorial of the main commands. General report of the status of the robot. Battery level, connection, connection type and rain indicator. Next scheduled job.
-
Page 24: Warranty Conditions
• The warranty ensures service coverage in all applicable cases, although the machine must be accompanied by its respective purchase invoice and be managed through an authorized Anova center. Your warranty is subject to the following conditions: • The tool has not been misused, neglected, modified or repaired by anyone other than an authorized service center. - Page 25 • Misuse, negligence, careless operation or lack of maintenance. • Defects caused by incorrect use, damage caused due to manipulations carried out by personnel not authorized by Anova or use of non-original spare parts. • Unauthorized or improper maintenance, tampering, or overloading are excluded from this warranty, as are accessories such as light bulbs, blades, and drill bits, etc.
- Page 26 13. EXPLODED...
-
Page 28: Ec Declaration Of Conformity
In the event that the machine is modified and this modification is not approved by the manufacturer and communicated to the distributor, this declaration will lose its value and validity. Machine name: ROBOT LAWNMOWER Model: RC800 (RMA801M20V) Recognized and approved standard to which it conforms: 2006/42/EC 2014/53/EU...
Need help?
Do you have a question about the RC800 and is the answer not in the manual?
Questions and answers