
Related Manuals for Energy zeroCO2 XL


Summary of Contents for Energy zeroCO2 XL
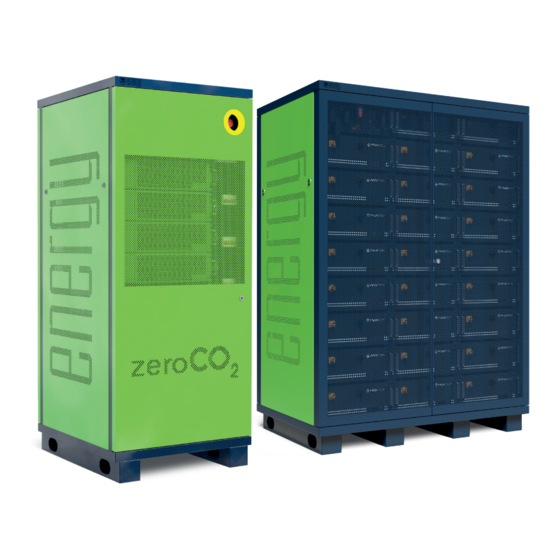
- Page 1 XL Large Storage Inverter System Operation Manual TM033 Rev.010...
- Page 3 The EMS on-board computer allows you to implement management logics customized for the type of application: increase in self-consumption, peak shaving, feeding energy into the grid in a controlled way following the daily energy price curves in the electricity market.
-
Page 4: Table Of Contents
Table of Contents 1.0 Definitions......................6 Safety .......................8 2.1 Skills of qualified personnel ...............8 2.2 Symbols ....................8 2.3 Reference standards ................11 2.4 Before connection ...................11 2.5 During the use ..................12 3.0 Introduction ....................13 3.1 Product Presentation ................13 3.1.1 Schematic diagram solution ............14 3.1.2 Working logic ................16 3.2 System architecture and operation ............17 - XL System ..............17 3.2.1 zeroCO - XL capability curve ............18 3.2.2 zeroCO - XL System parameters ..........19... - Page 5 6.0 Turning the system ON and OFF ..............62 6.1 System turn ON ..................62 6.2 System turn OFF ..................64 7.0 Maintenance ....................66 - BESS 125K BMS replacement ..........66 7.1 zeroCO - BESS 125K battery module replacement .......68 7.2 zeroCO - XL System EMS module replacement ........70 7.3 zeroCO - XL System MBMS module replacement .........72 7.4 zeroCO - XL System Switch module replacement .........74 7.5 zeroCO - XL System UPS module replacement ........76 7.6 zeroCO - XL System PCS module replacement ........78 7.7 zeroCO 8.0 Work logic and cloud monitoring ..............80 8.1 Work logic ....................80 8.2 Cloud platform monitoring ...............81...
-
Page 6: Definitions
1.0 DEFINITIONS BESS: “Battery Energy Storage system”. Electrical energy storage system based on electrochemical Li-ion batteries (LFP). Given the capacity of the individual battery, the total number of modules used defi nes the capacity of the system. BMS: “Battery Management System”. System for monitoring and managing the charge /discharge of a Li-ion battery (LFP);... - Page 7 zeroCO Defi nitions - 7...
-
Page 8: Safety
2.0 SAFETY zeroCO XL is a system that works at dangerous voltage levels both on the AC side and on the DC side, it must be installed exclusively by qualifi ed personnel and authorized. Read all safety instructions carefully before any operation and always observe them when working with the system. - Page 9 The certifi cate label for Safety by TÜV Rheinland. Danger. The batteries and components of the electrical panel provide electrical energy, causing burns or fi re risk if short-circuited or installed incorrectly. Only a qualifi ed person can perform the wiring of the system.
- Page 10 Attention. Improper settings or maintenance can permanently damage the system. Attention. Incorrect inverter parameters will lead to battery or system failure/ damage. Attention. It is very important and necessary to read the user manual (in accessories) carefully before installing or using the system. Failure to follow these instructions or the warnings in this document may result in electric shock, serious injury or death, or may damage the battery, potentially rendering it unusable.
-
Page 11: Reference Standards
Reference standards DESCRIPTION CODE Safety standards for secondary lithium IEC62619, IEC63056, IEC62477-1 batteries IEC62040-1 UN38.3 Safe Transport Standard UN38.3 Electromagnetic compatibility (EMC) EN IEC 61000-6-1:2019 EN IEC 61000-6-2:2019 EN 61000-6-3:2007+A1 EN 61000-6-4:2007+A1 IEC 61000-6-1:2016 IEC 61000-6-2:2016 IEC 61000-6-3:2006+A1 IEC 61000-6-4:2018 - 2014/30/UE UKCA EMC Standard BS EN IEC 61000-6-2:2019 BS EN 61000-6-2:2005... -
Page 12: During The Use
During the use • If the system (batteries e BMS) must be Moved interrupt AC power (if any) and DC. • It is forbidden to connect different types of batteries in the same system unless authorized by the supplier. • It is forbidden to connect batteries with defective or incompatible inverters. -
Page 13: Introduction
The EMS on-board computer allows you to implement smart management logics, customized, according to the type of application: increased self-consumption, peak shaving, feeding energy into the grid in a controlled manner or following the daily energy price curves inthe electricity market. -
Page 14: Schematic Diagram Solution
CONTATORE DI PRODUZIONE CARICO BATTERIE PRODUCTIONAL MEASUREMENT BATTERY CHARGE CO-GENERATORE POWER SUPPLY GENERATOR SISTEMA DI ACCUMULO BESS BATTERY ENERGY STORAGE SYSTEM BESS METER DI PRODUZIONE SISTEMA GESTIONE DELL'ACCUMULO PRODUCTIONAL METER BATTERY MANAGEMENT SYSTEM BMS PRODUZIONE DA FONTE ALTERNATIVA ALTERNATIVE POWER SUPPLY Fig. -
Page 15: Working Logic
Has One request higher, which results in a flattening of the network withdrawal curve. • Energy trading: it consists in optimizing the feeding of energy into the grid during the various price time slots, maximizing the resulting remuneration. (1) Available as an accessory. -
Page 16: System Architecture And Operation
Caution. The number of zeroCO - BESS 125K to be connected to the same zeroCO - XL System must be commensurate not only with the energy needs of the system but also with the size chosen for zeroCO - XL System, according to the recommendations in this manual. -
Page 17: Zeroco
Caution. It is advisable to size the system to work in charge / discharge mode 0.5C (kWh / kW ratio = 2). Caution. For working speeds > 0.5C it is recommended to install in an air- conditioned environment with temperature control. Caution. -
Page 18: Xl System Parameters
<70 <71 <73 <74 PCS topology Trasformerless zeroCO - BESS 125K minimum number Energy Management System parameters Power supply [V - Hz] 230 - 50 Self-consumption power [W] Standby power [W] <5 AC parameters Maximum power [kW] Maximum apparent power [kVA]... - Page 19 Model 120K 180K 240K DC parameters Maximum power [kW] Voltage range [V] 680 - 1000 Rated electric current [A] ±72 ±144 ±216 ±288 Maximum electric current [A] ±88 ±176 ±264 ±352 Voltage error [%] ±1 Constant voltage accuracy [%] ±1 Current error [%] ±1 Constant current accuracy [%]...
- Page 20 DIMENSIONAL Fig. 3.3 Fig. 3.4 zeroCO Introduction - 21...
-
Page 21: Bess 125K
3.2.4 zeroCO - BESS 125K The zeroCO - BESS 125K rack can hold 26 Pylontech high voltage Li-ion batteries (LFP) model H32148-C and the BMS, forming a single storage of 125 kWh nominal. The battery modules are connected in series inside the rack and the entire ring connected in parallel to the BMS controller that manages the entire string. -
Page 22: 3.2.5 Parametri Zeroco 2 - Bess 125K
3.2.5 Parametri zeroCO - BESS 125K MODEL zeroCO - BESS 125K Order Code 90110030 Dimensions [WxHxD, mm] 1200x1683x776 Weight [kg] 1445 Cell technology Li-ion (LFP) Battery module model H32148-C BMS Controller Name SC1000-200J-C (alimentatore interno) Charge / discharge test current [A] 29,6 Rated charge/discharge current [A] Max charge/discharge current [A]... -
Page 23: Control Of The Working Environment Of The Storage System
4.0 RECEPTION AND HANDLING Control of the working environment of the storage system 4.1.1 Cleaning Danger. The battery system is equipped with high-voltage connectors. If cleaning is necessary, it will be mandatory to isolate the system. Before installing and powering up the system, dust and any processing scraps must be removed to maintain a clean environment. -
Page 24: Installation Place Checking
4.1.4 Installation place checking Danger. Before installing the system it is necessary to ensure that the ground on which it rests is stable and safe. The resistance of the grounding system must be ≤100mΩ. 4.1.5 Safety area A free area suffi cient to allow access to the individual battery and routine maintenance must be maintained around the system. -
Page 25: Unpacking Mode
4.2.1 Unpacking mode Upon receipt, proceed as follows: 1. Move the entire packaging by inserting the forks of the pallet truck between the plinths of the pallet (Fig. 4.2). Fig. 4.2 Caution. The weight of the packaged product is 320 kg and may be unstable. Caution. - Page 26 2. Place the packaging near the installation area and remove the forks of the pallet truck (Fig. 4.3). Fig. 4.3 zeroCO Reception and handling - 27...
- Page 27 3. Remove the layer of extensible wire along the entire height of the packaging at one of the four corners (Fig. 4.4). 4. Remove the 2 plastic straps (Fig. 4.5). 5. Remove the cardboard bumper corners (Fig. 4.6). 6. Face the pallet truck to the pallet, with the forks corresponding to the appropriate palletable spaces between the rack sockets, without entering at this stage.
- Page 28 Fig. 4.6 Fig. 4.7 zeroCO Reception and handling - 29...
- Page 29 10. Slide the rack towards the forks of the pallet truck, pushing in a combined manner from both sides by three (or more) people (Fig. 4.8). 11. Placed the rack on the forks make sure of stability. 12. Unlock the wheels of the pallet truck. 13.
- Page 30 Fig. 4.9 Fig. 4.10 zeroCO Reception and handling - 31...
-
Page 31: Xl System
4.2.2 Packing list All accessories are already wired and mounted inside the rack. What is necessary for the installation is reported in the list of articles in the following paragraphs. • Cables for coBinding between zeroCO2 - BESS 125K and zeroCO2 - XL System. - Page 32 zeroCO - BESS 125K Upon receipt zeroCO - BESS 125K is thus packed (Fig. 4.14): • Pallet 1200mm x 800mm. • 4 angular cardboard bumpers placed vertically at the corners. 4 angular cardboard bumpers placed horizontally at the roof. • 2 plastic straps in connection to the pallet.
-
Page 33: Unpacking Mode
4.3.1 Unpacking mode Upon receipt, proceed as follows: 1. Move the entire package by inserting the forks of the pallet truck between the plinths of the pallet (Fig. 4.15). Fig. 4.15 Caution. The weight of the packaged product is 230 kg and may be unstable. Caution. - Page 34 2. Place the packaging near the installation area and remove the forks of the pallet truck (Fig. 4.16). Fig. 4.16 zeroCO Reception and handling - 35...
- Page 35 3. Remove the layer of extensible wire along the entire height of the packaging at one of the four corners (Fig. 4.17). 4. Remove the two plastic straps (Fig. 4.18). Fig. 4.17 Fig. 4.18 36 - Reception and handling...
- Page 36 5. Remove the cardboard angular bumpers (Fig. 4.19). Fig. 4.19 zeroCO Reception and handling - 37...
- Page 37 6. Face the pallet truck to the pallet, with the forks corresponding to the appropriate pallet spaces between the rack sockets, without entering this phase (Fig. 4.20). 7. Bring the forks of the pallet truck to a height from the ground equal to that of support to the hooves.
- Page 38 Fig. 4.20 Fig. 4.21 zeroCO Reception and handling - 39...
- Page 39 16. Open the front and rear doors of the rack (Fig. 4.22 and Fig. 4.23). 17. Remove the kit carried inside it . 18. Place the D+, D- and RJ45 cables coming from the PCS inside the rack, passing them through the appropriate slots at the sockets and the back of the base (Fig. 4.24).
- Page 40 Fig. 4.24 Fig. 4.25 zeroCO Reception and handling - 41...
-
Page 41: Bess 125K
Caution. The power connectors are equipped with a lock button (1), press it before disconnecting the connector. • Kit Cables wiring verse the controller battery kit Meter for Energy measurement: Fig. 4.26 1x positive power cable (190mm, 1/0AWG, two orange quick-connect terminals) for serial connection between battery module and main controller. - Page 42 Fig. 4.30 24x 180mm RJ45 communication cable (twisted pair, Cat.5s) for cascading connection between batteries. Fig. 4.31 2x 500mm RJ45 communication cable (twisted pair, Cat.5s) for cascading batteries arranged in adjacent columns. 1x Three-phase Modbus RS485 MID meter for external sensors – Maximum current 5A –...
-
Page 43: Installation
5.0 INSTALLATION Installation tools Cutter Crimp Cable ties Screwdriver Screwdriver Adjustable wrench Socket wrench Multimeter Tab. 5.1 - Tools needed to install the battery pack. Caution. Use properly insulated instruments to avoid accidental electric shock or short circuits. If insulated instruments are not available, cover all exposed metal surfaces, except the tips, with insulating tape. -
Page 44: Personal Protective Equipment
Personal protective equipment We recommend that you wear the following safety equipment when handling system components. Dielectric gloves for Safety glasses Safety shoes live work Warning. The power terminals of the battery system are crossed by high-voltage DC. The system must be installed in a restricted area and must be operated only by qualifi... -
Page 45: Zeroco
zeroCO - XL System installation For the installation of zeroCO - XL System, at least three people are required to correctly handle the loads during the positioning and wiring phase. Proceed to connect the system as per the following general procedure. 5.3.1 zeroCO - XL System cable connection Danger. - Page 46 2. Prepare an AC power cable of the type 3Ph + N + PE. For L1, L2, L3, N cables without terminal or with tip lugs can be used. For the grounding part, use eyelet lug with M6 screw hole (Fig. 5.4). 3.
- Page 47 5. Reconnect the grounding cable by screwing the appropriate M5 screw from the inside of the panel (Fig. 5.8). Close the cover panel by screwing the 4x M5 screws Fig. 5.8 Fig. 5.9 Work on the back of the rack for DC connections. 6.
- Page 48 Fig. 5.10 Fig. 5.11 Fig. 5.12 Fig. 5.13 zeroCO Installation - 49...
- Page 49 Communication cables: work on the front of the rack for the connection cables to be connected to each zeroCO - BESS 125K BMS. 10. Remove the side door (1, Fig. 5.15, right side looking at the front rack). Accessing laterally, you will fi nd the communication cables (2, Fig. 5.15) which, coming from the ethernet switch, pass through the appropriate front cable glands (Fig.
- Page 50 Fig. 5.15 Fig. 5.16 Fig. 5.17 zeroCO Installation - 51...
-
Page 51: Bms Control Module And Battery Battery Module Installation In Zeroco
BMS control module and battery battery module installation in zeroCO - BESS 125K • Two people are required to move a BMS module, each of whom must hold one hand in grip with the appropriate front handle and the other hand in support of the lower and back of the module. - Page 52 • Two people are required to move a battery module, each of What must hold One hand in grip to the appropriate handle frontal and the other hand supporting the bottom and back of the module. • Rest the rear part of module on the guides. •...
- Page 53 • In case all 27 rack slots are not occupied, it is recommended to occupy the same number of slots between column left column central e right column so that the length of the cables supplied is still suffi cient to ensure the link. Fig.
-
Page 54: Battery Module Interface
5.4.1 Battery module interface Fig. 5.23 - H32148-C 1. B+ power terminal For parallel connection between the fi rst battery (the closest) and BMS, for series connection of one battery to the previous one. 2. B- power terminal For parallel connection between the last battery (the farthest) and BMS, for series connection of one battery to the next. -
Page 55: Control Module
5.4.2 Control module The control module has an internal power supply and therefore does not require connection to sources via AC power cables. It is also equipped with contactors that in case of anomalies open at current levels 180A, not requiring the installation of upstream protection fuses. Model SC1000-200J-C Related product... - Page 56 1. D+ external power terminal To connect the battery string to the positive terminal of zeroCO - XL System. 2. B+ power terminal For parallel connection to the fi rst battery (the closest). 3. Switch breaker. It acts on the opening/closing of the high voltage DC output of the BMS control module.
- Page 57 15. STATUS. Report battery module status: green=operating, red=failure or protection. 16. SOC. Indicates the battery charge level. Each LED corresponds to 25% charge. status charge level Battery Mode Description • • status off off off off off off all off sleep normal L2 off off off off off Power Saving Mode...
-
Page 58: Zeroco - Bess 125K Cables Connection
5.4.3 zeroCO - BESS 125K cables connection Danger. Do not short-circuit the positive and negative poles of the battery system. Caution. An incorrect connection of the cables will cause a system failure. Caution. Always consult the wiring diagram supplied with the system for the connection detail depending on the system confi... - Page 59 Fig. 5.25 Fig. 5.26 Fig. 5.27 Fig. 5.28 Fig. 5.29 Fig. 5.30 Fig. 5.31 - Parallel closure between batteries and BMS 60 - Installation...
-
Page 60: Bms Add Switch Settings
5.4.4 BMS ADD Switch settings Each BMS on zeroCO - BESS 125K is equipped with a 6-bit setting system that allows you to manually set the communication interface. The bottom position is OFF and means “0” (zero). The top position is ON and means “1” (one). Bits 1 through 5 handle the address. -
Page 61: Turning The System On And Off
6.0 TURNING THE SYSTEM ON AND OFF System turn ON Caution. Before turning on the system, double check all power and communication cables . Check the following: • Verify who the Disconnector of picture of distribution general Is in position OFF. •... - Page 62 Caution. In case of error during self-diagnosis, you must debug before moving on to the next step. Contact Energy S.p.A. support to perform the debugging procedure. Caution. To start a BMS after starting the fi rst one, it is necessary that the self- diagnosis on the previous group has been successful.
-
Page 63: System Turn Off
System turn OFF Caution. In the event of a breakdown, prior to maintenance, or long periods of inactivity, perform the shutdown procedure described in this chapter. Operation to turn off the system: 1. Turn off MBMS on board zeroCO - XL System by bringing the switch to the OFF position. - Page 64 zeroCO Turning the system ON and OFF - 65...
-
Page 65: Maintenance
7.0 MAINTENANCE Caution. In the event of a fault, prior to maintenance or in the event of long periods of inactivity, carry out the shutdown procedure described in chapter “6.1 System turn ON” at page 62. Danger: The zeroCO 2-XL is a system that works at dangerous voltage levels, both AC and DC side. - Page 66 • Remove the control module from the holder and place it in the predetermined place. • Install the new control module (BMS) and reconnect all cables. Refer to chapter “5.4 BMS control module and battery battery module installation in zeroCO2 - BESS 125K”...
-
Page 67: Bess 125K Battery Module Replacement
zeroCO - BESS 125K battery module replacement • Perform the shutdown procedure described in chapter “6.2 System turn OFF” at page 64. You can replace a damaged battery module with a new battery module at any time. In a series-attached system, even if the new module has a better health status (SOH), it will adapt to the module with lower health status. - Page 68 Fig. 7.5 - Replacing the battery module Fig. 7.6 - Replacing the battery module • Install the new form battery e connect i Cables. Make reference to chapter “5.4 BMS control module and battery battery module installation in zeroCO2 - BESS 125K”...
-
Page 69: Xl System Ems Module Replacement
zeroCO - XL System EMS module replacement • Perform the shutdown procedure described in chapter “6.2 System turn OFF” at page 64. Caution. Mark the communication cables before disconnecting them from the EMS to avoid an incorrect sequence in the next connection. Refer to the wiring diagram provided for connecting communication cables. - Page 70 Fig. 7.7 - EMS module replacement Fig. 7.8 - EMS module replacement zeroCO Maintenance - 71...
-
Page 71: Xl System Mbms Module Replacement
zeroCO - XL System MBMS module replacement • Perform the shutdown procedure described in chapter “6.2 System turn OFF” at page 64. Fig. 7.9 - MBMS module Caution. Mark the communication cables before removing them from the MBMS to avoid an incorrect sequence in the next connection. Refer to the wiring diagram provided for connecting communication cables. - Page 72 Fig. 7.10 - MBMS module replacement Fig. 7.11 - MBMS module replacement zeroCO Maintenance - 73...
-
Page 73: Xl System Switch Module Replacement
zeroCO - XL System Switch module replacement • Perform the shutdown procedure described in chapter “6.2 System turn OFF” at page 64 . Caution. Mark the communication cables before disconnecting them from the switch to avoid an incorrect sequence in the next connection. Refer to the wiring diagram provided for connecting communication cables. - Page 74 Fig. 7.12 - Switch module replacement Fig. 7.13 - Switch bracket screws Fig. 7.14 - Switch module replacement zeroCO Maintenance - 75...
-
Page 75: Xl System Ups Module Replacement
zeroCO - XL System UPS module replacement • Perform the shutdown procedure described in chapter “6.2 System turn OFF” at page 64 . Caution. Mark the cables before disconnecting them from the UPS to avoid an incorrect sequence in the next connection. •... - Page 76 Fig. 7.15 - UPS module replacement Fig. 7.16 - UPS module replacement zeroCO Maintenance - 77...
- Page 77 zeroCO - XL System PCS module replacement • Perform the shutdown procedure described in chapter “6.2 System turn OFF” at page 64 . Caution. Mark the cables before disconnecting them from the PCS to avoid an incorrect sequence in the next connection. Refer to the wiring diagram provided for connecting communication cables .
- Page 78 Fig. 7.17 - PCS module replacement Fig. 7.18 - PCS module replacement zeroCO Maintenance - 79...
-
Page 79: Work Logic
With this way of working, the focus of the plant is the energy fed into the grid. 2. SELF-USE DISCHARGE The energy produced is used directly to meet the load;... -
Page 80: Cloud Platform Monitoring
Caution. It is necessary to agree before start-up, with the assistance of Energy S.p.A. the desired mode of operation, as described in the previous paragraph, since this is completed at the software level directly on the web platform. - Page 81 • Insert the name user (or the address email) e the password Press releases for Access to zeroCO monitoring cloud2 EMS. Confi rm with a click on the Login button (Fig. 8.2). Entra in ZeroCO2 EMS Fig. 8.2 - Enter credentials •...
- Page 82 (green cursor): positive power value which by convention concerns: Production, Feed-in, Load absorption, Batteries being charged. (orange cursor ): negative power value which by convention concerns: Purchase from the mains, Batteries being discharged. Caution. A cursor color that disagrees with the fl ow directions described above indicates an incorrect connection direction for the amperometric transformers of the measuring meters.
- Page 83 0 kW, no cursor appears. This means that the storage is “steady” and is not contributing to the energy fl ows of the system. In this case, the storage can be in two different states referred to as IDLE and SLEEP.
- Page 84 On-screen Meaning description IDLE The working conditions do not allow to contribute, but he is ready to leave as soon as they fall within the operational ranges: Ex.1 = In a time slot “Discharge” is at a charge percentage lower than minimum SOC.
- Page 85 The central console accounts for energy values in a time interval selected by the user (Fig. 8.11). The “Energy Sold Price “ fi eld refers to the cumulative profi t, and is presented only if the plant works in trading mode.
- Page 86 Fig. 8.11 - Energy By clicking on the calendar icon, you can change the time interval on which to display the values, choosing from some proposed periods, or selecting a custom period. Fig. 8.12 - Calendar zeroCO Work logic and cloud monitoring - 87...
- Page 87 With a click on the “Self-consumption” section you go to view the data of self- consumed energy in the set period. Fig. 8.13 - Energy On the right side of the dashboard, the statuses of each zeroCO XL device and the time elapsed since the last status change are listed in real time: EMS on-board computer status and set working mode.
- Page 88 Fig. 8.15 - System Commands With click on the “Scheduler” section (Fig. 8.16) you can see the alternation of the charging and discharging phases of the storage, on a today, daily basis (customizing the calendar date, 1 and 2 Fig. 8.17), of the last 3 days or of the last 7 days.
- Page 89 Fig. 8.17 - EMS Schedule Fig. 8.18 - 90 - Work logic and cloud monitoring...
- Page 90 Fig. 8.19 - Fig. 8.20 - Returning to the main dashboard, and scrolling under the “Scheduler” button, you can see the trend of the quantities in play. The width of the time interval on which to view the trend can be chosen by the user by clicking on the “Custom” button and accessing the calendar.
- Page 91 Placing the mouse inside the Cartesian diagram (1, Fig. 8.21) You have the legend, and the reading of the instantaneous values. Fig. 8.21 - • PV Total Active Power = Power Produced by photovoltaic. • Power (PV-PCS-GRID) = Power supplied by the zeroCO XL System in charge or discharge (depending on whether positive or negative).
- Page 92 Fig. 8.23 - From the left menu, in the “ALARMS” tab, it is fi nally possible to view any alarms and errors in progress, or the historical log, on a period of time that can still be set by the user from the calendar icon: Fig.
-
Page 93: Periodic Maintenance Of The System
History inspection Analyze the cloud monitoring alarm list for anomalies. In case of malfunctions or failures, contact Energy S.p.A. support. Shutdown and maintenance It is recommended to perform every 12 months shutdown, routine maintenance and restart in order to maintain optimal system effi ciency. -
Page 94: Remarks
ADR (European Convention on the International Carriage of Dangerous Goods by Road) and subsequent amendments. Contact the vendor for more information. Energy S.p.A. reserves the right to modify the product and the following manual without notice. zeroCO Remarks - 95... -
Page 95: System Installation And Power-On Progress List
SYSTEM INSTALLATION AND POWER-ON PROGRESS LIST CONDITION REFERENCE □ The environment meets all technical requirements: Chapter 4.1 at page 24 Cleaning, Temperature, Fire-fi ghting system □ Selecting the Installation Site Chapter 4.1.4 at page 25 □ Installation and installation zeroCO2 - BESS 125 K Chapter 5.0 at page 44 □... -
Page 96: System Shutdown Progress List
SYSTEM SHUTDOWN PROGRESS LIST CONDITION REFERENCE □ Turn the main circuit breaker of the system OFF Chapter 6.2 at page 64 □ Bring MBMS OFF in zeroCO2 - XL System Chapter 6.2 at page 64 □ Bring EMS OFF in zeroCO2 - XL System Chapter 6.2 at page 64 □... -
Page 97: Common Failures In Ems Cloud
COMMON FAILURES IN EMS CLOUD zeroCO - BESS 125K Alarme Description Overvoltage Overvoltage Undervoltage Undervoltage Overcurrent Overcurrent OverTemperature Excessive temperature UnderTemperature Excessively low temperature NOTE: The alarm is detected and indicated in the alarm section of EMS Cloud, both at the cell level, at the module level, and for the entire stack. See chapter “8.0 Working logics and cloud monitoring”... -
Page 98: Accessory
2U -19" of blackout 90900315 Eastron three-phase Measures energy 1 exchange meter kit with external production and energy - from 1 to 3 CT consisting of exchange (if suffi cient on production Eastron SDM630MCT the low voltage side) to and three ESCT-T24-5... - Page 99 Energy S.p.A. Piazza Manifattura 1 38068 Rovereto (TN) - Italia Tel: +39 049 2701296 email: service@energysynt.com web: www.energyspa.com Pylon Technologies Co., Ltd. No. 73, Corsia 887, via ZuChonghi, parco hi-tech di Zhangjiang Pudong, Shanghai 201203, China +86-21-51317699 service@pylontech.com.cn www.pylontech.com.cn...
Need help?
Do you have a question about the zeroCO2 XL and is the answer not in the manual?
Questions and answers