Table of Contents
Advertisement
Quick Links
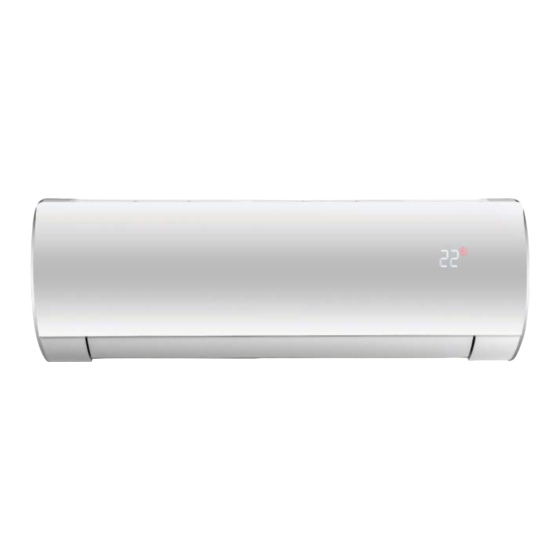
Direct expansion indoor unit for ISERIES systems
Unità interna ad espansione diretta per sistemi ISERIES
Unité intérieure à détente directe pour systèmes ISERIES
Inneneinheiten mit Direktverdampfung für ISERIES-Systeme
Unidad interior de expansión directa para sistemas ISERIES
Unidade interior de expansão direta para sistemas ISERIES
37.4254.114.01
03/2023
INSTRUCTIONS
D'UTILISATION
INSTRUCCIONES
DE INSTRUÇÕES
AWIAS19
AWIBS19
AWICS19
OPERATING
EN
ISTRUZIONI
IT
D'USO
NOTICE
FR
BEDIENUNGS-
DE
ANLEITUNG
ES
DE USO
MANUAL
PT
Advertisement
Table of Contents

Related Manuals for Argo I Series


Summary of Contents for Argo I Series
- Page 1 OPERATING INSTRUCTIONS ISTRUZIONI D’USO NOTICE D’UTILISATION BEDIENUNGS- ANLEITUNG INSTRUCCIONES DE USO MANUAL DE INSTRUÇÕES AWIAS19 AWIBS19 AWICS19 Direct expansion indoor unit for ISERIES systems Unità interna ad espansione diretta per sistemi ISERIES Unité intérieure à détente directe pour systèmes ISERIES Inneneinheiten mit Direktverdampfung für ISERIES-Systeme Unidad interior de expansión directa para sistemas ISERIES Unidade interior de expansão direta para sistemas ISERIES...
-
Page 2: Table Of Contents
CONTENTS NAME OF PARTS AND OPERATION SELECTOR SWITCH INSTALLATION LOCATION ELECTRICAL REQUIREMENTS SAFETY INSTRUCTIONS USING THE REMOTE CONTROL UNIT REMOTE CONTROL UNIT HOW TO SET THE PRESENT TIME COOLING MODE HEATING MODE AUTOMATIC OPERATION DEHUMIDIFYING MODE(DRY) FAN ONLY MODE ADJUSTING THE FAN SPEED AIR IONIZER NIGHT MODE ENERGY SAVING MODE (ECO) -
Page 3: Name Of Parts And Operation Selector Switch
NAME OF PARTS AND OPERATION SELECTOR SWITCH WIRED CONTROLLER (OPTIONAL-NOT SUPPLIED) INDOOR 1. Remote control unit. 9. Indoor unit sensor: It detects the room temperature around the indoor unit. 2. Remote control sensor: It detects the room temperature around the remote control unit. 3. -
Page 4: Safety Instructions
INSTALLATION LOCATION USING THE REMOTE CONTROL UNIT HOW TO INSTALL BATTERIES ● This air conditioner must be installed by qualified RESET Remove trhe lid in the rear part of the ● installation technicians in accordance with the installation instructions provided with the unit. remote control unit. -
Page 5: Remote Control Unit
REMOTE CONTROL UNIT DISPLAY Information described below is displayed: Flap position Operation mode Cooling Light AUTO I FEEL mode Heating Dehumidification Night mode TURBO mode Automatic ECO mode Celsius o Fahrenheit degrees WEEK Fan speed Low battery Temperature Buttons’ lock active Days of the week Clock Timer: 3 types + delayed timer... -
Page 6: Cooling Mode
HEATING MODE HOW TO SET THE CLOCK 1. Press for a few seconds the Timer button Press the button 1. Turn on the unit with the ON / OFF AUTO ARROWS button. WEEK 2. Press the button until the HEATING symbol appears on the display. -
Page 7: Dehumidifying Mode(Dry)
The air conditioner will automatically operate by switching ADJUSTING THE FAN SPEED from heating to cooling operation (or vice versa) in order to maintain the set temperature. AUTOMATIC 4. Press the button to select the fan speed. Set with the button the “AUTO”... -
Page 8: Turbo Mode
ENERGY SAVING MODE (ECO) HOW TO SET SCHEDULES This program is used to limit the maximum electrical power A) DELAYED TIMER absorbed by the unit. This timer is used to start the unit (if it is off) or to stop the unit (if it is on) after When the energy saving program is selected, the air conditioner a certain time, to set the delayed time. -
Page 9: Parameters Setting
PARAMETERS SETTING To access to the “Parameter menu”, long press “MODE/SET” from the main screen or from the OFF screen: (2 sec) The first parameter shown is P00. Press“UP”or“DOWN”to scroll the parameter list: When a parameter has been selected, long press “MODE/SET” to modify the value of the parameter. The value of the parameter starts blinking and SET symbol switches on: (2 sec) Press “UP”... - Page 10 (0.5 sec) Press “ON/OFF” to go back to main screen: Par. Parameter name Default Values Factory default reset 0 = No action 1 = Reset all remote control parameters to facto- ry default value 2 = Reset all unit parameters to factory default value Software version Software version of the remote controller...
-
Page 11: Adjusting The Air Flow Direction
ADJUSTING THE AIR FLOW DIRECTION CAUTION HORIZONTAL (manual) Do not move the flap with your hands when the air The horizontal air flow can be adjusted by moving the lever conditioner is running. to the left or right, as indicated in the following figure. CAUTION Lever •... - Page 12 OPERATION WITHOUT THE REMOTE NOTE CONTROL UNIT Power failure during operation. In the event of power failure, the unit will stop. When the If you have lost the remote control unit or it has troubles, power is resumed, the unit will restart automatically after follow the steps below.
-
Page 13: Use With Wired Controller (Optional-Not Supplied)
USE WITH WIRED CONTROLLER (OPTIONAL-NOT SUPPLIED) This wired controller can be combined with different types of indoor units: for this reason some functions may not be available. However, the selection of any functions not available for a certain type of unit does not affect the correct functioning of the controller itself: simply nothing will happen. - Page 14 HOME DISPLAY Main functions of the wired controller can be set directly on the home display: SELECTED UNIT DATE WORKING MODE TIMER COOLING INDOOR HEATING NIGHT DEHUMIDIFYING TURBO FAN ONLY AUTOMATIC FAN SPEED IFEEL ROOM TEMPERATURE SETPOINT SELECTED UNIT: The box around the unit number indicates the selected unit. HIGHLIGHTED UNIT: If the unit number icon is highlighted the unit is ON.
- Page 15 MAIN PARAMETERS MENU If the icon is highlighted the parameter is active. Use the < / > buttons to move between the icons. Use the OK button to change the value of the selected parameter. Example of active NIGHT icon IFEEL TURBO SETTINGS...
- Page 16 SETTINGS MENU Use the < / > buttons to move between the icons. DISPLAY BUTTONS CLOCK TEMPERATURE °C BACK LEFT RIGHT TIMER LANGUAGE UP / DOWN OK / SET CLOCK: Select CLOCK icon and press OK to enter the setting menu. The following options will appear: LEVEL 1 LEVEL 2 CLOCK FORMAT...
- Page 17 CALENDAR Press OK to enter the setting menu. The following options will appear: LEVEL 1 LEVEL 2 SCHEDULE Enabled LEV. 1 T on 14:30 T off 17:30 LEV. 2 SCHEDULE Select the number of the Timer program to be set (1, 2 or 3). T on (ON TIME) Set the ON time, once you have entered LEVEL 2, press OK to move to the minutes’...
- Page 18 CARE AND CLEANING HOW TO REPLACE THE FILTER WARNING ● Maintenance operations must be carried out by specially trained personnel. For safety, be sure to turn the air conditioner off and also ● to disconnect the power before cleaning. Do not pour water on the indoor unit to clean it. This will ●...
-
Page 19: Tips For Energy Saving
Trouble: the air conditioner does not run at all. TIPS FOR ENERGY SAVING Possible cause: 1. Power failure. DO NOT: 2. Leakage breaker tripped. Block the air intake and outlet of the unit. ● 3. Operation button is OFF. If they are obstructed, the unit will not work well, and 4. - Page 23 INFORMATION FOR CORRECT DISPOSAL OF THE PRODUCT IN ACCORDANCE WITH THE EUROPEAN DIRECTIVE 2012/19/EU At the end of its working life this equipment must not be disposed of as an household waste. It must be taken to special local community waste collection centres or to a dealer providing this service. Disposing of an electrical and electronic equipment separately avoids possible negative effects on the environment and human health deriving from an inappropriate disposal and enables its components to be recovered and recycled to obtain significant savings in energy and resources.
- Page 24 Via Alfeno Varo, 35 - 25020 Alfianello - BS - Italy Tel. +39 0331 755111 - Fax +39 0331 755501 www.argoclima.com...
Need help?
Do you have a question about the I Series and is the answer not in the manual?
Questions and answers