Advertisement
Getting Started
This chapter provides you with the information on hardware setup procedures. While connecting devices, be careful in holding the devices and use a grounded wrist strap to avoid static electricity.
Package Contents
| All-in-one PC | Modern AM242P, Modern AM242TP, Modern AM272P |
| Documentation | User Guide (Optional) |
| Quick Start Guide (Optional) | |
| Warranty Card & Warranty Book (Optional) | |
| Accessories | Mouse (Optional) |
| Keyboard (Optional) | |
| AC/DC Adapter | |
| Power Cord |

- Contact your place of purchase or local distributor if any of the items is damaged or missing.
- Package contents may vary by country.
- The included power cord is exclusively for this personal computer and should not be used with other products.
Safety & Comfort Tips
- Choosing a good workspace is important if you have to work with your PC for a long period of time.
- Your work area should have enough illumination.
- Choose the proper desk and chair and adjust their height to fit your posture when operating.
- When sitting on the chair, sit straight and keep a good posture. Adjust the chair's back (if available) to support your back comfortably.
- Place you feet flat and naturally on the floor, so that your knees and elbows have the proper position (about 90-degree) when operating.
- Put your hands on the desk naturally to support your wrists.
- Avoid using your PC in a place where discomfort may occur (such as on the bed).
- The PC is an electrical device. Please treat it with great care to avoid personal injury.
System Overview
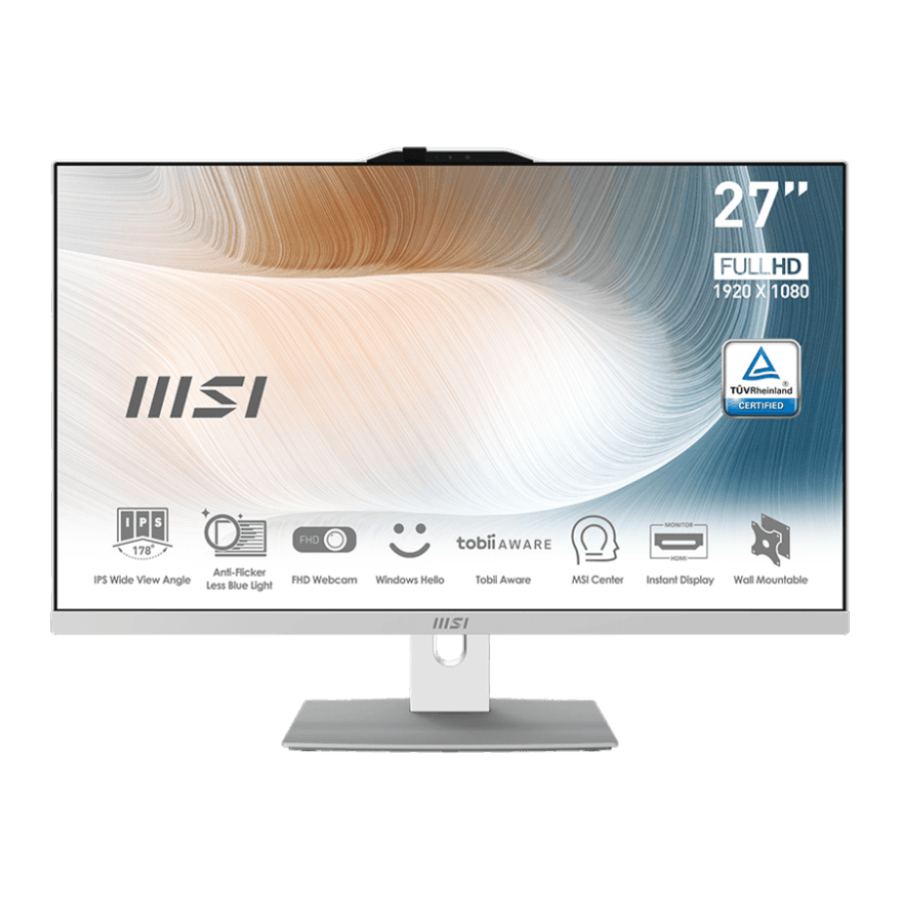
Front View

- Webcam
- Touch Screen (Modern AM242TP)
Rear View

 | Navi Key The AIO PC comes with a Navi Key, a multi-directional control that helps navigate the On-Screen Display (OSD) menu. | ||||||||||||||||||
 | Power Jack | ||||||||||||||||||
 | Kensington Lock | ||||||||||||||||||
 | HDMI-In Port (with MSI Instant Display Technology)  The High-Definition Multimedia Interface (HDMI) is an all-digital audio/video interface capable of transmitting uncompressed streams. HDMI supports all TV format, including standard, enhanced, or high-definition video, plus multi-channel digital audio on a single cable. With MSI Instant Display Technology, when you connect power to the AIO PC successfully, the monitor will automatically enter "standby" mode without pressing the power button. When devices are connected to the HDMI-in port, the monitor will be turned on immediately. You can also switch the modes through the Monitor Power/ Mode Button on the side panel if you have already turned on your AIO PC. This technology helps to save more energy for your system. | ||||||||||||||||||
 | HDMI 2.0b Port Supports a maximum resolution of 4K 60Hz. Available for the processor with integrated graphics. ∙ Graphics specifications may vary depending on the installed CPU. | ||||||||||||||||||
 | USB 2.0 Port This connector is provided for USB peripheral devices. (Speed up to 480 Mbps) High-speed devices are recommended for USB 3.2 ports whereas lowspeed devices, such as mouse or keyboard, are suggested to be plugged into the USB 2.0 ports. | ||||||||||||||||||
 | LAN Jack The standard RJ-45 LAN jack is provided for connection to the Local Area Network (LAN). You can connect a network cable to it.
|

Side View

 | USB 3.2 Gen 2 Port (Type-C) This connector is provided for USB peripheral devices. This connector can provide up to 5V 3A of power. (Speed up to 10 Gbps) |
 | USB 3.2 Gen 2 Port This connector is provided for USB peripheral devices. (Speed up to 10 Gbps) |
 | Combo Audio Jack This connector is provided for headphones or speakers or microphones. |
| Monitor LED |
 | Hard Disk Drive LED This indicator shows the activity status of the HDD. It flashes when the system is accessing data on the HDD and remains off when no disk activity is detected. |
| System Power Button/ LED The power LED glows when the system is turned on and goes off when the system is shut down. In terms of power saving, the LED blinks in S3 (Suspend to RAM) mode and goes off in S4 (Suspend to Disk) mode. |
 | 2.5" SSD/HDD Bay |
Top & Bottom View

- Ventilator
- Stereo Speakers
Hardware Setup
Installing the Monitor Stand
- Leave the monitor in its protective foam packaging. Align the stand bracket to the monitor groove.
- Tighten the stand bracket with screws.
- Connect the base to the stand and tighten the base screw to secure the base.
- Make sure the stand assembly is properly installed before setting the monitor upright.


- Remove the screws on the monitor groove if needed before installing the stand.
- Place the monitor on a soft, protected surface to avoid scratching the display panel.
- Do not use any sharp objects on the panel.
- The groove for installing the stand bracket can also be used for wall mount. Please contact your dealer for proper wall mount kit.
Adjusting the Monitor
This AIO PC is designed to maximize your viewing comfort with its adjustment capabilities.

Connecting the Power
Connect the adapter to the AIO PC and plug in the power cord. Press the power button to power on the AIO PC.
Power ratings:
- 120W: 100-240V, 19.5V
![]() 6.15A
6.15A


- The illustrations are for reference only. Your AIO PC may vary in appearance.
- Please make sure the AIO PC has been grounded to earth through the AC power cord and the electrical outlet before powering on the AIO PC.
- Do not use any sharp objects on the display panel.
- Avoid pressing the display panel when adjusting.
OSD Setup
This chapter provides you with essential information on OSD Setup.
All information is subject to change without prior notice.
Navi Key
The AIO comes with a Navi Key, a multi-directional control that helps navigate the OnScreen Display (OSD) menu.

Up/Down/Left/Right:
- selecting function menus and items
- adjusting function values
- entering into/exiting from function menus
Press (Menu):
- launching the On-Screen Display (OSD)
- entering submenus
- confirming a selection or setting
Hot Key
- Users may enter into Volume, Brightness, Mode and Input Source function menus by moving the Navi Key up, down, left or right when the OSD menu is inactive.
OSD Setup via Navi Key
Press the Middle button of Navi Key to launch the On-Screen Display (OSD) main menu. Use the Up, Down, Left, Right buttons to tune the desired function menus to suit your personal preferences. Press Menu 3 seconds to shut the panel off. Press Menu again to wake it up.

Image
| 1st Level Menu | 2nd/ 3rd Level Menu | Description | ||
| Mode | User |
| ||
| Reader | ||||
| Cinema | ||||
| Designer | ||||
| sRGB | ||||
| Brightness | 0-100 |
| ||
| Contrast | 0-100 |
| ||
| Sharpness | 0-5 |
| ||
| Eye Saver | OFF |
| ||
| ON | ||||
| Color Temperature | Cool |
| ||
| Normal | ||||
| Warm | ||||
| Customization | R (0-100) | |||
| G (0-100) | ||||
| B (0-100) | ||||
| Screen Size | 4:3 |
| ||
| 16:9 | ||||
Input Source
| 1st Level Menu | Description |
| PC | User can use Navi Key, and OSD Menu to adjust the Input Source in any Mode. |
| HDMI |
Setting
| 1st Level Menu | 2nd Level Menu | Description |
| Language | English |
|
| 繁體中文 | ||
| 简体中文 | ||
| Italiano | ||
| Español | ||
| Français | ||
| Português | ||
| Deutsch | ||
| 日本語 | ||
| Русский | ||
| Transparency | 0-5 |
|
| OSD Time Out | 5-30 |
|
| Audio Volume | 0-100 |
|
| Reset | YES |
|
| NO |
Component Replacement & Upgrade
Please note that certain components preinstalled in the product may be upgradable or replaceable by user's request depending on the models users purchased.

For any further information on the product users purchased, please contact the local dealer. Do not attempt to upgrade or replace any component of the product if you are not an authorized dealer or service center, since it may cause the warranty void. It is strongly recommended that you contact the authorized dealer or service center for any upgrade or replace service.
System Operations
This chapter provides you with essential information on system operations.
All information is subject to change without prior notice.
Power Management
Power management of personal computers (PCs) and monitors has the potential to save significant amounts of electricity as well as deliver environmental benefits.
To be energy efficient, turn off your display or set your PC to sleep mode after a period of user inactivity.
Power Management in Windows 10
- [Power Options] in Windows OS allow you to control the power management features of your display, hard drive, and battery. Right-click [Start]
![]() , select [Control Panel] from the list and then click [System and Security].
, select [Control Panel] from the list and then click [System and Security].

- Select [Power Options] and choose a power plan that suits your personal needs. You may also fine-tune the settings by clicking [Change plan settings].
- The Shut Down Computer menu presents the options of Sleep (S3/S4) & Shut Down (S5) for rapid and easy management of your system power.
 , select [Control Panel] from the list and then click [System and Security].
Power Management
The power management feature allows the computer to initiate a low-power or "Sleep" mode after a period of user inactivity. To take advantage of these potential energy savings, the power management feature has been preset to behave in the following ways when the system is operating on AC power:
- Turn off the display after 10 minutes
- Initiate Sleep after 30 minutes
Waking the System Up
The computer shall be able to wake up from power saving mode in response to a command from any of the following:
- the power button,
- the network (Wake On LAN),
- the mouse,
- the keyboard.
 Energy Saving Tips:
- Turn off the monitor by pressing the monitor power button after a period of user inactivity.
- Tune the settings in Power Options under Windows OS to optimize your PC's power management.
- Install power saving software to manage your PC's energy consumption.
- Always disconnect the AC power cord or switch the wall socket off if your PC would be left unused for a certain time to achieve zero energy consumption.
Network Connection (Windows 10)
Wired Network
- Right-click [Start]
![]() and select [Network Connections] from the list.
and select [Network Connections] from the list. - Select [Ethernet] and then [Network and Sharing Center].

- Select [Set up a new connection or network].

- Choose [Connect to the Internet] and click [Next].
- Select [Broadband (PPPoE)] to connect using DSL or cable that requires a user name and password.

- Type the information from your Internet Service Provider (ISP) and click [Connect] to establish your LAN connection.


Wireless Network
- Go to [Start]
![]() , click [Settings] and select [Network and Internet].
, click [Settings] and select [Network and Internet]. - A list of available WLAN connections pops up. Choose a connection from the list.
- To establish a new connection, select [Network and Sharing Center].
![]()
- Select [Set up a new connection or network].
- Followingly, choose [Manually connect to a wireless network] and click [Next] to continue.
- Enter information for the wireless network you intend to add and click [Next] to proceed.

- A new WLAN connection has been made.


System Recovery (Windows 10)
The purposes for using the System Recovery Function may include:
- Restore the system back to the initial status of original manufacturer's default settings.
- When some errors have occurred to the operating system in use.
- When the operating system is affected by virus and is not able to work normally.
- When you want to install the OS with other built-in languages.
Before using the System Recovery Function, please back up the important data saved on your system drive to other storage devices.
If the following solution fails to recover your system, please contact the authorized local distributor or service center for further assistance.
Reset this PC
- Go to [Start]
![]() , click [Settings] and select [Update and security].
, click [Settings] and select [Update and security]. - Select [Recovery] and click [Get started] under [Reset this PC] to start the system recovery.

- The [Choose an option] screen pops up. Choose between [Keep my files] and [Remove everything].


| Reset this PC | Keep my files | ||
| Remove everything | Only the drive where Windows is installed | Just remove my files | |
| Remove files and clean the drive | |||
| All drives | Just remove my files | ||
| Remove files and clean the drive | |||
Keep my files
- Select [Keep my files].

- The [Your apps will be removed] screen shows a list of apps that will need to be reinstalled from the web or installation discs. Click [Next] to continue.

- The next screen will show the changes to be made during the process. Click [Reset] to start the system reset.


Remove everything
- Select [Remove everything].

- If you have multiple hard drives, a screen will pop up, asking you to choose between [Only the drive where Windows is installed] and [All drives].
- Then select between [Just remove my files] and [Remove files and clean the drive].

- The next screen will show the changes to be made during the process. Click [Reset] to start the system reset.


System Recovery (F3 Hotkey Recovery) (Optional)
Precautions for Using the System Recovery Function
- If your hard drive and system encountered non-recoverable problems, please use the F3 Hotkey recovery from the Hard Drive first to perform the System Recover Function.
- Before using the System Recovery Function, please backup the important data saved on your system drive to other storage devices.
Recovering the system with the F3 Hotkey
- Follow the instructions below to continue:
- Restart the PC.
- Press the F3 hotkey on the keyboard promptly when the MSI greeting appears on the display.
- On the [Choose an Option] screen, select [Troubleshoot].
- On the [Troubleshoot] screen, select [Restore MSI factory] to reset the system to the default settings.
- On the [RECOVERY SYSTEM] screen, select [System Partition Recovery].
- Follow the on-screen instructions to continue and complete the Recovery Function.
Troubleshooting
My system does not start.
- Check if the system is connected to an electrical outlet and it is turned on.
- Check if the power cord and all cables are connected firmly.
When I turn on my computer, the message "Operating System not found" appears or Windows does not start.
- Check if there is a non-bootable CD/ DVD inside the optical disk drive. If so, remove the CD/ DVD then restart the computer.
- Check Boot Device Priority settings in the BIOS Setup.
The system can not be shut down.
It is best to shut down your computer using the Shut Down icon in the operating system. Using other methods, including those listed below, may result in data failure. If the Shut Down procedure does not work, choose one of the following steps:
- Press Ctrl+Alt+Del keys, then choose Shut Down.
- Press and hold the power button till the system is off.
- Unplug the power cable from the system.
My microphone does not work.
- For built-in microphone, please go to Start > Control Panel > Sounds and Audio Devices > Audio to check if it is muted.
- If you are using an external microphone, check that the microphone is plugged into the Microphone jack.
The Internet connection has problems.
- If you are having a problem connecting to your Internet Service Provider (ISP), check if the ISP is experiencing technical problems.
- Check the Network settings and connection and make sure the system is properly configured to Internet access.
- The wireless LAN data transfer speed is affected by distance and obstructions between devices and access points. To maximize the data transfer speed, choose the access point closest to your system.
System speakers do not work.
- Check the master volume setting in the Audio Mixer.
- If you are using an application that has its own volume control, check if the volume is muted.
- If you have connected an audio cable to the Headphone jack, disconnect it.
- If the system has OSD function, please adjust the volume of OSD.
System monitor does not display anything.
- Check if the system is connected to an electrical outlet and it is turned on.
- The system may be in Standby mode. Press any key to activate the Display.
Safety Instructions
- Read the safety instructions carefully and thoroughly.
- All cautions and warnings on the device or User Guide should be noted.
- Refer servicing to qualified personnel only.
Power
- Make sure that the power voltage is within its safety range and has been adjusted properly to the value of 100~240V before connecting the device to the power outlet.
- If the power cord comes with a 3-pin plug, do not disable the protective earth pin from the plug. The device must be connected to an earthed mains socket-outlet.
- Please confirm the power distribution system in the installation site shall provide the circuit breaker rated 120/240V, 20A (maximum).
- Always unplug the power cord before installing any add-on card or module to the device.
- Always disconnect the power cord or switch the wall socket off if the device would be left unused for a certain time to achieve zero energy consumption.
- Place the power cord in a way that people are unlikely to step on it. Do not place anything on the power cord.
- If this device comes with an adapter, use only the MSI provided AC adapter approved for use with this device.
Battery
Please take special precautions if this device comes with a battery.
- Danger of explosion if battery is incorrectly replaced. Replace only with the same or equivalent type recommended by the manufacturer.
- Avoid disposal of a battery into fire or a hot oven, or mechanically crushing or cutting of a battery, which can result in an explosion.
- Avoid leaving a battery in an extremely high temperature or extremely low air pressure environment that can result in an explosion or the leakage of flammable liquid or gas.
- Do not ingest battery. If the coin/button cell battery is swallowed, it can cause severe internal burns and can lead to death. Keep new and used batteries away from children.
European Union:

Batteries, battery packs, and accumulators should not be disposed of as unsorted household waste. Please use the public collection system to return, recycle, or treat them in compliance with the local regulations.
Taiwan:

廢電池請回收
For better environmental protection, waste batteries should be collected separately for recycling or special disposal.
California, USA:

The button cell battery may contain perchlorate material and requires special handling when recycled or disposed of in California. For further information please visit: https://dtsc.ca.gov/perchlorate/
Environment
- To reduce the possibility of heat-related injuries or of overheating the device, do not place the device on a soft, unsteady surface or obstruct its air ventilators.
- Use this device only on a hard, flat and steady surface.
- To prevent the device from tipping over, secure the device to a desk, wall or fixed object with an anti-tip fastener that helps to properly support the device and keep it safe in place.
- To prevent fire or shock hazard, keep this device away from humidity and high temperature.
- Do not leave the device in an unconditioned environment with a storage temperature above 60℃ or below 0℃, which may damage the device.
- The maximum operating temperature is around 35℃.
- When cleaning the device, be sure to remove the power plug. Use a piece of soft cloth rather than industrial chemical to clean the device. Never pour any liquid into the opening; that could damage the device or cause electric shock.
- Always keep strong magnetic or electrical objects away from the device.
- If any of the following situations arises, get the device checked by service personnel:
- The power cord or plug is damaged.
- Liquid has penetrated into the device.
- The device has been exposed to moisture.
- The device does not work well or you can not get it working according to the User Guide.
- The device has dropped and damaged.
Technical Support
If a problem arises with your system and no solution can be obtained from the user's manual, please contact your place of purchase or local distributor. Alternatively, please try the following help resources for further guidance. Visit the MSI website for technical guide, BIOS updates, driver updates and other information via https://www.msi.com/support/

Documents / Resources
References
Download manual
Here you can download full pdf version of manual, it may contain additional safety instructions, warranty information, FCC rules, etc.
Download Msi M242 12M,AM242T/TP/P 12M,AM272/AM272P 12M,MS-AE07,MS-AF82 - Modern Series Manual
Advertisement


Need help?
Do you have a question about the Modern AM242 12M; Modern AM242T 12M; Modern AM242P 12M; Modern AM242TP 12M; Modern AM272 12M; Modern AM272P 12M; MS-AE07; MS-AF8 and is the answer not in the manual?
Questions and answers