Advertisement
- 1 Parts Identification
- 2 Controls/Functions
- 3 BEFORE FIRST USE
- 4 TO CLEAN
- 5 FUNCTIONS
- 6 SELECTING A FUNCTION
- 7 BOILING WATER
- 8 USING THE GLASS STEW POT
- 9 USING THE TEA INFUSER
- 10 MINERAL DEPOSITS
- 11 DELAY TIMER
- 12 KEEP WARM
- 13 CUSTOM AUTOMATIC KEEP WARM
- 14 TIME SETTING
- 15 Function Times & Temperatures Table
- 16 RECIPES
- 17 TROUBLESHOOTING
- 18 Documents / Resources
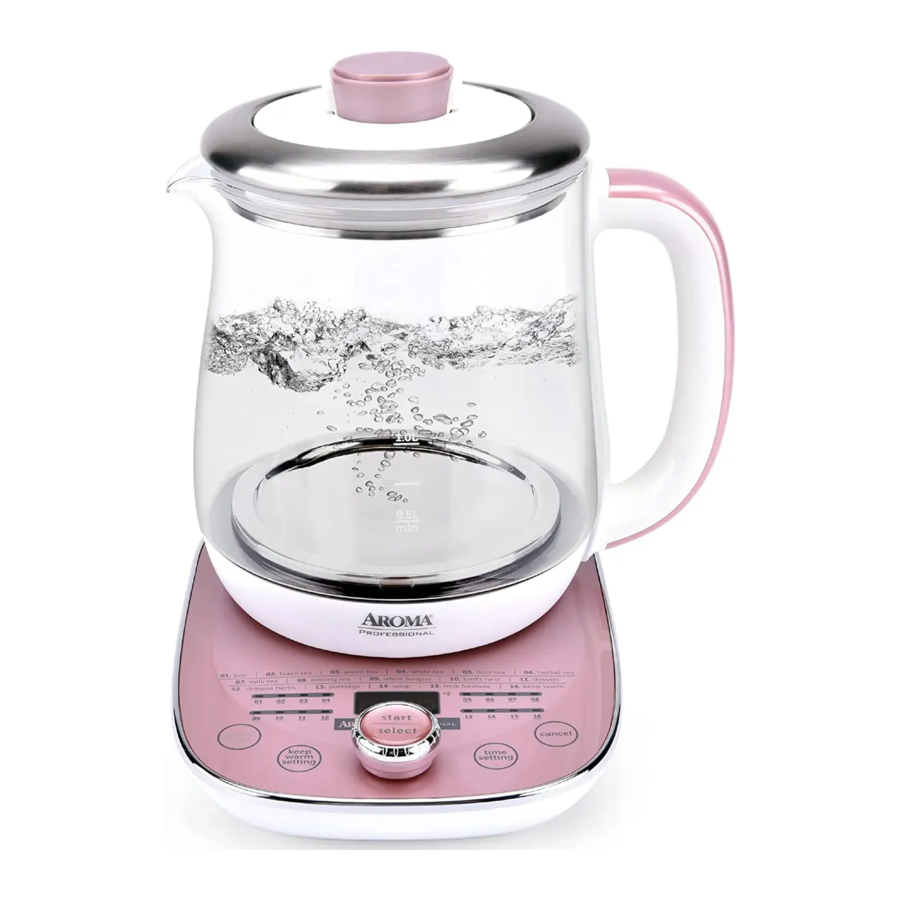
Parts Identification

Controls/Functions

Control Dial (Start/Select)
Powers the unit on/off. Turn the control dial until the desired function is selected then press the control dial to begin heating.
Delay Timer![]()
Boils water right when it's needed with preparation up to 9 1/2 hours in advance. The amount of delay time can be adjusted using the control dial.
Keep Warm Setting
Allows you to adjust the temperature for Keep Warm mode between 113ºF and 193ºF.
Time Setting
Allows you to adjust the heating time for all functions except 01. Boil and 15. Milk Formula by 1, 5, 30, or 60 minute increments depending on the selected function.
Cancel
Cancels a current function.
BEFORE FIRST USE
 Before using for the first time, it is recommended to clean the interior of the kettle thoroughly. Please follow the
 ![]() procedures below before using the kettle:
procedures below before using the kettle:
- Read all instructions and important safeguards.
- Remove all packaging materials and check that all items have been received in good condition.
- Tear up all plastic bags and dispose of them properly as they can pose a risk to children.
![]() Clean the interior of the kettle with a soft sponge
Clean the interior of the kettle with a soft sponge ![]() and warm, soapy water. If your hand will not fit inside the kettle, swish warm, soapy water
and warm, soapy water. If your hand will not fit inside the kettle, swish warm, soapy water ![]() around in the interior of the kettle with the kettle lid on. Take care to keep the electrical components on the exterior of the kettle dry.
around in the interior of the kettle with the kettle lid on. Take care to keep the electrical components on the exterior of the kettle dry.- With a damp cloth, gently wipe the exterior of the kettle. Hand wash all parts (glass stew pot, glass stew pot lid, removable silicone ring, tea infuser). Do not wipe electrical components as this may
![]() cause damage to the unit.
cause damage to the unit. - Dry all parts thoroughly.
- Following the instructions in "Boiling Water", boil 6 cups of water. Once the water has boiled, pour it out then rinse the inside of the kettle once more with warm water. The kettle is now ready for use.
TO CLEAN
- Wipe the exterior of the kettle with a damp cloth, taking care to avoid the electrical components.
- Clean the interior of the kettle with a soft sponge and warm, soapy water. If your hand will not fit inside the kettle, swish warm, soapy water
![]() around in the interior of the kettle with the kettle lid on.
around in the interior of the kettle with the kettle lid on. - Rinse and drain any remaining soapy water from the kettle.
- If the glass stew pot, glass stew pot lid, removable silicone ring, or tea infuser were used, hand wash using warm, soapy water then dry thoroughly.
- Dry the interior and exterior of the kettle thoroughly before placing it back on the power base.

Always unplug the kettle and allow it to cool completely before cleaning.
Never attempt to disassemble the kettle or the power base.
Never immerse the kettle, power cord, plug or power base in the water.
Always take care not to allow electrical components to come into contact with water.
Do not use abrasive cleaners or scouring pads of any kind on the kettle or power base. This will cause damage to the finish and may create a risk of electrical shock.
Never wash the glass stew pot, glass stew pot lid, removable silicone ring, tea infuser, kettle or kettle lid in the dishwasher.
Note:
- Any other servicing should be performed by Aroma® Housewares.
FUNCTIONS
- Boil
Brings contents to boiling temperature (212ºF) quickly and efficiently. - Black Tea
Boils to 212ºF making it ideal for loose leaf black teas, Simply place the tea leaves inside the tea infuser and brew. - Green Tea
Heats to 170ºF making it ideal for loose leaf green teas. Simply place the tea leaves inside the tea infuser and brew. - White Tea
Heats to 160ºF making it ideal for loose leaf white teas. Simply place the tea leaves inside the tea infuser and brew. - Fruit Tea
Place dried or fresh fruit into the tea infuser to infuse water with your favorite delicious fruity flavors. - Herbal Tea
Fill the kettle with any herbs of your choice and allow them to steep in hot water until brewed to perfection. - Milk Tea
Allows you to brew milk tea by placing your preferred tea leaves inside the tea infuser and adding milk into the kettle. - Oolong Tea
Heats to 185ºF making it ideal for loose leaf oolong teas, Simply place the tea leaves inside the tea infuser and brew. - White Fungus
Add white fungus into the glass stew pot to soften them or to directly cook them into healthy dessert soups. - Bird's Nest
Using the glass stew pot, steam bird's nests to provide you with skin-beautifying collagen teas and soups. - Dessert
Prepares traditional Chinese dessert soups such as sweet rice soup, red bean soup and more. - Chinese Herbs
Steeps and stews Chinese medicinal herbs at optimal temperatures for up to 1 1/2 hours. - Porridge
Cooks perfectly tender rice porridge when rice and water are added to the kettle. - Soup
Can prepare a variety of soups by adding ingredients into the glass stew pot and allowing them to stew or by adding ingredients directly into the kettle. - Milk Formula
Add water to the kettle to bring it to a safe, warm temperature for use in milk formula. - Keep Warm
Will keep contents warm at a default temperature of 143ºF and default time of 1 hour.![]() To customize, adjust the temperature from 113ºF-193ºF using Keep Warm Setting and adjust the time from 1-8 hours using Time Setting.
To customize, adjust the temperature from 113ºF-193ºF using Keep Warm Setting and adjust the time from 1-8 hours using Time Setting.
 To customize, adjust the temperature from 113ºF-193ºF using Keep Warm Setting and adjust the time from 1-8 hours using Time Setting.
Note:
- Refer to the "Function Times & Temperatures Table" for each function's temperature and the adjustable time ranges available for each function.
The glass portions of the kettle will become extremely hot during use and remain hot for sometime after. Do not touch the glass body or kettle lid until the kettle has cooled completely.
Never open the kettle lid while water and/or other liquids are boiling.
SELECTING A FUNCTION
- Place the power base on a sturdy, level and dry surface.
![]()
- Press the lid release buttons and remove the kettle lid. Fill with the desired amount of water and/or other liquids. Liquid must be filled between the MIN and MAX levels.
- While pressing the lid release buttons, place the kettle lid on securely then carefully place the kettle onto the power base.
- Plug the power cord into an available 120V AC wall outlet.
- Press the control dial to turn on the unit. The unit will beep to signify it has been powered on.
- Turn the control dial until the desired function is selected. With every turn of the control dial, the unit will beep and the selected function's indicator light will illuminate.
- Once selected, press the control dial to initiate the function. The unit will beep as the selected function begins its heating cycle.
- When finished serving, press Cancel then press the control dial to power off the unit. Once the unit is off, safely unplug the power cord from the wall outlet.
Note:
- To remove only the kettle lid, press the lid release buttons while removing.
- If attempting to remove the kettle lid without pressing the lid release buttons, both the kettle lid and detachable stainless steel ring will be removed together. To put the stainless steel ring back on, align the silicone cut-out with the handle.
- All functions EXCEPT 01. Boil will automatically switch to Keep Warm mode after their heating cycle has completed. The default Keep Warm mode will keep contents warm for 1 hour.
BOILING WATER
- Place the power base on a sturdy, level and dry surface.
- Press the lid release buttons and remove the kettle lid. Fill with the desired amount of water. Water must be filled between the MIN and MAX levels.

- While pressing the lid release buttons, place the kettle lid on securely then carefully place the kettle onto the power base.

- Plug the power cord into an available 120V AC wall outlet.
- Press the control dial to turn on the unit. The unit will beep to signify it has been powered on.
- Turn the control dial to select function 01. Boil The unit will beep and the 01. Boil indicator light will illuminate.
- Press the control dial once more to initiate the boil cycle. The unit will beep and begin to heat.
- If automatic Keep Warm mode is desired, press Keep Warm Setting after initiating 01. Boil. To set a custom Keep Warm temperature, press Keep Warm Setting to increase the temperature by ten degree increments until the desired temperature is flashing on the digital display. After the contents reach a boil, the kettle will enter Keep Warm mode automatically.
- If Keep Warm mode was not selected, the unit will beep and automatically turn off when boiling temperature is reached.
- When finished serving, press Cancel then press the control dial to power off the unit. Once the unit is off, safely unplug the power cord from the wall outlet.


The glass portions of the kettle will become extremely hot during use and remain hot for sometime after. Do not touch the glass body or kettle lid until the kettle has cooled completely.
Never open the kettle lid while water is boiling.
USING THE GLASS STEW POT
The provided glass stew pot can be used to stew and steep ingredients for soups, bird's nests and more. To use, follow the instructions below:
- Place the power base on a sturdy, level and dry surface.
- Press the lid release buttons to remove the kettle lid. Fill the kettle with water, other liquids and/or any other desired ingredients. Liquid must be filled to around the 1.0L level.

- Slide the removable silicone ring onto the glass stew pot starting from the bottom to the top, Add desired ingredients into the glass stew pot. Insert the assembled glass stew pot and removable silicone ring.

- Always use the glass stew pot lid when using the glass stew pot. Place the glass stew pot lid inside the middle of the removable silicone ring. The water level will rise slightly above the 1.25L line.

![]() Carefully place the kettle onto the power base.
Carefully place the kettle onto the power base.

- Plug the power cord into an available 120V AC wall outlet.
- Press the control dial to turn on the unit. The unit will beep to signify it has been powered on.
- Turn the control dial until the desired function is selected. With every turn of the control dial, the unit will beep and the selected function's indicator light will illuminate.
- Once selected, press the control dial to initiate the function, The unit will beep as the selected function begins its heating cycle.
- When finished, press Cancel then press the control dial to power off the unit. Using heatresistant gloves or oven mitts, carefully remove the glass stew pot with the removable silicone ring and the glass stew pot lid still intact.
- Once the unit is off, safely unplug the power cord from the wall outlet.


Do not fill the kettle with more than 1.0L of liquid while using the glass stew pot to avoid and prevent overflow while boiling.
Never wash the glass stew pot, glass stew pot lid, removable silicone ring, tea infuser, kettle or kettle lid in the dishwasher.
The glass portions of the kettle will become extremely hot during use and remain hot for sometime after. Do not touch the glass body or kettle lid until the kettle has cooled completely.
Never open the kettle lid while water is boiling.
Use heat-resistant gloves or oven mitts when removing the entire glass stew pot.
USING THE TEA INFUSER
The provided tea infuser can be used to easily steep loose leaf teas and other smaller ingredients to prepare a variety of different delicious teas. To use, follow the ![]() instructions below:
instructions below:
- Place the power base on a sturdy, level and dry surface.
- Press the lid release buttons and remove the kettle lid. Fill with the desired amount of water. Water must be filled between the MIN and MAX levels.

![]() Add desired ingredients inside the tea infuser. Place the kettle lid on top of the tea infuser and press to secure.
Add desired ingredients inside the tea infuser. Place the kettle lid on top of the tea infuser and press to secure.
![]()
- While pressing the lid release buttons, place the
![]() tea infuser with the kettle lid attached into the middle of the detachable stainless steel ring.
tea infuser with the kettle lid attached into the middle of the detachable stainless steel ring.

- Carefully place the kettle onto the power base.

![]() Plug the power cord into an available 120V AC wall outlet.
Plug the power cord into an available 120V AC wall outlet.- Press the control dial to turn on the unit. The unit will beep to signify it has been powered on.
- Turn the control dial until the desired function is selected. With every turn of the control dial, the unit will beep and the selected function's indicator light will illuminate.
![]() When finished, press Cancel then press the control dial to power off the unit. Press the lid release buttons to remove the entire tea infuser with the kettle lid still on. Use heat-resistant gloves or oven mitts while removing to avoid injury,
When finished, press Cancel then press the control dial to power off the unit. Press the lid release buttons to remove the entire tea infuser with the kettle lid still on. Use heat-resistant gloves or oven mitts while removing to avoid injury,- Once the unit is off, safely unplug the power cord from the wall outlet.


The glass portions of the kettle will become extremely hot during use and remain hot for sometime after. Do not touch the glass body or kettle lid until the kettle has cooled completely.
Never open the kettle lid while liquids are boiling.
Use heat-resistant gloves or oven mitts when removing the tea infuser.
MINERAL DEPOSITS
Regular use of the kettle can leave behind mineral deposits or cause white residue and scale build-up on the interior of the kettle. This residue is normal and will ![]() not negatively affect you or the unit but can impact the quality of prepared meals/drinks over time if not cleaned properly. Follow these steps to remove deposits and residue:
not negatively affect you or the unit but can impact the quality of prepared meals/drinks over time if not cleaned properly. Follow these steps to remove deposits and residue:
- Fill the kettle with 4 cups of water and 3 tablespoons of baking soda OR 1 cup of white vinegar OR 1/2 cup of lemon juice.
- Bring contents to a boil by following the instructions in "Boiling Water".
![]()
- Allow the mixture to soak in the kettle overnight.
![]()
- Empty contents and rinse out the kettle thoroughly with warm, soapy water.
- Fill the kettle with 6 cups of water and bring to a boil. Once boiled, empty the kettle and dry thoroughly.
- Repeat as needed.
Helpful Hints:
- Using distilled water will help to prevent the buildup of mineral deposits.
- It is recommended to deep clean the kettle at least once a month.
DELAY TIMER
- Place the power base on a sturdy, level and dry surface.
![]() Press the lid release buttons to remove the kettle lid. Fill with the desired amount of water and/or ingredients. Liquid must be filled between the MIN and MAX levels.
Press the lid release buttons to remove the kettle lid. Fill with the desired amount of water and/or ingredients. Liquid must be filled between the MIN and MAX levels.- While pressing the lid release buttons, place the kettle lid on securely then carefully place the kettle onto the power base.
- Plug the power cord into an available 120V AC wall outlet.
- Press the control dial to turn on the unit. The unit will beep to signify it has been powered on.
- Turn the control dial until the desired function is selected. With every turn of the control dial, the unit will beep and the selected function's indicator light will illuminate. The functions available for the delay timer are 01. Boil, 06. Herbal Tea, 09. White Fungus, 10. Bird's Nest, 11. Dessert, 13. Porridge and 14. Soup.
- Press Delay Timer.
- Adjust the desired delay time by turning the control dial. Turn the control dial clockwise to
![]() increase and counterclockwise to decrease. The time will increase or decrease by 30 minute increments and can be delayed up to 9 1/2 hours.
increase and counterclockwise to decrease. The time will increase or decrease by 30 minute increments and can be delayed up to 9 1/2 hours. - Press the control dial to begin the delay timer. Once the selected amount of delay time has elapsed, the unit will begin heating for the selected function.
- When finished serving, press Cancel then press
![]() the control dial to power off the unit. Once the
the control dial to power off the unit. Once the ![]() unit is off, safely unplug the power cord from the wall outlet.
unit is off, safely unplug the power cord from the wall outlet. ![]()
KEEP WARM
- Place the power base on a sturdy, level and dry surface.
- Press the lid release buttons to remove the kettle lid. Fill with the desired amount of liquid. Liquid must be filled between the MIN and MAX levels.
- While pressing the lid release buttons, place the
![]() kettle lid on securely then carefully place the kettle onto the power base.
kettle lid on securely then carefully place the kettle onto the power base. - Plug the power cord into an available 120V AC wall outlet.
- Press the control dial to turn on the unit. The unit will beep to signify it has been powered on.
- Turn the control dial to select function 16. Keep
![]() Warm. The unit will beep and the 16. Keep Warm indicator light will illuminate.
Warm. The unit will beep and the 16. Keep Warm indicator light will illuminate. - Press Keep Warm Setting to adjust the temperature from 113ºF to 193ºF. Each press will increase the temperature by 10 degree increments.
- Press Time Setting to adjust the duration of Keep Warm mode from 1 to 8 hours. Each press will increase the time by 1 hour increments.
- Press the control dial to begin heating to the input temperature or the default temperature. The kettle will be kept at this temperature until the input time or default time has expired.
- When finished serving, press Cancel then press the control dial to power off the unit. Once the unit is off, safely unplug the power cord from the wall outlet.
Note:
- All functions EXCEPT 01. Boil will automatically switch to Keep Warm mode after their heating cycle has completed. The default Keep Warm mode will keep contents warm for 1 hour.
- While serving in Keep Warm mode, if the kettle is not returned back to the power base within 10 minutes, Keep Warm will be canceled.
- The default time and temperature for the 16. Keep
![]() Warm function is 1 hour and 143ºF respectively.
Warm function is 1 hour and 143ºF respectively.
CUSTOM AUTOMATIC KEEP WARM
To set a custom Keep Warm temperature to be implemented after a selected function's cycle has completed, follow these steps:
- Press Keep Warm Setting after selecting the desired function.
![]()
- To set a custom Keep Warm temperature, press Keep Warm Setting to increase the temperature by 10 degree increments until the desired temperature is flashing on the digital display.
- Press the control dial to begin the function's heating cycle.
- After the selected function's cycle has completed, the kettle will enter the custom Keep Warm mode and remain at the input temperature for 1 hour.
TIME SETTING
- Place the power base on a sturdy, level and dry surface.
- Press the lid release buttons to remove the kettle lid. Fill with the desired amount of water and/or ingredients. Liquid must be filled between the MIN and MAX levels.
- Place the kettle lid on securely then carefully place the kettle onto the power base.
- Plug the power cord into an available 120V AC wall outlet.
- Press the control dial to turn the unit on. The unit will beep to signify it has been powered on.
- Turn the control dial until the desired function is selected. The Time Setting feature is available for all functions EXCEPT 01. Boil and 15. Milk Formula.
- Press Time Setting to adjust heating time. Each press will increase the time by one minute increments.
- Press the control dial to initiate the selected function. The kettle will heat for the amount of time that was set and switch to Keep Warm once the time has expired.
- When finished serving, press Cancel then press the control dial to power off the unit. Once the unit is off, safely unplug the power cord from the wall outlet.
Function Times & Temperatures Table

RECIPES
Chocolate Fondue
4 cups water
3 1/2 oz. semi-sweet chocolate, chopped into small pieces
1 1/2 oz. milk chocolate, chopped into small pieces
1/3 cup heavy whipping cream
pinch of salt
strawberries, cookies, marshmallows, angel food cake or fruits of your choice, for dipping
Fill the kettle with 4 cups of water. Add semi-sweet chocolate, milk chocolate, heavy whipping cream, and salt into the glass stew pot then carefully place the glass stew pot inside the kettle by following the steps in "Using the Glass Stew Pot". Select and initiate the 11. Dessert function using the control dial and set the Time Setting to 20 minutes. Allow the chocolate to completely melt then continue to keep the chocolate warm on Keep Warm mode while serving.
SERVES 2-4.
Ginseng Herb Chicken Soup
| 1/2 oz. | marjoram, rinsed |
| 1/2 oz. | cloves, rinsed |
| 1/2 oz. | basil, rinsed |
| 1/2 oz. | ginseng, rinsed |
| 1 | celery stalk, chopped |
| 1 | bay leaf |
| 4 | chicken legs |
| 4 cups | water |
| 1 3/4 cups | water |
Fill the kettle with 4 cups of water. Place the assorted herbs and 1% cups of water into the glass stew pot then then carefully place the stew pot inside the kettle by following the steps in "Using the Glass Stew Pot". Let the ingredients soak for 40 minutes then add the chicken legs to the glass stew pot and replace the glass stew pot lid. Select and initiate the 12. Chinese Herbs function using the control dial and set the Time Setting for 40 minutes. Once finished cooking, pour into heat-safe bowls to serve.
SERVES 2.
Red Bean Soup
4 oz. dried red beans, rinsed and soaked overnight
2 tbsp. rock sugar
2 dried orange peels
5 cups water
Add dried red beans, orange peels, and water into the kettle then place the kettle lid on securely. Select 11. Dessert and set the Time Setting for 1 hour and 20 minutes. Press the control dial to begin heating. Once finished boiling, stir in the rock sugar then pour into heat-safe bowls to serve.
SERVES 4.
Porridge
1/2 cup rice
4 cups water
Rinse the rice until the water runs clear. Add the rice and 4 cups of water to the kettle. Select 13. Porridge and set the Time Setting for 40 minutes to lh hours, depending on how tender you prefer your porridge. Press the control dial to begin heating. Once finished cooking, pour into heat-safe bowls to serve. ![]()
SERVES 4.
Yogurt
| 2 cups | milk |
| 2 tbsp. | yogurt |
| 8 cups | water |
Add 4 cups of water to the kettle. Pour milk into the glass stew pot then place the glass stew pot inside the kettle with the removable silicone ring attached. Select the 04. White Tea function to sterilize the milk. Safely remove the glass stew pot and pour out the hot water inside the kettle then refill with 4 more cups of cold water. Place the glass stew pot back inside the kettle to cool the milk. Once the milk has cooled, stir in yogurt. Select 16. Keep Warm and set the temperature to 113ºF and the Time Setting for 6 1/2 hours. Pour the yogurt into a bowl and refrigerate until completely cooled.
SERVES 2.
Ramen Noodles
1 can chicken stock
2 cups water
1 cup spinach
1 pack instant ramen noodles
1 cup grilled chicken, chopped
1 egg, beaten
1/2 cup warm water
salt
Pour the chicken stock and water into the kettle then place the kettle lid on securely. Select and initiate the 01. Boil function using the control dial. While the kettle comes to a boil, mix together the beaten egg, warm water and salt in a large bowl. After the water has come to a boil, pour the egg mixture into the glass stew pot and carefully place the glass stew pot inside the kettle by following the steps in "Using the Glass Stew Pot". Select and initiate the 14. Soup function using the control dial and set the Time Setting for 10 minutes. After 5 minutes has elapsed, add the ramen noodles, spinach and grilled chicken into the kettle. Allow the kettle to heat for the remainder of the time on the 14. Soup function then serve in a heat-safe bowl.![]()
SERVES 1.
Dried Snow Fungus, Lotus Seed & Red Date Soup
1 dried snow fungus, stem trimmed
1/4 cup dried lotus seeds, rinsed
1/4 cup dried red dates, seeded
5 cups water
2 tbsp. rock sugar
Soak the dried snow fungus in water for 20 minutes then tear apart into small pieces. Add water and all ingredients except the rock sugar into the kettle then place the kettle lid on securely. Select and initiate the 09. White Fungus function using the control dial and set the Time Setting for 1 hour. Once finished boiling, stir in the rock sugar then ![]() pour into heat-safe bowls to serve.
pour into heat-safe bowls to serve.
SERVES 4.
Bird's Nest
| 1 | dried bird's nest |
| 8 | small red dates, rinsed |
| 2 tbsp. | rock sugar |
| 1 1/2 cups | water |
| 4 cups | water |
Soak the dried bird's nest in cold water for 4 hours, draining and refilling with fresh cold water after 2 hours of soaking. Drain the water then carefully pick out the feathers using tweezers. Fill the kettle with 4 cups of water. Place Ih cups of water, the soaked bird's nest, and red dates into the glass stew pot then carefully place the glass stew pot inside the kettle by following the steps in "Using the Glass Stew Pot". Select and initiate the 10. Bird's Nest function using the control dial and set the Time Setting for 40 minutes. After the kettle has reached a boil, carefully remove the glass stew pot and empty its ![]() contents into a bowl. Sprinkle rock sugar atop and serve.
contents into a bowl. Sprinkle rock sugar atop and serve.
SERVES 2.
Chicken Nagaimo Soup
2 chicken wings
1 chicken leg, cut into 3" pieces
1 cup nagaimo, cut into 2" pieces
5 dried shiitake mushrooms, soaked and stemmed
7 red dates
1 in. ginger, sliced
1 tbsp. goji berries
2 tbsp. rice wine
1 tbsp. salt
5 cups water
Add chicken, mushrooms, red dates, ginger, and water into the kettle ![]() then place the kettle lid on securely. Select and initiate the 14. Soup function using the control dial and set the Time Setting for 37 minutes. Once 37 minutes has elapsed, add in goji berries, nagaimo, cooking wine, and salt and boil for an additional 3 minutes before serving.
then place the kettle lid on securely. Select and initiate the 14. Soup function using the control dial and set the Time Setting for 37 minutes. Once 37 minutes has elapsed, add in goji berries, nagaimo, cooking wine, and salt and boil for an additional 3 minutes before serving.
SERVES 4.
For additional recipes, visit us at www.AromaCo.com
TROUBLESHOOTING
The kettle and indicator lights do not work when powered on.
- Make sure the kettle is seated properly on the power base and that the power base is connected to a functioning electrical outlet.
- If there is no water or liquid in the kettle, the internal safety mechanism will automatically turn the kettle off. The kettle will begin working again after the kettle is removed from and returned to the power base and the internal temperature drops to a safe level.
The water is boiling, but the power switch and indicator lights do not turn off.
- The automatic shut-off feature will not operate properly if the kettle lid is not completely closed. Allow the kettle to cool, then check to see that the kettle lid is properly locked into place.
There are mineral deposits or white residue on the interior of the kettle.
- A certain amount of scale build-up is normal after use and is caused by minerals contained in hard water.
- To remove deposits, refer to "Mineral Deposits".
Error Code Chart
ff an error shows on the digital display, the following chart will help explain the next course of action.
| Code | Description | Corrective Action |
| 000 | Kettle missing from power base or the temperature sensor has an open circuit | Place the kettle back onto the power base and restart the selected function. If the problem persists, contact customer service at 1-800-276-6286. |
| E00 | Dry boil protection | Power off the unit, fill the kettle with water and restart the selected function. |
| E01 | Temperature sensor has short circuited or overheated | Turn off the kettle. Allow to cool for 5 minutes then restart. if the problem persists, contact customer service at 1-800-276-6286. |
Note:
- If the problem persists, please contact our customer service department at 1-800-276-6286 or by email at CustomerService@AromaCo.com
Questions or concerns about your Aroma product?
www.AromaCo.com/Support
1-800-276-6286

Here at Aroma we strive to make a difference—to design and distribute products that enhance and enrich people's lives.
Aroma offers an array of exceptional products to make cooking simple and satisfying. Discover other countertop appliances and cookware from our current product lineup to complement your kitchen.
REGISTER YOUR PRODUCT
Activate your warranty. Registration is quick and easy.
Be notified of:
- new product releases
- new test kitchen recipes
- sales and promotions
...and more!

SCAN TO REGISTER
or visit AromaCo.com/registration

/AromaHousewares
Published By:
Aroma Housewares Co. | 6469 Flanders Drive, San Diego, CA 92121, U.S.A.
1-800-276-6286 | www.AromaCo.com
©2021 Aroma Housewares Company I All rights reserved.![]()

Documents / Resources
References
![www.aromaco.com]() Kitchen Countertop Cooking Products - Aroma Housewares
Kitchen Countertop Cooking Products - Aroma Housewares![www.aromaco.com]() FAQs - Kitchen Appliance FAQs - Aroma Housewares
FAQs - Kitchen Appliance FAQs - Aroma Housewares![aromaco.com]() Product Registration - Register My Product - Aroma Housewares
Product Registration - Register My Product - Aroma Housewares
Download manual
Here you can download full pdf version of manual, it may contain additional safety instructions, warranty information, FCC rules, etc.
Advertisement


Need help?
Do you have a question about the AWK-701 and is the answer not in the manual?
Questions and answers