Advertisement
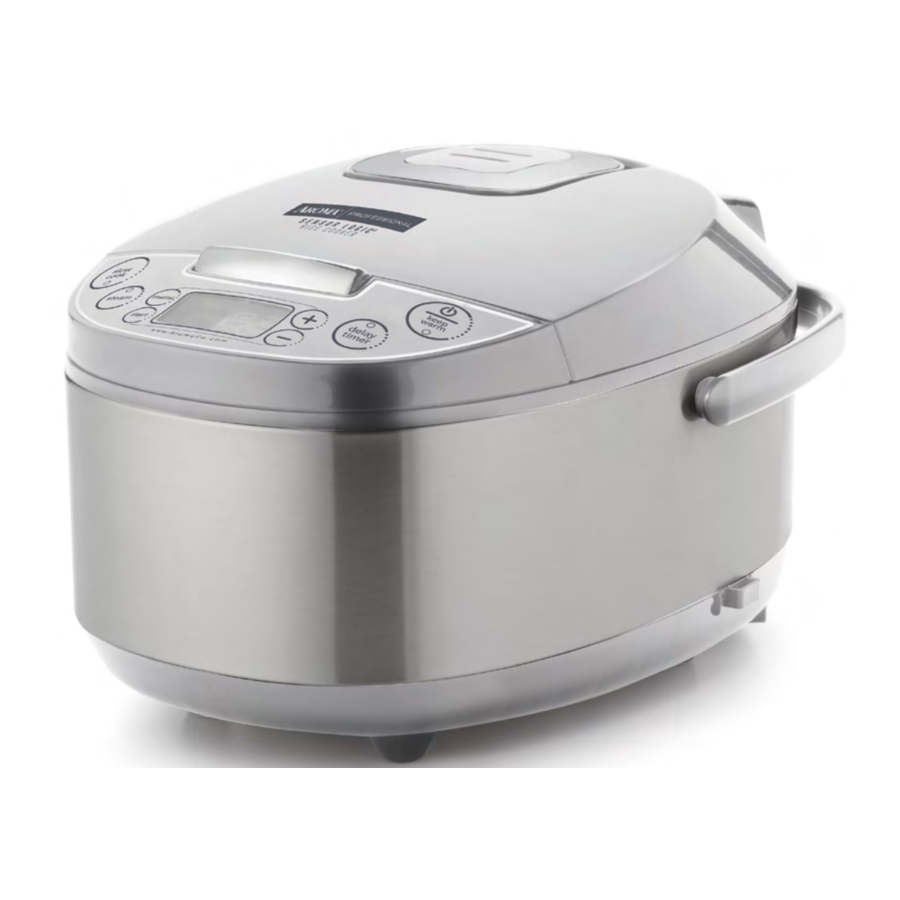
Parts Identification

Digital Controls
Power ( )/Keep Warm
One press turns the cooker on/off. A second press will set the rice cooker to its Keep Warm setting.
Delay Timer
The Delay Timer sets up to 12 hours for rice ready when it's needed. Add rice and water in the morning and come home to delicious rice ready to eat!
Slow Cook
Sets to Slow Cook from 2 to 10 hours and is great for homemade roasts and stews.
Steam
Set the time food needs to steam. A count down will begin once water reaches a boil and shut off once time has elapsed.
Menu
Allows rice cooker to be set to one of its specialized cooking functions.
Start
Begins cooking on the selected function.
White
Cooks fluffy, delicious rice automatically.
Brown
Ideal for cooking brown rice or grains to perfection.
Sauté-then-Simmer
Sauté-then-Simmer STS™ Technology will sauté foods at a high heat and automatically switch over to its simmer mode once liquid is added.
Soup
Great for preparing savory soups and delicious stews.
Oatmeal
Perfect for preparing a hearty breakfast classic.
Cake
This function cooks cakes and other treats.
(-) or (+)
Allows you to adjust time for specific functions.
Before First Use
- Read all instructions and important safeguards.
- Remove all packaging materials and check that all items have been received in good condition.
- Tear up all plastic bags and dispose of them properly as they can pose a risk to children.
- Wash steam vent and all other accessories in warm, soapy water. Rinse and dry thoroughly.
- Remove the inner pot from cooker and clean with warm, soapy water. Rinse and dry thoroughly before returning to cooker.
- Wipe cooker body clean with a damp cloth.
To Clean
- Remove the steam vent from the lid when cooker is completely cooled by lifting up.
- Wash the inner pot and all accessories or wash them in the top rack of the dishwasher.
- Wipe cooker body clean with a damp cloth.
- Thoroughly dry cooker body and all accessories.
- Reassemble for next use.
Note:
- Do not use harsh abrasive cleaners or scouring pads on the rice cooker and its accessories.
- If washing in the dishwasher, a slight discoloration to the inner pot will occur. This is cosmetic only and will not affect performance.
- Do not immerse the rice cooker base, cord or plug in water at any time.
- Any other servicing should be performed by Aroma® Housewares.
Troubleshooting
- Rice is too dry/hard after cooking.
If your rice is dry or hard/chewy when the cooker switches to Keep Warm, additional water and cooking time will soften the rice. Depending on how dry your rice is, add ½ to 1 cup of water and stir through. Close the lid and press the White Rice button. When cooker switches to Keep Warm mode, open the lid and stir the rice to check the consistency. Repeat as necessary until rice is soft and moist. - Rice is too moist/soggy after cooking.
If your rice is still too moist or soggy when the cooker switches to Keep Warm, use the serving spatula to stir the rice. This will redistribute the bottom (moistest) part of the rice as well as release excess moisture. Close the lid and allow to remain on Keep Warm mode for 10-30 minutes as needed, opening the lid and stirring periodically to release excess moisture.
Helpful Hints:
The provided rice cooker cup is the equivalent to a 3/4 standard US cup

Note:
- Because rice varieties may vary in their make-up, results may differ. Here are some troubleshooting tips to help you achieve the desired consistency.
Cooking Rice
- Using the provided measuring cup, add rice to the inner pot.
- Rinse rice to remove excess starch. Drain.
- Fill with water to the line which corresponds to the number of cups of rice being cooked.
- Place the inner pot into the cooker.
- Close the lid securely.
- Plug the power cord into an available 120V AC wall outlet.
- Press the (
![]() )/Keep Warm button to turn on the cooker.
)/Keep Warm button to turn on the cooker. - Press the Menu button to cycle to the White or Brown rice function depending on the type of rice being cooked. The indicator light will confirm which function is selected.
- Press the Start button to begin cooking the rice. The digital display will show a "chasing" pattern and the indicator light will become solid to indicate that it is cooking.
- The cooker will count down the final minutes of cook time (12 minutes for White and 25 minutes for Brown).
- Once rice is finished, the rice cooker will beep and automatically switch to Keep Warm. The digital display will show the number of hours the rice cooker has been on Keep Warm, beginning with "0."
- For better results, stir the rice with the serving spatula to distribute any remaining moisture.
- When finished serving, turn the rice cooker off by pressing the (
![]() )/Keep Warm button once to change it from its Keep Warm setting and then press again until the rice cooker powers off.
)/Keep Warm button once to change it from its Keep Warm setting and then press again until the rice cooker powers off. - Unplug the power cord from the power outlet first, then from the rice cooker.
Note:
- Before placing the inner pot into the cooker, check that it is dry and free of debris. Adding the inner pot when wet may damage the cooker.
- Brown rice requires a much longer cooking cycle than other rice varieties due to the extra bran layers on the grains. The Brown rice function on this cooker allows extra time and adjusted heat settings in order to cook the rice properly. If it appears the cooker is not heating up immediately on the Brown rice setting, this is due to a low-heat soak cycle that proceeds the cooking cycle to produce better Brown rice results.
- Rice should not be left in the cooker on Keep Warm for more than 12 hours.
Helpful Hints:
If you misplace the measuring cup, a ¾ standard US cup is an exact replacement.
To add more flavor to rice, try substituting a favorite meat or vegetable broth or stock. The ratio of broth/stock to rice will be the same as water to rice.
For approximate rice cooking times and suggested rice/water ratios, see the "Rice/ Water Measurement Table".
Rice/ Water Measurement Table
| UNCOOKED RICE | RICE WATER LINE (inside pot) | APPROX. COOKED RICE YIELD | COOKING TIMES |
| 2 Cups* | Line 2 | 4 Cups* | White Rice: 34-39 Min. Brown Rice: 59-64 Min. |
| 3 Cups* | Line 3 | 6 Cups* | White Rice: 38-43 Min. Brown Rice: 61-66 Min. |
| 4 Cups* | Line 4 | 8 Cups* | White Rice: 41-46 Min. Brown Rice: 63-68 Min. |
| 5 Cups* | Line 5 | 10 Cups* | White Rice: 45-50 Min. Brown Rice: 65-70 Min. |
| 6 Cups* | Line 6 | 12 Cups* | White Rice: 48-53 Min. Brown Rice: 67-72 Min. |

*1 Rice Cooker Cup = ¾ US Cup
Using Delay Timer
- Using the provided measuring cup, add rice to the inner pot.
- Rinse rice to remove excess starch. Drain.
- Fill with water to the line which corresponds to the number of cups of rice being cooked.
- Place the inner pot into the cooker.
- Close the lid securely.
- Plug the power cord into an available 120V AC wall outlet.
- Press the (
![]() )/Keep Warm button to turn on the cooker.
)/Keep Warm button to turn on the cooker. - Press the Delay Timer button. Each press increases in one hour increments. It may be set 1 to 15 hours in advance.
- Once the needed time is selected, press the Menu button to cycle to the White or Brown function depending on the type of rice being cooked. The indicator light will confirm which function is selected.
- Press the Start button to set the delayed time. The digital display will show the amount of time remaining before rice begins cooking and the indicator light will become solid.
- Once rice begins cooking, a chasing pattern will be displayed.
- The rice cooker will countdown the final minutes of cook time (12 minutes for White and 25 minutes for Brown).
- Once rice is finished, the rice cooker will beep and automatically switch to Keep Warm. The digital display will show the number of hours the rice cooker has been on Keep Warm, beginning with "0."
- For better results, stir the rice with the serving spatula to distribute any remaining moisture.
- When finished serving rice, turn the rice cooker off by pressing the (
![]() )/Keep Warm button once to change it from its Keep Warm setting and then press again until the rice cooker powers off.
)/Keep Warm button once to change it from its Keep Warm setting and then press again until the rice cooker powers off. - Unplug the power cord from the power outlet first, then from the rice cooker.
Note:
- Due to the longer cooking time needed, Brown rice may only be delayed for 2 hours or more.
- Rice should not be left in the cooker on Keep Warm for more than 12 hours.
Helpful Hints:
If you misplace the measuring cup, a ¾ standard US cup is an exact replacement.
To add more flavor to rice, try substituting a favorite meat or vegetable broth or stock. The ratio of broth/stock to rice will be the same as water to rice.
For approximate rice cooking times and suggested rice/water ratios, see the "Rice & Water Measurement Table".
Slow Cook
- Press the (
![]() )/Keep Warm button to turn on the rice cooker.
)/Keep Warm button to turn on the rice cooker. - Press the Slow Cook button.
- Use the (-) or (+) buttons to set the time. These buttons will adjust cooking time in one hour increments between 2 and 10 hours.
- Press the Start button to begin slow cooking at the selected time. The digital display will show the remaining cooking time and the button's indicator light will become solid to indicate that it is cooking.
- The rice cooker will begin to slow cook. The digital display will count down in one hour increments from the selected time.
- Once the selected time has passed, the rice cooker will beep and switch to Keep Warm mode. The digital display will show the number of hours the rice cooker has been on Keep Warm beginning with "0."
- Open the lid to check food for doneness. If fully cooked, remove food for serving.
- When finished serving, turn the rice cooker off by pressing the (
![]() )/Keep Warm button once to change it from its Keep Warm setting and then press again until the rice cooker powers off.
)/Keep Warm button once to change it from its Keep Warm setting and then press again until the rice cooker powers off. - Unplug the power cord from the power outlet first, then from the rice cooker.

The rice cooker will not switch to Keep Warm until all liquid is boiled away. Follow the recipe carefully and do not leave the rice cooker unattended.
Use a long-handled wooden or heat-safe spoon to stir food while slow cooking.
Note:
- Before placing the inner pot into the cooker, check that the cooking pot is dry and free of debris. Adding the inner pot when wet may damage the cooker.
- Slow cooking requires a small amount of liquid. Without liquid, the cooker will automatically switch to Keep Warm.
Steam
- Using the provided measuring cup, add 2 cups of water to the inner pot.
- Place the inner pot into the cooker.
- Place food to be steamed onto the steam tray.
- Place the steam tray into the cooker.
- Close the lid securely.
- Plug the power cord into an available 120V AC wall outlet.
- Press the (
![]() )/Keep Warm button to turn on the rice cooker.
)/Keep Warm button to turn on the rice cooker. - Press the Steam button. The digital display will show a flashing 5 to represent five minutes of steam time.
- Use the (-) or (+) buttons to set the desired time. These buttons will adjust cooking time in one minute increments between 5 and 30 minutes.
- Press the Start button to begin steaming at the selected time. The digital display will show the selected cooking time and the button's indicator light will become solid to indicate that it is cooking.
- Once the water reaches a boil, the digital display will count down in one minute increments from the selected time.
- Once the selected time has passed, the rice cooker will beep and switch to Keep Warm mode. The digital display will show the number of hours the rice cooker has been on Keep Warm, beginning with "0."
- Check steamed food for doneness. If finished steaming, carefully remove the steam tray. It will be hot.
- Turn the rice cooker off by pressing the (
![]() )/ Keep Warm button once to change it from its Keep Warm setting and then press again until the rice cooker powers off.
)/ Keep Warm button once to change it from its Keep Warm setting and then press again until the rice cooker powers off. - Unplug the power cord from the power outlet first, then from the rice cooker.
Helpful Hints:
Smaller foods may be placed on a heat-proof dish and then placed onto the steam tray. Parchment paper or aluminum foil may be used as well. Place the paper/foil in the center of the steam tray and ensure it does not create a seal along the bottom of the steam tray. For best results, it is recommended to puncture small holes in the paper/foil. For suggested steaming times and water amounts, see the meat and vegetable steaming tables.
Steam Food & Cook Rice
To steam while cooking rice, begin cooking rice by following steps 1 to 9 of Cooking Rice.
- Place food to be steamed onto the steam tray.
- Using caution to avoid escaping steam, open the lid.
- Place steam tray into the rice cooker.
- Close the lid securely.
- Using caution, open the lid to check food for doneness.
- If food is finished steaming, carefully remove the steam tray. It will be hot.
- Allow the rice cooker to continue cooking rice.
- Once the rice is done, the rice cooker will beep and switch to Keep Warm mode. The digital display will show the number of hours the rice cooker has been on Keep Warm, beginning with "0."
Note:
- Do not attempt to cook more than 3 cups (uncooked) of rice if steaming and cooking rice simultaneously. The steam tray will not fit properly if more than 6 cups of rice are cooked.
- Food can be steamed at any time while rice cooks, however for best results food should be steamed toward the end of the rice cooking cycle. This will allow for rice and steamed food to be ready at the same time. See the "Rice/Water Measurement Table" for approximate rice cooking times.
- Before placing the inner cooking pot into the rice cooker, check that the cooking pot is dry and free of debris. Adding the inner cooking pot when wet may damage the rice cooker.
- For best results, stir the rice with the serving spatula to distribute any remaining moisture.
- When finished serving, turn the rice cooker off by pressing the (
![]() )/Keep Warm button once to change it from its Keep Warm setting and then press again until the rice cooker powers off.
)/Keep Warm button once to change it from its Keep Warm setting and then press again until the rice cooker powers off. - Unplug the power cord from the power outlet first, then from the rice cooker
Steaming Tables
Meat Steaming Table
| Meat | Steaming Time | Safe Internal Temperature |
| Fish | 25 Min. | 140° |
| Chicken | 30 Min. | 165° |
| Pork | 30 Min. | 160° |
| Beef | Medium = 25 Min. Medium-Well = 30 Min. Well = 33 Min. | 160° |
Vegetable Steaming Table
| Vegetable | Steaming Time |
| Asparagus | 20 Minutes |
| Broccoli | 15 Minutes |
| Cabbage | 25 Minutes |
| Carrots | 25 Minutes |
| Cauliflower | 25 Minutes |
| Corn on the Cob | 25 Minutes |
| Green Beans | 15 Minutes |
| Peas | 20 Minutes |
| Spinach | 20 Minutes |
| Squash | 20 Minutes |
| Zucchini | 20 Minutes |
* When steaming, Aroma® recommends using 2 cups of water with the provided measuring cup.
Helpful Hints:
Since most vegetables only absorb a small amount of water, there is no need to increase the amount of water with a larger serving of vegetables.
Steaming times may vary depending upon the cut of meat being used.
To ensure meat tastes its best, and to prevent possible illness, check that meat is completely cooked prior to serving. If it is not, simply place more water in the inner pot and repeat the cooking process until the meat is adequately cooked.
Note:
- Altitude, humidity and outside temperature will affect cooking times.
- These steaming charts are for reference only. Actual cooking times may vary.
Sauté-then-Simmer®
- Add ingredients to be sautéed/browned to the inner cooking pot.
- Place the inner cooking pot into the rice cooker.
- Plug the power cord into an available 120V AC wall outlet.
- Press the (
![]() )/Keep Warm button to turn on the rice cooker.
)/Keep Warm button to turn on the rice cooker. - Press the Menu button to cycle to the STS® function. The indicator light will confirm which function is selected.
- Press the Start button to begin sautéing. The digital display will show a "chasing" pattern and the indicator light will become solid to indicate that it is cooking. Using a long-handled wooden spoon, stir ingredients until sautéed/browned to the desired level.
- Add other called for ingredients and liquid to the inner cooking pot.
- Close the lid securely and allow the rice cooker to cook.
- After a few minutes, the rice cooker will automatically switch to its "Simmer" mode. The rice cooker will countdown the final minutes of cook time starting at 12 minutes.
- Once the meal has cooked, the rice cooker will beep and automatically switch over to Keep Warm.
- When finished serving, turn the rice cooker off by pressing the (
![]() )/Keep Warm button once to change it from its Keep Warm setting and then press and hold again until the rice cooker powers off.
)/Keep Warm button once to change it from its Keep Warm setting and then press and hold again until the rice cooker powers off. - Unplug the power cord from the power outlet first, then from the rice cooker.
Do not use the provided serving spatula to sauté. It is not intended to be used in contact with high temperatures. Use a long-handled wooden or heat-safe spoon to stir food while sautéing.
Helpful Hints:
If sautéing only, after food has been sautéed/ browned to the desired level, press the (![]() )/Keep Warm button to switch the rice cooker to its Keep Warm setting to keep sautéed food warm and fresh for serving.
)/Keep Warm button to switch the rice cooker to its Keep Warm setting to keep sautéed food warm and fresh for serving.
Note:
- Before placing the inner cooking pot into the rice cooker, check that the cooking pot is dry and free of debris. Adding the inner cooking pot when wet may damage the rice cooker.
- Food should not be left in the rice cooker on Keep Warm for more than 12 hours
Soup
- Add ingredients to the inner pot.
- Place the inner pot into the cooker.
- Close the lid securely.
- Plug the power cord into an available 120V AC wall outlet.
- Press the (
![]() )/Keep Warm button to turn the rice cooker on.
)/Keep Warm button to turn the rice cooker on. - Press the Menu button to cycle to the Soup function. The indicator light will confirm which function is selected.
- Press the Start button to begin cooking on the selected function. The digital display will show a "chasing" pattern and the indicator light will become solid to indicate that it is cooking.
- The rice cooker will countdown the final minutes of cook time starting at 10 minutes.
- Once food is finished, the rice cooker will beep and automatically switch to its Keep Warm setting. The digital display will show the number of hours the rice cooker has been on the Keep Warm setting, beginning with "0."
- When finished serving, turn the rice cooker off by pressing the (
![]() )/Keep Warm button once to change it from its Keep Warm setting and then press and hold again until the rice cooker powers off.
)/Keep Warm button once to change it from its Keep Warm setting and then press and hold again until the rice cooker powers off. - Unplug the power cord from the power outlet first, then from the rice cooker.
Note:
- Before placing the inner pot into the cooker, check that the cooking pot is dry and free of debris. Adding the inner pot when wet may damage the cooker.
Oatmeal
- Following package instructions for suggested oatmeal/water ratio, add oatmeal and water to the inner cooking pot.
- Place the inner cooking pot into the rice cooker.
- Close the lid securely.
- Plug the power cord into an available 120 VAC wall outlet.
- Press the (
![]() )/Keep Warm button to turn the rice cooker on.
)/Keep Warm button to turn the rice cooker on. - Press the Menu button to cycle to the Oatmeal function. The indicator light will confirm which function is selected.
- Press the Start button to begin cooking on the selected function. The digital display will show a "chasing" pattern and the indicator light will become solid to indicate that it is cooking.
- The rice cooker will countdown the final minutes of cook time starting at 12 minutes.
- Once oatmeal is finished, the rice cooker will beep and automatically switch to its Keep Warm setting. The digital display will show the number of hours the rice cooker has been on the Keep Warm setting, beginning with "0."
- When finished serving, turn the rice cooker off by pressing the (
![]() )/Keep Warm button once to change it from its Keep Warm setting and then press again until the rice cooker powers off.
)/Keep Warm button once to change it from its Keep Warm setting and then press again until the rice cooker powers off. - Unplug the power cord from the power outlet first, then from the rice cooker.
Helpful Hints:
Using caution to avoid escaping steam, open the lid and stir occasionally with a long-handled wooden spoon to assist with cooking.
Note:
- Oatmeal should not be left in the rice cooker on Keep Warm for more than 12 hours.
Cake
- Follow instructions on cake mix packaging or recipe to mix liquid ingredients and cake mix. Add cake mix into the inner pot.
- Place the inner cooking pot into the rice cooker.
- Close the lid securely.
- Plug the power cord into an available 120 VAC wall outlet.
- Press the (
![]() )/Keep Warm button to turn the rice cooker on.
)/Keep Warm button to turn the rice cooker on. - Press the Menu button to cycle to the Cake function. The indicator light will confirm which function is selected.
- Press the Start button to begin cooking on the selected function. The digital display will show a "chasing" pattern and the indicator light will become solid to indicate that it is cooking.
- The rice cooker will countdown the final minutes of cook time starting at 10 minutes.
- Once cake is finished, the rice cooker will beep and automatically switch to its Keep Warm setting. The digital display will show the number of hours the rice cooker has been on the Keep Warm setting, beginning with "0."
- Remove the cake carefully by inverting the inner pot onto a flat dish or surface. Turn the rice cooker off by pressing the (
![]() )/Keep Warm button once to change it from its Keep Warm setting and then press and hold again until the rice cooker powers off.
)/Keep Warm button once to change it from its Keep Warm setting and then press and hold again until the rice cooker powers off. - Unplug the power cord from the power outlet first, then from the rice cooker.
Note:
- Before placing the inner cooking pot into the rice cooker, check that the cooking pot is dry and free of debris. Adding the inner cooking pot when wet may damage the rice cooker.
- The Cake function will run for 50 minutes before switching to Keep Warm. Adjust cook time accordingly depending on the recipe being used.
- Cake should not be left in the rice cooker on Keep Warm for more than 12 hours. Remove cake immediately for best results.
Helpful Hints:
Check cake for doneness by placing a toothpick into the cake. If it comes out clean, the cake is ready!
Recipes
Jalapeño Quinoa with Shallots
1 tbsp olive oil
1 small shallot, minced
1 clove garlic, minced
2 jalapeño peppers, minced
2 cups quinoa, thoroughly rinsed
2 ½ cups chicken broth
Set the cooker for STS™ function. Pour the oil into the inner pot and add shallot, garlic and peppers. Using a longhandled wooden spoon, stir until softened. Add the quinoa and chicken broth. Stir well. Close the lid and select Brown to begin cooking. Cook until quinoa is done. Serve while warm.
SERVES 4.
Cajun Andouille & Red Bean Soup
¾ lb. andouille sausage, cut into ¼-inch slices
½ cup white onion, chopped
1 clove garlic, peeled and minced
15 oz. can red kidney beans, rinsed/drained
14 oz. can diced tomatoes, undrained
11 oz. can whole kernel corn with sweet peppers, undrained
3 cups beef broth
1 tbsp fresh basil, chopped feta cheese, crumbled, for garnish
Set the cooker for STS™ function. Brown sausage for 2-3 minutes. Add the onion and garlic and sauté until tender. Add the remaining ingredients except for the cheese. Close the lid and select Steam to cook for 20 minutes. Ladle into individual bowls and top each serving with the cheese.
SERVES 4.
Jambalaya
1 lb. spicy smoked sausage
1 lb. shrimp, peeled and deveined
2 cups cooked chicken, shredded
1 ½ cups rice
1 4-oz. can chicken broth
2 tbsp diced green chiles
---- creole seasoning
Cut the smoked sausage in half, lengthwise, then into 1/4" half circles. Add all ingredients to the inner pot and mix well. Place inner pot in the rice cooker and close the lid. Set to White. The rice cooker will automatically switch to Keep Warm once the meal is ready.
SERVES 4.
Green Chile Chicken and Rice
1 ½ cups rice
3 cups chicken broth
2 tbsp diced minced onion
½ tsp salt
1 10-oz. can chicken breast chunks, with liquid
1 4-oz. can diced green chiles, with liquid
Place all ingredients in the inner pot and stir. Place inner pot into the rice cooker, cover and select White. Allow to cook until rice cooker switches to Keep Warm. Add salt to taste. Stir and serve immediately as a main course.
SERVES 4.

Documents / ResourcesDownload manual
Here you can download full pdf version of manual, it may contain additional safety instructions, warranty information, FCC rules, etc.
Download Aroma ARC-616 - 4 in 1 Multicooker, Rice Cooker, Slow Cooker, Food Steamer Manual
Advertisement


Need help?
Do you have a question about the ARC-616 and is the answer not in the manual?
Questions and answers