Bose L1 Pro32 - Portable Line Array Manual
- Service manual (42 pages) ,
- Owner's manual (24 pages) ,
- Firmware update (44 pages)
Advertisement
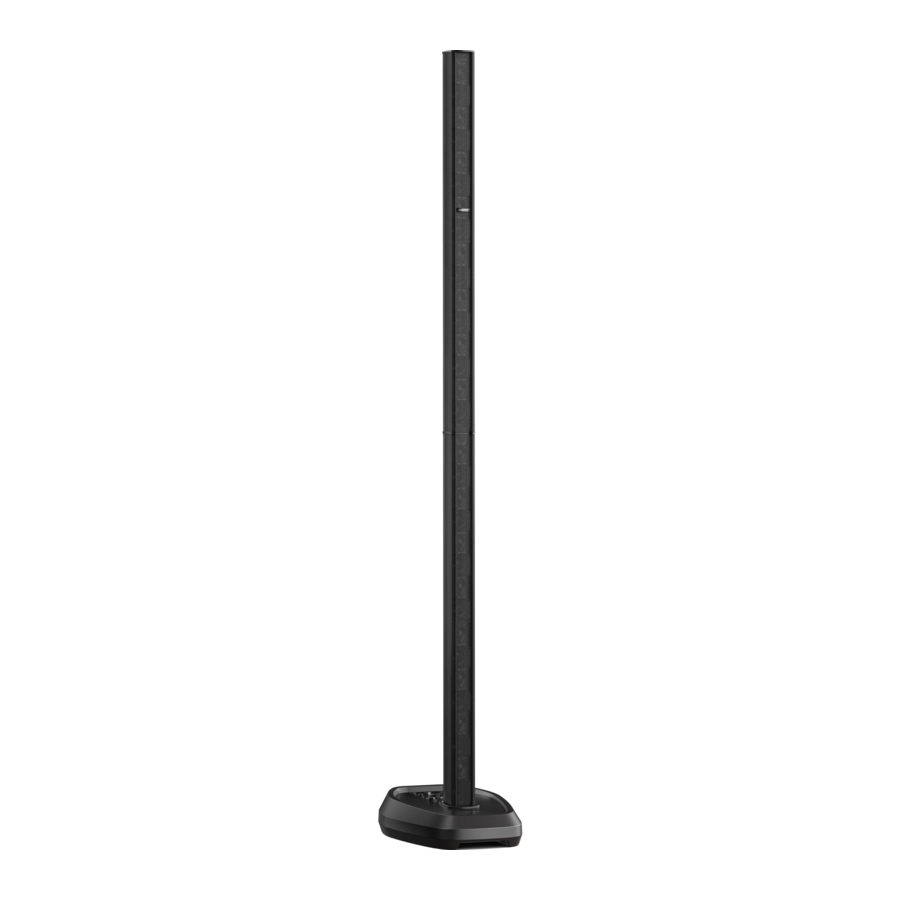
Overview
Package Contents

Optional Accessories
- L1 Pro32 Array & Power Stand Bag
- SubMatch Cable
For additional information on L1 Pro accessories, visit PRO.BOSE.COM.
Setup
Connections and Controls

- Channel Parameter Control: Adjust the level of volume, treble, bass, or reverb for your desired channel. Press the control to switch between parameters; rotate the control to adjust the level of your selected parameter.
- Signal/Clip Indicator: The LED will illuminate green when a signal is present and will illuminate red when the signal is clipping or the L1 Pro is entering limiting. Reduce the channel or signal volume to prevent signal clipping or limiting.
- Channel Mute: Mute the output of an individual channel. Press the button to mute the channel. While muted, the button will illuminate white.
- Channel ToneMatch Button: Select the ToneMatch preset for an individual channel. Use MIC for microphones and use INST for acoustic guitar. The corresponding LED will illuminate white while selected.
- Channel Input: Analog input for connecting microphone (XLR), instrument (TS unbalanced), or line level (TRS balanced) cables.
- Phantom Power: Press the button to apply 48-volt power to channels 1 and 2. The LED will illuminate white while phantom power is applied.
- USB Port: USB-C connector for Bose service use.
Note: This port is not compatible with Thunderbolt 3 cables. - XLR Line Output: Use an XLR cable to connect the line-level output to a Sub1/Sub2 or another bass module.
- ToneMatch Port: Connect your L1 Pro to a T4S or T8S ToneMatch mixer via a ToneMatch cable.
![]()
Do not connect to a computer or phone network. - Standby Button: Press the button to power on the L1 Pro. The LED will illuminate white while the L1 Pro is on.
- System EQ: Press the button to scroll through and select a master EQ suitable for the use case. The corresponding LED will illuminate white while selected.
- TRS Line Input: Use a 6.4-millimeter (1/4-inch) TRS cable to connect line-level audio sources.
- Aux Line Input: Use a 3.5-millimeter (1/8-inch) TRS cable to connect line-level audio sources.
- Bluetooth® Pair Button: Set up pairing with Bluetooth capable devices. The LED will flash blue while the L1 Pro is discoverable and illuminate solid white when a device is paired for streaming.
- SubMatch Output: Connect a Sub1/Sub2 bass module with a SubMatch cable.
- Power Input: IEC power cord connection.
Assembling the Power Stand and Array

Before connecting the power stand to a power source, assemble the L1 Pro32 using the upper mid-high array and lower mid-high array.
- Insert the lower array into the power stand.
- Insert the upper array into the lower array.
The L1 Pro32 can be used without the upper array. This configuration is useful when a venue ceiling cannot accommodate the height of the L1 Pro32.
Connecting Power and a Sub1/Sub2

- Plug the SubMatch cable into the SubMatch Input on a Sub1/Sub2.
- Plug the other end of the SubMatch cable into the SubMatch Output of the L1 Pro32.
- Plug the power cord into the Power Input on the L1 Pro32.
- Plug the other end of the power cord into a live electrical outlet.
Note: Do not power on the L1 Pro until after you've connected your sources. See Connecting Sources - Press the Standby Button. The LED will illuminate white while the L1 Pro is on.
Note: Press and hold the Standby Button for 10 seconds to reset the L1 Pro to factory settings.
Press the Standby Button on any connected Sub1/Sub2. For additional information on how to set up a Sub1/ Sub2, see the Sub1/Sub2 owner's guide at PRO.BOSE.COM.
Note: When two Subs are connected to the L1 Pro32, first turn on the Sub connected directly to the L1 Pro32, then turn on the second Sub.
AutoOff/Low-power Standby
After four hours of no use, the L1 Pro will enter AutoOff/Low-power Standby mode to save power. To wake the L1 Pro from AutoOff/Low-power Standby mode, press the Standby Button. When the L1 Pro32 goes into AutoOff/Low-power Standby mode, this will cut power to any Sub1/Sub2 connected with a SubMatch cable. Press the Standby Button on a connected Sub1/Sub2 to wake it from AutoOff/Low-power Standby mode.
Note: Disable AutoOff/Low-power Standby mode by pressing and holding all three Channel Parameter Controls for 10 seconds, or via the Settings page in the Bose Music app. Enable AutoOff/Low-power Standby mode by repeating this step. Disabling AutoOff/Low-power Standby mode will result in higher energy usage when the L1 Pro is not in use.
Connecting Sources
Channel 1 & 2 Controls
Channel 1 and 2 are for use with microphones, guitars, keyboards, or other instruments. The channel inputs are suitable for a wide qw range of input types and will have the proper gain staging to minimize noise when the channel volume is set for the desired output level.
- Connect your sound source to the Channel Input with the appropriate cable.
![]()
- Apply a ToneMatch preset—to optimize the sound of your microphone or instrument—by pressing the Channel ToneMatch Button until the LED for your chosen preset is illuminated. Use MIC for microphones and use INST for acoustic guitars and other instruments. Use OFF if you do not want to apply a preset.
Note: Use the Bose Music app to choose custom presets from the ToneMatch library. The corresponding LED will illuminate green when a custom preset is selected.
![]()
- Press the Channel Parameter Control to choose a parameter to modify. The parameter name will illuminate white while it is selected.
![]()
- Rotate the Channel Parameter Control to adjust the level of the selected parameter. The parameter LED will indicate the level of the selected parameter.
Note: While Reverb is selected, press and hold the control for two seconds to mute the reverb. While reverb is muted, Reverb will flash white. To unmute reverb, press and hold for two seconds while Reverb is selected. Reverb mute will reset when the L1 Pro is powered off.
![]()


Channel 3 Controls
Channel 3 is for use with Bluetooth® enabled devices and line-level audio inputs.
Bluetooth Pairing
The following steps describe how to manually connect a Bluetooth enabled device to stream audio.
You can use the Bose Music app to access additional device control. For more information on the Bose Music app, see Bose Music App Control below.
- Turn on the Bluetooth feature on your mobile device.
- Press and hold the Bluetooth Pair Buttonfor two seconds. When ready to pair, the LED will flash blue.
![]()
- Your L1 Pro will be visible in your device list on your mobile device. Select your L1 Pro from the device list. When the device pairs successfully, the LED will illuminate solid white.
Note: Some notifications may be audible through the L1 Pro while in use. To prevent this, disable notifications on your connected device. Enable airplane mode to prevent call/message notifications from interrupting audio.
![]()


TRS Line Input
A mono input. Use a 6.4-millimeter (1/4-inch) TRS cable to connect line-level audio sources, such as mixers or instrument effects.
Aux Line Input
A stereo input. Use a 3.5-millimeter (1/8-inch) TRS cable to connect a line-level audio source, such as mobile devices or laptops.
Bose Music App Control
Download the Bose Music app for additional device control and audio streaming. Once downloaded, follow the instructions in the app to connect your L1 Pro. For specific information on how to use the Bose Music app, see the in-app help.


Features
- Adjust channel volume
- Adjust channel mixer parameters
- Adjust system EQ
- Enable channel mute
- Enable reverb mute
- Enable phantom power
- Access to ToneMatch preset library
- Save scenes
Additional Adjustments
Channel Mute
Press the Channel Mute to mute the audio for an individual channel. While a channel is muted, the button will illuminate white. Press the button again to unmute the channel.

Phantom Power
Press the Phantom Power button to apply 48-volt power to channels 1 and 2. The LED will illuminate white while phantom power is applied. Apply phantom power when using a condenser microphone. Press the button again to turn off phantom power.
Note: Phantom power will only affect sources connected to a Channel Input using an XLR cable.

System EQ
Select your system EQ by pressing the System EQ button until the corresponding LED for your desired EQ illuminates white. Choose between OFF, LIVE, MUSIC, and SPEECH. Your chosen EQ will stay selected when you power off and power on your L1 Pro.
Note: The system EQ affects power stand/array audio only. System EQ does not affect XLR Line Output audio.

Setup Scenarios
The L1 Pro32 can be placed on the floor or on an elevated stage (see Assembling the Power Stand and Array).

Do not place the equipment in an unstable location. The equipment could become unstable leading to a hazardous condition, which could result in injury.


The power stand should not be placed anywhere that may block the ventilation holes at the rear/bottom of the L1 Pro32. Operating directly on sand or grass could cause debris to enter the product through vent openings and result in the L1 Pro32 not functioning properly.

All of the following setup scenarios require at least one Sub1 or Sub2 bass module. For proper Sub1/Sub2 settings, see the Sub1/Sub2 owner's guide at PRO.BOSE.COM.
Musician (with Sub)
")
Musician with Mobile Device (with Sub)
")
Band (with Sub)
")
Musician with T8S Mixer (with Sub)
") Note: T8S left channel audio is delivered only.
Note: T8S left channel audio is delivered only.
Musician (with Analog Sub Connection)
")
Musician Stereo with T4S Mixer (with Two Subs)
")
DJ Stereo (with Two Subs)
")
*Alternate Connection
This scenario may require a specialized cable or adapter. Connect a TRS cable to the TRS Line Input to allow for a wider range of volume control.

DJ Mono (with Two Stacked Subs)
")
*Alternate Connection
This scenario may require a specialized cable or adapter. Connect a TRS cable to the TRS Line Input to allow for a wider range of volume control.

**Alternate Connection
The L1 Pro32 can be connected to a Sub1/Sub2 by analog connection. Two Subs can also be connected together by analog connection. When connecting two Subs together by analog connection, connect the Line Output of the first Sub to the Line Input of the second Sub with an XLR cable. Subs set up without a SubMatch cable must be connected to a power source.
 - Alternate Connection")
DJ Mono (with Two Stacked Cardioid Subs)
")
*Alternate Connection
This scenario may require a specialized cable or adapter. Connect a TRS cable to the TRS Line Input to allow for a wider range of volume control.

**Alternate Connection
The L1 Pro32 can be connected to a Sub1/Sub2 by analog connection. Two Subs can also be connected together by analog connection. When connecting two Subs together by analog connection, connect the Line Output of the first Sub to the Line Input of the second Sub with an XLR cable. Subs set up without a SubMatch cable must be connected to a power source.
 - Alternate Connection")
DJ Stereo (with Four Stacked Subs)
 - Step 1")
 - Step 2")
 - Step 3")
*Alternate Connection
This scenario may require a specialized cable or adapter. Connect a TRS cable to the TRS Line Input to allow for a wider range of volume control.

Musician Dual Mono (with Two Subs)
")
*Alternate Connection
This scenario requires a specialized cable or adapter. Connect a TRS cable to the TRS Line Input to allow for a wider range of volume control.

Musician with S1 Pro Monitor (with Sub)
")
*Alternate Connection
This scenario requires a specialized cable or adapter. Connect a TRS cable to allow for a wider range of volume control.

Care & Maintenance
Cleaning Your L1 Pro
- Before cleaning your L1 Pro32, disconnect the L1 Pro32 from AC power.
- Clean the product enclosure using only a soft, dry cloth. If necessary, carefully vacuum the grille of the L1 Pro.
- Gently wipe external surface of vent area (on the rear/bottom of the L1 Pro32) with cloth to remove debris that may be lodged in vent openings. Take care not to push debris into the L1 Pro32.
- With the array removed from the power stand, gently remove debris from vent openings near array output connector (at the base of the power stand). Take care not to push debris into the L1 Pro32.
![]()
Do not use any solvents, chemicals, or cleaning solutions containing alcohol, ammonia, or abrasives.
![]()
Do not use any sprays near the product or allow liquids to spill into any openings.
Troubleshooting
| Problem | What to do |
No power |
|
No sound |
|
Standby LED is flashing red (thermal fault) |
|
Standby LED is solid red (system fault) |
|
| With nothing plugged into the L1 Pro, a light hum or buzz is heard |
|
Instrument or audio source sounds distorted |
|
Microphone is encountering feedback |
|
| Paired Bluetooth® device will not connect to the loudspeaker |
|
Excessive hum when daisy-chaining multiple units |
|

Documents / Resources
References
Download manual
Here you can download full pdf version of manual, it may contain additional safety instructions, warranty information, FCC rules, etc.
Advertisement


Need help?
Do you have a question about the L1 Pro32 and is the answer not in the manual?
Questions and answers