TruHearing TH Premium BTE LI 19 - Standard and Power Behind-the-Ear Manual
- User manual (41 pages) ,
- Manual for hearing care professionals (16 pages) ,
- User manual (21 pages)
Advertisement
Welcome
Thank you for choosing our hearing instruments to accompany you through everyday life. Like anything new, it may take you a little time to become familiar with them.
This guide, along with support from your Hearing Care Professional, will help you understand the advantages and greater quality of life your hearing instruments offer.
To receive the most benefit from your hearing instruments, it is recommended that you wear them every day, all day. This will help you get adjusted to them.

It is important to read this user guide and the safety manual thoroughly and completely. Follow the safety information to avoid damage or injury.
Before using your hearing instruments for the first time, fully charge them. Follow the instructions in the charger's user guide.
Your hearing instruments
This user guide describes optional features that your hearing instruments may or may not have.
Ask your Hearing Care Professional to indicate the features that are valid for your hearing instruments.
Instrument type
Your hearing instruments are BTE (Behind-The-Ear) models. A tube delivers the sound from the hearing instrument into the ear. The instruments are not intended for children under the age of 3 years or persons with a developmental age of under 3 years.
A power cell (lithium-ion rechargeable battery) is permanently built into your hearing instrument. This enables easy charging with our inductive charger.
The wireless functionality enables advanced audiological features and synchronization between your two hearing instruments.
Your hearing instruments feature Bluetooth® low energy* technology allowing for easy data exchange with your smartphone, and for seamless audio streaming with your iPhone**.
* The Bluetooth word mark and logos are owned by the Bluetooth SIG, Inc., and any use of such marks by the legal manufacturer of this product is under licenses. Other trademarks and trade names are those of their respective owners.
** iPad, iPhone, and iPod touch are trademarks of Apple Inc., registered in the U.S. and other countries.
Getting to know your hearing instruments
It is recommended to familiarize yourself with your new hearing instruments. With the instruments in your hand try using the controls and note their location on the instrument. This will make it easier for you to feel and press the controls while wearing the hearing instruments.
If you have problems pressing the controls of your hearing instruments while wearing them, you can ask your Hearing Care Professional whether a remote control or a smartphone app to control your instruments is available.
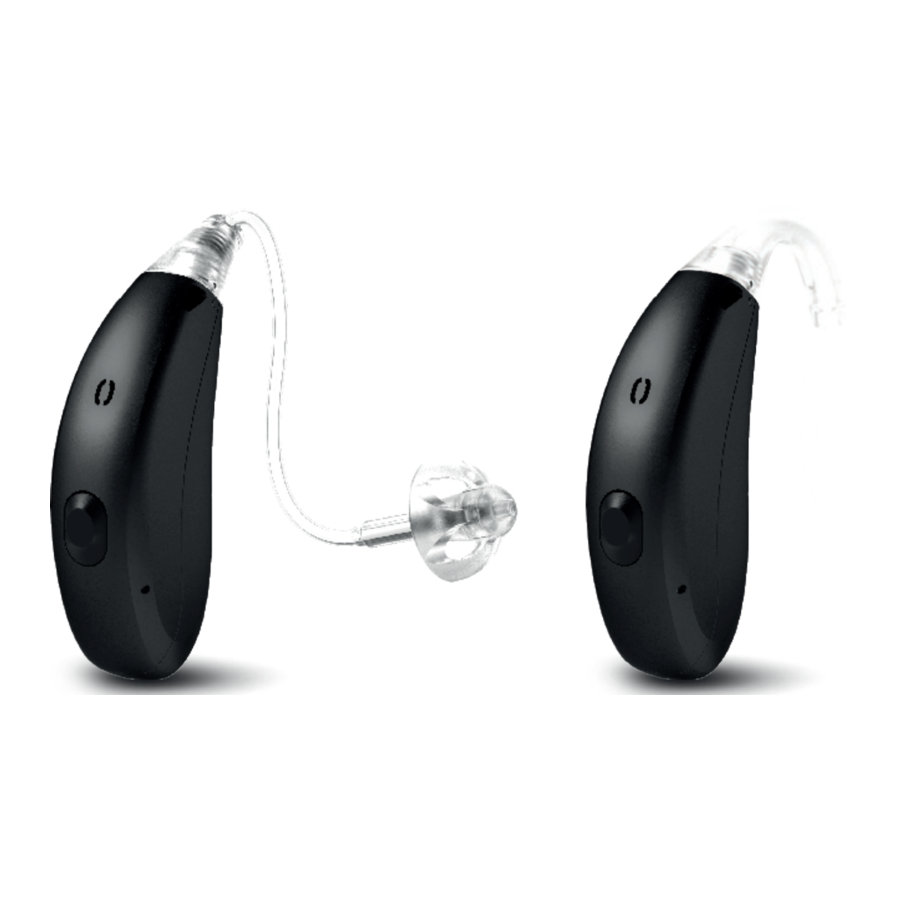
Components and names
Your hearing instruments are either attached to an earhook and a custom-made ear piece or to a standard tube (ThinTube) and a standard ear piece (LifeTip).

- Ear piece
- Retention strand (optional)
- Tube (ThinTube)
- Adapter for ThinTube
- Microphone openings
- Push button (control, on/off switch)
- Earhook
You can use standard ear pieces together with a standard tube or custom-made ear pieces together with an earhook and tube.
You can easily exchange the standard ear pieces and clean the standard tube. Read more in section "Maintenance and care".
Standard ear pieces / tubes | Size | |
 |  LifeTip open or closed LifeTip open or closed | |
| |  LifeTip semi-open LifeTip semi-open | |
| |  LifeTip double LifeTip double | |
| ThinTube | |
Custom-made ear pieces
Examples:

Controls
With the push button you can, for example, switch hearing programs. The Hearing Care Professional has programmed your desired functions to the push button.
Push button function | L | R |
| Press briefly: | ||
| Program up |  | |
| Volume up | | |
| Volume down | | |
| Tinnitus therapy signal level up | | |
| Tinnitus therapy signal level down | | |
| TV stream on/off | | |
| Press for about 2 seconds: | ||
| Program up | | |
| Volume up | | |
| Volume down | | |
| Tinnitus therapy signal level up | | |
| Tinnitus therapy signal level down | | |
| TV stream on/off | | |
| Activate/deactivate airplane mode | | |
| Press for more than 3 seconds: | ||
| Turn on/off | | |
| L = Left, R = Right | ||
You can also use a remote control to change hearing programs and adjust the volume of your hearing instruments. With our smartphone app you have even more control options.
Features
![]() The tinnitus therapy feature generates a sound to distract you from your tinnitus.
The tinnitus therapy feature generates a sound to distract you from your tinnitus.
Daily use
Charging
Place your hearing instruments in the charger.

- Follow the instructions in the charger's user guide. You can also find useful tips for charging in the charger's user guide.
Low power indication
You will hear an alert signal to indicate the power cell is running low. The signal will be repeated every 15 minutes. Depending on the usage of your hearing instruments, you have approximately 2 hours to charge your hearing instruments before they stop working.
Turning on and off
You have the following options to turn your hearing instruments on or off.
Via charger
- Turning on: Take the instruments out of the charger.
The startup melody is played in your hearing instruments. The default volume and hearing program are set. - Turning off: Place the hearing instruments in the charger.
Note that the charger must be connected to the power supply. For details refer to the charger's user guide.
Via push button
- Turning on: Press and hold the push button until the startup melody starts to play. Release the push button while the melody is playing.
The default volume and hearing program are set. - Turning off: Press and hold the push button for several seconds.
See also the tips for charging in the charger's user guide.
Switching to standby mode
Via remote control or smartphone app, you can switch your hearing instruments to standby mode. This mutes the hearing instruments. When you leave standby mode, the previously used volume and hearing program are set.
Note:
- In standby mode, the hearing instruments are not turned off completely. They draw some power.
Therefore we recommend to use standby mode only for a short period of time. - If you want to leave standby mode, but the remote control or app is not at hand: Turn your hearing instruments off and on again (via push button or by shortly placing them in the charger until one or more orange LEDs light up). In this case, the default volume and hearing program are set.
Inserting and removing the hearing instruments
Your hearing instruments have been fine-tuned for your right and left ear. Colored markers indicate the side:

- red marker = right ear
- blue marker = left ear
Inserting a hearing instrument:

- Hold the tube close to the ear piece.
- Carefully push the ear piece into the ear canal 1.
- Twist it slightly until it sits well.
Open and close your mouth to avoid accumulation of air in the ear canal. - Lift the hearing instrument and slide it over the top of your ear 2.
Risk of injury!
-
Insert the ear piece carefully and not too deeply into the ear.
-
It may be helpful to insert the right hearing instrument with the right hand and the left hearing instrument with the left hand.
-
If you have problems inserting the ear piece, use the other hand to gently pull your earlobe downwards. This opens the ear canal and eases insertion of the ear piece.
The optional retention strand helps to securely retain the ear piece in your ear. To position the retention strand:
- Bend the retention strand and position it carefully into the bottom of the bowl of your ear (refer to the picture).


Removing a hearing instrument:

- Lift the hearing instrument and slide it over the top of your ear 1.
- X Hold the tube close to the ear piece and pull the ear piece out carefully 2.
Risk of injury!
-
In very rare cases the ear piece could remain in your ear when removing the hearing instrument. If this happens, have the ear piece removed by a medical professional.
Clean and dry your hearing instruments after usage.
Read more in section "Maintenance and care".
Adjusting the volume
Your hearing instruments automatically adjust the volume to the listening situation.
- If you prefer manual volume adjustment, press the push button.
Refer to section "Controls" for the setting of your push button.
An optional signal can indicate the volume change. Once the maximum or minimum volume has been reached, you may hear an optional signal tone.
Changing the hearing program
Depending on the listening situation, your hearing instruments automatically adjust their sound.
Your hearing instruments may also have several hearing programs which allow you to change the sound, if needed. An optional signal tone can indicate the program change.
- To change the hearing program, press the push button briefly.
Refer to section "Controls" for the setting of your controls. Refer to section "Hearing programs" for a list of your hearing programs.
The default volume is applied.
Further adjustments (optional)
You can also use the hearing instrument controls to change other features, for example, the level of the tinnitus therapy signal.
Refer to section "Controls" for the setting of your controls.
Special listening situations
On the phone
When you are on the phone, hold the telephone receiver slightly above your ear. The hearing instrument and telephone receiver have to be aligned. Turn the receiver slightly so that the ear is not completely covered.

Telephone program
You may prefer a certain volume when using the phone. Ask your Hearing Care Professional to configure a telephone program.
- Switch to the telephone program whenever you are on the phone.
If a telephone program is configured for your hearing instruments, it is listed in section "Hearing programs".
Audio streaming with iPhone
Your hearing instruments are Made for iPhone hearing instruments. This means you can get phone calls and listen to music from your iPhone directly into your hearing instruments.
For more information about compatible iOS devices, pairing, audio streaming and other useful functions, contact your Hearing Care Professional.
Airplane mode
In areas where the use of Bluetooth technology is not allowed (e.g. on some airplanes), you can activate the airplane mode. This turns Bluetooth in your hearing instruments off temporarily. The hearing instruments still work without Bluetooth, however direct audio streaming will not be possible and other functions will not be available.
- To activate or deactivate the airplane mode, use the controls of your hearing instruments.
Refer to section "Controls" for more information.
An alert tone indicates when airplane mode is activated or deactivated.
Maintenance and care
To prevent damage it is important that you take care of your hearing instruments and follow a few basic rules, which will soon become a part of your daily routine.
Hearing instruments
Cleaning
Your hearing instruments have a protective coating. However, if not cleaned regularly you may damage the hearing instruments or cause personal injury.
- Clean your hearing instruments daily with a soft, dry tissue.
- Never use running water or immerse the devices in water.
![]()
- Never apply pressure while cleaning.
- Ask your Hearing Care Professional for recommended cleaning products, special care sets, or more information on how to keep your hearing instruments in good condition.

Drying
Your charger dries the hearing instruments while charging. You can also use conventional products to dry your hearing instruments. Ask your Hearing Care Professional for recommended drying products and for individual instructions on when to dry your hearing instruments.
Storage
- Short-term storage (up to several days): Turn off your hearing instruments via the push button or place them in the powered charger.
The charger must be connected to the power supply. If the charger is not connected to power supply and you place your hearing instruments in the charger, the hearing instruments are not turned off.
Note that when you turn off the hearing instruments via a remote control or smartphone app, the hearing instruments are not turned off completely. They are in standby-mode and still draw some power. - Long-term storage (weeks, months, ...): First, fully charge your hearing instruments. Turn them off via the push button before storing them. We recommend using drying products while storing the hearing instruments.
At 6 month intervals you will have to charge the hearing instruments to avoid an unrecoverable deep-discharge of the power cell. Deep-discharged power cells cannot be charged anymore and they have to be replaced. We recommend recharging more frequently than 6 month intervals.
Ear pieces and tubes
Cerumen (ear wax) may accumulate on the ear pieces. This may affect sound quality.
- For hearing instruments with a standard tube (ThinTube):
Clean the ear pieces daily, clean the tubes as required.
Exchange the ear pieces and tubes approximately every three to six months, or sooner if you notice cracks or other changes. - For hearing instruments with earhook:
Clean the ear pieces daily.
Ask your Hearing Care Professional to clean the tubes or to exchange the ear pieces and tubes as needed.
Cleaning ear pieces
- Clean the ear piece upon removal with a soft and dry tissue.
This prevents cerumen becoming dry and hardening.


- Never use running water or immerse the ear piece in water.
Cleaning tubes
Never use running water or immerse the tube in water.
You can clean standard tubes (ThinTube) using a special cleaning wire. Ask your Hearing Care Professional for suitable cleaning wires.
- Screw off the tube.

- Carefully insert the cleaning wire into the tube 1.
- Push the cleaning wire all the way through the tube 2.
- Wipe away any cerumen or debris that is dislodged from the tube.
- Completely remove the cleaning wire from the tube.
- Screw the tube onto the hearing instrument.

Exchanging standard ear pieces (LifeTip)
- Pull off the used ear piece and plug on the new ear piece.
")
")
Exchanging standard tubes
- Unscrew the used tube from the adapter.

- Screw on the new tube.

Professional maintenance
Your Hearing Care Professional can perform a thorough professional cleaning and maintenance.
Custom-made ear pieces and wax filters should be exchanged as needed by your Hearing Care Professional.
Ask your Hearing Care Professional for your individual recommendation of maintenance intervals and for support.
Important safety information

This section contains important safety information regarding the power cell. For more safety information, refer to the safety manual supplied with the hearing instruments. A power cell (lithium-ion rechargeable battery) is permanently built into your hearing instrument. Incorrect use of the power cell or the hearing instrument can cause the power cell to burst. Risk of injury, fire or explosion!
- Follow the safety instructions for power cells in this section.
- Observe the operating conditions. Refer to section "Operating, transport and storage conditions".
- Pay special attention to protect your hearing instruments from extreme heat (e.g. fire, microwave oven, inductive oven or other high-induction fields) and sunlight.
- Charge your hearing instruments only with the approved charger. Ask your Hearing Care Professional for support.
- Do not disassemble the power cell.
Replacement and repair have to be performed by a professional. Therefore:
- Do not repair or replace the power cell yourself.
- Do not use the hearing instruments when their performance after charging reduces considerably.
- In the unlikely event of a power cell bursting or exploding, keep all combustible materials away.
In any of the above cases, return your hearing instruments to the Hearing Care Professional.
Further information
Safety information
For more safety information, refer to the safety manual supplied with the device.
Accessories
The type of available accessories depends on the instrument type. Examples are: a remote control, an audio streaming device, or a smartphone app for remote control.
Some hearing instrument types support CROS and BiCROS solutions for people with single-sided deafness.
Consult your Hearing Care Professional for further information.
Operating, transport, and storage conditions
The hearing instruments operate in the following environmental conditions (also valid in between uses):
| Operating conditions | Discharging | Charging |
| Temperature | 0 to 50°C (32 to 122°F) | 10 to 35°C (50 to 95°F) |
| Relative humidity | 5 to 93% | 5 to 93% |
| Atmospheric pressure | 700 to 1060 hPa | 700 to 1060 hPa |
During extended periods of transport and storage, please observe the following conditions:
| Storage | Transport | |
| Temperature (recommended) | 10 to 25°C (50 to 77°F) | -20 to 60°C (-4 to 140°F) |
| Temperature (maximum range) | 10 to 40°C (50 to 104°F) | -20 to 60°C (-4 to 140°F) |
| Relative humidity (recommended) | 20 to 80% | 5 to 90% |
| Relative humidity (maximum range) | 10 to 80% | 5 to 90% |
| Atmospheric pressure | 700 to 1060 hPa | 700 to 1060 hPa |
Note that you have to charge the hearing instruments at least every 6 months.
For other parts, such as the charger, other conditions may apply.
Risk of injury, fire or explosion during shipment.
- Ship power cells or hearing instruments according to local regulations.
Disposal information
- To avoid environmental pollution, do not throw power cells or hearing instruments into household trash.
- Recycle or dispose of power cells or hearing instruments according to local regulations.
Symbols used in this document
 | Points out a situation that could lead to serious, moderate, or minor injuries. |
 | Indicates possible property damage. |
 | Advice and tips on how to handle your device better. |
 | "Made for iPhone", "Made for iPad", and "Made for iPod" mean that an electronic accessory has been designed to connect specifically to iPhone, iPad, or iPod, respectively, and has been certified by the developer to meet Apple performance standards. Apple is not responsible for the operation of this device or its compliance with safety and regulatory standards. Please note that the use of this accessory with iPhone, iPad, or iPod may affect wireless performance. |
Troubleshooting
Problem and possible solutions
Sound is weak.
- Increase the volume.
- Charge the hearing instrument.
- Clean or exchange the tube and the ear piece.
Hearing instrument emits whistling sounds.
- Reinsert the ear piece until it fits securely.
- Decrease the volume.
- Clean or exchange the ear piece.
Sound is distorted.
- Decrease the volume.
- Charge the hearing instrument.
- Clean or exchange the tube and the ear piece.
Hearing instrument emits signal tones.
- Charge the hearing instrument.
Hearing instrument does not work.
- Turn the hearing instrument on.
- Charge the hearing instrument. Observe also the status LEDs on the charger.
Consult your Hearing Care Professional if you encounter further problems.
Country-specific information
USA and Canada
Certification information for hearing instruments with wireless functionality:
TH Premium BTE LI 19
- HVIN: WP4N1
- Contains FCC ID: SGI-RFM001
- IC: 267AB-WP4N1
Manufactured for:
TruHearing Inc.
12936 S. Frontrunner Blvd
Draper, UT 84020 United States
Information in this brochure is subject to change without notice. Copyright © 2019 All rights reserved.
Hearing Instrument Made in Singapore.
Document No. 04006-99T01-7600 EN-USA | D10971980
Order/Item No. 10971980 1.0 V11011083 SI/19326C-20
Master Rev01, 08.2019
© 08.2019, TruHearing Inc. All rights reserved.www.truhearing.com

Documents / Resources
References
Download manual
Here you can download full pdf version of manual, it may contain additional safety instructions, warranty information, FCC rules, etc.
Download TruHearing TH Premium BTE LI 19 - Standard and Power Behind-the-Ear Manual
Advertisement


Need help?
Do you have a question about the TH Premium BTE LI 19 and is the answer not in the manual?
Questions and answers