Advertisement
Table of Contents
Contents
Roland RDH-100, RDH-102 - Kick Drum Pedal Manual
Check the Included Items
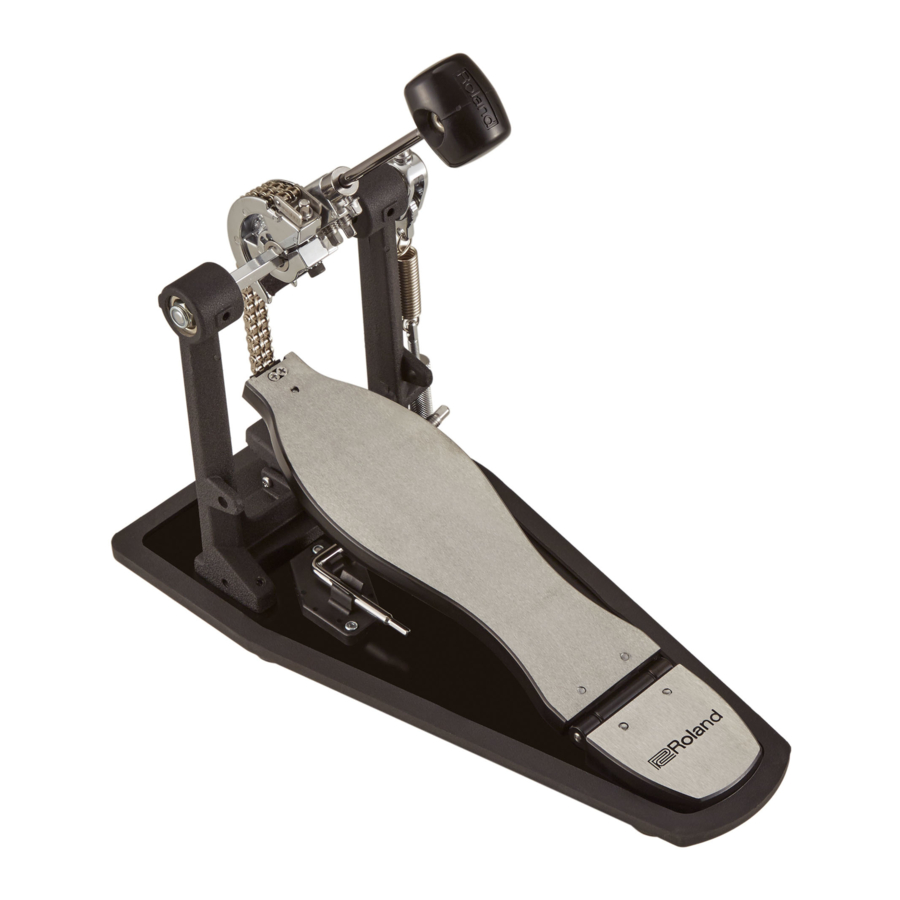
- RDH-100
![]()

| RDH-100 | ||
| No. | Part | Pieces |
| 1 | Pedal | 1 |
| 2 | Drum key with hex wrench | 1 |
| 3 | Shock absorber | 2 |
| 4 | Beater | 1 |
- RDH-102
![]()

| RDH-102 | ||
| No. | Part | Pieces |
| 1 | Pedal (left) | 1 |
| 2 | Pedal (right) | 1 |
| 3 | Drum key with hex wrench | 1 |
| 4 | Connector pipe | 1 |
| 5 | Shock absorber | 2 |
| 6 | Beater | 2 |
Descriptions
RDH-102

RDH-100
Refer to the RDH-102 pedal (right).

Assembly
- Attaching the beater (two locations)
- Using the included drum key with hex wrench, loosen the beater fastening bolt.
- Insert the beater into the beater holder, and retighten the beater fastening bolt.

- Attaching the connector pipe (RDH-102 only)
- Loosen the pedal attachment bolt of the connector pipe.
- Attach the connector pipe to the pedal (right), and tighten the pedal attachment bolt (right) located on the right side of the connector pipe.
At this time, ensure that the shape of the connector section is correctly matched.

- Attach the connector pipe to the pedal (left).
Rotate the belt toward yourself, and with the pedal lifted, tighten the pedal attachment bolt (left) to secure it.

- Attaching to the bass drum
- Attach the Shock absorber to your kick pad or bass drum.
Insert it into the anchor bolt located on the bottom of the bass drum, and turn the Shock absorber into the screw threads to tighten it (two locations).

- Using the included drum key with hex wrench, loosen the clamp bolt of the pedal (right).
* If you use the drum key that is included with the V-drum or KD series, you will be able to adjust the clamp bolt more easily.

- Insert the bass drum between the pedal plate and the clamp.

- Attach the Shock absorber to your kick pad or bass drum.


Adjustments

- Adjusting the beater position
- Adjust the left/right beater position.
Set the beater position so that it is in the center of the striking surface, and tighten the clamp bolt that you loosened in 3-2 to fasten it. Verify that the bass drum and pedal plate are in firm contact with the floor so that they are stable.

- Adjust the beater height.
Loosen the memory lock (two locations) and the beater fastening bolt (four locations), and adjust the beater height so that it is in the center of the striking surface. When you have set the height, tighten the fastening bolt first and then the memory lock.

- Adjust the left/right beater position.
- Adjusting the pedal (left/right) separation
- Adjust the length of the connector pipe as appropriate for your drum setup.
Loosen the connector pipe length adjustment bolts (four locations), adjust the length, and then retighten the length adjustment bolts.
 separation")
- Adjust the length of the connector pipe as appropriate for your drum setup.
- Adjusting the beater angle
- Loosen the beater angle adjustment bolt(s) (one location on the RDH-100, two locations on the RDH-102).
- While using one hand to hold the beater, tighten the beater angle adjustment bolt(s).
* The illustration below shows the RDH-102. If you are using the RDH-100, there is one beater.

- Adjusting the foot board angle
- Using the drum key with hex wrench, loosen the foot board angle adjustment bolt.
- Adjust the amount of chain wrap. Wrapping the chain toward yourself increases the foot board angle.
- When you have specified the angle, tighten the foot board angle adjustment bolt to secure it.

- Adjusting the pedal tension
- Rotate the upper nut counter-clockwise, moving it upward.

- Rotate the upper nut counter-clockwise, moving it upward.


 separation")


To increase the tension (making the pedal harder to press)
- While pressing the upper nut down, turn the lower nut counter-clockwise to tighten it.
To decrease the tension (making the pedal easier to press)
- While pressing the upper nut down, turn the lower nut clockwise to loosen it.

- Retighten the upper nut so that it reaches the lowest position.

Main Specifications
| Drive System | Double Chain |
| Beater | Plastic |
| Weight |
|
| Accessories |
|
* This document explains the specifications of the product at the time that the document was issued. For the latest information, refer to the Roland website.
Safety Instructions

- Do not disassemble or modify by yourself
Do not carry out anything unless you are instructed to do so in the owner's manual. Otherwise, you risk causing malfunction.
![]()
- Do not repair or replace parts by yourself
Be sure to contact your dealer, a Roland service center, or an official Roland dealer.
For a list of Roland service centers and official Roland dealers, refer to the Roland website.
![]()
- Do not use or store in the following types of locations
- Subject to temperature extremes (e.g., direct sunlight in an enclosed vehicle, near a heating duct, on top of heat-generating equipment); or are
- Damp (e.g., baths, washrooms, on wet floors); or are
![]()
![]()
- Exposed to steam or smoke; or are
- Subject to salt exposure; or are
- Exposed to rain; or are
- Dusty or sandy; or are
- Subject to high levels of vibration and shakiness; or are
- Placed in a poorly ventilated location.
- Do not place in an unstable location
![information]()
Otherwise, you risk injury as the result of the unit toppling over or dropping down. - Be cautious to protect children from injury
![warning]()
Always make sure that an adult is on hand to provide supervision and guidance when using the unit in places where children are present, or when a child will be using the unit. - Do not drop or subject to strong impact
Otherwise, you risk causing damage or malfunction.
![]()


- Avoid climbing on top of the unit, or placing heavy objects on it
Otherwise, you risk injury as the result of the unit toppling over or dropping down.
![]()
- Take care so as not to get fingers pinched
When setting up or disassembling the pedal, be careful not to pinch your fingers.
![]()
- Footboard
- Keep small items out of the reach of children
![warning]()
To prevent accidental ingestion of the parts listed below, always keep them out of the reach of small children.- Removable Parts
Screws
Spring Parts
Knobs
Bolts
Nuts - The bottom of the pedal plate has rubber protrusions that absorb vibration. Although the stand might sway during performance, this is not a malfunction.
- Removable Parts


- Placement
Depending on the material and temperature of the surface on which you place the unit, its rubber feet may discolor or mar the surface. - Maintenance
Never use benzine, thinners, alcohol or solvents of any kind, to avoid the possibility of discoloration and/or deformation. - Additional Precautions
- This instrument is designed to minimize the extraneous sounds produced when it's played. However, since sound vibrations can be transmitted through floors and walls to a greater degree than expected, take care not to allow these sounds to become a nuisance others nearby.
- When disposing of the packing carton or cushioning material in which this unit was packed, you must observe the waste disposal regulations that apply to your locality.
- Intellectual Property Right
Roland and Noise Eater are either registered trademarks or trademarks of Roland Corporation in the United States and/or other countries.
Roland Service Centers and Distributors
When you need repair service, access this URL and find your nearest Roland Service Center or authorized Roland distributor in your country.
http://roland.cm/service


Documents / Resources
References
Download manual
Here you can download full pdf version of manual, it may contain additional safety instructions, warranty information, FCC rules, etc.
Advertisement


Need help?
Do you have a question about the RDH-100 and is the answer not in the manual?
Questions and answers