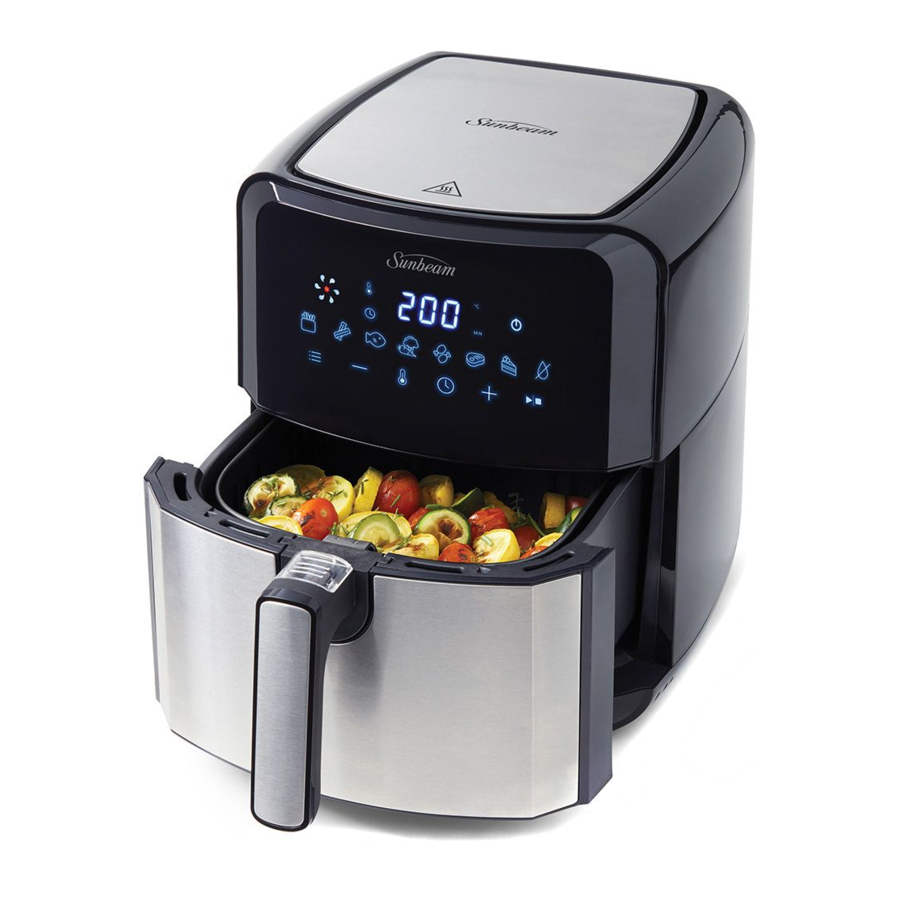
Sunbeam DiamondForce AFP4500DF - 3-in-1 Digital Air Fryer Manual
- User manual (15 pages)
Advertisement
Safety Precautions
SAFETY PRECAUTIONS FOR YOUR DIAMONDFORCE 3-IN-1 DIGITAL AIR FRYER
- Use your air fryer at least 200mm away from walls and curtains, and do not use in confined spaces.
- Do not operate the air fryer when placed directly onto a bench top. Place a heat proof mat or chopping board underneath to protect the surface.
- Avoid placing your air fryer on top of stone/stone polymer composite benchtops as this type of benchtop can be susceptible to cracking under heat.
- Do not operate the unit on an inclined surface.
- Do not move or cover the unit whilst in operation.
- Do not immerse the base of the unit in water or any other liquid.
- Do not touch any metal surface of the unit whilst in use as it will be hot.
- Use oven mitts when supporting the base of the basket during basket removal when hot.
- Use only the supplied basket and tray inside the unit.
- Do not plug in or switch on the unit without having the basket inside the air fryer unit.
- Do not place food or liquid inside the unit. Only place inside the basket or top of the supplied tray.
- Do not operate the unit without food or liquid in the basket or supplied tray.
- Do not use the basket or tray on the stovetop, inside a microwave oven or inside an oven.
Sunbeam is very safety conscious when designing and manufacturing consumer products, but it is essential that the product user also exercise care when using an electrical appliance. Listed below are precautions which are essential for the safe use of an electrical appliance:
- Read carefully and save all the instructions provided with an appliance.
- Always turn the power off at the power outlet before you insert or remove a plug. Remove by grasping the plug - do not pull on the cord.
- Turn the power off and remove the plug when the appliance is not in use and before cleaning.
- Do not use your appliance with an extension cord unless this cord has been checked and tested by a qualified technician or service person.
- Always use your appliance from a power outlet of the voltage (A.C. only) marked on the appliance.
- This appliance is not intended for use by persons (including children) with reduced physical, sensory or mental capabilities, or lack of experience and knowledge, unless they have been given supervision or instruction concerning use of the appliance by a person responsible for their safety.
- Children should be supervised to ensure that they do not play with the appliance.
- The temperature of accessible surfaces may be high when the appliance is operating.
- Never leave an appliance unattended while in use.
- Do not use an appliance for any purpose other than its intended use.
- Do not place an appliance on or near a hot gas flame, electric element or on a heated oven.
- Do not place on top of any other appliance.
- Do not let the power cord of an appliance hang over the edge of a table or bench top or touch any hot surface.
- Do not operate any electrical appliance with a damaged cord or after the appliance has been damaged in any manner. If damage is suspected, return the appliance to the nearest Sunbeam Appointed Service Centre for examination, repair or adjustment.
- For additional protection, Sunbeam recommend the use of a residual current device (RCD) with a tripping current not exceeding 30mA in the electrical circuit supplying power to your appliances.
- Do not immerse the appliance in water or any other liquid unless recommended.
- Appliances are not intended to be operated by means of an external timer or separate remote control system.
- This appliance is intended to be used in household and similar applications such as: staff kitchen areas in shops, offices and other working environments; farm houses; by clients in hotels, motels and other residential type environments; bed and breakfast type environments.
 Hot Surface
Do Not Touch
This symbol indicates, temperature of accessible surfaces may be high when the appliance is operating and for some time after use.
If you have any concerns regarding the performance and use of your appliance, please visit www.sunbeam.com.au or contact the Sunbeam Consumer Service Line.
Ensure the above safety precautions are understood.
Features of your Device

- Digital display & user interface
- Removable cooking tray
- Cooking basket
- Handle
- Heating fan vent cover
- Power cord
Control Panel

- Heating element indicator
- Temperature indicator
- Time indicator
- Power
- Air fry presets (From left to right) FRIES, BACON, SEAFOOD, VEGGIES,POULTRY, MEAT, CAKE/BREAD, DEHYDRATE
- Manual Mode: Cake / Bread baking, Dehydrate
- Preset selector
- Decrease temperature / timer
- Temperature setting
- Timer setting
- Increase temperature / timer
- Start/Pause
Parts & Accessories
 Never immerse any part of the air fryer body, power cord or plug in water or any other liquid. Before assembling or disassembling your air fryer, ensure it is unplugged and all parts are cool.
DiamondForce non-stick basket surface
This product features the DiamondForce coating advantage with advanced non-stick performance. This unique diamond infused non-stick coating provides superior food release, requiring little to no oil when air frying food and easy wipe clean up.

High and Low Rack Tray
The additional tray is ideal for 2 layer air frying of bacon, salmon, chicken breast, or steak. The tray can be flipped for a high rack or low rack to cater for different sizes of food.


Remove the basket from the unit before lifting the tray out of the basket. Use mittens when removing the tray from the basket as this can be hot.
Usage Instructions
Before First Use
Before using your Air Fryer for the first time, unpack the appliance and remove all packaging, promotional materials and stickers from the product. Remove any plastic or cardboard from underneath the air fry basket. Remove all printed documents.
Wash the cooking basket and tray in warm soapy water using a mild household detergent. Rinse thoroughly and dry.
Using Your Air Fryer
- Place on a flat, level, heat-resistant surface.
- To open the unit, pull the handle towards you and ensure that the basket ejection button is covered.
![]()
- Put your desired food inside the perforated basket. If using the tray accessory, position the tray inside the perforated basket and place your additional ingredients on top of the tray.
- Slide the basket back into the air fryer. Noting to carefully align with the guides in the body of the air fryer. Never use the air fryer without the basket in it.
![]()
![]()
Do not touch the basket and tray during and after use, as it gets very hot. - Plug the cord into 230-240V power outlet and turn the power (
![]() ) on.
) on. - Once plugged and the tray and basket are properly placed in the main housing, the power light will be illuminated. The air fryer's default temperature is 200°C, while the cooking time will be set to 15 minutes.
- If you are happy with the default temperature setting, press start/pause button (
![]() ) to start cooking.
) to start cooking.
Note: The fan icon indicates that the cooking cycle is in process.
![]()
- Some ingredients require shaking through the cooking process. To do this, pull the handle and gently shake / stir the food. You can use a heat-resistant plastic or wooden or silicone utensils.
Slide the basket back into the air fryer.
![]()
Do not press the basket ejection button during shaking.
Note: Avoid using sharp or metal objects to prolong the life of your non-stick surface. Do not cut food inside the basket or tray. Do not leave utensils in contact inside the basket or on top of the unit.
Note: When you pull the basket out of the unit, the LED display will disappear, but will appear once you put the basket in. Cooking will resume once the basket has been put back in and aligned back to the body of the air fryer. Your setting will only reset when the basket has not been put back in after 30 minutes. - Audible alert will sound once timer is done.
- After cooking, carefully pull the basket out completely out of the unit and on to a stable, even, and heat resistant surface.
- To use the basket ejection button, slide the transparent cover on top of the handle forward with your thumb and press the button underneath. This will release and detach the basket from the base. Lift the perforated basket using the handle and place on a stable, even, and heat resistant surface.
![]()
Ensure that you are transferring the perforated basket safely as there might be oil dripping form the food. Do not turn the basket upside down with the basket still attached to it as any excess oil that has collected on the bottom of the basket housing will leak onto the ingredients. The basket and the ingredients are hot. Depending on the type of ingredients in the air fryer, steam may escape from the basket.
![]()
Do not press the basket ejection button during shaking.
![]()
Oil left on the base on the main housing basket is hot. - Empty the basket into a bowl or onto a plate using heat resistant utensils.


Cooking Modes
This product operates 3 appliances in 1. You can choose from air frying, dehydrating, and baking.
- Choose the desired cooking mode – Air Fry, Bake or Dehydrate.
- To select an Air Fry preset, press the PRESETS button and select any of the 6 air fry presets: Fries, Bacon, Seafood, Veggies, Poultry, Meat.
- Press Cake/Bread for baking cakes or baking breads after proofing.
- Press Dehydrate for dehydrating fruits, herbs, flowers, or for proofing bread.
- Press Start/Pause button to start.
Manual Modes
- To manually set the time, press the Timer Setting and use the PLUS and MINUS signs. You will see the time reading in the Time Indicator next to the power button.
- To manually set the temperature, press the Temperature Setting and use the PLUS and MINUS signs. You will see the temperature reading in the Temperature Indicator next to the Power button.
Air Fry Preset Mode
- Choose from the 6 Air Fry Presets – Fries, Bacon, Seafood, Veggies, Poultry, Meat. Temperature and time will automatically appear.
- Press Start/Pause button (
![]() ).
).
Note: To quickly pause cooking cycle, pull the handle out. Alternatively, you can press start/pause button.
Note: When you pull the basket out of the unit, the LED display will disappear, but will appear once you put the basket in. Cooking will resume once the basket has been put back in and aligned back to the body of the air fryer. Your setting will only reset when the basket has not been put back in after 30 minutes.
Care And Cleaning
Use heat-resistant plastic or wooden or silicone utensils when shaking food inside the basket or taking food out of the basket. Avoid using sharp or metal objects to prolong the life of your non-stick surface. Do not cut food inside the basket or tray. Do not leave utensils in contact inside the basket or on top of the unit.
To clean after use
Always unplug your Digital Air Fryer and allow it to cool completely before cleaning it. NEVER immerse the MAIN body, power cord or plug in water or any other liquid. To prevent damage to the appliance do not use alkaline cleaning agents when cleaning, use a soft cloth and a mild detergent.
DiamondForce non-stick coating
When cleaning DiamondForce™ non-stick coating, do not use metal (or other abrasive scourer). When the basket has cooled down, you may wipe using a paper towel to remove residue on the basket. With the perforated basket ejected from the main basket housing, wash with warm soapy water using a mild household detergent. Rinse thoroughly and dry the basket with a soft cloth before storing. Alternatively, you can put the removable perforated basket into the dishwasher.
Tray Accessory
Before first use, wash with warm soapy water using a mild household detergent and dry thoroughly. When the tray has cooled down, you may wipe using a paper towel to remove residue then wash with warm soapy water using a mild household detergent. Rinse thoroughly and dry the tray with a soft cloth before storing to avoid rusting.
Storage
After the unit has cooled down, carefully wipe any oil spatter from the heating fan cover with kitchen paper. Wipe over the outer body with a clean, slightly damp cloth and dry.
You can store your air fryer on your benchtop or in a safe place. If the outer body of the unit accumulates dust, wipe over with a clean, slightly damp cloth. Dry thoroughly to avoid rusting on the stainless steel parts.
Always lock the basket the basket casing before storing. When basket is placed back in the casing, slide the transparent lid of the ejection button back.
This appliance has no user serviceable parts. Any servicing beyond that described in the Cleaning Section should be performed by an Authorised Service
Representative only.
Temperature Setting Guide
This table provides the default time and temperature for each Air Fry Preset and Cooking Modes, and the Temperature and Time Range of each Preset as a guide when selecting for Manual Mode.
| Defaults | Range (For Manual Mode) | |||
| Preset | Temperature (Degrees in C) | Time (in Mins) | Temperature (Degrees in C) | Time (in Mins) |
| Default (When turning on) | 200 | 15 | 80-200 | 1-60 |
| Fries | 200 | 25 | 80-200 | 1-60 |
| Bacon | 185 | 10 | 80-200 | 1-60 |
| Seafood | 180 | 15 | 80-200 | 1-60 |
| Veggies | 190 | 30 | 80-200 | 1-60 |
| Poultry | 190 | 25 | 80-200 | 1-60 |
| Meat | 200 | 25 | 80-200 | 1-60 |
| Cake / Bake | 170 | 35 | 80-200 | 1-60 |
| Dehydrate | 70 | 4hours | 27-70 | 2-24hours |
Please note that due to the variations in thickness and size of foods being cooked, cooking results may vary. Always ensure that the food is thoroughly cooked before consuming.
Cooking Guide
Guide to oils and fats
Using your Digital Air Fryer to cook food will help you to reduce the amount of oil needed in some recipes, which may benefit your diet.
The table below lists some of the more widely available, popular oils. All of them can be used in your Digital Air Fryer. However, for best results, we recommend Vegetable or Rapeseed oil.
| Oil Type | Use |
| Vegetable oil | Shallow, deep and stir frying. |
| Rapeseed oil (often called vegetable oil) | Shallow, deep and stir frying. |
| Corn oil | Shallow, deep and stir frying. |
| Sunflower oil | Shallow, deep and stir frying. |
| Olive oil | Shallow and stir frying. Marinades, dressings, drizzling. |
| Sesame oil | Shallow, deep and stir frying. Marinades, drizzling. |
| Peanut oil (often called ground nut oil) | Shallow and stir frying. Dressings. Adds a nutty flavour. |
| Grape Seed oil | Shallow, deep and stir frying. |
| You can also use low calorie cooking spray in your Digital Air Fryer. | Always ensure that the ingredients are evenly coated with oil. |
Guide to cooking popular foods in your air fryer
The following table provides basic cooking guidelines for popular foods that can be used for each Air fry Preset, Dehydrate, Bake, and Manual Mode. Please note that due to the variations in thickness and size of the foods being cooked some experimentation may be required for the best cooking results. Always ensure that the food is thoroughly cooked to food-safe temperature throughout before consuming.
When cooking fresh fries, keep oil quantities as low as possible for the healthiest results. However, if you feel the fries are a little pale and require further browning, increase the quantity of oil slightly.
Note: For crispier results it is recommended to shake the fryer basket 2-4 times throughout the cooking cycle.
For larger quantities, (1kg) increase cooking times and toss food more frequently.
| Pre-set Programs | Min – Max Amount | Time (min) | Temp | Shake, turn or Stir halfway through | Additional Information |
| FRIES/POTATO PRODUCTS Tip: For best results, use 750g frozen shoestring fries, shake once. If using 1 kilo, shake 2 or 3 times or as required. | |||||
| Shoestring fries | 200g - 1kg | 20-25 | 200c | Yes | |
| Steak cut fries | 200g - 1kg | 25-30 | 200c | Yes | |
| Sweet potato fries | 200g - 1kg | 20-25 | 200c | Yes | |
| Potato Gems | 200g - 1kg | 10-15 | 200c | Yes | |
| Hash Browns | 4-6 pieces | 8-10 | 200c | Yes | |
| Hand cut chips - fresh | 200g - 1kg | 25-30 | 200c | Yes | Soak 30 minutes In water, rinse, pat dry, then toss in 1Tbs oil prior to cooking |
| Roast potatoes-fresh | 200g - 1kg | 20-25 | 200c | Yes | Soak 30 minutes In water, rinse, pat dry, then toss in 1Tbs oil prior to cooking |
| BACON Tip: You can use any type of bacon for this preset. Check from time to time depending on how you like your bacon cooked. Be careful when lifting the base as the bacon's fat can be left in the main housing of the basket. | |||||
| Rashers | 4 - 6 each | 10 | 185c | Yes | |
| SEAFOOD Tip: Best for both frozen seafood or fresh salmon with skin. Place the salmon's skin side down the basket for crispy skin results due to the perforation on the all sides of the basket. | |||||
| King prawns | 12 | 6-8 | 180c | Yes | |
| Fish fillets - white | 200g each | 8-12 | 180c | Yes | Coat with oil prior to cooking if desired |
| Salmon fillet | 350g | 18 | 190c | Yes | Coat with oil prior to cooking if desired |
| Calamari | 350g | 15 | 200c | Spray with vegetable oil | |
| VEGETABLES Tip: Best for thicker veggies such as carrots, broccoli, cauliflower, and asparagus rather than leafy vegetable like spinach, kale and collard green. | |||||
| Potatoes, sweet potato, Carrots, beetroot, swede | 150g - 1kg | 20-30 | 190c | Yes | Toss in oil if needed prior to cooking |
| Eggplant, capsicum, onion Cauliflower, broccoli, Pumpkin | 150g - 1kg | 10-15 | 190c | Yes | Toss in oil if needed prior to cooking |
| Mushrooms, broccolini, Asparagus, zucchini | 150g - 1kg | 5-15 | 190c | Yes | Toss in oil if needed prior to cooking |
| POULTRY Tip: Your air fryer can fit a 2kg whole chicken. You can also use chicken wings, drumsticks or breast fillets for a crispy skin finish with moist meat. See Recipes for more inspiration. | |||||
| Whole chicken | 1.3kg - 2kg | 45-60 | 180c | Coat with oil prior to cooking | |
| Drumsticks | 4-6 each | 25-30 | 200c | Yes | Coat with oil prior to cooking |
| Breast fillets | 120g each | 25 | 190c | Yes | Coat with oil prior to cooking |
| MEAT Tip: This preset cooks meat such as steak to medium-light pink middle and 750g pork belly. When using pork belly, score the pork belly across on diagonal, 2cm apart. No need to shake our turn over. Less oil is required as the pork will ooze this out from its own meat. | |||||
| Steak | 2 x 200g | 10-14 | 200c | Yes | |
| Beef patties | 4 x 100g | 5-8 | 200c | Yes | |
| Sausages | 4-6 each | 8-10 | 200c | Yes | |
| Pork tenderloins | 4 x 120g | 15 | 200c | Yes | Toss in 1Tbs oil prior to cooking |
| Pork belly | 750g | 25 | 200c | Toss in 1Tbs oil prior to cooking | |
| Rack of lamb | 500g - 800g | 20-30 | 120c | ||
| Lamb loin chops | 6 each | 10-15 | 130c | Yes | |
| CAKE/BREAD Tip: Use a 20cm cake tin to fit inside the basket. Bake cakes or bread using this function. After proofing (using the Dehydrate function), use this cooking mode to bake the bread to perfection. See Recipes for detailed instructions. | |||||
| Cake | 20cm | 45 | 165c | Use 20cm cake tin | |
| Muffins | 6 each | 15 | 160c | ||
| Brownies | 15 | 160c | 15cm square cake tin | ||
| Individual Puddings | 4 | 12-15 | 180c | 175ml ramekin | |
| Bread white loaf | 500g | 25 | 170c | 20cm round cake tin | |
| Bread wholegrain loaf | 500g | 30 | 170c | 20cm round cake tin | |
| Bread Mix Loaf White | 500g | 20cm round cake tin | |||
| Bread Mix Loaf Brown | 500g | 20cm round cake tin | |||
| DEHYDRATE Tip: Dehydrate fruits, herbs and flowers, plus you can also use this function to proof dough with minimal fuss and under controlled temperature. Perfect for proofing bread before baking. | |||||
| Herbs, flowers | Multi-layer | 2-4 hours | 35c | Yes | |
| Yoghurt | Pots | 8-12 hours | 40c | Yes | |
| Soft vegetables | Single layer | 6-8 hours | 45c | Yes | |
| Hard vegetables | Multi-layer | 8-10 hours | 50c | Yes | |
| Citrus peel | Multi-layer | 4-6 hours | 55c | Yes | |
| Fruit- high in sugar | Single layer | 12-14 hours | 60c | Yes | |
| Fruit - other | Variable | 8-10 hours | 60c | Yes | |
| Fish | Single layer | Up to 8 hours | 65c | Yes | |
| Meat jerky | Single layer | Up to 10 hours | 70c | Yes | |
| Dough proof | 500g | 30 | 27c | 18cm glass greased bowl | |
| MANUAL Tip: These types of food are a great alternative to red meat. | |||||
| Tofu | 450g | 10-15 | 190c | Yes | |
| Tempeh | 450g | 10-15 | 160c | Yes | |
| Halloumi | 450g | 8-10 | 180c | Yes | |

Documents / ResourcesDownload manual
Here you can download full pdf version of manual, it may contain additional safety instructions, warranty information, FCC rules, etc.
Download Sunbeam DiamondForce AFP4500DF - 3-in-1 Digital Air Fryer Manual
Advertisement


Need help?
Do you have a question about the DiamondForce AFP4500DF and is the answer not in the manual?
Questions and answers