
Related Manuals for SMA SUNNY TRIPOWER X 20-US


Summary of Contents for SMA SUNNY TRIPOWER X 20-US
- Page 1 Operating manual SUNNY TRIPOWER X 20-US / 25-US / 30-US ENGLISH STPxx-US-50-BE-en-11 | Version 1.1...
- Page 2 SMA Solar Technology AG Legal Provisions The information contained in these documents is the property of SMA Solar Technology AG. No part of this document may be reproduced, stored in a retrieval system, or transmitted, in any form or by any means, be it electronic, mechanical, photographic, magnetic or otherwise, without the prior written permission of SMA Solar Technology AG.
- Page 3 SMA Solar Technology AG Legal Provisions Copyright © 2023 SMA Solar Technology AG. All rights reserved. Operating manual STPxx-US-50-BE-en-11...
-
Page 4: Table Of Contents
System overview......................20 4.2.1 Sunny Tripower X as System Manager ..........20 4.2.2 Sunny Tripower X with SMA Data Manager as System Manager ..21 Product Description ....................22 Symbols on the Product ..................... 22 Interfaces and Functions .................... 23 4.5.1... - Page 5 SMA Solar Technology AG Table of contents Mounting .................. 30 Requirements for Mounting ..................30 5.1.1 Requirements for the Mounting Location..........30 5.1.2 Permitted and prohibited mounting positions........30 5.1.3 Dimensions for mounting ................ 31 5.1.4 Recommended clearances for mounting..........31 Mount the product.
- Page 6 Table of contents SMA Solar Technology AG DC connection......................49 6.9.1 Assembling the DC Connectors ............. 49 6.9.2 Connecting the PV Array................ 50 Commissioning ................. 54 Procedure for commissioning as System Manager..........54 Procedure for commissioning as a subordinate device ........... 55 Commissioning the Inverter..................
- Page 7 SMA Solar Technology AG Table of contents 11.1 Event messages ......................72 11.2 Calculating the insulation resistance ................. 87 11.3 Checking the PV System for Ground Faults .............. 88 11.4 Cleaning the Fans ...................... 89 11.5 Manual restart after electric arc................90 12 Decommissioning the Product..........
-
Page 8: Information On This Document
You will find the latest version of this document and further information on the product in PDF format and as eManual at www.SMA-Solar.com. You can also call up the eManual via the user interface of the product. Illustrations in this document are reduced to the essential information and may deviate from the real product. -
Page 9: Symbols In The Document
SMA Solar Technology AG 1 Information on this Document CAUTION Indicates a hazardous situation which, if not avoided, could result in minor or moderate injury. NOTICE Indicates a situation which, if not avoided, can result in property damage. Symbols in the Document... -
Page 10: Additional Information
"PUBLIC CYBER SECURITY - Guidelines for a Secure PV System Technical Information Communication" "Efficiency and Derating" Technical Information Efficiency and derating behavior of the SMA inverters "Parameters and Measured Values" Technical Information Device-specific overview of all parameters and measured values and their setting options Information about the SMA Modbus registers "SMA Modbus ®-interface - ennexOS"... -
Page 11: Safety
Unauthorized alterations can be dangerous and lead to personal injury. In addition, an unauthorized alteration will void guarantee and warranty claims and in most cases terminate the operating license. SMA Solar Technology AG shall not be held liable for any damage caused by such changes. -
Page 12: Important Safety Instructions
This document does not replace any regional, state, provincial, federal or national laws, regulations or standards that apply to the installation, electrical safety and use of the product. SMA Solar Technology AG assumes no responsibility for the compliance or non-compliance with such laws or codes in connection with the installation of the product. - Page 13 SMA Solar Technology AG 2 Safety DANGER Danger to life due to electric shock when touching live system components in case of a ground fault If a ground fault occurs, parts of the system may still be live. Touching live parts and cables results in death or lethal injuries due to electric shock.
- Page 14 2 Safety SMA Solar Technology AG WARNING Danger to life due to electric shock from destruction of the measuring device due to overvoltage Overvoltage can damage a measuring device and result in voltage being present in the enclosure of the measuring device. Touching the live enclosure of the measuring device results in death or lethal injuries due to electric shock.
- Page 15 NOTICE Manipulation of system data in networks You can connect the supported SMA products to the Internet. When connected to the Internet, there is a risk that unauthorized users can access and manipulate the data of your system. • Set up a firewall.
- Page 16 Communication disturbances in the local network The IP address range 192.168.12.0 to 192.168.12.255 is occupied for communication amongst SMA products and for direct access to SMA products. Communication problems might occur if this IP address range is used in the local network.
-
Page 17: Scope Of Delivery
SMA Solar Technology AG 3 Scope of delivery Scope of delivery Figure 1: Components included in scope of delivery Position Quantity Designation Inverter Mounting bracket Bolt M5 x 14 Positive DC connector Negative DC connector Sealing plug for unused negative DC inputs... - Page 18 3 Scope of delivery SMA Solar Technology AG Position Quantity Designation Quick reference guide with password label on the rear side The label contains the following information: • PIC (Product Identification Code) identification key for registering the system in Sunny Portal •...
-
Page 19: Product Overview
It is possible to use and configure the Sunny Tripower X either as a System Manager or as a subordinate inverter. When using a Sunny Tripower X as System Manager, you can integrate up to four additional SMA inverters and one SMA energy meter in a system. -
Page 20: System Overview
4 Product Overview SMA Solar Technology AG System overview 4.2.1 Sunny Tripower X as System Manager Figure 2: System with Sunny Tripower X as System Manager and one energy meter STPxx-US-50-BE-en-11 Operating manual... -
Page 21: Sunny Tripower X With Sma Data Manager As System Manager
SMA Solar Technology AG 4 Product Overview 4.2.2 Sunny Tripower X with SMA Data Manager as System Manager Figure 3: System with Sunny Tripower X and SMA Data Manager as System Manager Operating manual STPxx-US-50-BE-en-11... -
Page 22: Product Description
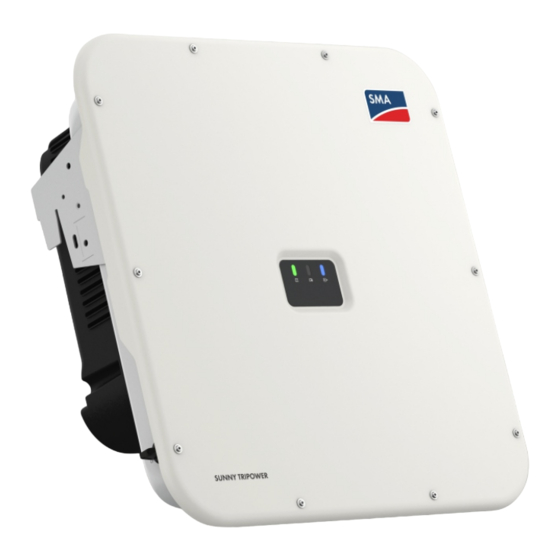
4 Product Overview SMA Solar Technology AG Product Description Figure 4: Design of the product Position Designation Warning label DC load-break switch LEDs The LEDs indicate the operating state of the product. Type label The type label clearly identifies the product. The type label must remain per- manently attached to the product. -
Page 23: Interfaces And Functions
Sunny Tripower X as System Manager The Sunny Tripower X can be used as System Manager in systems with a total of 5 SMA inverters and a maximum system size of 150 kVA. When used as System Manager, the Sunny Tripower X in conjunction with an energy meter takes over the control at the point of interconnection and can control up to 4 subordinate inverters. -
Page 24: User Interface
The product is equipped with a Modbus interface. The Modbus interface is deactivated by default and must be configured as needed. The Modbus interface of the supported SMA products is designed for industrial use – via SCADA systems, for example – and has the following tasks: •... -
Page 25: Digital Inputs
SMA ShadeFix is disabled by default, and can be enabled if required. The time interval of SMA ShadeFix is usually 6 minutes. This means that the inverter determines the optimum operating point every 6 minutes. Depending on the PV system or shading situation, it may be useful to adjust the time interval. - Page 26 4 Product Overview SMA Solar Technology AG NOTICE - The inverter's Rapid Shutdown function is initiated by disconnecting the inverter from the AC grid voltage, for example, by opening the main PV system AC disconnect. The AC disconnect that serves as the Rapid Shutdown initiation device must be readily accessible and clearly marked ®...
-
Page 27: Arc-Fault Circuit Interrupter (Afci)
• Manual restart after electric arc ⇒ page 90 4.5.14 SMA Smart Connected SMA Smart Connected is the free monitoring of the product via the SMA Sunny Portal. Thanks to SMA Smart Connected, the operator and qualified person will be informed automatically and proactively about product events that occur. -
Page 28: Integrated Plant Control
(e.g., with set fallback level). In addition, a specific event message and the as- sociated event number are displayed on the user interface of the product or the System Man- ager (e.g. SMA Data Manager) (see Sec- tion 11.1, page 72). STPxx-US-50-BE-en-11 Operating manual... - Page 29 SMA Solar Technology AG 4 Product Overview LED signal Explanation The blue LED is flashing slowly (2 s on and 2 s Communication connection is being established. off) The product is establishing a connection with a local network or is establishing a direct connec- tion to a smart device (e.g., smartphone, tablet...
-
Page 30: Mounting
5 Mounting SMA Solar Technology AG Mounting Requirements for Mounting 5.1.1 Requirements for the Mounting Location WARNING Danger to life due to fire or explosion Despite careful construction, electrical devices can cause fires. This can result in death or serious injury. -
Page 31: Dimensions For Mounting
SMA Solar Technology AG 5 Mounting 5.1.3 Dimensions for mounting Figure 5: Position of the anchoring points(Dimensions in mm (in)) 5.1.4 Recommended clearances for mounting To guarantee optimal operation and adequate heat dissipation for the inverter, the following requirements for clearances should be observed. This will prevent the inverter power output from being reduced due to excessive temperatures. -
Page 32: Mount The Product
5 Mounting SMA Solar Technology AG ☐ If multiple products are mounted in areas with high ambient temperatures, increase the clearances between the products and ensure sufficient fresh-air supply. Figure 6: Recommended clearances(Dimensions in mm (in)) Mount the product. Additionally required mounting material (not included in the scope of delivery): ☐... - Page 33 SMA Solar Technology AG 5 Mounting 3. Tighten the mounting bracket horizontally with screws and washers. 2x 2x 4. Hook the inverter into the mounting bracket. 5. Ensure that the inverter is securely in place. The inverter is correctly hooked in when the openings in the mounting bracket and the mounting tab line up.
-
Page 34: Mounting Equipment Grounding Bar
5 Mounting SMA Solar Technology AG 6. Secure the inverter to the mounting bracket on both sides with an M5x14 screw. Insert screws into the screw holes on the left and right tab of the mounting bracket and tighten them (TX25, torque: 1.5 Nm (13 in-lb)). - Page 35 SMA Solar Technology AG 5 Mounting Procedure: 1. Drill or punch holes required for connecting the conduits at the pre-notched spots. 2. Mount the enclosure on the bottom of the inverter using the M5x14 screws from the scope of delivery of the accessory kit (TX25, torque: 4 Nm (35 in-lb)).
-
Page 36: Electrical Connection
6 Electrical Connection SMA Solar Technology AG Electrical Connection Requirements for the electrical connection 6.1.1 Permitted grid configurations The inverter approved for operation in the following utility grids: • 480 V / 277 V WYE 6.1.2 Residual-current monitoring unit The inverter does not require an external residual-current device when operating. If local regulations require the use of a residual-current device, the following must be observed: ☐... -
Page 37: Requirements For The Pv Modules Per Input
SMA Solar Technology AG 6 Electrical Connection ☐ Cable category: minimum CAT5e ☐ Plug type: RJ45 of Cat5, Cat5e or higher ☐ Shielding: SF/UTP, S/UTP, SF/FTP or S/FTP ☐ Number of insulated conductor pairs and insulated conductor cross-section: at least 2 x 2 x 0.22 mm²... -
Page 38: Additionally Required Material For The Connection To Digital Inputs
6 Electrical Connection SMA Solar Technology AG ☐ Sheath stripping length: 150 mm (5.9 in) ☐ UV-resistant for outdoor use ☐ The cable type and cable-laying method must be appropriate for the application and location. 6.1.10 Additionally required material for the connection to digital inputs ☐... -
Page 39: Interior View
SMA Solar Technology AG 6 Electrical Connection 6.2.2 Interior View Figure 8: Connection areas in the interior of the product Position Designation DIN rail for installing the DC overvoltage protection Network Ports MFR slot for connection to the multifunction relay Slot DI 1-4 for connecting digital signal sources (e.g. -
Page 40: Connecting The Ac Conductors
6 Electrical Connection SMA Solar Technology AG Procedure Connect signal source to digital inputs (optional) Section 6.7, page 45 Section 6.8, page 46 Connect the PV modules. Section 6.9, page 49 Connecting the AC conductors Additionally required material: ☐ 1 conduit (trade size: 27 mm (1 in) or smaller with suitable reducer bush) ☐... - Page 41 SMA Solar Technology AG 6 Electrical Connection 3. If your country requires the DC load-break switch to be protected against reconnection, secure the DC load-break switch against reconnection with a padlock. 4. Unscrew the screws of the enclosure lid with a Torx screwdriver (TX 25) and remove the enclosure lid carefully forward.
-
Page 42: Connecting The Network Cables
6 Electrical Connection SMA Solar Technology AG 11. For connection without a neutral conductor, use the L 1 L 2 L 3 jumper provided to bridge terminal blocks PE and N. For this, press the locking levers of terminals PE and N upward, guide the jumper into the terminals, and press the locking levers downward again. -
Page 43: Connection To The Multifunction Relay
SMA Solar Technology AG 6 Electrical Connection ☐ Where required: Field-assembly RJ45 connector. ☐ 1 conduit (trade size: 27 mm (1 in) or smaller with suitable reducer bush) ☐ 1 rain-tight conduit fitting or conduit fitting for wet locations complying with UL 514B (trade size: 27 mm (1 in) or smaller with suitable reducing bush) -
Page 44: Connect Signal Source To Mfr
6 Electrical Connection SMA Solar Technology AG 6.6.2 Connect signal source to MFR Additionally required material: ☐ Conduit (trade size: 27 mm (1 in) or smaller with suitable reducer bush) ☐ Rain-tight conduit fittings or conduit fittings for wet locations complying with UL 514B (trade size: 27 mm (1 in) or smaller with suitable reducing bush) -
Page 45: Connection To Digital Input Di 1-4
SMA Solar Technology AG 6 Electrical Connection • Additionally required material for the connection to digital inputs ⇒ page 38 • Signal cable requirements ⇒ page 37 Connection to digital input DI 1-4 6.7.1 Digital input DI 1-4 An external signal source can be connected to digital input DI 1-4 (e.g. for active power limitation). -
Page 46: Connection To Digital Input Di 5-6
6 Electrical Connection SMA Solar Technology AG 5. Attach the conduit to the conduit fitting. 6. Guide the conductors from the conduit into the inverter. 7. Strip the insulation off the conductor 6 mm (0.24 in). 8. Release the conductor entries on the supplied 5-pole plug. -
Page 47: Pin Assignment Di 5-6
SMA Solar Technology AG 6 Electrical Connection Also see: • Circuitry overview DI 5 ⇒ page 47 • Circuitry overview DI 6 ⇒ page 47 6.8.2 Pin assignment DI 5-6 Digital input Assignment Digital input 5 Digital input 6 Not assigned Voltage supply output 6.8.3 Circuitry overview DI 5... -
Page 48: Connecting Signal Source To Digital Input Di 5-6
6 Electrical Connection SMA Solar Technology AG 6.8.5 Connecting Signal Source to Digital Input DI 5-6 Procedure: 1. Connect the connection cable to the digital signal source (see the manual from manufacturer). 2. Disconnect the inverter from all voltage sources (see Section 9, page 67). -
Page 49: Dc Connection
SMA Solar Technology AG 6 Electrical Connection 12. Ensure that all conductors are correctly connected. 13. Ensure that the conductors sit securely in the terminal points. Also see: • Additionally required material for the connection to digital inputs ⇒ page 38 • Signal cable requirements ⇒ page 37 DC connection 6.9.1... -
Page 50: Connecting The Pv Array
6 Electrical Connection SMA Solar Technology AG 4. Ensure that the conductor with the cold-formed contact ferrule is plugged far enough into the DC connector and has snapped into place. 5. Tighten the DC connector swivel nut (torque: 3.5 Nm to 4 Nm (31 in-lb to 35 in-lb)). - Page 51 SMA Solar Technology AG 6 Electrical Connection Requirements: ☐ The miniature circuit breaker must be switched off and prevented from being reconnected. ☐ The DC load-break switch must be set to OFF and, depending on local regulations, prevented from restarting using a padlock.
- Page 52 6 Electrical Connection SMA Solar Technology AG 7. If the DC connector is equipped with a DC cable of the wrong polarity, the DC connector must be reassembled. When this is done, the DC cable must always have the same polarity as the DC connector.
- Page 53 SMA Solar Technology AG 6 Electrical Connection 13. If the DC terminal cover is available as an accessory, mount the cover of the DC terminal cover with the 3 M6x20 screws (TX25, torque: 6 Nm (53 in-lb)). Also see: • Requirements for the PV modules per input ⇒ page 37 •...
-
Page 54: Commissioning
If required, change the network configura- Commissioning Assistant tion on the welcome page. The automatic network configuration recommended by SMA Solar Technology AG via DHCP server is activated by default. Only change the network configurations if the default configuration is not suitable for your net- work. -
Page 55: Procedure For Commissioning As A Subordinate Device
Carry out the configuration using the Com- Commissioning Assistant missioning Assistant. When doing so, select Subordinate device in the device configu- ration. Register the inverter as an SMA Speedwire Commissioning Assistant of the device in the System Manager. System Manager Also see: •... - Page 56 7 Commissioning SMA Solar Technology AG ☐ The enclosure lid must be mounted. Procedure: 1. If necessary, switch on the supply of the connected signal sources. 2. If the DC load-break switch has been secured with a padlock, open and remove the padlock on the DC load-break switch.
-
Page 57: Operation
Communication disturbances in the local network The IP address range 192.168.12.0 to 192.168.12.255 is occupied for communication amongst SMA products and for direct access to SMA products. Communication problems might occur if this IP address range is used in the local network. -
Page 58: Establishing A Connection Via Ethernet In The Local Network
Port 443 (https/TLS) User interface ennexos.sunnyportal.com Port 9524 (TCP) SMA Webconnect 1.5 and SMA SPOT wco.sunnyportal.com 8.1.1.3 Establishing a Connection via Ethernet in the local network Requirements: ☐ The product must be connected to the local network via a network cable (e.g. via a router). -
Page 59: Establishing A Connection Via Wlan In The Local Network
SMA Solar Technology AG 8 Operation 8.1.1.4 Establishing a Connection via WLAN in the Local Network Requirements: ☐ The product must be commissioned. ☐ The product must be integrated into the local network. Tip: You can change the network configuration on the welcome page of the product. -
Page 60: Access Information For Direct Wi-Fi Connection
8.1.2.4 Establishing direct Wi-Fi connection with Wi-Fi network search 1. Search for Wi-Fi networks with your smart device. 2. Select the SSID of the product SMA[serial number] in the list with the detected Wi-Fi networks. 3. Enter the device-specific Wi-Fi password (see WPA2-PSK on the type label). -
Page 61: Wps Function
☑ The login page of the user interface opens if the product has already been configured. 5. If the login page of the user interface does not open, enter the IP address 192.168.12.3 or, if your smart device supports mDNS services, SMA[serial number].local or http://SMA[serial number] in the address bar of the web browser. -
Page 62: Design Of The User Interface
8 Operation SMA Solar Technology AG Design of the User Interface Figure 12: Design of the User Interface Position Designation Description Focus navigation Enables the navigation between the following levels: • System • Device User settings Provides the following functions: •... -
Page 63: Access Rights To The User Interface
Speedwire encryption is used to encrypt system communication between all compatible Speedwire devices. In order to be able to use the Speedwire encryption in the system, all connected Speedwire devices, apart from the SMA Energy Meter, must support the SMA Speedwire Encrypted Communication function. -
Page 64: Resetting The Product To Default Setting
4. Select SMA Speedwire devices and confirm with [Next]. ☑ All SMA Speedwire devices in the systems are searched for and displayed. 5. Enable SMA Speedwire encryption and select [Continue]. 6. Assign a new system password and select [Save]. -
Page 65: Arc-Fault Circuit Interrupter (Afci)
☐ An update file with the desired inverter firmware must be available. You can download the update file, for example, from the product page under www.SMA-Solar.com. ☐ The user interface must be open and you must be logged in as Installer or Administrator. - Page 66 8 Operation SMA Solar Technology AG 7. Follow the instructions in the dialog. 8. Select the Monitoring menu. 9. Select the menu item Event monitor. 10. Check the events to see whether the firmware update has been completed successfully. STPxx-US-50-BE-en-11...
-
Page 67: Disconnecting The Product From Voltage Sources
SMA Solar Technology AG 9 Disconnecting the product from voltage sources Disconnecting the product from voltage sources Prior to performing any work on the product, always disconnect it from all voltage sources as described in this section. Always adhere to the prescribed sequence. - Page 68 9 Disconnecting the product from voltage sources SMA Solar Technology AG 7. Unscrew the screws (TX25) of the lid if the DC terminal cover is present. 8. Remove the lid downwards if the DC terminal cover is present. 9. Use a current clamp to ensure that no current is present in the DC cables.
- Page 69 SMA Solar Technology AG 9 Disconnecting the product from voltage sources DANGER Danger to life due to electric shock when touching exposed DC conductors or DC plug contacts if the DC connectors are damaged or loose The DC connectors can break or become damaged, become free of the DC cables, or no longer be connected correctly if the DC connectors are released and disconnected incorrectly.
- Page 70 9 Disconnecting the product from voltage sources SMA Solar Technology AG 16. Check that there is no voltage between L1 and N, L2 and N, and L3 and N at the AC terminal block for connecting the utility grid. Use a suitable measuring device for this purpose.
-
Page 71: Cleaning
SMA Solar Technology AG 10 Cleaning 10 Cleaning The product must be cleaned regularly to ensure that the product is free of dust, leaves and other dirt. NOTICE Damage to the product due to cleaning agents The use of cleaning agents may cause damage to the product and its components. -
Page 72: Troubleshooting
11 Troubleshooting SMA Solar Technology AG 11 Troubleshooting 11.1 Event messages 11.1.1 Event 101 Event message: • Grid incident Explanation: The grid voltage or grid impedance at the connection point of the inverter is too high. The inverter has disconnected from the utility grid. - Page 73 SMA Solar Technology AG 11 Troubleshooting 11.1.3 Event 103 Event message: • Grid incident Explanation: The grid voltage or grid impedance at the connection point of the inverter is too high. The inverter has disconnected from the utility grid. Corrective measures: •...
- Page 74 11 Troubleshooting SMA Solar Technology AG Explanation: The ten-minute average value of the grid voltage is no longer within the permissible range. The grid voltage or grid impedance at the connection point is too high. The inverter disconnects from the utility grid to maintain power quality.
- Page 75 SMA Solar Technology AG 11 Troubleshooting 11.1.8 Event 404 Event message: • Grid incident Explanation: The inverter has disconnected from the utility grid. A stand-alone grid or a very large change in the grid frequency was detected. Corrective measures: • Make sure there is no power outage or work being done on the utility grid and contact a grid operator if necessary.
- Page 76 11 Troubleshooting SMA Solar Technology AG Corrective measures: • If possible, check the grid frequency and observe how often fluctuations occur. If fluctuations occur frequently and this message is displayed often, contact the grid operator and request approval to change the operating parameters of the inverter. If the grid operator gives his approval, discuss any changes to the operating parameters with the Service.
- Page 77 SMA Solar Technology AG 11 Troubleshooting 11.1.13 Event 1001 Event message: • L / N swapped Explanation: Incorrect installation of the L / N connection. Corrective measures: • Check the AC cabling from the inverter to the feed-in meter. • Check the AC voltages on the inverter connection.
- Page 78 11 Troubleshooting SMA Solar Technology AG 11.1.16 Event 1501 Event message: • Reconnection fault grid Explanation: The changed country standard or the value of a parameter you have set does not correspond to the local requirements. The inverter cannot connect to the utility grid.
- Page 79 SMA Solar Technology AG 11 Troubleshooting 11.1.19 Event 3701 Event message: • Residual current too high • Check generator Explanation: The inverter has detected a residual current through brief grounding of the PV array. Corrective measures: • Check the PV system for ground faults.
- Page 80 11 Troubleshooting SMA Solar Technology AG • Wait for higher irradiation. • If this message is displayed frequently in the morning, increase the voltage limit for starting grid feed-in. Change the parameter Critical voltage to start feed-in. • If this message is displayed frequently with medium irradiation, ensure that the PV array is correctly rated.
- Page 81 SMA Solar Technology AG 11 Troubleshooting Explanation: The inverter has switched off due to excessive temperature. Corrective measures: • Clean the cooling fins on the rear of the enclosure and the air ducts on the top using a soft brush.
- Page 82 11 Troubleshooting SMA Solar Technology AG Corrective measures: • Check the grid voltage and connection on the inverter. If the grid voltage lies outside the permissible range due to local grid conditions, ask your grid operator if the voltage can be adjusted at the feed-in point or if it would be acceptable to change the monitored operating limits.
- Page 83 SMA Solar Technology AG 11 Troubleshooting 11.1.31 Event 7015 Event message: • Fault sensor interior temperature Explanation: A temperature sensor in the inverter is defective and the inverter interrupts the feed-in operation. The cause must be determined by the Service.
- Page 84 11 Troubleshooting SMA Solar Technology AG 11.1.34 Event 7801 Event message: • Fault overvoltage protector Explanation: One or more surge arresters have tripped or one or more surge arresters are not inserted correctly. Corrective measures: • Ensure that the surge arrester is inserted correctly.
- Page 85 11.1.39 Event 9002 Event message: • SMA Grid Guard code invalid Explanation: The SMA Grid Guard code entered is incorrect. The operating parameters are still protected and cannot be changed. Corrective measures: • Enter the correct SMA Grid Guard code. 11.1.40 Event 9003 Event message: •...
- Page 86 11 Troubleshooting SMA Solar Technology AG Corrective measures: • In order to be able to make changes to the grid parameters, you must be logged in as Administrator or Installer on the user interface. All changes to grid-relevant parameters should be coordinated with the grid operator.
-
Page 87: Calculating The Insulation Resistance
SMA Solar Technology AG 11 Troubleshooting Corrective measures: • Check the configuration of the Rapid Shutdown function and ensure that the operating mode selected is selected according to the DC disconnection unit used. • Check the functionality of the PV array disconnect switches. -
Page 88: Checking The Pv System For Ground Faults
11 Troubleshooting SMA Solar Technology AG 11.3 Checking the PV System for Ground Faults If the red LED is glowing and the event number 3501, 3601 or 3701 is being displayed in the Results menu on the inverter user interface, there may be a ground fault present. The electrical insulation from the PV system to ground is defective or insufficient. -
Page 89: Cleaning The Fans
SMA Solar Technology AG 11 Troubleshooting Device required for safe disconnection and short-circuiting of the PV modules The insulation resistance can only be measured with a suitable device for safe disconnection and short-circuiting of the PV modules. If no suitable device is available, the insulation measurement must not be carried out. -
Page 90: Manual Restart After Electric Arc
11 Troubleshooting SMA Solar Technology AG 2. Press the two locking tabs together to release the fan drawer and carefully pull the enclosure with the fan out downward. 3. Disconnect the fan connector in the unlocked state. 4. Clean the fan assembly with a soft brush or a vacuum cleaner. -
Page 91: Decommissioning The Product
SMA Solar Technology AG 12 Decommissioning the Product 12 Decommissioning the Product To decommission the inverter completely upon completion of its service life, proceed as described in this Section. CAUTION Risk of injury due to weight of product Injuries may result if the product is lifted incorrectly or dropped while being transported or mounted. - Page 92 12 Decommissioning the Product SMA Solar Technology AG 14. Lift the inverter up and off the mounting bracket. 15. If the inverter is to be stored or shipped in packaging, pack the inverter. Use the original packaging or packaging that is suitable for the weight and dimensions of the inverter.
-
Page 93: Disposal
SMA Solar Technology AG 13 Disposal 13 Disposal The product must be disposed of in accordance with the locally applicable disposal regulations for waste electrical and electronic equipment. Operating manual STPxx-US-50-BE-en-11... -
Page 94: Technical Data
14 Technical Data SMA Solar Technology AG 14 Technical Data 14.1 General Data Width x height x depth 728 mm x 762 mm x 266 mm (28.7 in x 30 in x 10.5 in) Weight 35 kg Length x width x height of the packaging 800 mm x 880 mm x 400 mm (31.5 in x 34.6... -
Page 95: Dc Input
SMA Solar Technology AG 14 Technical Data Grid configurations 480/277 V wye connection National standards and approvals, UL 62109-1, UL 1699B Ed. 1, as per 04/2023 IEEE 1547-2018, UL 1741 SB, UL 3741, ® Canadian Electrical Code CSA 22.2 No. 62109-1:16 / 62109-2:16, FCC Part 15... - Page 96 14 Technical Data SMA Solar Technology AG STP 20-US-50 STP 25-US-50 STP 30-US-50 Maximum apparent 20000 VA 25000 VA 30000 VA power Rated apparent power 20000 VA 25000 VA 30000 VA Nominal grid voltage 480 V / 277 V 480 V / 277 V 480 V / 277 V Rated grid voltage 277 V...
-
Page 97: Digital Inputs
Reset time 5 ms Maximum cable length 100 m (328 ft) 14.6 Communication SMA devices Max. 5 inverters with SMA Speedwire and 1 energy meter, 100 Mbit/s I/O systems and meters Ethernet, 10/100 Mbit/s, Modbus TCP 14.7 Data Storage Capacity 1-minute values 7 days... -
Page 98: Efficiency
14 Technical Data SMA Solar Technology AG 14.8 Efficiency STP 20-US-50 STP 25-US-50 STP 30-US-50 CEC weighted effi- 97.5 % 98 % 98 % ciency, η 14.9 Protective Devices DC reverse polarity protection Short-circuit diode Input-side disconnection point DC load-break switch DC overvoltage protection... -
Page 99: Torques
SMA Solar Technology AG 14 Technical Data Multifunction relay As standard DC surge protection devices type 1+2 and 2 or Optional type 2 14.12 Torques Screws for protecting the inverter from being 1.5 Nm (13.3 in-lb) lifted (TX25) Equipment grounding bar screws (TX25) 4 Nm (35.4 in-lb ±2.7 in-lb) -
Page 100: Accessories
SMA Sensor Module-US MD.SEN-US-40 SMA Sensor Module-US with interfaces for the connection of differ- ent sensors as accessories for Sunny Tripower X-US, Sunny Tripower CORE1-US and Sunny Boy solar inverters of type SB3.0-1SP- US-40/-41 / SB3.0-1SP-US-40/-41 / SB5.0-1SP-US-40/-41 / SB6.0-1SP-US-40/-41 / SB7.0-1SP-US-40/-41 / SB7.7-1SP-... -
Page 101: Compliance Information
Changes or modifications made to this equipment not expressly approved by SMA Solar Technology AG may void the FCC authorization to operate this equipment. -
Page 102: Contact
17 Contact SMA Solar Technology AG 17 Contact If you have technical problems with our products, please contact the SMA Service Line. The following data is required in order to provide you with the necessary assistance: • Type of device • Serial number •... - Page 104 www.SMA-Solar.com...
Need help?
Do you have a question about the SUNNY TRIPOWER X 20-US and is the answer not in the manual?
Questions and answers