Table of Contents
Advertisement
Quick Links
Advertisement
Table of Contents

Related Manuals for Magtrol TORQUE 10


Summary of Contents for Magtrol TORQUE 10
- Page 1 TORQUE 10 TORQUE TRANSDUCER SOFTWARE USER MANUAL www.magtrol.com...
- Page 2 TORQUE 10 While every precaution has been exercised in the compilation of this document to ensure the accuracy of its contents, Magtrol, Inc. assumes no responsibility for errors or omissions. Additionally, no liability is assumed for any damages that may result from the use of the information contained within this publication.
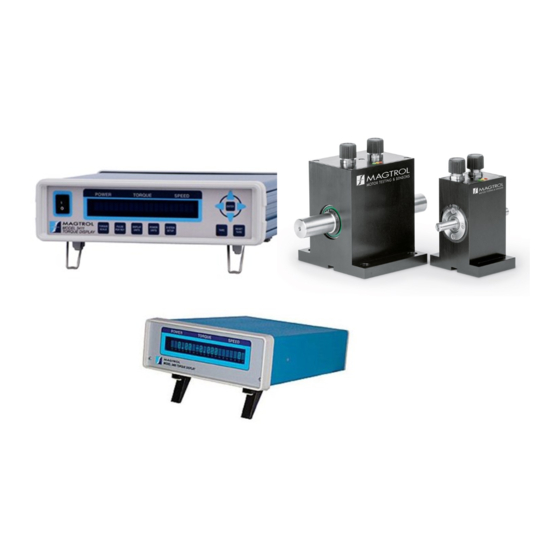
- Page 3 The Software TORQUE 10 is designed to control the TS 100 Series, Model 3411 Torque Display Unit and Model 3410 Torque Display Unit, which are a high-precision products integrating the most recent measurement techniques.
- Page 4 TORQUE 10 www.magtrol.com...
-
Page 5: Table Of Contents
TABLE OF CONTENTS SAFETY PRECAUTIONS TABLE OF CONTENTS PREFACE INTRODUCTION ABOUT TORQUE 10 SYSTEM REQUIRMENTS SOFTWARE FEATURES 1.3.1 New Features of TORQUE 10 1.3.2 Other Features SOFTWARE INSTALLATION INSTALLATION PROCEDURE DRIVER INSTALLATION TS 1XX SERIE DRIVER MODEL 3411 DRIVER 3.2.1 LAN Configuration... - Page 6 TORQUE 10 RUN TEST IN “HS DATA ACQUISITION” MODE EXAMPLE OF DATA FILE DATA DISPLAY EXPORT TO EXCEL FUNCTION PRINT GRAPH DISPLAY 10. CREATING TASK 10.1 TEMPERATURE INPUT (TI) TASKS www.magtrol.com...
-
Page 7: Preface
This manual contains information required for installation and general use of Magtrol’s TORQUE 10 Software. To achieve maximum capability and ensure proper use, please read this manual in its entirety before operating. Keep the manual in a safe place for quick reference whenever a question should arise. - Page 8 PREFACE TORQUE 10 CONVENTIONS USED IN THIS MANUAL The following symbols and type styles may be used in this manual to highlight certain parts of the text: INDICATES INFORMATION CONSIDERED IMPORTANT BUT NOT HAZARD RELATED. THIS IS INTENDED TO DRAW THE OPERATOR’S ATTENTION TO COMPLEMENTARY INFORMATION OR ADVICE RELATING TO THE SUBJECT BEING TREATED.
-
Page 9: System Requirments
1. INTRODUCTION 1.1 ABOUT TORQUE 10 Magtrol’s TORQUE 10 is a program designed for use with Windows® 7 SP1/10/11 operating systems for PC-based data acquisition. Used in conjunction with Magtrol’s Torque Sensors or Display Equipment, TORQUE 10 is equipped to interface and measure mechanical parameter of device under test. - Page 10 INTRODUCTION TORQUE 10 www.magtrol.com...
-
Page 11: Software Installation
TORQUE 10 SOFTWARE INSTALLATION 2. SOFTWARE INSTALLATION 2.1 INSTALLATION PROCEDURE Plug the USB flash memory or insert the TORQUE 10 DVD-Rom disk into your target computer’s DVD drive. The installer package can be downloaded from the Magtrol Internet Site. https://www.magtrol.com/software-downloads/ Installation listing: •... - Page 12 SOFTWARE INSTALLATION TORQUE 10 Figure 3 Destination Directory Window This process can take several minutes to an hour depending upon the computer being used. Please plan accordingly. When all programs are installed, the following window will appear. Click Finish to complete the installation.
-
Page 13: Driver Installation
3.1 TS 1XX SERIE DRIVER The TS can be controlled in USB (TMC) interface or COM (CDC) interface. TORQUE 10 supports the USB (TMC) interface for TS 100 Series. The COMx could be used, but not recommended. The USB interface doesn’t require any specific driver except the basic... -
Page 14: Lan Configuration
DRIVER INSTALLATION TORQUE 10 Figure 4 3411 LAN Settings 3.2.1 LAN CONFIGURATION Run NI MAX.exe from National Instruments software tools Open Devices and Interfaces Right click on Network Devices, select Create New VISA TCP/IP Resource Select Manual Entry of RAW Socket... - Page 15 TORQUE 10 DRIVER INSTALLATION Enter IP address and Port Number (3411) then press Validate Figure 6 NI MAX TCP/IP Press Validate Figure 7 NI MAX Validate Press OK and Next Enter the name of port which will appears in Interface field.
-
Page 16: Model 3410 Driver
DRIVER INSTALLATION TORQUE 10 Figure 8 NI MAX TCP/IP Alias name Then Press Finish. If you have some problem to configure correctly the LAN, please ask your IT service to have some help. 3.3 MODEL 3410 DRIVER No specific driver requested. This MODEL 3410 has a true RS-232 interface. -
Page 17: Torque 10 Executation
TORQUE 10 TORQUE 10 EXECUTATION 4. TORQUE 10 EXECUTATION Double click on TORQUE 10.exe Figure 9 Main window 4.1 MENU On top of the window, 3 menus are available 4.1.1 FILE MENU Figure 10 File Menu www.magtrol.com... -
Page 18: Introduction About Torque
TORQUE 10 EXECUTATION TORQUE 10 CONTROL FUNCTION Load setup Press to load a specific Setup file. Press to save the current configuration in current filename. If the Save Setup [Ctrl+S] current filename is empty, a dialog windows opens to select the filename to save. -
Page 19: Setup Configuration
TORQUE 10 SETUP CONFIGURATION 5. SETUP CONFIGURATION This is the default button when starting the TORQUE 10 program. Figure 13 Setup display www.magtrol.com... -
Page 20: Device Interface
3411: USB0::0x2BCF::0x0020::14L34110070::2::INSTR or LAN ➔ Chapter 3411 Setup 3410: COMx ➔ Chapter 3410 Setup To know the COMx port select, go to Device Manager windows Figure 14 Device Manager TS Series = Magtrol Torque Sensor 3411 Torque Display = 3411 www.magtrol.com... -
Page 21: Ts 1Xx Setup
This control shows the last calibration date. If the calibration date has expired, the Calibrate button appears. Pressing it Calibration Date will take you to the official Magtrol website to contact the calibration service. This mode is used to acquire 10000 torque samples in 1 HS Data Acquisition second. -
Page 22: 3411 Setup
SETUP CONFIGURATION TORQUE 10 5.3 3411 SETUP Figure 16 3411 Setup When Interface of 3411 is selected the Device Name is displayed. Model,SerialNumber,FirmwareVersion CONTROL FUNCTION Device Name Identification of the device Set the nominal torque of the Torquemaster connected to the... -
Page 23: 3411 Lan Setting
TORQUE 10 SETUP CONFIGURATION Figure 17 3411 USB setup 5.3.1 3411 LAN SETTING Figure 18 3411 LAN Setting Enter correct parameter for LAN settings. Please contact your IT administration if you need more information. www.magtrol.com... -
Page 24: 3410 Setup
SETUP CONFIGURATION TORQUE 10 5.4 3410 SETUP Figure 19 3410 Setup When Interface of 3410 is selected the Device Name is displayed. Model and Firmware Version CONTROL FUNCTION Device Name Identification of the device Set the nominal torque of the Torquemaster connected to... -
Page 25: Instruments Setup Compatibility
TORQUE 10 SETUP CONFIGURATION 5.5 INSTRUMENTS SETUP COMPATIBILITY Thanks to the flag next to "Device Interface", it is Possible to activate two channels simultaneously. All the instruments can be combined with each other in any combination. It is important to note that the HS Data Acquisition mode cannot be activated when both channels are activated. -
Page 26: Sensor Input (Temperature)
SETUP CONFIGURATION TORQUE 10 Figure 22 Setup 3411 & Setup 3410 5.6 SENSOR INPUT (TEMPERATURE) The accessory temperature input device. This requires a USB or PCI data acquisition device and an TI Task configured in Measurement and Automation Explorer. For more information on TI Task refer to Section 10.1... -
Page 27: File
TORQUE 10 SETUP CONFIGURATION 5.7 FILE Figure 24 File indicator INDICATOR FUNCTION Setup File Path Show the current Setup file path and name. Data File Path Show the current Data file path and name. Right click on field can be used to Open the file location. This is a helpful to locate and manage the Setup and Data files. - Page 28 SETUP CONFIGURATION TORQUE 10 www.magtrol.com...
-
Page 29: Display Configuration
TORQUE 10 DISPLAY CONFIGURATION 6. DISPLAY CONFIGURATION Keynote: You cannot access this menu if you have selected the HS Data Acquisition mode of the TS 100 Series. Figure 26 Configure Display 6.1 FLAG PART This is the list of parameters that can be measured and displayed during a test. Select an item by click on the flag. - Page 30 DISPLAY CONFIGURATION TORQUE 10 www.magtrol.com...
-
Page 31: Test Function
TORQUE 10 TEST FUNCTION 7. TEST FUNCTION This example shows the activation of both channels TS 100 Series connected in USB mode. The LED next to the Tare buttons indicate the status of the Tare value for each channel. Figure 27 Test button... - Page 32 TEST FUNCTION TORQUE 10 The Sampling rate is depending of the model connected and if 1 or 2 channels are selected. Vales for normal mode (HS data acquisition ➔ disable) The following table shows the Sampling rate per second. Channel 1 or 2...
-
Page 33: Run Test "Normal" Two Channels
TORQUE 10 TEST FUNCTION 7.1 RUN TEST “NORMAL” TWO CHANNELS Press RUN button to start the measurement. Figure 29 Run “Normal” mode Two Channels This example shown a test at the maximum speed of acquisition in “Normal” mode! 7.1.1 RESULT OF ACQUISITION Figure 30 Acquisition from 2 channels www.magtrol.com... -
Page 34: Run Test "Normal" Single Channel
TEST FUNCTION TORQUE 10 7.2 RUN TEST “NORMAL” SINGLE CHANNEL Figure 31 Run “Normal” mode Single Channels Figure 32 Acquisition from single channel www.magtrol.com... -
Page 35: Run Test In "Hs Data Acquisition" Mode
TORQUE 10 TEST FUNCTION 7.3 RUN TEST IN “HS DATA ACQUISITION” MODE The High-Speed Data Acquisition mode is used to increase the sampling rate of data. For the TS 100 Series, this is the one shoot acquisition of 10’000 values of torque in 1 second. - Page 36 TEST FUNCTION TORQUE 10 Figure 35 Result of HS data acquisition Time stamp will be added for each torque value Figure 36 HS data acquisition Display Use File menu to save data. Data are not automatically saved at the end of the test. This operation must be done manually be the operator.
-
Page 37: Example Of Data File
TORQUE 10 TEST FUNCTION 7.4 EXAMPLE OF DATA FILE Figure 37 Data file example This file (.mdf) is a text file formatted with tabular separator. Use Torque 10, Notepad, Excel or others to open this file. www.magtrol.com... - Page 38 TEST FUNCTION TORQUE 10 www.magtrol.com...
-
Page 39: Data Display
TORQUE 10 DATA DISPLAY 8. DATA DISPLAY Figure 38 Data Button This view shows the measurement in spreadsheet windows. Use the scrollbar to navigate at the end of the file. Use File menu to save, export or print data. www.magtrol.com... -
Page 40: Export To Excel Function
DATA DISPLAY TORQUE 10 8.1 EXPORT TO EXCEL FUNCTION From the Data or Graph View, it possible to export the table directly to Excel sheet. Figure 39 Export to Excel function This operation requires to have a licenced Microsoft Excel 2009 or... -
Page 41: Print
TORQUE 10 DATA DISPLAY 8.2 PRINT From the Data View, it possible to print the table directly The printing function is only available on the Default printer of Windows environment. Before print, check the default printer configured Figure 41 Printer function dialog The printer cannot be selected for this operation, the spreadsheet will be printed on the Default printer of Windows. - Page 42 DATA DISPLAY TORQUE 10 www.magtrol.com...
-
Page 43: Graph Display
TORQUE 10 GRAPH DISPLAY 9. GRAPH DISPLAY Figure 43 Graph display Control Function Located to the upper left of the graph the legend expands as more plot parameters are selected. Each plot is identified with an abbreviated name and is color coded. There are many plot... - Page 44 GRAPH DISPLAY TORQUE 10 Control Function Auto Axis Enables auto-scaling of the Y-axis and X-axis parameter. This provides several features for manipulating the plot being displayed. By clicking on the various icons, you can move the Graph Palette plotted data within the boundaries of the graph and zoom in or out on small portions of the plot.
-
Page 45: Creating Task
TORQUE 10 CREATING TASK 10. CREATING TASK 10.1 TEMPERATURE INPUT (TI) TASKS To create a temperature input task, double-click the Measurement & Automation Explorer (MAX) shortcut on your desktop. Figure 46 Expand Data Neighborhood by clicking on the small triangle next to it. If you see NI-DAQmx Tasks as one of the items, skip to step #6. - Page 46 CREATING TASK TORQUE 10 Click NI-DAQmx Task and then Next. Figure 49 Skip to step #7. Right-click NI-DAQmx Tasks and click Create New NI-DAQmx Task… Figure 50 Expand Acquire Signals. Figure 51 Expand Analog Input. Figure 52 Expand Temperature. www.magtrol.com...
- Page 47 TORQUE 10 CREATING TASK Figure 53 Select the type of device used for measurement. In this example we will measure temperature with thermocouples. Click Thermocouple. Figure 54 The product being configured for thermocouple temperature measurement is a NI 9211 in the cDAQ chassis.
- Page 48 CREATING TASK TORQUE 10 TI Task will now appear in the Data Neighborhood tree. Figure 58 The middle pane of MAX contains configuration settings for this thermocouple module. Figure 59 To configure all channels the same, click the first channel, scroll down to the last channel, then press the Shift key and click on the last item.
- Page 49 Exit MAX by clicking the X in the upper right corner of the window. This is all that is needed to enable the device for use in TORQUE 10. You are not limited to thermocouple inputs; you may select any of the temperature input options that the device is capable of providing.
- Page 50 CREATING TASK TORQUE 10 www.magtrol.com...
- Page 51 Material Authorization (RMA) process. Depending on where the equipment is located and which unit(s) will be returned, you will be directed to either ship your equipment back to MAGTROL, Inc. in the United States or MAGTROL SA in Switzerland. RETURNING EQUIPMENT TO MAGTROL, INC. (UNITED STATES) When returning equipment to MAGTROL INC.
- Page 52 For all other jobs, a detailed service quote will be provided in the coming days. Please note that, for special products, the process time could be longer. 4. If you choose to not repair your equipment, Magtrol reserves the right to charge you the following fees: •...
- Page 53 Revisions To This Manual The contents of this manual are subject to change without prior notice. The latest updated versions of our manuals are available and downloadable at any time on Magtrol’s website www.magtrol.com in the « SUPPORT » section.
- Page 54 © 2023 MAGTROL | Due to continual product development, MAGTROL reserves the right to modify specifications and user manual without forewarning MAGTROL INC MAGTROL SA Subsidiaries 70 Gardenville Parkway Rte de Montena 77 Germany, France Buffalo, NY 14224 | USA 1728 Rossens | Switzerland India &...
Need help?
Do you have a question about the TORQUE 10 and is the answer not in the manual?
Questions and answers