Table of Contents
Advertisement
Available languages
Available languages
Quick Links
Advertisement
Table of Contents

Related Manuals for MINN KOTA TERROVA QUEST 24V


Summary of Contents for MINN KOTA TERROVA QUEST 24V
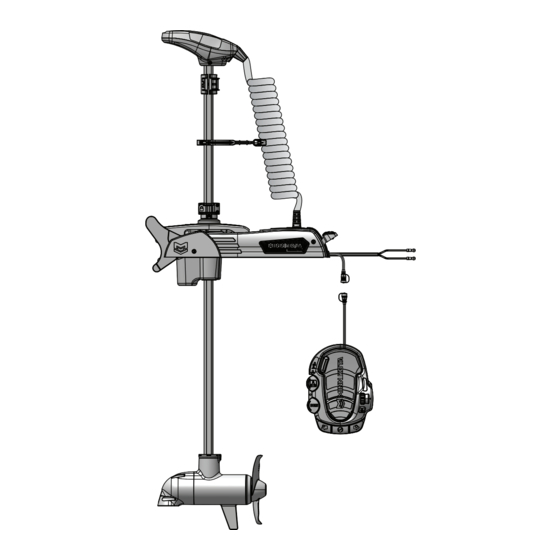
- Page 1 TERROVA® QUEST BOW-MOUNT TROLLING MOTOR Installation Instructions...
-
Page 2: Motor Information
Thank you for choosing Minn Kota. We believe that you should spend more time fishing and less time positioning your boat. That’s why we build the smartest, toughest, most intuitive trolling motors on the water. Every aspect of a Minn Kota trolling motor is thought out and rethought until it’s good enough to bear our name. -
Page 3: Safety Considerations
WARNING You are responsible for the safe and prudent operation of your vessel. We have designed your Minn Kota product to be an accurate and reliable tool that will enhance boat operation and improve your ability to catch fish. This product does not relieve you from the responsibility for safe operation of your boat. -
Page 4: Know Your Boat
KNOW YOUR BOAT Starboard Starboard Port Port Inboard Inboard Outboard Outboard Keel Keel Port Port Starboard Starboard Gunwale Gunwale Transom Transom Stern Stern Gunwale Gunwale Stern Stern Hull Hull 4 | minnkota.johnsonoutdoors.com ©2023 Johnson Outdoors Marine Electronics, Inc. -
Page 5: Installation
Your new Terrova QUEST comes with everything you’ll need to install it directly to the boat. The motor can be mounted directly to the bow or coupled with a Minn Kota quick release bracket for ease of mounting and removal. For compatible quick release brackets and to locate your nearest dealer, visit minnkota.johnsonoutdoors.com. -
Page 6: Mounting Considerations
MOUNTING CONSIdERATIONS MOUNTING CONSIdERATIONS It is recommended that the motor be mounted as close to the centerline or keel of the boat View accessories as possible. Make sure the area under the mounting location is clear to drill holes and install available for your hardware. - Page 7 NOTICE: The trolling motor weighs up to 90lb. Minn Kota recommends having a second person help with the installation. Remove the four Sideplate Screws using a #3 Phillips Screwdriver. Two screws will be located on each side of the mount.
- Page 8 INSTALLING THE TERROVA QUEST The center mounting hole on each side of the Base Extrusion is blocked by a Spring. One end of each Needle-Nose Needle-Nose Spring Spring Pliers Pliers Spring must be disconnected in order to access the mounting holes. To disconnect the Spring, take a Needle-nose Pliers and carefully grab the hooked end on the top half of the Spring.
- Page 9 INSTALLING THE TERROVA QUEST With the motor at the intended mounting location, Base Extrusion Base Extrusion Drilling Locations Drilling Locations take an Awl or similar tool and mark all six mounting holes in the Base Extrusion. Slide the motor aside to drill the mounting holes. Drill through the boat deck using a Drill and a 3/8”...
- Page 10 INSTALLING THE TERROVA QUEST With the mounting hardware secure, reassemble the Springs that were disconnected. Use a Needle- Needle-Nose Needle-Nose Pliers Pliers nose Pliers to grab the hooked end of the loose Needle-Nose Needle-Nose Spring. Reconnect it by pulling it upwards and Pliers Pliers hooking it in the hole on the Side Rail.
-
Page 11: Battery & Wiring Installation
CAUTION CAUTION These guidelines apply to general rigging to support your Minn Kota motor. Powering multiple motors or additional electrical devices These guidelines apply to general rigging to support your Minn Kota motor. Powering multiple motors or additional electrical devices from the same power circuit may impact the recommended conductor gauge and circuit breaker size. -
Page 12: Selecting The Correct Batteries
Minn Kota recommends using Minn Kota brand chargers to recharge the batteries connected to your Minn Kota trolling motor, as they have been engineered to work with motors that include a bonding wire. Learn more about Minn Kota chargers online at minnkota.johnsonoutdoors.com. -
Page 13: Connecting The Batteries In Series
Additional Accessories Connected to Trolling Motor Batteries Significant damage to your Minn Kota motor, your boat electronics, and your boat can occur if incorrect connections are made between your trolling motor batteries and other battery systems. Minn Kota recommends using an exclusive battery system for your trolling motor. - Page 14 CONNECTING THE BATTERIES IN SERIES 36-Volt Systems Three 12-volt batteries are required. The batteries must be wired in series, only as directed in the wiring diagram, to provide 36 volts. Make sure that the motor is switched off (speed selector on “0”). +36 Volts to trolling motor To trolling motor negative positive (or circuit breaker)
-
Page 15: Completing The Installation
This portion of the installation will cover how to verify power, install the Bow-mount Stabilizer, and more. The installation will conclude with connecting Accessory Cables and setting motor preferences for ease of use. Minn Kota recommends connecting the trolling motor to the One-Boat Network app to assist in these steps. - Page 16 POWERING ON THE WIRELESS REMOTE Powering on the Wireless Remote ITEM(S) NEEDED #8 x 1 #7 x 1 Power on the trolling motor. Wireless Wireless To turn on the Wireless Remote (Item #8), press and Remote Remote hold the Power button on the side of the Remote.
-
Page 17: Installing The Foot Pedal
INSTALLING THE FOOT PEdAL Installing the Foot Pedal ITEM(S) NEEDED #14 x 4 #C x 1 Take the Foot Pedal (Item #C) and turn it over. Put a Foot Pedal Pad (Item #14) in each of the pad locations. Foot Pedal Foot Pedal Bottom Bottom... - Page 18 IdENTIFYING TROLLING MOTOR FEATURES ANd THEIR ASSOCIATEd CABLES IdENTIFYING TROLLING MOTOR FEATURES ANd THEIR ASSOCIATEd CABLES Feature & Cable Identification The Terrova QUEST is pre-installed with Advanced GPS Navigation - including the ability to connect via Ethernet to a Humminbird unit. The motor is also pre-installed with sonar, either Dual Spectrum CHIRP or Built-in MEGA Side Imaging.
- Page 19 FEATURE & CABLE MANAGEMENT Feature & Cable Management dUAL SPECTRUM CHIRP Your trolling motor may be pre-installed with a transducer system dual Spectrum CHIRP Lower Unit featuring Humminbird’s Dual Spectrum CHIRP. CHIRP stands for “Compressed High Intensity Radar Pulse.” Dual Spectrum CHIRP is a 2D sonar transducer with a temperature sensor that is integrated into the lower unit of the trolling motor.
- Page 20 dUAL SPECTRUM CHIRP The integrated design of the Dual Spectrum CHIRP transducer protects it in the lower unit of the trolling motor from underwater hazards and prevents tangles and damage to the transducer cables. In certain situations, air bubbles may adhere to the surface of the Dual Spectrum CHIRP transducer and affect the performance.
- Page 21 If using cable ties, do not over-tighten. Any excess cable should be bundled in a loose loop of no less than 4” in diameter. The connection cable should be routed to the fish finder following Minn Kota recommendations on routing the cables to optimize mobility and maximize functionality.
- Page 22 dUAL SPECTRUM CHIRP If installing directly to a Solix or Apex, the connection Fourteen-Pin Fourteen-Pin will be flat on the back of the fish finder display. Connector Connector Align the pins on the Accessory Cable with the Dual Spectrum CHIRP Dual Spectrum CHIRP Solix or Apex Solix or Apex...
- Page 23 dUAL SPECTRUM CHIRP ITEM(S) NEEDED #18 x 1 If installing directly to a Helix Adapter Cable, align Fourteen-Pin Fourteen-Pin Receptacle Receptacle the pins on the accessory cable or extension cable Connector Connector with the receptacle on the Helix Adapter Cable (Item #18).
- Page 24 Built-in MEGA Side Imaging+ comes available in the Minn Kota flagship families of trolling motors, including Ultrex and Ulterra, with 200 feet of coverage on either side of your boat. With Humminbird MEGA imaging sonar built right into the trolling motor, you now have a crystal clear view of what’s directly to the left and...
- Page 25 BUILT-IN MEGA SIdE IMAGING Built-in MEGA Side Imaging Connections Directly Directly Control Head Control Head to Solix to Solix or Apex or Apex Advanced GPS Advanced GPS Ethernet Connector Ethernet Connector Extension Extension Cable Cable (if needed) (if needed) Built-in MEGA Built-in MEGA Side Imaging Side Imaging...
- Page 26 BUILT-IN MEGA SIdE IMAGING Coil Cord Coil Cord NOTICE: Your fish finder should be turned off Built-in Built-in MEGA Down MEGA Down until this procedure is complete. Imaging Imaging Place the motor in the deployed position. Fourteen-Pin Fourteen-Pin Locate the Fourteen-Pin Connector at the end Connector Connector of the Built-in MEGA Side Imaging accessory cable.
- Page 27 BUILT-IN MEGA SIdE IMAGING ITEM(S) NEEDED #18 x 1 If installing directly to a Helix Adapter Cable, align 4h Fourteen-Pin Fourteen-Pin Receptacle Receptacle the pins on the accessory cable or extension cable Connector Connector with the receptacle on the Helix Adapter Cable (Item #18).
- Page 28 AdVANCEd GPS NAVIGATION Your Minn Kota trolling motor and Humminbird fish finder communicate with each other to change the way you fish. Advanced GPS Navigation offers a large array of features including controlling speed, steering, Spot-Lock, and the ability to record and retrace paths on the water, all at your fingertips.
- Page 29 AdVANCEd GPS NAVIGATION GPS Ethernet Connection Advanced GPS Advanced GPS Ethernet Connector Ethernet Connector Control Control To Helix To Helix Head Head Coil Cord Coil Cord Helix Adapter Cable Helix Adapter Cable (provided if needed) (provided if needed) Ethernet Cable Ethernet Cable (provided) (provided)
- Page 30 AdVANCEd GPS NAVIGATION ITEM(S) NEEDED #15 x 1 Identify the keyed Receptacle on the Ethernet Cable Ethernet Ethernet (Item #15). It will be keyed to fit with the Eight- Cable Cable Pin Advanced GPS Ethernet Connector below the Control Head. NOTICE: The Ethernet Cable has a Receptacle for Advanced...
- Page 31 AdVANCEd GPS NAVIGATION To install the Ethernet Cable, align the pins on Eight-Pin Eight-Pin the Advanced GPS Ethernet Connector with the Receptacle Receptacle Connector Connector Receptacle on the Ethernet Cable. Notice the keyed connectors. Tighten the Collar from the Ethernet Cable to secure the connection.
- Page 32 Cable Cable Cable to secure the connection. Helix Adapter Cable Helix Adapter Cable NOTICE: Minn Kota provides one Helix Adapter Cable (AS EC QDE - Ethernet Adapter Cable - 720074-1) with every trolling motor equipped with Advanced GPS Navigation. Ethernet...
- Page 33 SECURING ACCESSORY CABLES Securing Accessory Cables NOTICE: If only one cable is present below the Control Head, this installation is not applicable. Before securing accessory cables, please review the "Identifying Trolling Motor Features and Their Associated Cables" section of this document.
- Page 34 SECURING ACCESSORY CABLES Place the motor in the stowed position. Confirm all Accessory Cables are connected to an output device as desired. To secure the Accessory Cables, the Sonar Cable Control Head Control Head and Ethernet Cable will be tied together inside the Coil Cord using Cable Ties.
- Page 35 SECURING ACCESSORY CABLES Follow the Accessory Cables from the Control Head to the Mount and place additional Cable Ties every 4–6 Cable Tie Cable Tie Control Control inches. The number of Cable Ties needed will vary Head Head depending on the length of the trolling motor Shaft. Ethernet Ethernet Cable...
- Page 36 INSTALLING THE PROP Installing the Prop ITEM(S) NEEDED #10 x 1 #11 x 1 #12 x 1 #13 x 1 CAUTION Drive Drive Disconnect the motor from the battery before beginning any prop work or maintenance. Take the Drive Pin (Item #13) and slide it through Armature Armature the Hole in the Armature Shaft.
- Page 37 OPTIMIZING THE PERFORMANCE OF THE TERROVA QUEST WITH THE WIRELESS REMOTE OR ONE-BOAT NETWORK APP Minn Kota® and Humminbird® have joined forces to bring you the One-Boat Network, including the latest Advanced GPS Navigation Wireless Remote and the One-Boat Network app. The Wireless Remote comes from the factory paired to the trolling motor.
-
Page 38: Keel Offset
ONE-BOAT NETWORK AdJUSTMENTS ONE-BOAT NETWORK AdJUSTMENTS KEEL OFFSET The Terrova QUEST comes from the factory with the Lower Unit NOTICE: When the motor is installed from the factory, parallel to the Mount. When the Lower Unit is parallel to the Mount, the Keel Offset is 0 degrees. - Page 39 KEEL OFFSET Press the Menu button on the Wireless Remote. Use the Speed Up or Speed Down button to find the Motor Settings menu. Use the Steer Right button to select Motor Settings. In the Motor Settings Menu, use the Speed Up or Speed Down button to find Setup/Calibration.
- Page 40 KEEL OFFSET Setting the Keel Offset with the One-Boat Network App Power on the trolling motor by pressing the Power Indicator Panel Indicator Panel button on the Indicator Panel. When the trolling System System motor is on, the System Status LED will be blue.
- Page 41 KEEL OFFSET In the Motor Settings menu, find and tap Setup and Calibration. In Setup and Calibration, find and tap Keel Mount Offset. Review all safety warnings. Follow the prompts in the One-Boat Network app. If the placement of the trolling motor is pointing forward and parallel to the keel, tap Set.
- Page 42 STRAIGHT ON dEPLOY Minn Kota recommends setting the Keel Offset when the position of the Lower Unit is parallel with the Keel. Save the Keel Offset before exploring the Straight on Deploy feature. Straight on Deploy uses the position recorded in Keel Offset to know where to position the Lower Unit to be parallel with the Keel.
- Page 43 STRAIGHT ON dEPLOY To Toggle Straight on Deploy with the One-Boat Network App Open the One-Boat Network (OBN) app on a mobile device. Make sure the mobile device is paired with the trolling motor and that the motor is powered "on." From the OBN home screen, tap the Motor menu.
- Page 44 STOW ORIENTATION STOW ORIENTATION The Stow Orientation is a term used to describe the lower unit NOTICE: If the Stow Orientation is set to Prop Right, the and Prop position when the motor is stowed. The lower unit will Depth Collar must be rotated on the Shaft to improve automatically rotate into the Stow Orientation when stowing the accessibility.
- Page 45 STOW ORIENTATION Setting the Stow Orientation with the One-Boat Network App Open the One-Boat Network (OBN) app on a mobile device. Make sure the mobile device is paired with the trolling motor and that the motor is powered "on." From the OBN home screen, tap the Motor menu. The Motor menu opens the Motor home screen.
- Page 46 BOAT SCALE BOAT SCALE Trolling motor performance can be impacted by factors including, but not limited to, wind, water conditions, boat specifications, battery health, wiring, etc. Boat Scale provides a method of adjusting how the trolling motor will perform to account for these and other variables.
- Page 47 BOAT SCALE Adjusting Boat Scale with the One-Boat Network App Open the One-Boat Network (OBN) app on a mobile device. Make sure the mobile device is paired with the trolling motor and that the motor is powered "on." From the OBN home screen, tap the Motor menu. The Motor menu opens the Motor home screen.
- Page 48 ONE-BOAT NETWORK BUTTONS Minn Kota trolling motors equipped with Advanced GPS Navigation are compatible with devices enabled with the One-Boat Network (OBN), such as the Wireless Remote and Foot Pedal. OBN functions can be enabled and disabled through customizable OBN buttons on the Wireless Remote and Foot Pedal.
- Page 49 CUSTOMIZING THE ONE-BOAT NETWORK BUTTONS ON THE WIRELESS REMOTE One-Boat Network functions can be enabled and disabled through four One-Boat Network buttons on the Wireless Remote. The One- Boat Network buttons can be customized to control the following functions, depending on your setup: Function Icon Description...
- Page 50 CUSTOMIZING THE ONE-BOAT NETWORK BUTTONS ON THE WIRELESS REMOTE Customize the One-Boat Network Buttons on the Wireless Remote On the Wireless Remote, press the Menu button to open the Motor Menu. In the Motor Menu, use the Speed Down Speed Up button to find the Motor Settings menu.
- Page 51 CUSTOMIZING THE ONE-BOAT NETWORK BUTTON ON THE FOOT PEdAL Minn Kota trolling motors equipped with Advanced GPS Navigation are compatible with devices enabled with the One-Boat Network, such as the Foot Pedal. One-Boat Network functions are enabled and disabled through the Foot Pedal with the One-Boat Network button.
- Page 52 CUSTOMIZING THE ONE-BOAT NETWORK BUTTON ON THE FOOT PEdAL In the One-Boat Network menu, use the Speed Down or Speed Up button to find Foot Pedal. Use the Steer Right button to select Foot Pedal. In the Foot Pedal menu, use the Speed Down or Speed Up button to find the desired function.
- Page 53 ROTATING THE dEPTH COLLAR AdJUSTMENTS ROTATING THE dEPTH COLLAR The Depth Collar is installed from the factory so that the Cam Lever opens in an upward motion when the Stow Orientation of the lower unit is Prop Left. The factory default Stow Orientation is Prop Left. Stow Orientation can be changed to Prop Right using the wireless remote or One-Boat Network app.
- Page 54 ROTATING THE dEPTH COLLAR INSTALLATION With the Stow Orientation set to Prop Right, stow Depth Depth the trolling motor. Ensure that the Lower Unit is Collar Collar resting securely on the Fall Away Ramps and that the STOWED LED on the Indicator Panel is illuminated orange.
- Page 55 ROTATING THE dEPTH COLLAR Remove the Depth Collar from the Shaft. Turn the Screw Screw Depth Depth Depth Collar 180° so that the screw hole in the Hole Hole Collar Collar Depth Collar sits above the Shaft. Shaft Shaft Shaft Shaft Place the Depth Collar on the Shaft in the new position.
- Page 56 ROTATING THE dEPTH COLLAR With the Depth Collar in position on the Shaft, take the Screw and Spring that were removed earlier in Lever Lever the installation. Hold the Spring inside the Depth Collar against the screw hole. The Spring should sit between the Depth Collar halves.
- Page 57 NOTES ©2023 Johnson Outdoors Marine Electronics, Inc. minnkota.johnsonoutdoors.com | 57...
-
Page 58: Recommended Accessories
Stop buying new batteries and start taking care of the ones you’ve got. Many chargers can actually damage your battery over time – creating shorter run times and shorter overall life. Digitally controlled Minn Kota chargers are designed to provide the fastest charge that protect and extend battery life. MK212PCL... - Page 59 TERROVA® QUEST MOTEUR DE PÊCHE À LA TRAÎNE MONTÉ SUR ÉTRAVE Instructions d’Installation...
-
Page 60: Numéro De Série
C’est pourquoi nous construisons les moteurs de pêche à la traîne les plus intelligents, les plus solides et les plus faciles à utiliser. Chaque aspect d’un moteur de pêche à la traîne Minn Kota est réfléchi et étudié jusqu’à ce qu’il soit digne de porter notre nom. Nous avons investi des heures incalculables de recherche et d’essais pour vous offrir les avantages caractéristiques de Minn Kota, qui vous mènent vraiment «... -
Page 61: Consignes De Sécurité
AVERTISSEMENT Vous seul êtes responsable de la navigation sécuritaire et prudente de votre bateau. Nous avons conçu votre produit Minn Kota pour qu’il soit un outil précis et fiable qui vous permettra d’améliorer l’utilisation de votre bateau et d’accroître votre capacité de pêcher des poissons. Ce produit ne vous exonère pas de la responsabilité... -
Page 62: Connaissez Votre Bateau
CONNAISSEZ VOTRE BATEAU Étrave Étrave Bâbord Bâbord Tribord Tribord En-bord En-bord Hors-bord Hors-bord Quille Quille Bâbord Bâbord Tribord Tribord Plat-bord Plat-bord Tableau Arrière Tableau Arrière Poupe Poupe Plat-bord Plat-bord Étrave Étrave Poupe Poupe Coque Coque 62 | minnkota.johnsonoutdoors.com ©2023 Johnson Outdoors Marine Electronics, Inc. - Page 63 Votre nouveau Terrova QUEST est offert avec tout ce dont vous aurez besoin pour le montage direct au bateau. Le moteur peut être monté directement sur l’étrave ou couplé avec un coudé à dégagement rapide Minn Kota pour un montage et un démontage simples.
- Page 64 FACTEURS dE MONTAGE FACTEURS dE MONTAGE Il est recommandé que le moteur soit monté aussi près que possible de l’axe ou de la quille Découvrez les du bateau. Assurez-vous que la zone sous l’emplacement de montage est dégagée afin accessoires de pouvoir percer les trous et installer la quincaillerie.
- Page 65 à une source d’alimentation. AVIS : Le moteur de pêche à la traîne pèse jusqu’à 90 lb (40,8 kg). Minn Kota recommande d’obtenir l’aide d’une deuxième personne pour l’installation. Retirez les quatre vis de la plaque latérale en utilisant un tournevis cruciforme nº...
- Page 66 INSTALLATION dU TERROVA QUEST Le trou de montage central de chaque côté de l’extrusion de base est bloqué par un ressort. Une Pince à bec Pince à bec Ressort Ressort pointu pointu extrémité de chaque ressort doit être déconnectée pour accéder aux trous de montage. Pour déconnecter le ressort, prenez une pince à...
- Page 67 INSTALLATION dU TERROVA QUEST Avec le moteur à l’emplacement de montage prévu, Extrusion de base Extrusion de base Emplacements de perçage Emplacements de perçage utilisez un poinçon ou un outil similaire et marquez les six trous de montage dans l’extrusion de base. Glissez le moteur de côté...
- Page 68 INSTALLATION dU TERROVA QUEST Le matériel de montage bien fixé, réassemblez les ressorts qui ont été déconnectés. Utilisez une Pince à bec Pince à bec pointu pointu pince à bec pointu pour saisir l’extrémité à crochet Pince à bec Pince à bec du ressort libre.
-
Page 69: Installation Des Batteries Et Du Câblage
ATTENTION ATTENTION Ces lignes directrices s’appliquent au gréement général pour soutenir le moteur de Minn Kota. L’alimentation de multiples moteurs ou Ces lignes directrices s’appliquent au gréement général pour soutenir le moteur de Minn Kota. L’alimentation de multiples moteurs ou d’autres appareils électriques, à... - Page 70 Si vous utilisez une batterie à manivelle pour démarrer un moteur hors-bord à essence, Minn Kota recommande d’utiliser des batteries marines séparées pour votre moteur de pêche à la traîne Minn Kota. Vérifiez toujours auprès du fabricant de la batterie les instructions d’entretien et de rangement spécifiques.
-
Page 71: Autres Points À Considérer
Minn Kota recommande l’utilisation de chargeurs de marque Minn Kota pour recharger les batteries connectées à votre moteur de pêche à la traîne Minn Kota, étant donné qu’ils ont été conçus de sorte à fonctionner avec les moteurs dotés d’un fil de masse. - Page 72 BRANCHER LES BATTERIES EN SÉRIE BRANCHER LES BATTERIES EN SÉRIE (SI REUIS POUR VOTRE MOTEUR) Systèmes de 24 Volts 24 Volts à Moteur à la Traîne Pour un moteur de Deux batteries de 12 volts sont nécessaires. Les batteries doivent Positif (ou le disjoncteur) traîne négative être branchées en série, uniquement tel qu’illustré...
- Page 73 BRANCHER LES BATTERIES EN SÉRIE Systèmes de 36 Volts Trois batteries de 12 volts sont nécessaires. Les batteries doivent être branchées en série, uniquement tel qu’illustré dans le schéma de câblage, afi n de fournir 36 volts. Assurez-vous que le moteur est éteint 36 Volts à...
-
Page 74: Terminer L'installation
L’installation se terminera par la connexion des câbles accessoires et le réglage des préférences du moteur pour faciliter l’utilisation. Minn Kota recommande de connecter le moteur de pêche à la traîne à l’application One-Boat Network pour faciliter ces étapes. Vous trouverez de plus amples renseignements dans le document de l’application One-Boat Network inclus avec le moteur de pêche à... - Page 75 MISE SOUS TENSION dE LA TÉLÉCOMMANdE SANS FIL Mise sous tension de la télécommande sans fil ARTICLE(S) REQUIS #8 x 1 #7 x 1 Mettez le moteur de pêche à la traîne sous tension. Télécommande Télécommande Pour allumer la télécommande sans fil (article nº 8), sans fil sans fil appuyez sur le bouton d’alimentation...
- Page 76 INSTALLATION dE LA PÉdALE Installation de la pédale ARTICLE(S) REQUIS #14 x 4 #C x 1 Prenez la pédale (article nº C) et retournez-la. Placez un coussinet de pédale (article nº 14) dans chacun des emplacements de coussinet. Bas de la Bas de la pédale pédale...
- Page 77 IdENTIFICATION dES FONCTIONS dU MOTEUR dE PÊCHE à LA TRAÎNE ET dE LEURS CÂBLES CONNEXES IdENTIFICATION dES FONCTIONS dU MOTEUR dE PÊCHE à LA TRAÎNE ET dE LEURS CÂBLES CONNEXES Identification des fonctionnalités et des câbles Le Terrova QUEST est préinstallé avec la navigation GPS avancée - y compris la possibilité de se connecter via Ethernet à une unité Humminbird.
- Page 78 GESTION dES FONCTIONNALITÉS ET dES CÂBLES Un CHIRP à double spectre ou un MEGA Side Imaging intégré CHIRP à double spectre MEGA Side Imaging intégré est préinstallé sur votre moteur de pêche à la traîne. Un câble d’accessoire sonar sortira de la base de la tête de contrôle et sera enroulé...
- Page 79 CHIRP à dOUBLE SPECTRE Caractéristiques du CHIRP à double spectre : SÉPARATION SUPÉRIEURE DES CIBLES - Séparer les poissons de leur habitat, c’est le nerf de la guerre. Et maintenant, vous serez en mesure de faire plus facilement la différence entre le poisson-appât et le poisson-gibier et la structure et la végétation à proximité. ARCHES DE POISSON CLAIREMENT DÉFINIES - Nous avons de mauvaises nouvelles pour votre ennemi juré.
- Page 80 Tout surplus de câble devrait être enroulé en une boucle lâche d’au moins 4 po (10 cm) de diamètre. Le câble de connexion doit être acheminé vers le détecteur de poissons en suivant les recommandations de Minn Kota sur l’acheminement des câbles afin d’optimiser et de maximiser la fonctionnalité.
- Page 81 CHIRP à dOUBLE SPECTRE Tête de contrôle Tête de contrôle AVIS : Votre détecteur de poissons doit CHIRP à CHIRP à être éteint jusqu’à ce que cette procédure double double spectre spectre soit terminée. Placez le moteur dans la position déployée. Localisez le connecteur à...
- Page 82 CHIRP à dOUBLE SPECTRE Si vous installez directement sur un Solix ou un Connecteur à Connecteur à Apex, la connexion sera plate à l’arrière de l’écran du quatorze broches quatorze broches détecteur de poissons. Détecteur Détecteur Câble accessoire du Câble accessoire du de poissons de poissons Enlignez les broches du câble accessoire et la...
- Page 83 CHIRP à dOUBLE SPECTRE ARTICLE(S) REQUIS #18 x 1 Si vous installez directement sur un câble adaptateur Connecteur Connecteur Prise Prise à quatorze à quatorze Helix, enlignez les broches du câble accessoire ou broches broches du câble d’extension et la prise du câble adaptateur Helix (article nº...
- Page 84 élargissant les zones de couverture latérales, tout en améliorant l’imagerie désormais claire comme du cristal. MEGA Side Imaging+ intégré est disponible dans les gammes phare Minn Kota de moteurs de pêche à...
- Page 85 MEGA SIdE IMAGING INTÉGRÉ Connexions du MEGA Side Imaging intégré Tête de contrôle Tête de contrôle Directement Directement à Solix ou à Solix ou Connecteur Ethernet Connecteur Ethernet Apex Apex GPS avancé GPS avancé Câble Câble d’extension d’extension MEGA Side MEGA Side (si nécessaire) (si nécessaire)
- Page 86 MEGA SIdE IMAGING INTÉGRÉ Tête de contrôle Tête de contrôle AVIS : Votre détecteur de poissons doit MEGA Side MEGA Side être éteint jusqu’à ce que cette procédure Imaging Imaging intégré intégré soit terminée. Placez le moteur dans la position déployée. Localisez le connecteur à...
- Page 87 MEGA SIdE IMAGING INTÉGRÉ Déterminez si la prise à l’extrémité du câble Directement Directement accessoire MEGA Side Imaging intégré sera fixée à Solix ou à Solix ou Apex Apex directement à : 1) un détecteur de poissons Humminbird® Solix Câble Câble MEGA Side MEGA Side...
- Page 88 NAVIGATION GPS AVANCÉE Votre moteur de pêche à la traîne Minn Kota et le détecteur de poissons Humminbird communiquent entre eux pour changer votre façon de pêcher. La navigation GPS avancée offre un large éventail de fonctionnalités, notamment le contrôle de la vitesse, de la direction, de Spot-Lock et de la possibilité...
- Page 89 Ethernet. CÂBLES ETHERNET - Minn Kota fournit un câble Ethernet de 30 pieds (9,1 mètres) (AS EC 30E - câble Ethernet de 30 pieds (9,1 mètres) 720073-4) avec chaque moteur de pêche à la traîne équipé de la navigation GPS avancée. Le câble Ethernet de 30 pieds (9,1 mètres) accueillera une connexion Ethernet standard pour la plupart des installations à...
- Page 90 NAVIGATION GPS AVANCÉE Connexion Ethernet GPS Connecteur Ethernet Connecteur Ethernet GPS avancé GPS avancé Tête de Tête de À Helix À Helix contrôle contrôle Cordon Cordon Câble adaptateur Helix Câble adaptateur Helix enroulé enroulé (fourni si nécessaire) (fourni si nécessaire) Câble Ethernet Câble Ethernet (fourni)
- Page 91 NAVIGATION GPS AVANCÉE ARTICLE(S) REQUIS #15 x 1 Identifiez la prise codée sur le câble Ethernet Tête de Tête de Connecteur Connecteur (article nº 15). Il sera codé pour s’adapter au contrôle contrôle Ethernet GPS Ethernet GPS Connecteur Connecteur avancé avancé...
- Page 92 NAVIGATION GPS AVANCÉE Prenez la prise du câble Ethernet et faites-la passer Câble Câble Prise Prise parallèlement au câble sonar, qui doit être déroulé et Ethernet Ethernet pendre librement à côté du cordon enroulé. Laissez suffisamment de jeu dans le câble pour fixer la prise au connecteur Ethernet GPS avancé.
- Page 93 Câble adaptateur Ethernet pour sécuriser la connexion. Helix Helix AVIS : Minn Kota fournit un câble adaptateur Helix (AS EC QDE - câble adaptateur Ethernet 720074-1) avec chaque moteur de pêche à la traîne équipé de la navigation GPS avancée.
- Page 94 FIXATION dES CÂBLES ACCESSOIRES Fixation des câbles accessoires AVIS : Si un seul câble est présent sous la tête de contrôle, cette installation n’est pas applicable. Avant de fixer les câbles accessoires, veuillez consulter la section « Identification des fonctionnalités des moteurs de pêche à la traîne et de leurs câbles associés »...
- Page 95 FIXATION dES CÂBLES ACCESSOIRES Le moteur de pêche à la traîne déployé, compensez Câble Câble l’unité inférieure à son réglage le plus élevé. Ethernet Ethernet Vérifiez que tous les câbles accessoires sont connectés à un périphérique de sortie comme vous Connecteur Connecteur le souhaitez.
- Page 96 FIXATION dES CÂBLES ACCESSOIRES Suivez les câbles de la tête de contrôle au support et placez des attache-fils supplémentaires tous Tête de Tête de les 4 pouces (10,2 centimètres) autour des câbles contrôle contrôle après le premier attache-fils. Le nombre d’attache- Environ 4 pouces Environ 4 pouces (10,2 centimètres)
- Page 97 Attache-fils Attache-fils AVIS : Minn Kota recommande de faire passer les câbles accessoires par le cordon enroulé. Il n’est pas recommandé de contourner le cordon enroulé lors de l’acheminement des câbles accessoires. Placez le moteur dans la position arrimée.
-
Page 98: Installation De L'hélice
INSTALLATION dE L’HÉLICE Installation de l’hélice ARTICLE(S) REQUIS #10 x 1 #11 x 1 #12 x 1 #13 x 1 ATTENTION Ergot Ergot d’entraînement d’entraînement Débranchez le moteur de la batterie avant d’effectuer tout travail ou entretien sur l’hélice. Prenez l’ergot d’entraînement (article nº 13) et Arbre Arbre d’armature... - Page 99 OPTIMISER LA PERFORMANCE dU TERROVA QUEST GRÂCE à LA TÉLÉCOMMANdE SANS FIL OU à L’APPLICATION ONE-BOAT NETWORK Minn Kota® et Humminbird® ont uni leurs forces pour vous offrir One-Boat Network, y compris la plus récente télécommande sans fil de navigation GPS avancée et l’application One-Boat Network.
- Page 100 RÉGLAGES dE ONE-BOAT NETWORK RÉGLAGES dE ONE-BOAT NETWORK dÉCALAGE dE LA QUILLE Le Terrova QUEST vient de l’usine avec l’unité inférieure parallèle AVIS : Lorsque le moteur est installé en usine, le au support. Lorsque l’unité inférieure est parallèle au support, la décalage de la quille est de 0 degré.
- Page 101 dÉCALAGE dE LA QUILLE Appuyez sur le bouton Menu de la télécommande sans fil. Utilisez le bouton Accélérer ou Ralentir pour trouver le menu Réglages du moteur. Utilisez le bouton Direction droite pour sélectionner Réglages du moteur. Dans le menu Réglages du moteur, utilisez le bouton Accélérer ou Ralentir pour trouver...
- Page 102 dÉCALAGE dE LA QUILLE Réglage du décalage de la quille avec l’application One-Boat Network Mettez le moteur de pêche à la traîne sous tension Panneau indicateur Panneau indicateur en appuyant sur le bouton d’alimentation sur le panneau indicateur. Lorsque le moteur de pêche à d’état du d’état du système...
- Page 103 dÉCALAGE dE LA QUILLE Dans le menu Paramètres du moteur, trouvez et touchez Configuration et calibrage. Dans Configuration et calibrage, trouvez et touchez Décalage de support de la quille. Passez en revue tous les avertissements de sécurité. Suivez les instructions dans l’application One-Boat Network.
- Page 104 Minn Kota recommande de régler le décalage de la quille lorsque la position de l’unité inférieure est parallèle à la quille. Enregistrez le décalage de la quille avant d’explorer la fonction Déploiement direct. La fonction Déploiement direct utilise la position enregistrée dans la fonction Décalage de la quille pour savoir où...
- Page 105 dÉPLOIEMENT dIRECT Pour activer le déploiement direct avec l’application One-Boat Network Ouvrez l’application One-Boat Network (OBN) sur un appareil mobile. Assurez-vous que l’appareil mobile est jumelé au moteur de pêche à la traîne et que le moteur est « en marche ». À...
- Page 106 ORIENTATION d’ARRIMAGE ORIENTATION d’ARRIMAGE L’orientation d’arrimage est un terme utilisé pour décrire la position AVIS : Si l’orientation d’arrimage est réglée sur Hélice de l’unité inférieure et celle de l’hélice lorsque le moteur est à droite, le collier de réglage de la profondeur doit être arrimé.
- Page 107 ORIENTATION d’ARRIMAGE Réglage de l’orientation d’arrimage avec l’application One-Boat Network Ouvrez l’application One-Boat Network (OBN) sur un appareil mobile. Assurez-vous que l’appareil mobile est jumelé au moteur de pêche à la traîne et que le moteur est « en marche ». À...
- Page 108 TAILLE dU BATEAU TAILLE dU BATEAU Les performances du moteur de pêche à la traîne peuvent être affectées par des facteurs tels que, mais sans s’y limiter, le vent, les conditions de l’eau, les spécifications du bateau, l’état de la batterie, le câblage, etc. La taille de bateau fournit une méthode d’ajustement de la performance du moteur de pêche à...
- Page 109 TAILLE dU BATEAU Réglage de la taille du bateau avec l’application One-Boat Network Ouvrez l’application One-Boat Network (OBN) sur un appareil mobile. Assurez-vous que l’appareil mobile est jumelé au moteur de pêche à la traîne et que le moteur est « en marche ». À...
- Page 110 BOUTONS ONE-BOAT NETWORK Les moteurs de pêche à la traîne Minn Kota équipés d’un système de navigation GPS avancée sont compatibles avec les dispositifs activés par One-Boat Network (OBN), comme la télécommande sans fil et la pédale. Les fonctions OBN peuvent être activées et désactivées à...
- Page 111 PERSONNALISER LES QUATRE BOUTONS ONE-BOAT NETWORK dE LA TÉLÉCOMMANdE SANS FIL Les fonctions de One-Boat Network sont activées et désactivées à l’aide des boutons One-Boat Network sur la télécommande sans fil. Les boutons One-Boat Network peuvent être personnalisés pour commander les fonctions suivantes, selon votre configuration : Fonction Icône Description...
- Page 112 PERSONNALISER LES QUATRE BOUTONS ONE-BOAT NETWORK dE LA TÉLÉCOMMANdE SANS FIL Personnalisez les quatre boutons One-Boat Network de la télécommande sans fil Sur la télécommande sans fil, appuyez sur le bouton Menu pour ouvrir le menu Moteur. Dans le menu Moteur, utilisez le bouton Ralentir ou Accélérer pour trouver le menu Réglages du moteur.
- Page 113 PERSONNALISER LE BOUTON ONE-BOAT NETWORK dE LA PÉdALE Les moteurs de pêche à la traîne Minn Kota équipés d’un système de navigation GPS avancée sont compatibles avec les dispositifs activés par One-Boat Network, comme la pédale. Les fonctions de One-Boat Network sont activées et désactivées à l’aide du bouton One-Boat Network de la pédale.
- Page 114 PERSONNALISER LE BOUTON ONE-BOAT NETWORK dE LA PÉdALE Personnaliser le bouton OBN de la pédale avec la télécommande sans fil Le moteur de pêche à la traîne allumé, appuyez sur le bouton Menu de la télécommande sans fil. Dans le menu Moteur, utilisez le bouton Ralentir ou Accélérer pour trouver le menu Réglages du moteur.
- Page 115 PERSONNALISER LE BOUTON ONE-BOAT NETWORK dE LA PÉdALE Personnaliser le bouton One-Boat Network de la pédale grâce à l’application One-Boat Network Ouvrez l’application One-Boat Network (OBN) sur un appareil mobile. Assurez-vous que l’appareil mobile est jumelé au moteur de pêche à la traîne et que le moteur est «...
- Page 116 ROTATION dU COLLIER dE LA PROFONdEUR AJUSTEMENTS ROTATION dU COLLIER dE RÉGLAGE dE LA PROFONdEUR Le collier de réglage de la profondeur est installé en usine de sorte que le levier à came s’ouvre dans un mouvement ascendant lorsque l’orientation d’arrimage de l’unité inférieure est Hélice à gauche. La position d’arrimage par défaut en usine est Hélice à gauche. L’orientation d’arrimage peut être changée à...
- Page 117 ROTATION dU COLLIER dE LA PROFONdEUR OUTILS ET RESSOURCES NÉCESSAIRES • Tournevis cruciforme nº 3 INSTALLATION Avec l’orientation d’arrimage réglée sur Hélice Collier de réglage Collier de réglage à droite, rangez le moteur de pêche à la traîne. de la profondeur de la profondeur Assurez-vous que l’unité...
- Page 118 ROTATION dU COLLIER dE LA PROFONdEUR Retirez le collier de réglage de la profondeur de Collier de réglage Collier de réglage Trou de vis Trou de vis l’arbre. Tournez le collier de la profondeur de 180° de la profondeur de la profondeur de sorte que le trou de vis du collier de la profondeur Arbre Arbre...
- Page 119 ROTATION dU COLLIER dE LA PROFONdEUR Avec le collier de réglage de la profondeur en position Levier à Levier à sur l’arbre, prenez la vis et le ressort qui ont été came came retirés plus tôt dans l’installation. Tenez le ressort à...
-
Page 120: Accessoires Recommandés
à la longue, pouvant entraîner une autonomie réduite et une durée de vie plus courte. Les chargeurs Minn Kota à commande numérique assurent une charge rapide pour une protection et une durée de vie prolongée.
Need help?
Do you have a question about the TERROVA QUEST 24V and is the answer not in the manual?
Questions and answers