Table of Contents
Advertisement
Available languages
Available languages
Quick Links
A
技术要求:
1.该手册印刷颜色均为黑色 : PANTONE BLACK C
2.纸张规格为
3.如果供应商的排版需要加空白页,请加在封底之前
B
C
标记
处数 分区
D
编
制
审 核
审 定
批 准
1
1
145X210MM
封底按要求印刷物料条码,
红色字和框不用印刷
更改文件号 签 名
校对
性能
排版
日期
用户手册
MFD S 00W/X.2-ES( 763 )
60 3
日 期
阶 段 标 记
00
REV.
数
量
重
1
共
1
张
第
2
6710031419
U
5R
比 例
80G双胶
1:1
量
佛山市顺德区美的
洗涤电器制造有限公司
1
张
2
A
B
C
D
D
Advertisement
Chapters
Table of Contents

Related Manuals for Midea MFD60S300W.2-ES


Summary of Contents for Midea MFD60S300W.2-ES
- Page 1 技术要求: 1.该手册印刷颜色均为黑色 : PANTONE BLACK C 2.纸张规格为 145X210MM 3.如果供应商的排版需要加空白页,请加在封底之前 封底按要求印刷物料条码, 红色字和框不用印刷 用户手册 6710031419 MFD S 00W/X.2-ES( 763 ) 60 3 标记 处数 分区 更改文件号 签 名 日 期 阶 段 标 记 比 例 80G双胶 校对 REV. 编 制 数 审...
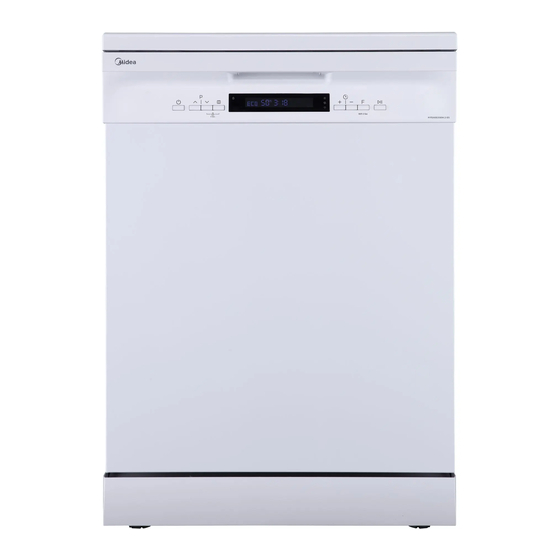
- Page 2 Lavavajillas MANUAL DEL USUARIO MFD60S300W.2-ES MSmartHome MFD60S300X.2-ES Descargue la app & active su producto Advertencia: Antes de utilizar este producto, lea atentamente este manual y consérvelo para futuras consultas. El diseño y las especificaciones están sujetos a cambios sin previo aviso con el fin de mejorar el producto.
-
Page 3: Table Of Contents
AGRADECIMIENTOS ¡Gracias por elegir Midea! Antes de utilizar su nuevo dispositivo Midea, lea atentamente este manual para asegurarse de que sabe cómo manejar las características y funciones que le ofrece su nuevo electrodoméstico de forma segura. CONTENIDO AGRADECIMIENTOS INSTRUCCIONES DE SEGURIDAD ESPECIFICACIONES DESCRIPCIÓN DEL PRODUCTO... -
Page 4: Instrucciones De Seguridad
INSTRUCCIONES DE SEGURIDAD Uso adecuado • Las siguientes directrices de seguridad tienen por objeto evitar riesgos imprevistos o daños derivados de un funcionamiento inseguro o incorrecto del dispositivo. Compruebe el embalaje y el aparato a su llegada para asegurarse de que todo está intacto para garantizar un funcionamiento seguro. - Page 5 Precaución Este indicador señala la existencia de un peligro con un grado de riesgo bajo que, si no se evita, puede provocar lesiones leves o moderadas. Atención Este indicador hace referencia a información importante (por ejemplo, daños materiales), pero no a un peligro. Respetar las instrucciones Este símbolo indica que solamente un técnico de especializado debe operar y realizar el manten-...
- Page 6 PELIGRO: Riesgo de incendio/materiales inflamables • Cuando utilice su lavavajillas, siga las siguientes indicaciones de seguridad: • La instalación y la reparación sólo pueden ser realizadas por un técnico calificado. • Este aparato está diseñado para ser utilizado en el hogar y en usos similares como: -áreas de cocina para el personal en tiendas, oficinas y otros entornos de trabajo;...
- Page 7 Para evitar el riesgo de electrocución, no sumerja el aparato, el cable o el enchufe en agua u otro líquido. • Por favor, desconecte el aparato antes de limpiarlo y realizar su mantenimiento. Utilice un paño suave humedecido con jabón neutro y, a continuación, utilice un paño seco para limpiarlo de nuevo.
- Page 8 • Abra la puerta con mucho cuidado si el lavavajillas está en funcionamiento, existe el riesgo de que salga un chorro de agua. • No coloque objetos pesados sobre la puerta ni se pare en ella cuando esté abierta. El aparato podría inclinarse hacia delante.
- Page 9 • Es necesario conectar el aparato a la válvula principal de agua utilizando juegos nuevos de mangueras. Los sets antiguos no deben ser reutilizados. • Para ahorrar energía, en la modalidad de espera, el aparato se apagará automáticamente después de 15 minutos sin que el usuario tenga que intervenir.
-
Page 10: Especificaciones
ESPECIFICACIONES Alto (Al) 845 mm Ancho (An) 598 mm Profundidad (P1) 600 mm (con la puerta cerrada) Profundidad (P2) 1175 mm (con la puerta abierta 90°) - Page 11 Información adicional: Enlace web al sitio web del proveedor, donde se encuentra la información del punto 6 del Anexo II del Reglamento (UE) 2019/2022 de la Comisión ( ) ( ): Frigicoll.es / Midea.es (a) para el programa eco. (b) los cambios en estos elementos no se considerarán pertinentes para los efectos del apartado 4 del artículo 4 del Reglamento (UE) 2017/1369.
-
Page 12: Descripción Del Producto
DESCRIPCIÓN DEL PRODUCTO Producto IMPORTANTE Para obtener el mejor rendimiento de su lavavajillas, lea todas las instrucciones de funcionamiento antes de utilizarlo por primera vez. Brazo aspersor superior Tubería interior Brazo aspersor inferior Contenedor Filtro de sal Dispensador Brazo aspersor superior Porta-cubiertos Canasta de cubiertos Cesta superior... -
Page 13: Guía De Inicio Rápido
GUÍA DE INICIO RÁPIDO Por favor, lea el contenido correspondiente en el manual de instrucciones para conocer el método de funcionamiento detallado. 1. Instale el lavavajillas. 2. Elimine los residuos más 3. Cargue las cestas. grandes de los platos. Evite el prelavado. Interior Exterior 4. -
Page 14: Instalación Del Producto
INSTALACIÓN DEL PRODUCTO ADVERTENCIA Peligro de electrocución Desconecte la corriente eléctrica antes de instalar el lavavajillas. Si no lo hace, podría provocar la muerte o sufrir una electrocución. Atención La instalación de las tuberías y los equipos eléctricos debe ser realizada por profesionales. - Page 15 Sobre la manguera de seguridad La manguera de suministro de seguridad consiste de paredes dobles. El sistema garantiza su intervención bloqueando el flujo de agua en caso de rotura de la mangu- era de suministro y cuando el espacio de aire entre ella y la manguera corrugada exterior esté...
- Page 16 Cómo eliminar el exceso de agua de las mangueras Si la conexión a la tubería de desagüe está situada a una altura superior a 1.000 mm, el exceso de agua puede permanecer en la manguera de drenaje. Será necesario vaciar el exceso de agua de la manguera en un cuenco o recipiente adecuado que se mantenga en el exterior y más bajo que el fregadero.
- Page 17 Debajo de una encimera existente (Cuando se instala debajo de una encimera) En la mayoría de las cocinas modernas hay una sola encimera bajo la cual se instalan los gabinetes y los electrodomésticos. En este caso, retire la encimera del lavavajillas desatornillando los tornillos situados bajo el extremo trasero de la encimera (a).
- Page 18 INSTRUCCIONES DE FUNCIONAMIENTO Panel de control Descripción • Presione este botón para encender su lavavajillas, la No.1 Encendido pantalla se iluminará. • Presione estos botones para seleccionar el programa Programa de lavado adecuado, el indicador del programa No.2 correspondiente se encenderá. •...
- Page 19 Descripción • Para iniciar el programa de lavado seleccionado o Iniciar/Pausar No.7 pausarlo cuando el lavavajillas está funcionando. • Lavado con detección automática, vajilla ligeramente Auto sucia o muy sucia, con o sin alimentos secos. • Para la vajilla más sucia, y las ollas, sartenes, platos, Intensivo+ etc.
- Page 20 Descripción • Este programa proporciona una limpieza eficaz del No.10 Auto-Limpieza+ propio lavavajillas. Cloud wash Programas La siguiente tabla muestra qué programas son los mejores en función de los niveles de residuos de alimentos y de la cantidad de detergente que se necesita. También muestra diversas informaciones sobre los programas.
- Page 21 Detergente de Tiempo de Rellenar Descripción de Energía Agua Programa prelavado/lavado funciona- abrillan- ciclo (kWh) principal miento (min) tador Prelavado(30°C) Lavado (60°C) 4/19g Enjuague 1,250 13,0 1 o 2 tabletas Enjuague(55°C) Silencioso Secado Prelavado(30°C) Lavado (60°C) 4/19g Enjuague(55°C) 1,050 15,0 1 o 2 tabletas Enjuague(50°C) 58 min...
- Page 22 Preparación y carga de los platos Considere la posibilidad de comprar utensilios identificados como aptos para el lavava- jillas. Para determinados artículos, seleccione un programa con la temperatura más baja posible. Para evitar que se dañen, no saque el material de vidrio ni los cubiertos del lavavajillas inmediatamente después de que el programa haya terminado.
- Page 23 Cómo retirar la vajilla Para evitar que el agua gotee del cesto superior al inferior, se recomienda vaciar primero el cesto inferior y luego el superior. ADVERTENCIA Los objetos estarán calientes. Para evitar daños, no saque los vasos y los cubiertos del lavavajillas hasta unos 15 minutos después de que haya terminado el programa.
- Page 24 CARGA DE LAS CESTAS SEGÚN LA NORMA EN60436: Cargar el lavavajillas a su máxima capacidad contribuirá a ahorrar energía y agua. 1. Cesta superior: Número Ítem Tazas Platos Vasos Tazones Recipiente de vidrio Recipientes para postres 2. Cesta inferior: Número Ítem Olla del horno Platos de postre...
- Page 25 3. Cesta para cubiertos: Número Ítem Cucharas de sopa Tenedores Cuchillos 4 4 4 Cucharas de té Cucharas de postre Información para las pruebas de comparabili- dad según la norma EN60436 Cucharas de servir Capacidad: 15 cubiertos Posición de la cesta superior: posición inferior Tenedor para servir Programa: ECO Cuchara para la salsa...
- Page 26 Consejos de uso para el estante para cubiertos 1. Levante la cesta derecha, tanto la izquierda como la derecha son planas. 2. Mueva la cesta derecha de derecha a izquierda, dos cestas se superponen. 3. Retire la cesta derecha de la bandeja, sólo quedará la cesta izquierda.
- Page 27 1. Saque la cesta superior. 2. Retire la cesta superior. posición inferior 3. Vuelva a colocar la cesta superior en 4. Empuje la cesta superior. los rodillos superiores o inferiores. posición superior Plegado de los estantes para tazas Para hacer espacio para los artículos más altos en la cesta superior, levante el estante para vasos hacia arriba.
- Page 28 USO DEL LAVAVAJILLAS Interior Exterior 1. Ajuste el descalcificador de agua 2. Cargue la sal en el descalcificador 3. Cargue la cesta 4. Llene el dispensador de detergente Carga de la sal en el descalcificador NOTA Si su modelo no dispone de descalcificador, puede saltarse este apartado. Utilice siempre la sal prevista para el lavavajillas.
- Page 29 NOTA El contenedor de sal sólo debe rellenarse cuando se enciende la luz de advertencia de sal en el panel de control. Dependiendo de lo bien que se disuelva la sal, la luz de advertencia de sal puede seguir encendida aunque el contenedor de sal esté lleno. Si no hay luz de advertencia de sal en el panel de control (para algunos modelos), puede estimar cuándo llenar la sal en el ablandador por los ciclos que el lavavajillas ha ejecutado.
- Page 30 NOTA Si su modelo no tiene ningún descalcificador, puede saltarse esta sección. Descalcifi- cador de agua La dureza del agua varía de un lugar a otro. Si se utiliza agua dura en el lavavajillas, se formarán depósitos en los platos y utensilios. El aparato está...
- Page 31 Llenado del depósito de abrillantador El abrillantador se libera durante el último enjuague para evitar que el agua forme gotas en la vajilla, que pueden dejar manchas y rayas. También mejora el secado al permitir que el agua se deslice por la vajilla. Su lavavajillas está diseñado para utilizar abrillantadores líquidos.
- Page 32 Llenado del dispensador de detergente 1. Por favor, elija una modalidad de 2. Añada detergente en la cavidad más acuerdo con la situación real. grande (A) para el lavado principal. A. Abra la tapa deslizando el pestillo Para un mejor resultado de limpieza, de liberación.
- Page 33 Inicio de un programa 1. Extraiga la cesta inferior y la superior, cargue la vajilla y empújela hacia atrás. Se recomienda cargar primero la cesta inferior y luego la superior. 2. Vierta el detergente. 3. Conecte el enchufe en la toma de corriente. Para información sobre el suministro de energía eléctrica consulte la última página "Ficha de producto".
- Page 34 CONFIGURACIÓN Y FUNCIONAMIENTO DE LA APLICACIÓN Descargue la aplicación MSmarthome MSmartHome Descargue MSmartHome app desde Google Play Store o Apple App. Descárguela e instálela en su teléfono. También puedes descargar la aplicación escaneando el código QR que aparece a continuación. Download the app &...
- Page 35 NOTA 1. Asegúrese de que sus dispositivos están encendidos. 2. Mantenga su teléfono móvil lo suficientemente cerca de su dispositivo cuando lo conecte a la red. 3. Conecte su teléfono móvil a la red inalámbrica de su casa y asegúrese de conocer la contraseña de la red inalámbrica.
-
Page 36: Limpieza Y Mantenimiento
LIMPIEZA Y MANTENIMIENTO Cuidado externo La puerta y su junta Limpie regularmente las juntas de la puerta con un paño suave y húmedo para eliminar los restos de comida. Cuando se carga el lavavajillas, los residuos de comida y bebida pueden gotear en los lados de la puerta del lavavajillas. - Page 37 3. Los restos de comida más grandes 4. Vuelva a montar los filtros en el pueden limpiarse enjuagando el orden inverso al del desmontaje, filtro bajo el grifo. Para una coloque el inserto del filtro y gire en limpieza más profunda, utilice un el sentido de las agujas del reloj cepillo de limpieza suave.
- Page 38 Cuidado del lavavajillas Precaución contra las heladas Por favor, tome medidas de protección contra las heladas en el lavavajillas en invierno. Después de cada ciclo de lavado, por favor, actúe de la siguiente manera: 1. Corte la corriente eléctrica del lavavajillas en la fuente de alimentación. 2.
-
Page 39: Solución De Problemas
SOLUCIÓN DE PROBLEMAS Antes de llamar al servicio técnico Revise los cuadros de las páginas siguientes para no tener que llamar al servicio técnico. Problema Posible motivo Solución • Se ha fundido el fusible Reemplace el fusible o restablezca el o se ha disparado el disyuntor. - Page 40 Problema Posible motivo Solución • Los elementos afectados Evite lavar en el lavavajillas los no son resistentes a la artículos que no son resistentes a la corrosión. corrosión. • No se ha ejecutado un Realice siempre un programa de programa después de lavado sin vajilla después de añadir añadir la sal del la sal.
- Page 41 Problema Posible motivo Solución • Los utensilios de Utilice un limpiador abrasivo suave Marcas negras o aluminio han rozado la para eliminar esas marcas. grises en la vajilla vajilla El detergente se • os platos bloquean el Vuelva a cargar los platos queda en el dispensador de correctamente.
- Page 42 Códigos de error Si hay un mal funcionamiento, el lavavajillas mostrará un código de error. La siguiente tabla muestra los posibles códigos de error y sus causas. Problema Posible motivo Solución • Tiempo de entrada Los grifos no están abiertos, o la más largo.
-
Page 43: Declaración Legal
Midea puede constituir una infracción de la marca o de la competencia desleal en violación de las leyes pertinentes. Este manual ha sido creado por Midea y Midea se reserva todos los derechos de autor del mismo. Ninguna entidad o individuo puede utilizar, duplicar, modificar, distribuir en todo o en parte este manual, ni agrupar o vender con otros productos sin el consen- timiento previo por escrito de Midea. -
Page 44: Eliminación Y Reciclaje
ELIMINACIÓN Y RECICLAJE Instrucciones importantes para la protección del medio ambiente Cumplimiento de la normativa RAEE y eliminación del producto de desecho: Este producto cumple con la normativa RAEE de la UE (2012/19/UE). Este producto lleva el símbolo de clasificación de residuos de aparatos eléctricos y electrónicos (RAEE). -
Page 45: Aviso De Protección De Datos
Espacio Económico Europeo. Puede solicitar más información al respecto. Puede ponerse en contacto con nuestro encargado de la protección de datos a través de MideaDPO@midea.com. Para ejercer sus derechos, como el de oponerse al tratamiento de sus datos personales con fines de marketing directo, póngase en contacto con nosotros a través de MideaDPO@mid-... -
Page 46: Declaración De Conformidad
Limitación de validez ( si la hubiera): ................Información complementaria: Organismo notificado implicado:................Expediente técnico en poder de: Foshan Shunde Midea Washing Appliances Mfg. Co., Ltd. Lugar y fecha de emisión (de esta DoC): .Foshan/2020-12-25......Firmado por o para el fabricante: ........ - Page 48 Dish Washer USER MANUAL MFD60S300W.2-ES MSmartHome MFD60S300X.2-ES Download the app & activate product Warning notices: Before using this product, please read this manual carefully and keep it for future reference. The design and specifications are subject to change without prior notice for product improvement.
- Page 49 THANK YOU LETTER Thank you for choosing Midea! Before using your new Midea product, please read this manual thoroughly to ensure that you know how to operate the features and CONTENTS THANK YOU LETTER SAFETY INSTRUCTIONS SPECIFICATIONS PRODUCT OVERVIEW QUICK START GUIDE...
-
Page 50: Safety Instructions
SAFETY INSTRUCTIONS Intended Use The following safety guidelines are intended to ● prevent unforeseen risks or damage from unsafe or incorrect operation of the appliance. Please check the packaging and appliance on arrival to make sure everything is intact to ensure safe operation. - Page 51 Caution The signal word indicates a hazard with a low degree of risk which, if not avoided, may result in minor or moderate injury. Attention The signal word indicates important information (e.g. damage to property), but not danger. Observe instructions This symbol indicates that a service technician should only operate and maintain this appliance in accordance with the...
- Page 52 DANGER: Risk of Fire/Flammable materials When using your dishwasher, follow the precautions ● ● listed below: Installation and repair can only be carried out by a ● qualified technician. This appliance is intended to be used in household ● and similar applications such as: -staff kitchen areas in shops, offices and other working environments;...
- Page 53 To protect against the risk of electrical shock, do not immerse the unit, cord or plug in water or other liquid. Please unplug before cleaning and maintenance the ● appliance. Use a soft cloth moisten with mild soap, and then use a dry cloth to wipe it again. If the supply cord is damaged, it must be replaced by ●...
- Page 54 operating, there is a risk of water squirting out. Do not place any heavy objects on or stand on the ● door when it is open. The appliance could tip forward. When loading items to be washed: ● 1) Locate sharp items so that they are not likely to damage the door seal;...
- Page 55 To save energy, in stand by mode, the appliance will ● switch of automatically after 15 minutes without any user interaction. The maximum number of place settings to be ● washed is 15. The maximum permissible inlet water pressure is ●...
-
Page 56: Specifications
SPECIFICATIONS Height (H) 845 mm Width (W) 598 mm Depth (D1) 600 mm (with the door closed) Depth (D2) 1175 mm (with the door opened 90°) - Page 57 Weblink to the supplier’s website, where the information in point 6 of Annex II to Commission Regulation (EU) 2019/2022 ( ) ( ) is found: Frigicoll.es / Midea.es (a) for the eco program. (b) changes to these items shall not be considered relevant for the purposes of paragraph 4 of Article 4 of Regulation (EU) 2017/1369.
-
Page 58: Product Overview
PRODUCT OVERVIEW Product IMPORTRANT To get the best performance from your dishwasher, read all operating instructions before using it for the first time. Top spray arm Inner pipe Lower spray arm Salt container Filter assembly Dispenser Upper spray Cup rack Cutlery rack Upper basket Lower basket... -
Page 59: Quick Start Guide
QUICK START GUIDE Please read the corresponding content in the instruction manual for detailed operating method. 1.Install the dishwasher 2. Remove larger residue 3. Load the baskets. from dishes. Avoid pre-rinsing. Inside Outside 4. Fill the dispenser with 5. Select a suitable program detergent and rinse aid. -
Page 60: Product Installation
PRODUCT INSTALLATION WARNING Electrical Shock Hazard Disconnect electrical power before installing dishwasher. Failure to do so could result in death or electrical shock. Attention The installation of the pipes and electrical equipments should be done by professionals. About Power Connection WARNING For personal safety: Do not use an extension cord or an adapter plug with this appliance. - Page 61 About the safety supply hose The safety supply hose consists of the double walls. The system guarantees its intervention by blocking the flow of water in case of the supply hose breaking and when the air space between the supply hose itself and the outer corrugated hose is full of water.
- Page 62 How to drain excess water from hoses If the connection to the drain pipe is positioned higher than 1000 mm, excess water may remain in the drain hose. It will be necessary to drain excess water from the hose into a bowl or suitable container that is held outside and lower than the sink. Water outlet Connect the water drain hose.
- Page 63 Underneath existing work top (When fitting beneath a work top) In most modern fitted kitchens there is only one single work top under which cabinets and electrical appliances are fitted. In this case remove the work top of the dishwasher by unscrewing the screws under the rear edge of the top (a).
-
Page 64: Operation Instructions
OPERATION INSTRUCTIONS Control Panel Description Power Press this button to turn on your dishwasher. No.1 ● Press these buttons to select the appropriate ● Program washing program, the corresponding program No.2 indicator will be lit. Press the button to select either upper basket ●... - Page 65 Description To start the selected washing program or pause it ● Start/Pause No.7 when the dishwasher is working. Auto sensing wash, lightly, normally or heavily soiled ● Auto crockery, with or with out dried-on food. For the heaviest soiled crockery, and normally soiled ●...
- Page 66 Description This program provides an effective cleaning of the ● No.10 MachineCare+ dishwasher itself. Cloud wash Programmes The table below shows which programs are best for the levels of food residue on them and how much detergent is needed. It also show various information about the programs.
- Page 67 Running Energy Water Rinse Detergent Description Program Time(min) (kWh) Of Cycle Pre/Main Wash Pre-wash(30 °C ) Wash(60 °C ) 4/19g Rinse 1.250 13.0 1 or 2 tabs Rinse(55 °C ) Whisper Drying Pre-wash(30 °C ) Wash(60 °C ) 4/19g Rinse(55 °C ) 1.050 15.0 1 or 2 tabs...
- Page 68 Preparing And Loading Dishes Consider buying utensils which are identified as dishwasher-proof. For particular items, select a program with the lowest possible temperature. To prevent damage, do not take glass and cutlery out of the dishwasher immediately after the program has ended. For washing the following cutlery/dishes Are not suitable Cutlery with wooden, horn china or mother-of-pearl handles...
- Page 69 Removing the dishes To prevent water dripping from the upper basket into the lower basket, we recommend that you empty the lower basket first, followed by the upper basket. WARNING Items will be hot! To prevent damage, do not take glass and cutlery out of the dishwasher for around 15 minutes after the program has ended.
- Page 70 LOADING THE BASKETS ACCORDING TO EN60436: Loading the dishwasher to its full capacity will contribute to energy and water savings. 1.Upper basket: Number Item Cups Saucers Glasses Mugs Glass bowl Dessert bowls 2.Lower basket: Number Item Oven pot Dessert plates Dinner plates Soup plates Oval platter...
- Page 71 4.Cutlery rack: Number Item Soup spoons Forks Knives 4 4 4 Tea spoons Dessert spoons Information for comparability tests in accordance with EN60436 Serving spoons Capacity: 15 place settings Serving fork Position of the upper basket: lower position Program: ECO Gravy ladle Rinse aid setting: Max Softener setting: H3...
- Page 72 Cutlery Rack Used Tips 1. Lift the right basket up, both left and right baskets are flat. 2. Move the right basket from right to left, two basket are overlapping. 3. Remove the right basket from the tray, only has the left basket.
- Page 73 1. Pull out the upper basket. 2. Remove the upper basket. Lower lower position 3. Re-attach the upper basket to upper 4. Push in the upper basket. or lower rollers. upper position Folding back the cup shelves To make room for taller items in the upper basket, raise the cup rack upwards. You can then lean the tall glasses against it.
- Page 74 USING YOUR DISHWASHER Inside Outside 1. Set the water softener 2. Loading the salt Into the softener 3. Loading the basket 4. Fill the detergent dispenser Loading The Salt Into The Softener NOTE If your model does not have any water softener, you may skip this section. Always use salt intended for dishwasher use.
- Page 75 NOTE The salt container must only be refilled when the salt warning light in the control panel comes on. Depending on how well the salt dissolves, the salt warning light may still be on even though the salt container is filled. If there is no salt warning light in the control panel (for some models), you can estimate when to fill the salt into the softener by the cycles that the dishwasher has run.
- Page 76 NOTE If your model does not have any water softener, you may skip this section. Water Softener The hardness of the water varies from place to place. If hard water is used in the dishwasher, deposits will form on the dishes and utensils. The appliance is equipped with a special softener that uses a salt container specifically designed to eliminate lime and minerals from the water.
- Page 77 Filling The Rinse Aid Reservoir The rinse aid is released during the final rinse to prevent water from forming droplets on your dishes, which can leave spots and streaks. It also improves drying by allowing water to roll off the dishes. Your dishwasher is designed to use liquid rinse aids. 1.
- Page 78 Filling The Detergent Dispenser 1. Please choose an open way according 2. Add detergent into the larger cavity to the actual situation. (A) for main wash. A. Open the cap by sliding the release For better cleaning result, especially latch. if you have very dirt items, pour a small B.
- Page 79 Starting A Program 1. Draw out the lower and upper basket, load the dishes and push them back. It is commended to load the lower basket first, then the upper one. 2. Pour in the detergent. 3. Insert the plug into the socket. The power supply refer to last page ”Product fiche”. Make sure that the water supply is turned on to full pressure.
-
Page 80: App Setup And Operation
APP SETUP AND OPERATION Download the MSmarthome App MSmartHome On an app market (Google Play Store, Apple App MSmartHome app. Download and install it on your phone. You can also download the app by scanning the QR code below. Download the app &... - Page 81 NOTE Make sure your devices are powered on. Keep your mobile phone close enough to your device when you are connecting your device to the network. Connect your mobile phone to the wireless network at home, and make sure you know the password of the wireless network. Check if your wireless router supports 2.4 GHz band and turn it on.
-
Page 82: Cleaning And Maintenance
CLEANING AND MAINTENANCE External Care The door and the door seal Clean the door seals regularly with a soft damp cloth to remove food deposits.When the dishwasher is being loaded, food and drink residues may drip onto the sides of the dishwasher door. - Page 83 3. Larger food remnants can be 4. Reassemble the filters in the reverse cleaned by rinsing the filter under order of the disassembly, replace the running water. For a more thorough filter insert, and rotate clockwise to clean, use a soft cleaning brush. the close arrow.
- Page 84 Caring For The Dishwasher Frost precaution Please take frost protection measures on the dishwasher in winter. Every time after washing cycles, please operate as follows: 1. Cut off the electrical power to the dishwasher at the supply source. 2. Turn off the water supply and disconnect the water inlet pipe from the water valve. 3.
-
Page 85: Troubleshooting
TROUBLESHOOTING Before Calling For Service Reviewing the charts on the following pages may save you from calling for service. Problem Possible reason Solution Fuse blown, or the Replace fuse or reset circuit breaker. ● circuit break tripped. Remove any other appliances sharing the same circuit with the dishwasher. - Page 86 Problem Possible reason Solution The affected items Avoid washing items that are not ● are not corrosion resistant. corrosion resistant in the dishwasher. A program Always run a wash program ● was not run after without any crockery after adding dishwasher salt was salt.
- Page 87 Problem Possible reason Solution Aluminium utensils Use a mild abrasive cleaner to Black or grey ● have rubbed against eliminate those marks. marks on dishes dishes Dishes block Re-loading the dishes properly. Detergent left in ● detergent dispenser dispenser Improper loading Use gloves if detergent residue can ●...
- Page 88 ERROR CODES If there is a malfunction the dishwasher will display an error code. The following table shows possible error codes and their causes. Problem Possible reason Solution Longer inlet time. Faucets is not opened, or water ● intake is restricted, or water pressure is too low.
-
Page 89: Trademarks, Copyrights And Legal Statement
Midea may constitute trademark infringement or unfair competition in violation of relevant laws. This manual is created by Midea and Midea reserves all copyrights thereof. No entity or individual may use, duplicate, modify, distribute in whole or in part this manual, or bundle or sell with other products without the prior written consent of Midea. -
Page 90: Disposal And Recycling
DISPOSAL AND RECYCLING Important instructions for environment Compliance with the WEEE Directive and Disposing of the Waster Product: This product complies with EU WEEE Directive (2012/19/EU). This product bears a classification symbol for waster electrical and electronic equipment (WEEE). This symbol indicates that this product shall not be disposed with other household wastes at the end of its service life. -
Page 91: Data Protection Notice
European Economic Area. Further information are provided on request. You can contact our Data Protection MideaDPO@midea.com. To exercise your rights such as right to object your personal date being processed for direct marketing purposes, please contact us via MideaDPO@midea.com. To find further information, please follow the QR Code. -
Page 92: Declaration Of Conformity
Limitation of validity (if any): ......................Supplementary information: Notified body involved:................Technical file held by:. Foshan Shunde Midea Washing Appliances Mfg. Co., Ltd. Place and date of issue (of this DoC): .Foshan/2020-12-25......Signed by or for the manufacturer: ........(Signature of authorised person) Name (in print):.....Ke Ningsheng...... - Page 93 00000000000000 此红框内丝印此用户手册对应的14位物料编码 红色框不需印刷 字体为Gotham-Book 8pt 位置大小严格按图纸操作...
Need help?
Do you have a question about the MFD60S300W.2-ES and is the answer not in the manual?
Questions and answers