Table of Contents
Advertisement
Quick Links
Advertisement
Table of Contents

Subscribe to Our Youtube Channel
Related Manuals for Midea MDWS-2703


Summary of Contents for Midea MDWS-2703
- Page 1 MDWS-2703 Please keep it as a refer in the later days.
- Page 2 QUICK USER GUIDE Please read the corresponding content on the instruction manual for detailed operating method. Connected to power supplies The power supply is 220-240V AC 50Hz the specification of the socket is 10A 250V AC The connection of the drain pipe: Put end of the drain into a sink or bucket. Fix the drain pipe with the back pipe of the machine.The interface is fitted with clamps and tightened with a screwdriver.
- Page 3 Open the door, placing the dishes and adding detergent Placing order by size and from the two sides to the middle. All cutlery are suggested to be tilted to improve cleaning preformance. The arm will be blocked with the improper placement of the cutlery and cleaning effect may not be ideal.
-
Page 4: Table Of Contents
CONTENTS Please carefully read this manual before using the dishwasher, it will help you use and maintain the dishwasher properly . IMPORTANT SAFETY INSTRUCTIONS GETTING TO KNOW YOUR APPLIANCE Dishwasher features Control panel USING YOUR DISHWASHER Loading the salt into the softener Adjusting Salt Consumption Loading the dishwasher baskets Filling the dispenser... -
Page 5: Important Safety Instructions
IMPORTANT SAFETY INSTRUCTIONS WANING When using your dishwasher, follow the precautions listed below: This appliance is intended to be used in household and similar applications such as: -staff kitchen areas in shops, offices and other working environments; -farm houses; -by clients in hotels, motels and other residential type environments;... - Page 6 experienceand knowledge, unless they have been given supervision or instruction concerning use of the appliance by a person responsible for their safety(For IEC 60335-1). This appliance is for indoor use only, for household use only. To protect against the risk of electrical shock, do not immerse the unit, cord or plug in water or other liquid.
- Page 7 Do not modify the plug provided with the appliance; If it does not fit the outlet. Have a proper outlet installed by a qualified electrician. Improper connection of the equipment-earthing conductor can result in the risk of an electric shock. Check with a qualified electrician or service representative if you are in doubt whether the appliance is properly earthed.
- Page 8 Do not wash plastic items unless they are marked dishwasher safe or the equivalent. For plastic items without mark, check the manufacturer's recommendations. Use only detergent additives designed for an automatic dishwasher. Never use soap, laundry detergent, or hand washing detergent in your dishwasher Children should be supervised to ensure that they do.
- Page 9 Disposal For disposing of package and the appliance please go to a recycling centre. Therefore cut off the power supply cable and make the door closing device unusable. Cardboard packaging is manufactured from recycled paper and should be disposed in the waste paper collection for recycling.
-
Page 10: Getting To Know Your Appliance
GETTING TO KNOW YOUR APPLIANCE IMPORTANT: Before using this dishwasher for the first time and to get the best performance, read these instructions. Dishwasher features Control panel Kick board Upper spray arm Cap of water tank Lower spray arm Salt container Filter Tableware basket Basket... -
Page 11: Control Panel
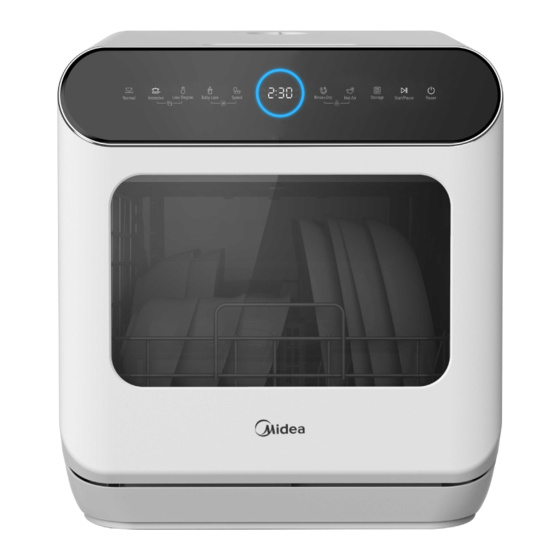
Control panel Buttons To turn on and off. Power Hygiene 72° Press the button to select Hygiene 72° program. Press the button to select Intensive program. For heavily soiled Intensive items include pots and pans with dried-on food. Press the button to select ECO program. This is the standard program suitable for normally soiled loads, such as pots, plates, glasses and lightly soiled pans. - Page 12 Control panel Press this button to set the delayed hours for washing. You can delay the start of washing up to 24 hours. One press on this button delays the start of washing by one hour. Delay + Press together for 3 seconds to activate or inactivate child lock.
-
Page 13: Using Your Dishwasher
USING YOUR DISHWASHER NOTE If your model have no water softener, you may skip this section. Loading the salt into the softener Always use salt intended for use with dishwasher. The salt container is located beneath the basket and should be filled as follows: WANING Only use salt specifically designed for dishwashers use! Every other type of salt not specifically designed for dishwasher use,... -
Page 14: Adjusting Salt Consumption
E. Usually, the salt warning light will be cease to be illuminated within 2-6 days after the salt container has been filled with salt. F. Immediately after filling the salt into the salt container, a washing programme should be started (Suggest choose rapid program). Otherwise filter system, pump or other important parts of the machine may be damaged by salty water. -
Page 15: Loading The Dishwasher Baskets
There are 6 levels of salt consumption in all. It is recommended to select the level according to below table: WATER HARDNESS Setting on the Digital display stalls Salt consumption(gram/cycle) water softener Mmol/l 0 - 0.94 0 - 5 1.0 - 2.0 6 - 11 2.1 - 3.0 12 - 17... - Page 16 Suitability of use in the dishwasher Not suitable for use: Limited suitability: Cutlery with wooden, horn, china or Some glasses can become dull mother-of-pearl handles after a large number of washes. Plastic items that are not heat resistant Silver and aluminium have a Older cutlery with glued parts that are tendency to discolour during not temperature resistant...
- Page 17 Use of the dishware support Small-size dishware will drop through the basket and block the rotation of spray arm. Flip the dishware support inward to support the small-size dishware.
- Page 18 Loading the basket according to EN50242 Loading basket Position the dishes and cookware so that they will not get moved by the spray of water. 1 1 1 2 2 2 3 3 3 5 5 5 4 4 4 7 7 7 8 8 8 6 6 6...
- Page 19 Loading the cutlery basket Item Number 3 3 3 Knife Serving spoon 5 5 5 4 4 4 Soup spoon 6 6 6 Fork 2 2 2 1 1 1 Serving fork 3 3 3 Gravy ladle Dessert spoon Tea spoon 7 7 7 8 8 8 For personal safety and a top quality clean, make sure place the silverware in...
- Page 20 Loading the basket according to EN60436 Loading basket Position the dishes and cookware so that they will not get moved by the spray of water. 1 1 1 2 2 2 6 6 6 3 3 3 4 4 4 5 5 5 7 7 7 6 6 6...
- Page 21 Loading the cutlery basket 7 7 7 6 6 6 5 5 5 Item Number 4 4 4 Knife Soup spoon 2 2 2 Teas poon 1 1 1 Dessert spoon 4 4 4 Fork 2 2 2 Serving fork Gravy ladle 2 2 2 3 3 3...
- Page 22 Filling the detergent WANING Only use detergent specifically for dishwashers. Never use any other detergents. This will damage the appliance. Dishwasher detergent is corrosive! Keep dishwasher detergent out of the reach of children. Concentrated Detergent Based on their chemical composition, detergents can be split in two basic types: Conventional, alkaline detergents with caustic components.
- Page 23 Adding detergent The palce to add the detergent...
-
Page 24: Programming The Dishwasher
PROGRAMMING THE DISHWASHER Wash cycle table according to EN50242 The table below shows the best programmes for the levels of food residue on them and how much detergent is needed. It also show various information about the programmes. Cycle Selection Description Energy Water... - Page 25 Wash cycle table according to EN60436 The table below shows the best programmes for the levels of food residue on them and how much detergent is needed. It also show various information about the programmes. Program Cycle Selection Description Time Energy Water Detergent...
-
Page 26: Turning On The Appliance
Turning on the appliance Starting a wash cycle... Draw out the basket(see the section entitled "Loading the Dishwasher"). Pour in the detergent (see the section“Fill the detergent”). Insert the plug into the socket. The power supply is 220-240VAC 50Hz, the specification of the socket is 10A 250V AC. -
Page 27: Forget To Add A Dish
Press Start/Pause Button to pause the machine when the door is closed, Press Program Button for more than 3 seconds the machine will be in stand-by state, then you can change the program to the desired cycle setting (see the section entitled "Starting a wash program" ). The Display window shows the state of the dishwasher: a) Display window shows "-:--"... -
Page 28: At The End Of The Wash Cycle
At the end of the Wash Cycle When the working cycle has finished, the buzzer of dishwasher will sound 8 seconds, then stop. Turn off the appliance using the ON/OFF button, shut off the water supply and open the door of the dishwasher. Wait a few minutes before unloading the dishwasher to avoid scald, the dishes and utensils are still hot and more susceptible to breakage. -
Page 29: Maintenance And Cleaning
MAINTENANCE AND CLEANING Filter system WANING Never use the dishwasher without filters! Make sure the filter is properly assembled. The performance may be affected and dishes and utensils could become damaged. The filter efficiently removes food particles from the wash water , allowing it to be recycled during the cycle. -
Page 30: Caring For The Dishwasher
NOTE If do it from step1 to step 2, the filter system will be removed; while if do it from Step 2 to Step 1, the filter system will be installed. The entire filter assembly should be cleaned once a week. Inspect the filters for blocking after every time the dishwasher has been used. - Page 31 Protect against freezing please take frost protection measures on the dishwasher in winter. Each time after washing cycles, please operate as follows. 1. Cut off electrical power to the dishwasher. 2. Turn off the water supply and disconnect the water inlet pipe from the water valve.
-
Page 32: How To Keep Your Dishwasher In Shape
How to keep your dishwasher in shape After every wash After every wash, turn off the water supply to the appliance and leave the door slightly open so that moisture and odours are not trapped inside. Remove the plug Before cleaning or performing maintenance, always remove the plug from the socket. No solvents or abrasive cleaning To clean the exterior and rubber parts of the dishwasher, do not use solvents or abrasive cleaning products. -
Page 33: Installation Preparation
INSTALLATION WANING Electrical Shock Hazard Disconnect electrical power before installing dishwasher. Failure to do so could result in death or electrical shock. Attention The installation of the pipes and electrical equipments should be done by professionals. Installation preparation The installation position of dishwasher should be near the existing water inlet tap and drain outlet and power socket. -
Page 34: About Power Connection
About Power Connection WANING For personal safety: Do not use an extension cord or an adapter plug with this appliance. Do not, under any circumstances, cut or remove the earthing connection from the power cord. Electrical Requirements Please look at the rating label to know the rating voltage and connect the dishwasher to the appropriate power supply. -
Page 35: Connection Of Drain Hoses
Connection of drain hoses Fix the drain pipe with the back pipe of the machine.The interface is fitted with clamps and tightened with a screwdriver. Fix the drain pipe with suction cups The connection of the drain pipe: Put end of the drain into a sink or bucket. How to Drain Excess Water From Hoses If the sink is more than1000 mm higher than the floor, the excess water in hoses cannot be drained directly into the sink. -
Page 36: Troubleshooting Tips
TROUBLESHOOTING TIPS Before calling for service Reviewing the charts on the following pages may save you from calling for service. Problem Possible Causes What To Do Dishwasher doesn't Fuse blown, or the Replace fuse or reset circuit breaker. start circuit break tripped. Remove any other appliances sharing the same circuit with the dishwasher. - Page 37 Problem Possible Causes What To Do Stained tub interior Detergent with Make sure that the detergent has no colourant may colourant. have been used. White film on Hard water minerals. To clean the interior, use a damp sponge with dishwasher detergent inside surface and wear rubber gloves.
- Page 38 Problem Possible Causes What To Do The dishes Not enough detergent Use more detergent, or change are not clean. was dispensed. your detergent. Items are blocking Rearrange the items so that the spray the movement of can rotate freely . the spray arms.
-
Page 39: Error Codes
Problem Possible Causes What To Do The dishesare Wrong program has With a short programme, the not drying been selected. washing temperature is lower, decreasing cleaning performance. Choose a programme with a long washing time. Use of cutlery with a Water drainage is more difficult with low-quality coating. -
Page 40: Technical Information
Technical information 4 2 0 4 2 0 Height Width 420mm Depth see rating label Voltage connected Load 0.04 - 1.0MPa Water pressure see rating label Power supply Capacity 2 place settings(EN-50242) 3 place settings(EN-60436) - Page 41 Company Name: Foshan Shunde Midea Washing Appliances Mfg. Co., Ltd Address: No.20, Gangqian Road, Beijiao,Shunde, Foshan, Guangdong, 528311 P.R.China...
Need help?
Do you have a question about the MDWS-2703 and is the answer not in the manual?
Questions and answers