
Subscribe to Our Youtube Channel
Related Manuals for Kärcher Chariot 2 iVACUUM 24 130 A/H


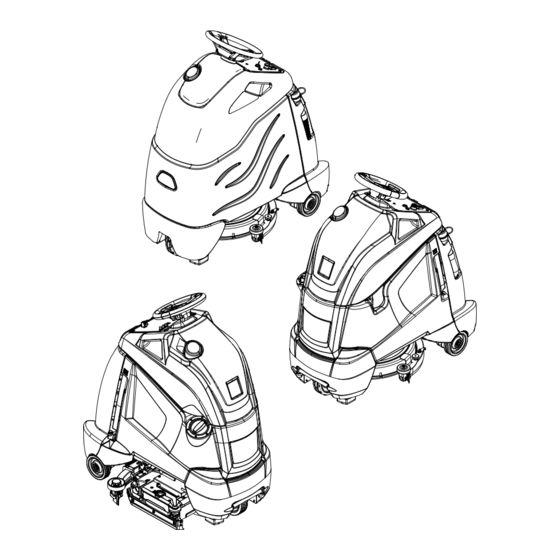
Summary of Contents for Kärcher Chariot 2 iVACUUM 24 130 A/H
- Page 1 Chariot 2 iVac 24 ATV English Español Register 86446760 - A 01/25/21 your product www.kaercher.com/welcome...
-
Page 2: Machine Data Label / Overview
Machine Data Label / Overview OVERVIEW The Chariot® iVacuum 24™ is a battery powered, stand-on, wide area vacuum intended for commercial use. The Chariot® iVacuum 24™ brushes and vacuums debris from indoor hard and carpeted surfaces and deposits the debris in the debris tray and filter bags. The unit also has an accessory wand and hose for cleaning small areas and non-floor surfaces. -
Page 3: Table Of Contents
Table of Contents Machine Data Label / Overview ....2 Table of Contents......3 How To Use This Manual. -
Page 4: How To Use This Manual
How To Use This Manual This manual contains the following sections: The SAFETY section contains important information regarding hazardous or unsafe practices of the • How to Use This Manual machine. Levels of hazards are identified that could • Safety result in product damage, personal injury, or severe •... -
Page 5: Safety
Safety Safety Label Locations These drawings indicate the location of safety labels on the machine. If at any time the labels become illegible, promptly replace them. Emplacement De L'étiquette De Sécurité REMARQUE : Ces dessins indiquent l'emplacement des étiquettes de sécurité sur la machine. Si, à tout moment, les étiquettes deviennent illisibles, contactez votre représentant autorisé... -
Page 6: Important Safety Instructions
Safety IMPORTANT SAFETY INSTRUCTIONS When using this machine, basic precaution must always be followed, including the following: READ ALL INSTRUCTIONS BEFORE USING THIS MACHINE. To reduce the risk of fire, electric shock, or injury: Use only indoors. Do not use outdoors or expose to rain. This appliance is for dry use only. Use only as described in this manual. - Page 7 Safety MESURES DE SÉCURITÉ IMPORTANTES Lors de l'utilisation d'un appareil à batteries, il est nécessaire de respecter systématique- ment des mesures de sécurité de base, comme suit : NOTE DE TOUTES CES MESURES AVANT D'UTILISER CETTE MACHINE. Pour réduire les risques d'incendie, de chocs électriques, ou de blessures : N'utiliser cette machine qu'en intérieur.
-
Page 8: Hazard Intensity Level
Safety The following symbols are used throughout this guide as indicated in their descriptions: HAZARD INTENSITY LEVEL There are three levels of hazard intensity identified by signal words -WARNING and CAUTION and FOR SAFETY. The level of hazard intensity is determined by the following definitions: WARNING - Hazards or unsafe practices which COULD result in severe personal injury or death. - Page 9 Safety Les symboles ci-dessous sont utilisés à travers ce manuel comme illustré dans leurs descriptions : DEGRÉS DE RISQUES EN CAS DE DANGER Il existe trois degrés de risques identifiés par les termes signalétiques -AVERTISSEMENT et ATTENTION et POUR VOTRE SÉCURITÉ. Le degré de risque est défini de la manière suivante: AVERTISSEMENT - Dangers ou méthodes dangereuses qui POURRAIENT provoquer de graves blessures ou entraîner la mort.
-
Page 10: Operations
Operations Technical Specifications ITEM DIMENSION/CAPACITY Nominal power 1224 W Rated Voltage 36 Volts DC Rated Amperage 34 amps Batteries 3 X12 Volt 130 AH @ 20 hr. rate Battery Compartment Dimensions 20-1/2 in. x 13 in. x 10 in. tall (330mm x 521mm x 254mm) Propelling Motor .38 HP (280 W) Cylindrical Brush Motor... - Page 11 Operations ITEM MEASURE Height 51.8 in (1316 mm) Length 44.0 in (1118 mm) Width without deck 24.5 in (622 mm) Width of deck 23.25 in (581 mm) Width with side broom 25.9 in (658 mm) WIDTH LENGTH HEIGHT This appliance is not intended for use by persons (including children) with reduced physical, sensory or mental capabilities, or lack of experience and knowledge, unless they have been given supervision or instruction concerning use of the appliance by a person responsible for their safety.
-
Page 12: How This Machine Works
Operations How This Machine Works The function of the operator control system is to control the direction and speed of the machine. The directional The Chariot® iVacuum 24 ATV™ is a battery powered, control system consists of the direction control switch, self-propelled, vacuum intended for commercial use. -
Page 13: Components
Operations Components 1. Accessory Hose 2. Brush Deck 3. Console 4. Control Panel 5. Main Cover 6. Pedal Platform 7. Rear Cover 8. Side Broom 9. Vacuum Bag 8.644-676.0 Operator’s Manual - iVac 24 ATV... -
Page 14: Drive Controls
Operations Drive Controls 8.644-676.0 Operator’s Manual - iVac 24 ATV... - Page 15 Operations 1. Key Switch 2. Emergency Stop/Brake Switch 3. Directional Control / Drive Reset Switch 4. Throttle Pedal 5. Horn Button 6. Steering Wheel 7. Speed Control 8. Battery Discharge Indicator Light 9. Hour Meter 10. Operator Presence Switch 1. KEY SWITCH Controls the power for machine functions.
- Page 16 Operations 4. THROTTLE PEDAL Controls the speed of the vehicle within the speed control setting selected. Pressing the pedal causes the machine to travel in the direction selected by the Directional Control Switch. To increase speed, increase pressure on the pedal. To decrease speed, decrease pressure on the pedal.
- Page 17 Operations 8. BATTERY DISCHARGE INDICATOR Indicates the charge level of the batteries. The indicator will be illuminated if the batteries have a sufficient charge. A slow, continous flash indicates the batteries require charging. The Battery Lockout function will activate when the batteries are low. Once active, the LED status indicator will begin to flash slowly and the controller will inhibit the side broom, main brushes, and vacuum operation.
-
Page 18: Vacuum Controls
Operations Vacuum Controls 1. Function Mode Switch The first two positions are for transport only. See drive controls section. Light vacuuming This mode is used for light vacuuming. In this mode the machine will propel at fast speed. The ‘floating’ brush deck is in the down position. The brushes will agitate, the side broom will bring debris into the path of the deck. -
Page 19: Pre-Run Machine Inspection
Operations Pre-run Machine Inspection Emergency Stop Procedures Do a pre-run inspection to find possible problems that 1. Release the throttle pedal by lifting right foot. could cause poor performance or lost time from break- 2. Turn machine power off with key switch by turning down. -
Page 20: Normal Vacuuming
Operations Normal Vacuuming To Begin Vacuuming Plan the vacuuming pattern in advance. The longest track is around the perimeter of the area to be cleaned. For efficient operation, the runs should be the longest When operating the machine around people, pay possible without turning or stopping. -
Page 21: To Stop Vacuuming
Operations To Stop Vacuuming 7. Tilt back panel to retrieve a new clean paper bag from the storage compartment in left side wall of 1. Remove foot from throttle pedal allowing pedal to main cover. return to neutral. 8. Return back panel to operating position. 2. -
Page 22: Maintenance
Maintenance Service Schedule BEFORE AFTER EACH EACH MAINTENANCE WORK 50 HRS WORK PERIOD PERIOD Check water level of batteries after charging; add distilled water if necessary Check that the vacuum box lid seal tightly Visually check for damaged or worn tires. Check vacuum hose connections. -
Page 23: Batteries
Maintenance Batteries 1. Cover Retainer Latch 2. Rear Cover 3. Battery Connector-Machine 4. Batteries 5. Battery Tray 8.644-676.0 Operator’s Manual - iVac 24 ATV... - Page 24 Maintenance Batteries (Wet Cell) The batteries provide the power to operate the machine. The batteries require regular maintenance to keep them operating at peak efficiency. The machine batteries will hold their charge for long periods of time, but they can only be charged a certain number of times.
- Page 25 Maintenance Battery Maintenance 1. When cleaning the batteries, use a solution of baking soda and water. Do not allow the cleaning When servicing machine, avoid contact with fluid to enter the battery cells, electrolyte will be battery acid. neutralized. 2. Maintain the proper electrolyte level in each battery cell.
- Page 26 Maintenance Checking Battery Specific Gravity Use a hydrometer to check the battery specific gravity. CHECKING GRAVITY a. Hydrometer Battery b. Battery NOTE: Do not take readings immediately after adding distilled water, if the water and acid are not thoroughly mixed, the reading may not be accurate. Check the hydrometer readings against this chart.
- Page 27 Maintenance Charging Batteries Use a 36 volt, 20 amp maximum output DC charger which will automatically shut off when the batteries are fully charged. 1. Stop the machine in a clean, well ventilated area When servicing machine, avoid contact with next to the charger.
- Page 28 Maintenance 5. Replace the battery caps, and leave them in place 7. Disconnect main positive lead and secure cable while charging. terminals away from batteries. 6. Unplug the battery connector from the machine. 8. Loosen both terminals on each jumper cable and remove one at a time.
-
Page 29: Delta Q Ic650 Charger Maintenance Instructions
Maintenance Delta Q IC650 Charger Maintenance Instructions 1. Do not expose charger to oil, dirt, mud or direct heavy water spray when cleaning the vehicle or machine. 2. The enclosure of the charger meets IP66, making it dust-tight and protected against powerful water jets. The AC inlet connection itself, when mated, is rated to IP20, which is not protected against water. -
Page 30: Delta Q Ic650 Charger Operating Instructions
Maintenance Delta Q IC650 Charger Operating Instructions - The charger may become hot during charging. Use hand protection to safely handle the charger during charging. - Extension cords must be a 3-wire cord no longer than 30m (100') at 10 AWG or 7.5m (25') at 16 AWG, per UL guidelines. -
Page 31: Selecting A Charge Profile
Maintenance Selecting a Charge Profile *Process will time out and profile will remain unchanged if there is 15 seconds of inactivity, a profile 1. Disconnect AC input from the charger, or from the number is allowed to display three times, or if AC power wall outlet. -
Page 32: Configuring The Ic650 Charger Using A Usb Flash Drive
Maintenance Configuring the IC650 Charger Using a USB Flash Drive Using the Delta Q software, USB storage drives can be pre-programmed to certain charger configuration. To use the USB port, follow these steps: 1. Insert the USB flash drive at any time, except during a charge cycle. Stop the charge cycle by removing AC power or the DC connection to the batteries. -
Page 33: Charge Tracking Data
Maintenance Charge Tracking Data All IC650 Chargers record data such as amp hours returned, charge cycle completion or interruption, and the charge profile being used. This data can be very useful in vehicle or machine diagnostics. To retrieve this data, follow these steps: 1. -
Page 34: Circuit Protection
Maintenance Circuit Protection Circuit Breakers 3 A Fuse Circuit breakers interrupt the flow of power in the event of an electrical overload. When a circuit breaker is tripped, reset it by pressing the exposed button. If a circuit breaker continues to trip, the cause of the electrical overload should be found and corrected. -
Page 35: Vacuum Diverter Valve Maintenance
Maintenance Vacuum Diverter Valve Maintenance For maintenance and removal of the vacuum diverter valve follow the steps below. 4. Remove the three (3) screws and washers 1. Remove hoses from diverter valve. retaining the diverter valve assembly to the console. 2. - Page 36 Maintenance Brush Deck 1. Debris Tray 2. Brush Deck Door 3. Side Broom 4. Deck Lift Actuator 8.644-676.0 Operator’s Manual - iVac 24 ATV...
-
Page 37: Brush Removal
Maintenance Brush Deck Debris Tray Removal The dual cylindrical head is designed to agitate the 1. Release the debris tray spring clip. carpet while vacuuming. The first brush pushes debris 2. Slide the debris tray away from machine. backwards. The second brush, brushing forward picks up debris and throws it into the debris tray. -
Page 38: Remove Brush Deck
Maintenance Brush Motor Carbon Brush Replacement 1. Scribe alignment mark on motor barrel to motor cap. Remove two bolts. Do not use a pressure washer to clean around the brush motors. Use tap pressure only. 2. Remove end cap from motor. NOTE: Motors contain two wave washers in cap. - Page 39 Maintenance To Repair or Replace Vacuum Motor 8. Remove move three (3) screws that secure vacuum motor. Replace motor. 1. Remove four (4) screws from top of control panel. 2. Tip control panel back from console to expose vacuum motor wires. 3.
-
Page 40: Drive Motor
Maintenance Drive Motor Drive Chain Tension The drive chain should deflect about 1/4 inch on either Drive Motor Carbon Brush Replacement side of the loop when the opposite side is tight. To adjust chain tension: 1. Remove bumper. Do not use a pressure washer to clean around the brush motors. - Page 41 Maintenance Brake Override 5. Push the machine slowly. Take care as voltage is generated while pushing the machine and may 1. Disconnect battery to prevent injury. cause the controller to temporarily stop the machine. 2. Turn wheel slightly to the right. 3.
-
Page 42: Machine Tie-Downs
Maintenance Preparation for Loading/Unloading Trailer Before loading or unloading machine from trailer, brush deck must be in the up position. When transporting the machine on a trailer or in a truck, in addition to using tie-downs, be sure to block the tires to prevent the machine from rolling. -
Page 43: Troubleshooting
Maintenance Troubleshooting PROBLEM CAUSE SOLUTION No machine function Console lid is open Close console lid No power to machine Battery disconnected Check all battery cable connections Emergency shut-off activated Reset Battery cables corroded Clean connections Faulty key switch Replace switch Batteries not plugged in Plug batteries in On Board charger plugged in... - Page 44 Maintenance Troubleshooting PROBLEM CAUSE SOLUTION Vacuum motor does not run, or Faulty vacuum circuit or switch Check wires & connections runs slowly Worn vacuum motor brushes Replace brushes, check commutator Vacuum circuit breaker tripped Reset circuit breaker Vacuum and brush do not turn on Circuit breaker tripped Reset Full bag or clog in system (bag full light Replace bag, empty debris tray, check...
-
Page 45: Battery Discharge Indicator Troubleshooting
Maintenance Battery Discharge Indicator Troubleshooting The battery indicator flashes when a problem occurs. The table below list solutions for the indicated problems. Number of Problem Solution flashes The battery needs charging, there is a bad connection to If the connections are good, try the battery or dependent on the programming, may charging the battery. -
Page 46: Suggested Spare Parts
Suggested Spare Parts 8.644-676.0 Operator’s Manual - iVac 24 ATV... - Page 47 Chariot 2 iVac 24 ATV Español Register 8.644-676.0-A 01/25/21 your product www.kaercher.com/welcome...
- Page 48 Registro de datos de la máquina/Descripción La iVacuum 24™ Chariot® es una aspiradora que cubre áreas amplias, con plataforma, autopropulsada mediante baterías y diseñada para uso comercial. La aspiradora iVacuum 24™ Chariot® cepilla y aspira residuos de superficies interiores duras y alfombradas y deposita los residuos en la bandeja de residuos y las bolsas del filtro. La unidad también tiene una manguera y varilla accesoria para limpiar áreas pequeñas y superficies que no son piso.
- Page 49 Table of Contents Registro de datos de la máquina/Descripción ..2 Pendientes .......39 Amarres de la máquina .
-
Page 50: Resolución De Problemas
Cómo utilizar el manual El manual contiene las siguientes secciones: La sección SEGURIDAD contiene información importante acerca de los usos de la máquina que • Cómo Utilizar El Manual pueden resultar peligrosos o poco seguros. Se • Seguridad identifican los niveles de riesgo que podrían •... -
Page 51: Seguridad
Seguridad Ubicaciones de etiquetas de seguridad. NOTA: Los dibujos indican la ubicación de las etiquetas de seguridad en la máquina. Si en un momento dado las etiquetas no se pueden leer, reemplácelas con rapidez. 86335010 PRECAUCIÓN CAUTION 86244310 PRECAUCIÓN 86385070 86252520 ADVERTENCIA ADVERTENCIA... -
Page 52: Seguridad
Seguridad INSTRUCCIONES DE SEGURIDAD IMPORTANTES Al usar un aparato eléctrico, hay que tomar unas precauciones básicas entre las que se incluyen las siguientes: LEA TODAS LAS INSTRUCCIONES ANTES DE UTILIZAR LA MÁQUINA. Para reducir el riesgo de incendio, descargas eléctricas y lesiones: Utilice sólo en interiores. - Page 53 Seguridad Los símbolos siguientes se usan a lo largo de la guía del modo indicado en sus descripciones: NIVEL DE INTENSIDAD DE RIESGO Hay tres niveles de intensidad de riesgo, identificados por palabras claves -ADVERTENCIA y PRECAUCIÓN y POR SEGURIDAD. El nivel de intensidad de riesgo está determinado por las siguientes definiciones: ADVERTENCIA - Riesgos o prácticas poco seguras que PODRÍAN provocar graves lesiones personales o la muerte.
-
Page 54: Operaciones
Operaciones Especificaciones técnicas ELEMENTO DIMENSIÓN/CAPACIDAD Potencia nominal 1224 W Voltaje nominal 36 Voltios CC Intensidad de corriente nominal 34 amperes Baterías 3 X12 voltios 130 AH a coeficiente 20 horas 20-1/2 pulg. x 13 pulg. x 10 pulg. de alto Dimensiones del compartimiento para las baterías (330mm x 521mm x 254mm) Motor de propulsión... - Page 55 Operaciones ELEMENTO MEDIDA Altura 1316 mm (51,8 pulgadas) Longitud 1118 mm (44 pulgadas) Anchura sin plataforma 622 mm (24,5 pulgadas) Anchura de la plataforma 581 mm (23,25 pulgadas) Anchura con la escoba lateral 658 mm (25,9 pulgadas) ANCHO LONGITUD ALTURA Este aparato no está...
-
Page 56: Cómo Funciona Esta Máquina
Operaciones Cómo funciona esta máquina La función del sistema de control del operario es controlar la dirección y la velocidad de la máquina. El sistema de La iVacuum 24 ATV™ Chariot® es una aspiradora control direccional consta de un interruptor de control autopropulsada mediante baterías y diseñada para uso de dirección, pedal de acelerador, interruptor de control comercial. -
Page 57: Componentes
Operaciones Componentes 6. Plataforma del pedal 7. Tapa posterior 1. Manguera accesoria 8. Escoba lateral 2. Plataforma de cepillado 9. Bolsa de aspiración 3. Consola 4. Panel de control 5. Tapa principal 8.644-676.0 Operator’s Manual - iVac 24 ATV... -
Page 58: Controles De Accionamiento
Operaciones Controles de accionamiento 8.644-676.0 Operator’s Manual - iVac 24 ATV... - Page 59 Operaciones 1. Interruptor de contacto 6. Volante 2. Interruptor de freno/ parada de emergencia 7. Control de velocidad 3. Control direccional / Interruptor de reinicio 8. Luz indicadora de descarga de las baterías de propulsión 9. Medidor de horas 4. Pedal del acelerador 10.
- Page 60 Operaciones 4. PEDAL DEL ACELERADOR Controla la velocidad del vehículo dentro de la configuración de control de velocidad seleccionada. Si se presiona el pedal la máquina avanza en la dirección seleccionada por el interruptor de control direccional. Para aumentar la velocidad, aumente la presión sobre el pedal. Para reducir la velocidad, disminuya la presión sobre el pedal.
- Page 61 Operaciones 8. INDICADOR DE DESCARGA DE LAS BATERÍAS Indica el nivel de carga de las baterías. El indicador se iluminará si las baterías tiene una carga suficiente. Si se enciende de manera lenta y continuada indica que las baterías requieren carga. La función de bloqueo de la batería siempre se activa cuando la carga de las baterías está...
-
Page 62: Controles De Aspiración
Operaciones Controles de aspiración 1. INTERRUPTOR DEL MODO DE FUNCIÓN Las primeras dos posiciones son únicamente para transporte. Consulte la sección de controles de accionamiento. Aspiración liviana Este modo se utiliza para la aspiración liviana. En este modo, la máquina funcionará a alta velocidad. -
Page 63: Inspección Previa Al Funcionamiento
Operaciones Inspección previa al funcionamiento Procedimientos de parada de emergencia de la máquina 1. Suelte el pedal del acelerador levantando el pie derecho. Realice una inspección previa al funcionamiento de la máquina para encontrar posibles problemas que podrían 2. Desconecte la alimentación de la máquina con provocar mal funcionamiento o una pérdida de tiempo el interruptor de contacto, girando el interruptor de debido a una avería. -
Page 64: Aspiración Normal
Operaciones Aspiración normal Para comenzar la aspiración Planee el patrón de aspiración por anticipado. La ruta más larga es la que rodea el perímetro del área que va a ser limpiada. Para conseguir un funcionamiento Al manejar la máquina cerca de gente, preste especial eficiente, deberían realizarse recorridos lo más largos atención a los movimientos inesperados. -
Page 65: Para Detener La Aspiración
Operaciones Para detener la aspiración 7. Incline el panel posterior para recuperar una bolsa de papel nueva del compartimiento de almacenamiento 1. Saque el pie del pedal del acelerador permitiendo que está en la pared izquierda de la tapa principal. que regrese a la posición neutral. -
Page 66: Mantenimiento
Mantenimiento Programación del mantenimiento ANTES DESPUÉS DE CADA DE CADA MANTENIMIENTO PERÍODO PERÍODO DE horas horas horas horas TRABAJO TRABAJO Controle el nivel de agua de las baterías después de la carga; añada agua destilada si es necesario. Controle que la tapa de la caja de aspiración se selle bien. -
Page 67: Baterías
Mantenimiento Baterías 1. Seguro del retenedor de cubierta 2. Tapa posterior 3. Conector de baterías - Máquina 4. Baterías 5. Bandeja de las baterías 8.644-676.0 Operator’s Manual - iVac 24 ATV... - Page 68 Mantenimiento Baterías (celda húmeda) Las baterías proporcionan la energía para operar la máquina. Las baterías requieren un mantenimiento regular para que sigan funcionando a su eficacia máxima. Las baterías de la máquina conservarán su carga durante períodos de tiempo prolongados pero sólo pueden ser cargadas una cantidad determinada de veces.
- Page 69 Mantenimiento Mantenimiento de las baterías 1. Cuando limpie las baterías, use una solución de bicarbonato de sodio y agua No deje que el fluido Cuando realice el mantenimiento de la máquina, de limpieza ingrese a las celdas de las baterías evite el contacto con el ácido de las baterías.
- Page 70 Mantenimiento Comprobar la gravedad específica de las baterías Utilice un hidrómetro para controlar el peso específico de la batería. CONTROL DE GRAVEDAD a. Batería del hidrómetro b. Batería NOTA:No tome las lecturas inmediatamente después de agregar agua destilada, si el agua y el ácido no se mezclan bien, las lecturas pueden ser incorrectas.
- Page 71 Mantenimiento Cargar las baterías Use un cargador de CC de 36 voltios, con una salida máxima de 20 amperes, el cual se detendrá automáticamente cuando las baterías estén totalmente cargadas. Cuando realice el mantenimiento de la máquina, 1. Detenga la máquina en un área limpia y bien ventilada evite el contacto con el ácido de las baterías.
- Page 72 Mantenimiento 5. Vuelva a colocar las tapas de la batería y déjelas 7. Desconecte el cable eléctrico positivo y coloque en su lugar mientras realiza la carga. las terminales del cable lejos de las baterías. 6. Desenchufe el conector de la batería de la máquina. 8.
-
Page 73: Instrucciones De Mantenimiento Del Cargador Delta Q
Mantenimiento Instrucciones de mantenimiento del cargador Delta Q IC650 1. No exponga el cargador al aceite, la suciedad, el barro o al chorro directo de agua cuando limpia el vehículo o la máquina. 2. La caja del cargador cumple con el grado de protección IP66, por lo cual es estanco y cuenta con protección contra chorros fuertes de agua. - Page 74 Mantenimiento Instrucciones de funcionamiento del cargador Delta Q IC650 - El cargador se puede calentar durante la carga. Use protección para manos para manipular en forma segura el cargador durante la carga. - Los alargadores deben consistir en un cable de 3 hilos no más largo que 30 m (100’) a 10 AWG o 7,5 m (25’) a 16 AWG, según las normas UL.
-
Page 75: Ic650
Mantenimiento Seleccionar un Perfil de Carga *El proceso se interrumpirá y el perfil seguirá sin cambios si hay un período de inactividad de 15 1. Desconecte la entrada de CA del cargador o del segundos, un número de perfil se exhibe tres veces, o tomacorriente de pared. - Page 76 Mantenimiento Configuración del cargador IC650 utilizando una memoria USB Con el software Delta Q, las unidades de almacenamiento USB se pueden preprogramar para una determinada configuración del cargador. Para utilizar el puerto USB, siga los siguientes pasos: 1. Inserte la memoria USB en cualquier momento menos durante el ciclo de carga. Detenga el ciclo de carga interrumpiendo el suministro de energía de CA o la conexión de CC a las baterías.
-
Page 77: Datos De Seguimiento De Carga
Mantenimiento Datos de Seguimiento de Carga Todos los cargadores IC650 registran datos tales como horas amp de retorno, finalización o interrupción del ciclo de carga y el perfil de carga que se utiliza. Estos datos pueden ser muy útiles en el diagnóstico del vehículo o la máquina. -
Page 78: Mantenimiento
Mantenimiento Protección de los circuitos Disyuntores Fusible 3 A Los disyuntores interrumpen el flujo de energía en caso de una sobrecarga eléctrica. Si se dispara un disyuntor, restáurelo presionando el botón expuesto. Si un disyuntor sigue disparándose, debe buscarse la causa de la sobrecarga y corregirla. -
Page 79: Vacuum Diverter Valve Maintenance
Mantenimiento Vacuum Diverter Valve Maintenance For maintenance and removal of the vacuum diverter valve follow the steps below. 4. Remove the three (3) screws and washers 1. Remove hoses from diverter valve. retaining the diverter valve assembly to the 2. Remove screw and washer (1) on right side of console. - Page 80 Mantenimiento Plataforma de cepillado 1. Bandeja de residuos 2. Puerta de la plataforma de cepillado 3. Escoba lateral 4. Accionador de elevación de la plataforma 8.644-676.0 Operator’s Manual - iVac 24 ATV...
-
Page 81: Extracción Del Cepillo
Mantenimiento Plataforma de cepillado Extracción de la bandeja de residuos El cabezal cilíndrico dual está diseñado para agitar la 1. Afloje el sujetador a resorte de la bandeja de residuos. alfombra mientras se aspira. El primer cepillo empuja 2. Deslice dicha bandeja para alejarla de la máquina. los residuos hacia atrás. -
Page 82: Retirar La Plataforma De Cepillado
Mantenimiento 8. Invierta el proceso para reensamblar con el motor nuevo. No use una lavadora de presión para limpiar los Sustitución de las escobillas de carbón motores de los cepillos. Use tan sólo la presión de los motores de los cepillos del grifo. - Page 83 Mantenimiento 5. Para volver a instalar, siga los pasos a la inversa. 8. Retire los tres (3) tornillos que sujetan el motor de aspiración. Sustituya el motor. NOTA: Debe alinear las mordazas del acoplador cuando deslice hacia adentro el montaje del alojamiento de accionamiento del cepillo.
-
Page 84: Motor De Accionamiento
Mantenimiento Motor de accionamiento Tensión de la cadena de propulsión Sustitución de las escobillas de carbón La cadena de propulsión debería flexionarse 1/4 de pulgada en cada lado del lazo cuando el lado opuesto del motor de propulsión esté ajustado. Para ajustar la tensión de la cadena: No use una lavadora de presión para limpiar los 1. -
Page 85: Anulación De Freno
Mantenimiento Anulación de Freno 1. Desconecte la batería para evitar lesiones. 2. Gire la rueda ligeramente hacia la derecha. 3. Retire las perillas que sujetan el panel de acceso sitio. Luego retire el panel de acceso. NOTA: El panel de acceso se encuentra cerca del baterías 6. - Page 86 Mantenimiento Preparación para la carga/descarga del remolque Antes de cargar o descargar una máquina del remolque, la plataforma de cepillado debe estar levantada. Si transporta la máquina en un remolque o un camión, además de utilizar amarres, asegúrese de bloquear los neumáticos para evitar que la máquina ruede.
- Page 87 Mantenimiento Resolución de problemas PROBLEM CAUSA SOLUCIÓN No hay función La tapa de la consola está abierta. Cierre la tapa de la consola de la máquina. Compruebe las conexiones de todos Baterías desconectadas los cables de las baterías Desconexión de emergencia activada Restaure Conexiones de las baterías corroídas Limpie las conexiones...
- Page 88 Mantenimiento Resolución de problemas PROBLEMA CAUSA SOLUCIÓN El motor de aspiración no Circuito o interruptor de vacío Controle los cables y las conexiones funciona, o lo hace lentamente. defectuosos Escobillas del motor de aspiración Sustituya las escobillas, compruebe desgastadas el conmutador Disyuntor de aspiración disparado Restaure disyuntor La aspiración y el cepillo...
- Page 89 Mantenimiento Resolución de problemas del indicador de descarga de las baterías El indicador de batería se ilumina cuando hay un problema. La tabla a continuación lista de soluciones para l os problemas indicados. Número Problema Solución de luces La batería necesita carga, hay una mala conexión a la Si las conexiones son correctas, batería o, según la programación, puede indicar que la intente cargando la batería.
- Page 90 Sugerido De Piezas Sueltas 8.644-676.0 Operator’s Manual - iVac 24 ATV...
- Page 91 Notes 8.644-676.0 Operator’s Manual - iVac 24 ATV...
- Page 92 THANK YOU! MERCI! GRACIAS! DANKE! Register your product and benefit from many advantages. Enregistrez votre produit et bénéficiez de nombreux avantages. Registre su producto y aproveche de muchas ventajas. Registrieren Sie Ihr Prudukt und Sie von vielen Vorteilen. www.kaercher.com/welcome Rate your product and tell us your opinion. Évaluez votre produit et donnez-nous votre opinion.
Need help?
Do you have a question about the Chariot 2 iVACUUM 24 130 A/H and is the answer not in the manual?
Questions and answers
What is the operator weight limit?
What is the operator weight limit for Karcher Chariot 24 **** A/H