Table of Contents
Advertisement
Advertisement
Table of Contents

Related Manuals for Feelworld L4


Summary of Contents for Feelworld L4
- Page 1 5-CH Multi Format Video Switcher User Manual...
- Page 2 Thank you for choosing our product! This User Manual is designed to show you how to use this video switcher quickly and make use of all the features. Please read all directions and instructions carefully before using this product. Safety Instruction The general safety information in this summary is for operating personnel.
-
Page 3: Table Of Contents
Chapter 4 Streaming ............................16 4.1 OBS Streaming ............................16 4.2 vMix Streaming ............................20 Chapter 5 Feelworld Live Plus Software Operation ..................23 5.1 Connect L4 and computer ........................23 5.2 Using Feelworld Live Plus (MAC version) ....................25... -
Page 4: Chapter 1 Your Product
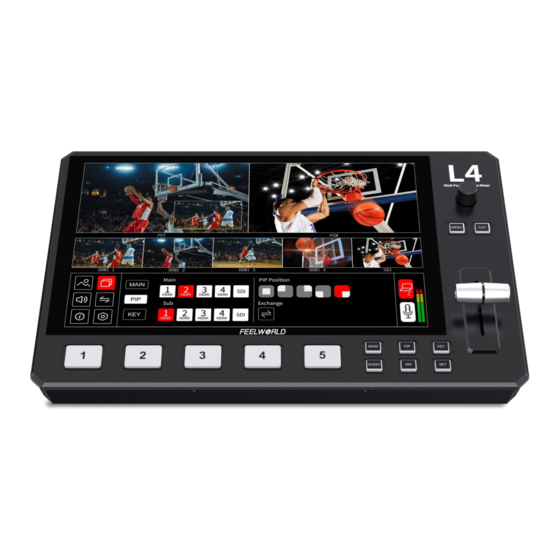
Chapter 1 Your Product 1.1 Product Overview FEELOWRLD L4 is a multi-camera video switcher with 4 HDMI and 1 SDI inputs, meet more professional needs. The audio supports MIC and LINE IN, you can choose any 2 for mixing from the 5 input audio sources and external audio. -
Page 5: Front Panel Instruction
The lights on the signal source buttons will appear in three states Static Green: is on air (PGM), Flashing green: ready to be switched, No light: no input source or the source not supported by L4 Main picture,click the input source can be switch signal Picture in Picture... -
Page 6: Interface Panel Instruction
Menu back key Press it to switch the signal from PST to PGM directly Knob ④ Rotate left or right to select menu items or adjust parameters. Press to confirm menu selection (icon turns red after confirmed) 1.4 Interface Panel Instruction Interface Instruction ①... -
Page 7: Chapter 2 Install Your Product
2.2 Connect Signal Source Input You can use any camera, computer or other HDMI device as the input source of the L4. It supports up to 4Kp30 standard and 4 sources of different formats and resolutions at the... -
Page 8: Connect Hdmi And Sdi Output
You can select PST or PGM mode for HDMI output For PST mode, you can see the audio and video conditions of all input signal sources, you can see the current status of each function of L4, and you can also see the PST (Preset) and current PGM (program)output. -
Page 9: Connect Usb3.0 As A Network Signal Source
2.5 Connect USB3.0 as a Network Signal Source You can use the L4’s USB CONTROL port to use the L4 as a webcam source, and you can recognize the webcam signal from the L4 on live streaming platforms like Zoom, YouTube, Facebook, Twitch, OBS, etc. -
Page 10: Connect Usb2.0 For Firmware Update
1. Format USB flash driver as FAT32 2. Copy the firmware update file to USB flash driver, insert to USB2.0 port of L4 (the color of USB2.0 port is white). Then turn on power of L4 (if L4 turned on already, please turn off first and turn on again), the buttons on the panel will be flashing after turned on power. -
Page 11: Chapter 3 Use Your Product
Chapter 3 Use Your Product 3.1 Touch Screen On the front panel of L4, you can see a 10.1-inch touch screen as shown in the picture below: The LCD screen presents 5 input sources, PST preset picture, PGM output picture and the menu operation interface. - Page 12 Click to adjust parameter values to adjust the brightness, contrast, and R.G.B color values of the image is increase value, is decrease value Brightness: 0~100 Contrast: 0~100 R.G.B: 0~255 RESET: After click RESET, the value reset to default value R.G.B 128, Brightness/Contrast 50 Including MAIN, PIP, KEY MAIN Click MAIN of menu interface or press button MAIN to enter main picture menu, you can...
- Page 13 Click PIP of menu interface or press button PIP to enter Picture in Picture menu. Select the signal source of main and sub picture, then you can see the selected signal in the PST (preset) interface. You can choose the position of the PIP , and also can click Exchange to quickly exchange the main picture and sub picture.
- Page 14 When AUDIO IN is connected to a microphone, click to select so that you can better hear the sound; When L4 is connected to electronic devices such as computer, smart phone, etc, you can plug headphone into the AUDIO IN port of L4 and click select to listen to audio from electronic device.
- Page 15 Export the LOGO file from the software FEELWORLD Live Plus (details see 5.2.2 SW - LOGO Overlay - Export Bin ) to the USB flash drive, then insert it into the USB2.0 interface of L4. Click to Choose File to import the LOGO , and then click "ON" to open LOGO overlay function.
-
Page 16: Switch Source
L4 After transition effect and transition mode is selected In AUTO+Time Mode: 1. -
Page 17: Chapter 4 Streaming
Chapter 4 Streaming 4.1 OBS Streaming Video Capture L4 is compatible with many third party steaming software, we recommend OBS, which is available to https://obsproject.com/download. download on Download the software and update to the latest version. 1. Click”+”icon 2. choose video capture device... - Page 18 Note:If there is no video format YUY 2 after setting above, check the USB 3.0 port connection. Make sure it is linked to USB 3.0 port on PC by USB 3.0 cable. (USB 3.0 cable or port is standard in blue while USB 2.0 is in black).
- Page 19 1. Set the audio source: Setting→Audio→Mic/Auxiliary Audio Devices 2.Right click the Video Capture Device in Source and choose Filter 3. Click “+”under Audio/Video Filters and choose Video Delay (Async)
- Page 20 4.You can custom the filter name in the pop-up window. Click OK to confirm the filter name. 5.Input delay value in ms, the value need to adjusted until the video and audio is synchronous. Streaming Setting 1. Find the RTMP URL and Stream Key provided by streaming broadcast website. 2.
-
Page 21: Vmix Streaming
4.2 vMix Streaming L4 streaming via vMix steps are as follow: 1. Click a new blank, then click the “Add Input” 2. Select Camera-Camera-FEELWORLD USB3.0 Capture. - Page 22 3. Select the same resolution as the L4 output. Then click “OK”. 4. Click “Stream” setting button. 5. Complete the URL and Key information. Click “Start 1”, vMix will begin streaming.
- Page 23 Note: vMix does not support automatic recognition of the output resolution of L4. Every time the output resolution of L4 is modified, the picture on vMix will pause. The user needs to re-select FEELWORLD USB3.0 Capture and manually input the current output resolution of L4.
-
Page 24: Chapter 5 Feelworld Live Plus Software Operation
L4 to your router and the computer to the Wi-Fi emitted by your wireless router. Note: The IP address of the L4 must be in the same WLAN segment as the computer or the mobile control device you choose. - Page 25 "Internet Protocol version 4 (TCP/IPv4)"; 3. Select "Use the following IP address" and change the IP address to the same network segment as L4 eg: L4's IP address is 192.168.0.99, then the computer's IP address can be set to 192.168.0.1-255. Please make sure that the IP addresses do not conflict.
-
Page 26: Using Feelworld Live Plus (Mac Version)
(take MAC version as example) Feelworld Live Plus simulates the L4's real world appearance and the operations you can control with Feelworld Live Plus are very similar to those you can do with the L4's hardware. After software is installed, click the icon login the software, you can add device by handle or search device automatically. - Page 27 Select the desired device by SN and IP and enter the management window, if the connection is successful, the indicator light in the lower left corner displays green, and if the connection is fail, the indicator light is red. 5.2.1 MENU Click【MENU】can set HDMI, Streaming Media, Audio, etc.
- Page 28 HDMI Out picture: including PST and PGM Resolution:720p@60, 1080p@25, 1080p@30, 1080p@50, 1080p@60 for optional Click<Setting>after selected Streaming Media Capture Device: Choose FEELWORLD USB3.0 Capture H.265: Turn ON/OFF , when turn it on, users can watch the output picture on software...
- Page 29 In order to solve the problem of control conflicts caused by different devices controlling the same L4 in the same LAN, Feelworld Live Plus provides a password protection function, as an administrator, you can set a password for the device controlling Feelworld Live Plus, and when you control the interface again, you need to enter the password to control it.
- Page 30 Network Setting In【Network Setting】, you can check current IP, mask and gateway. If you want to change the IP address,mask and gateway, turn off DHCP first and change the value, then click Setting. Version Info Click【Version Info】to check the software version...
- Page 31 Export bin: Click it to export the LOGO to USB flash driver, then you can insert the USB flash driver to the USB2.0 port of L4 and import the LOGO to L4. Note: only can import one logo picture, when import new one ,the original one will be covered.
- Page 32 5.2.3 Mode MAIN Click【MAIN】to select signal source for main picture, red is the signal for PGM, green is the signal for PST Click【PIP】can set for picture in picture Click to choose the signal of main picture and sub picture Click icon can choose the PIP mode Click icon can exchange main picture and sub picture...
- Page 33 Click【KEY】,the operation same as Chroma Key of 5.2.2 SW 5.2.4 Switching CUT: click to switch the signal PST to PGM directly AUTO: under AUTO mode, can set Cut Duration for effect or signal source (max 5 seconds) Note:T-BAR is for manual switching : Indicates PST is directly switched to PGM, and after switching, the PST and PGM screen are the same.
-
Page 35: Chapter 6 Product Parameters
Chapter 6 Product Parameters Screen 10.1-inch (touch) Input HDMI In 4×HMDI SDI In 1x 3G-SDI HDMI Out 1xHDMI SDI Out 1x 3G-SDI USB3.0 1×USB TypeA Connections 1×3.5mm (MIC) Audio 1×3.5mm (LINE) 1×RJ45 Communication 1×DC Jack Power HDMI SMPTE 720p@50/60|1080i@50/60|1080p@24/30/50/60| 2160p@30 VESA 1024X768@60|1280 X 720@60|1280 X 768@60| 1280X800@60|1280X1024@60|1360x768@60|1366x768@60|1 Input... - Page 36 Humidity 10%~85% Weight 1.48kg Physical 290.2(L) x 189.5(W) x 55.7(H)mm Dimension...
Need help?
Do you have a question about the L4 and is the answer not in the manual?
Questions and answers