Advertisement
Quick Links
Create amazing spaces
MANUAL
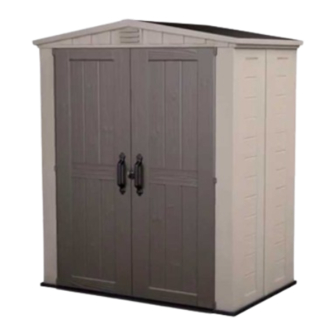
FACTOR 6x3
USER MANUAL | MODE D'EMPLOI | MANUAL DEL USUARIO | GEBRAUCHSANLEITUNG |
GEBRUIKSHANDLEIDING | MANUALE PER L'UTENTE | MANUAL DO UTILIZADOR
SKU: 17197903
US, Canada
Tel: +1877-638-7056, NACS@keter.com
UK
Tel: +44-121-506-0008, CSUK@keter.com
WWW.KETER.COM
For other European countries see the last page
WARRANTY ACTIVATION
Thank you for your purchase of the Keter shed.
In order to activate your warranty, please log onto our website and fill in the form under warranty activation.
1
keter.com/en/warrant-activation
Advertisement

Subscribe to Our Youtube Channel
Related Manuals for Keter FACTOR 6x3


Summary of Contents for Keter FACTOR 6x3
- Page 1 WWW.KETER.COM For other European countries see the last page WARRANTY ACTIVATION Thank you for your purchase of the Keter shed. In order to activate your warranty, please log onto our website and fill in the form under warranty activation. keter.com/en/warrant-activation...
- Page 2 SITE PREPARATION | PRÉPARATION DU SITE | PREPARACIÓN DEL LUGAR | VORBEREITUNG DES AUFSTELLUNGSORTES | VOORBEREIDING VAN HET TERREIN | PREPARAZIONE DEL LUOGO DI ASSEMBLAGGIO | PREPARAÇÃO DO LOCAL Level the ground surface Nivelez la surface du sol | Nivele la superficie del suelo | Ebnen Sie die Bodenoberfläche | Maak de bodem vlak | Livellare la superficie del terreno | Nivele a superfície do solo Recommendation: Construct a wooden or concrete base as a foundation | Recommandation : Fabriquez une base en bois ou en béton en guise de fondation | Recomendación: construya una base de madera o de cemento a modo de cimiento |...
- Page 3 BEFORE STARTING ASSEMBLY | AVANT DE COMMENCER LE MONTAGE | ANTES DE EMPEZAR EL ARMADO | VOR MONTAGEBEGINN | VOORDAT U BEGINT TE MONTEREN | PRIMA DI INIZIARE L’ASSEMBLAGGIO | ANTES DE INICIAR A MONTAGEM Read the care and safety guidelines at the end of this manual | Check to ensure that there are no missing or damaged parts BEFORE starting or arranging assembly | Remove all parts from the package(s) and spread them out on a clean work surface | Review all assembly instructions | Assemble all the parts according to the directions in this manual.
- Page 4 SHED PARTS | PIÈCES DE L’ABRI | PARTES DEL COBERTIZO | TEILE DES SCHUPPENS | ONDERDELEN VAN HET SCHUURTJE | COMPONENTI DELLA CASETTA | PEÇAS DO ABRIGO Remove all parts from the package(s) and spread them out on a clean work surface. Code letters are imprinted on each part for easy identification | Retirez toutes les pièces du/des paquet(s) et étalez-les sur une surface de travail propre.
- Page 5 WALL PARTS | PIÈCES DES MURS | PARTES DE LAS PAREDES | WANDELEMENTE | MUURONDERDELEN | COMPONENTI DELLA PARETE | PAINÉIS LATERAIS FCN (x4) SP (x2) CS3 (x2) CS (x1) CO(x24) WA(x24) DOOR PARTS | PIÈCES DE LA PORTE | PARTES DE LA PUERTA | TÜRELEMENTE | DEURONDERDELEN | COMPONENTI DELLA PORTA | PEÇAS DAS PORTAS FP2 (x2) FP1 (x2)
- Page 6 SCREWS | VIS | TORNILLOS | SCHRAUBEN | SCHROEVEN | VITI | PARAFUSOS inch inch sc15 (x14) 16 mm / 0.63” sc5 (x4) 12.5 mm / 0.49” inch inch inch s26b (x4) 26mm / 1” sc9 (x26) 31.5 mm / 1.24” scw8 (x4) 16 mm / 0.63”...
- Page 7 WALL ASSEMBLY | MONTAGE DU MUR | MONTAJE DE LAS | MONTAGE DER WÄNDE | MONTAGE VAN DE MUREN | ASSEMBLAGGIO DELLE PARETI | MONTAGEM DA PAREDE FCN (x4) Ensure all snap locks are secured before continuing assembly | Compruebe que todos los cierres rápidos estén asegurados antes de continuar con el montaje | S’assurer que tous les fermoirs à...
- Page 8 F6*3 (x1) FCN (x1) WA (x3) CO (x3) DOOR / FRONT PORTE / L'AVANT TÜRE / VORDERSEITE PUERTA / PARTE DELANTERA DEUR / VOORKANT PORTA / PARTE ANTERIORE PORTA / PARTE DA FRENTE CS3 (x1) CLICK...
- Page 9 FCN (x1) WA (x3) CO (x3) SP (x1) Outside Extérieure Exterior Außenseite Buitenkant Esterno Exterior...
- Page 10 CS (x1) CLICK SP (x1)
- Page 11 FCN (x1) WA (x3) CO (x3) CS3 (x1) CLICK...
- Page 12 FCN (x1) WA (x3) CO (x3) WA (x4) CO (x4) RD3 (x2)
- Page 13 DOOR ASSEMBLY | MONTAGE DE LA PORTE | ARMADO DE LA PUERTA | MONTAGE DER TÜR | DEURMONTAGE | ASSEMBLAGGIO DELLA PORTA | MONTAGEM DA PORTA FFD (x2) FP2 (x2) FP1 (x2) HG (x2) CLICK CLICK FHD (x2) CLICK...
- Page 14 HG (x2) CLICK...
- Page 15 ROOF ASSEMBLY | MONTAGE DU TOIT | MONTAJE DEL TECHO | DACHMONTAGE | DAKMONTAGE | ASSEMBLAGGIO DEL TETTO | MONTAGEM DO TELHADO CO (x4) WA (x4) RF3 (x1) KETER RB3 (x1) CO (x4) WA (x4) CLICK...
- Page 16 B3 (x1) sc9 (x4) TL3 (x2)
- Page 17 sc9 (x10) FAIBLE BAJO NIEDRIG LAAG BASSA BAIXA sc9 (x10) FAIBLE BAJO NIEDRIG LAAG BASSA BAIXA...
- Page 18 ST (x2) DS (x2) sc9 (x2) IH (x2) s26b (x4) s26b...
- Page 19 DH1 (x1) Left Gauche Izquierdo Verließ Links Sinistra Esquerdo FML (x1) sc5 (x2) Left Gauche Izquierdo Verließ Links Sinistra Esquerdo...
- Page 20 FLA (x2) scw8 (x4) Left Gauche Izquierdo Verließ Links Sinistra scw8 Esquerdo scw8 sc15 (x4) Left Gauche Izquierdo Verließ Links sc15 Sinistra Esquerdo...
- Page 21 DH2 (X1) Right Droit Derecho Richtig Rechts Destra Direito FMR (x1) sc5 (x2) Right Droit Derecho Richtig Rechts Destra Direito...
- Page 22 sc15 (x6) Right Droit Derecho Richtig Rechts Destra Direito sc15 sc15 (x4)
- Page 23 OPTION | OPCIÓN | OPTIE | OPZION | OPZIONE | OPÇÃOE SH (x1) Use wooden planks as shelves (wooden planks not included). Utilisez des planches de bois comme étagères (planches de bois non fournies). Utilice tablas de madera como estantes (tablas de madera no incluidas). Verwenden Sie Holzbretter als Regale (die Holzbretter sind nicht enthalten).
- Page 24 OPTION | OPCIÓN | OPTIE | OPZION | OPZIONE | OPÇÃOE SECURING THE SHED TO A FOUNDATION A x the shed to the foundation by drilling holes in the shed floor at the pre-marked locations and screwing it into the foundation using appropriate screws (screws not included). FIXER L’ABRI SUR UNE FONDATION Fixez l’abri à...
- Page 25 ADVERTENCIA SOBRE EL CUIDADO Y LA SEGURIDAD • La cobertizo está diseñada solo para el almacenamiento de productos. No está diseñada para habitar en ella. • Se recomienda encarecidamente fijar la cobertizo a un objeto inamovible o anclarla al suelo taladrando agujeros en el suelo de la cobertizo (en los lugares premarcadas para ello), e insertando tornillos adecuados en el suelo (los tornillos no están incluidos).
- Page 26 GARANTIE LIMITÉE DE 10 ANSC Votre abri de jardin Keter (« le Produit ») a été fabriqué à partir de matériaux recyclables de grande qualité, en faisant l'objet de contrôles rigoureux et d'une surveillance stricte. Si un problème devait se présenter avec le produit, veuillez adresser votre réclamation au service clients de Keter sur notre site internet (www.keter.com) ou par téléphone.
- Page 27 Keter no se hace responsable por ningún daño realizado por terceros o daños o pérdida de objetos dentro o cerca de la caseta. Al entregar el ticket o factura de compra y prueba del presunto fallo del producto, y sujeto a informar del fallo de manera puntual, Keter, a su discreción, reemplazará...
- Page 28 Made in Israel by | Fabriqué en Israël par | Fabricado en Israel por | Hergestellt in Israel von | Gemaakt in Israël door | Realizzato in Israele da | Fabricado em Israel por Keter Plastic Ltd., 1 Sapir St. Industrial Area, Herzliya 46852, Israel...
Need help?
Do you have a question about the FACTOR 6x3 and is the answer not in the manual?
Questions and answers