Table of Contents
Advertisement
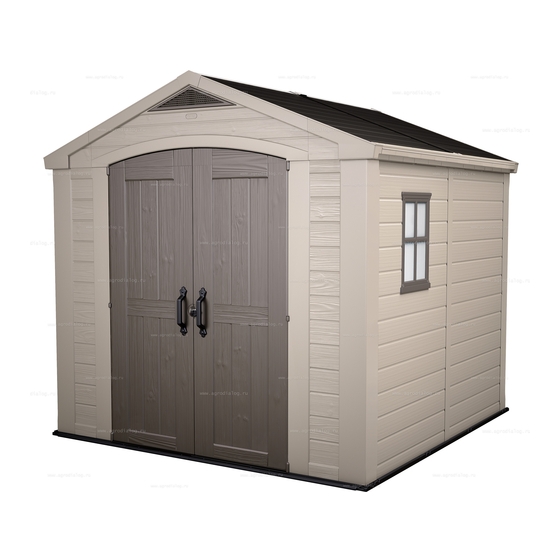
FACTOR 8x8
ASSEMBLY INSTRUCTIONS | CONSIGNES DE MONTAGE | INSTRUCCIONES DE MONTAJE | MONTAGEANLEITUNG
| MONTAGE-VOORSCHRIF TEN | ISTRUZIONI D'ASSEMBL AGGIO | INSTRUÇÕES DE MONTAGEM
Thank you for your purchase of the Keter shed,
WARRANTY
WARRANTY
In order to activate your warranty, please enter
www.keter.com, and fill in the form under
ACTIVATION
ACTIVATION
warranty activation.
IF THERE ARE MISSING OR BROKEN PARTS, PLEASE DO NOT RETURN THE PRODUCT TO THE STORE.
Please log onto our website, or contact Customer Service at:
S'IL Y A DES PIÈCES MANQUANTES OU CASSÉES, NE RETOURNEZ PAS LE PRODUIT AU MAGASIN.
Veuillez visiter notre site Internet, ou contacter notre Service Clientèle:
SI HUBIERA ALGUNA PARTE FALTANTE O DAÑADA, NO DEVUELVA EL PRODUCTO A LA TIENDA.
Inicie sesión en nuestro sitio en Internet o contáctese con nuestro servicio de atención al cliente:
BITTE BRINGEN SIE IHR PRODUKT NICHT GLEICH ZUM LADEN ZURÜCK, FALLS TEILE FEHLEN ODER DEFEKT SIND.
Bitte loggen Sie in unsere Website ein oder wenden Sie sich an unseren Kundenservice:
IN GEVAL VAN ONTBREKENDE OF GEBROKEN ONDERDELEN NIET HET PRODUCT NAAR DE WINKEL RETOURNEREN.
Ga naar onze website of neem contact op met de Klantenservice:
IN CASO DI PARTI MANCANTI O DANNEGGIATE, EVITARE DI RESTITUIRE IL PRODOTTO AL NEGOZIO.
Accedere al nostro sito o contattare il Servizio Clienti:
SE HOUVER PEÇAS EM FALTA OU PARTIDAS, NÃO DEVOLVA O PRODUTO À LOJA.
Entre na nossa página de Internet ou contacte o Serviço de Clientes:
FACTOR 8x8
2 easy steps to use a QR-code:
1. Download a FREE QR-Code
reader from your smartphone
application site.
2. Scan the QR-Code.
SKU: 17197916
WWW.KETER.COM
US: # 1-888-374-4262
Canada: # 1-800-661-6721
UK: # 0121-5060008
Other European Countries:
# 31-1612-28301
Advertisement
Table of Contents

Related Manuals for Keter FACTOR 8x8


Summary of Contents for Keter FACTOR 8x8
- Page 1 | MONTAGE-VOORSCHRIF TEN | ISTRUZIONI D’ASSEMBL AGGIO | INSTRUÇÕES DE MONTAGEM FACTOR 8x8 SKU: 17197916 2 easy steps to use a QR-code: Thank you for your purchase of the Keter shed, 1. Download a FREE QR-Code WARRANTY WARRANTY In order to activate your warranty, please enter reader from your smartphone application site.
- Page 2 KLANTENSERVICE | SERVIZIO CLIENTI | ASSISTÊNCIA AO CLIENTE IMPORTANT: For assistance with assembly or to request missing parts, please log onto our web site at www.www.keter.com or contact Customer Service. IMPORTANT: Pour toute assistance lors du montage ou pour obtenir des pièces manquantes, veuillez visiter notre site Internet: www.keter.com ou contacter notre Service Clientèle.
- Page 3 LEVEL THE GROUND | NIVELLEMENT DU SOL | NIVELE EL SUELO | SORGEN SIE FÜR EINE EBENE | GRUNDFLÄCHE MAAK DE GROND WATERPAS | METTERE IL TERRENO A LIVELLO | NIVELAR O SOLO Please select your construction site carefully | The ground surface must be level | it is highly recommended that you construct a wooden or concrete base to use as a foundation | Veuillez sélectionner le site de votre construction avec précaution.
- Page 4 Option Opción Option optie opzione opção Option Opción Option optie opzione opção In order to properly assemble some parts of the shed, it should be kept 70 cm / 27 inches from any fence or wall until fully assembled | Pour monter correctement les parties de l’abri, vous devez garder 70 cm / 27 pouces de distances d’un obstacle ou d’un mur jusqu’à...
- Page 5 CAUTION | AVERTISSEMENT | ADVERTENCIA | WICHTIG | WAARSCHUWING | ATTENZIONE | ATENÇÃO Some parts have steel edges | Please be careful when handling components | Always wear work gloves, eye protection and long sleeves when assembling or performing any maintenance on your shed | Do not attempt assembly on days with strong winds or low temperatures. Certaines pièces ont des bords en acier | Soyez prudent en les manipulant | Portez toujours des gants de travail, des lunettes de protection et des vêtements à...
- Page 6 ASSEMBLY PARTS | PIÈCES À ASSEMBLER | PIEZAS DE ENSAMBLE | MONTAGETEILE | MONTAGESTUKKEN | PARTI DA MONTARE | PEÇAS DE MONTAGEM For easy identification of the parts, code letters are imprinted on them | Pour une identification plus aisée, des lettres sont imprimées au dos de chaque pièce | Para una fácil identificación de las piezas, éstas llevan letras de código impresas | Für einfaches Identifizieren der Teile haben wir die Kennbuchstaben auf diesen eingeprägt | Voor het makkelijk identificeren van de onderdelen zijn er codeletters op afgedrukt | Per un’identificazione più...
- Page 7 FLOOR PANELS | PANNEAUX DU SOL | PANELES DEL PISO | BODENELEMENTE | VLOERPANELEN | PANNELLI DEL PAVIMENTO | PAINÉIS DO PISO FS(X2) FG(X2) FC(X3) FLE(X1) FGE(X2) FRE(X1) DOOR PARTS | PIÈCES DE LA PORTE | PARTES DE LA PUERTA | TÜRELEMENTE | DEURONDERDELEN | PARTI DELLA PORTA | PEÇAS DAS PORTAS DCL(X1) DP2(X1)
- Page 8 SCREWS | VIS | SCHRAUBEN | TORNILLOS | SCHROEVEN | VITI | PARAFUSOS SC15(X32) SC1(X37) SC12(X4) 1.8cm|0.7” 2.6cm|1” 5cm|1.97” inch inch inch SC5(X10) SF36(X58) SC8(X7) 1.25cm|0.49” 3.6cm|1.42” 4.3cm|1.7” inch inch inch SCN8(X7) WALL PARTS | PIÈCES DU CONTOUR | PARTES DE LAS PAREDES | WANDELEMENTE | MUURONDERDELEN | PARTI DELLA PARETE | PAINÉIS LATERAIS CO(X24) WA(X24)
- Page 9 FLOOR ASSEMBLY | MONTAGE DU SOL | ARMADO DEL PISO | MONTAGE DER BODENPLATTE | VLOERMONTAGE | MONTAGGIO DEL PAVIMENTO | MONTAGEM DO PISO FG(X2) FS(X2)
- Page 10 SC1(X12) FLE(X1) FGE(X2) FRE(X1)
- Page 11 SC1(X3) SC1(X12) • DOOR / FRONT • PORTE / DEVANT • TÜR / VORDERSEITE • PUERTA / FRENTE • DEUR / VOORKANT • PORTA / PARTE ANTERIORE • PORTA / FRENTE...
- Page 12 SC(X3) FMK(X3) SHELL ASSEMBLY | MONTAGE DE LA STRUCTURE | MONTAJE DEL ARMAZÓN | GERÜSTMONTAGE | GERAAMTESAMENSTELLING | MONTAGGIO DELLA STRUTTURA | MONTAGEM DA ESTRUTURA CO(X3) WA(X3) FOM(X1) FOM (x1) DOOR / FRONT PORTE / DEVANT TÜR / VORDERSEITE PUERTA / FRENTE DEUR / VOORKANT PORTA / PARTE ANTERIORE PORTA / FRENTE...
- Page 13 DECIDING ON THE LOCATION OF WINDOWS • Note that these panels (SPLW) can be installed in any of the four side panels. • The window panel can be installed in the side walls only. EMPLACEMENT DES FENÊTRES • Notez que ces panneaux (SPLW) peuvent être installés sur n’importe lequel des quatre panneaux lateraux.
- Page 14 SPL/SPLW(X1) • This side out • Côté extérieur • Cara exterior • Diese seite nach Aussen • Deze kant buiten • Lato rivolto verso L'esterno • Este lado para fora SPL/SPLW • DOOR / FRONT • PORTE / DEVANT • TÜR / VORDERSEITE •...
- Page 15 SPL/SPLW(X1) SPL/SPLW FOM(X1) CO(X3) WA(X3)
- Page 16 D88(1)(X1) DL88(1)(X1) DR88(1)(X1) CO(X2) WA(X2) DR88(1) D88(1) DL88(1) CLICK CLICK FOM(X1) SP(X2) CS(X1) CO(X3) WA(X3)
- Page 17 FOM(X1) SPL/SPLW(X2) CO(X3) WA(X3) CS(X1) SPL/SPLW SPL/SPLW D88(1)(X1) DL88(1)(X1) DR88(1)(X1) CO(X2) WA(X2) DL88(1) D88(1) DR88(1) CLICK...
- Page 18 TFB(X1) TCR(1)(X1) TCL(1)(X1) TCL(1) TCR(1) CLICK FTS(X2) SC1(X2) SC15(X2) SC15...
- Page 19 FBT(X1) SC15(X1) CLICK...
- Page 20 CO(X4) WA(X4) SC15(X1) CLICK...
- Page 21 DP1(x1) HG (x4) FND(x2) DP2(x1) DX (x2) DCL(x1) DCR(x1)
- Page 22 FND(X2)
- Page 23 TFF(X1) FTH(X1) TCL(1)(X1) TCR(1)(X1) TCL(1) CLICK TCR(1) SC1(X2) SC15(X2) FTS(X2) SC15...
- Page 24 CLICK CO(X4) WA(X4)
- Page 25 M88(X1) FMC(X1) SKC(X1) SC15(X1) SC15(X1) M88(X1)
- Page 26 SF36(X4) B88(X2) SF36(X4)
- Page 27 FGD(X2)
- Page 28 FGH(X1) FGV(X1) SC8(X1) SCN8(X1) SC8(X2) SCN8(X2)
- Page 29 FTC(X2) CLICK...
- Page 30 F88(X4) SC15(X4)
- Page 31 SC8(X4) SCN8(X4) SC1(X2) SCN8...
- Page 32 T88(X4)
- Page 33 TRP(X4) SF36(X30)
- Page 34 FS36(X20) SFR(X20) SC15(X12)
- Page 35 IH(X2) SC1(X4) DH1(X1) DH2(X1) SC5(X2)
- Page 36 DNS(X1) SC5(X8) Left Gauche Izquierdo Verließ Links Sinistra Esquerdo DLA(X2) • Left • Gauche • Izquierdo • Verließ • Links • Sinistra • Esquerdo...
- Page 37 FC(X3) DS(X2) SC12(X4) • Left side • Right side • Côté gauche • Côté droit • Lado izquierdo • Lado derecho • Linke Seite • Rechte Seite • Linkerzijde • Rechterzijde • Lato sinistro • Lato destro • Lado esquerdo •...
- Page 38 WINDOW ASSEMBLY | MONTAGE DE LA FENÊTRE | VENTANA DEL TECHO | FENSTERHMONTAGE RAAMMONTAGE | MONTAGGIO DE LA FINESTRA | MONTAGEM DO JANELA FWO (X1) CLICK...
- Page 39 FWT (X1) YWI (X1) SC15 (X8)
- Page 40 OPTION | OPCIÓN | OPTIE | OPZION | OPÇÃOE • Optional shed accessory kits are available. Each kit includes two shelves and two shelf holders. Shelves can only be installed in the side walls. • Please take into consideration that each assembly option (A or B ) requires a different assembly of SQ and SL. Decide on configuration before assembling shelves.
- Page 42 à partir des meilleures matières premières, elles sont exemptes de substances toxiques et entièrement recyclables. Dans le cas où vous rencontreriez un problème, veuillez le signaler à notre service clients par téléphone ou à travers notre site web : www.keter.com. La garantie limitée est valable à compter de la date d’achat et avec un document daté...
- Page 43 “limpas”: não tóxicas e completamente recicláveis. Se ocorrer algum problema, por favor, envie a sua reclamação para o serviço de atendimento ao cliente por telefone ou através do nosso web site: www.keter.com. A garantia limitada é válida a partir da data da compra e com uma prova de compra com data. O recibo deve ser apresentado mediante solicitação.
- Page 44 • Mantenga el techo libre de nieve y hojas. Grandes cantidades de nieve sobre el techo pueden dañar el cobertizo y hacer peligrosa la entrada al mismo. • Aunque su dirección varíe, el viento es un factor importante a tomar en cuenta cuando decida dónde ubicar su cobertizo. Por lo tanto, se recomienda reducir la exposició al viento del cobertizo en general y del lado de la puerta en particular.
Need help?
Do you have a question about the FACTOR 8x8 and is the answer not in the manual?
Questions and answers