Table of Contents
Advertisement
Advertisement
Table of Contents

Related Manuals for XTM XTM40


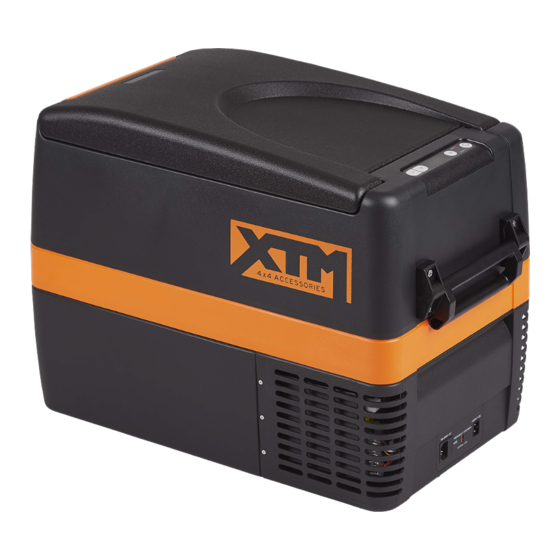
Summary of Contents for XTM XTM40
- Page 1 Operating manual Compressor Fridge/Freezer 40 LITRE AC/DC XTM40...
-
Page 3: Table Of Contents
XTM40 Please read this manual carefully before starting the device. Keep it in a safe place for future reference. If the device is passed on to another person, this manual must be handed over to the user along with it. -
Page 4: Explanation Of Symbols
Explanation of symbols XTM40 Explanation of symbols DANGER! Safety instruction: Failure to observe this instruction will cause death or serious injury. WARNING! Safety instruction: Failure to observe this instruction can cause death or serious injury. CAUTION! Safety instruction: Failure to observe this instruction can lead to injury. - Page 5 XTM40 Safety instructions WARNING! • Do not operate the device if it is visibly damaged. • If this device's power cable is damaged, it must be replaced with the same type as the original from the manufacturer in order to prevent safety hazards.
- Page 6 Safety instructions XTM40 • If the cooler is connected to the DC socket: Disconnect the cooler and other power consuming devices from the battery before connecting the quick charging device. • If the cooler is connected to the DC socket: Disconnect the cooler or switch it off when you turn off the engine.
-
Page 7: Scope Of Delivery
XTM40 Scope of delivery Scope of delivery Item Quantity Description Cooler Connection cable for DC connection Connection cable for AC connection Carrying handle, consisting of: – 2 holders – 1 handle – 4 fastening screws – Powdercoated steel basket –... -
Page 8: Intended Use
Intended use XTM40 Intended use The cooling device is suitable for cooling and freezing foods. The cooling device is designed to be operated from: • a DC on-board power supply of a vehicle, boat or caravan • a DC auxiliary battery •... - Page 9 XTM40 Function description Scope of functions • Power supply with priority circuit for connecting to the power supply • 3-level battery monitor to protect the vehicle battery • Turbo mode for rapid cooling • Display with temperature gauge (switches off automatically at low battery voltage) •...
- Page 10 Function description XTM40 Operating panel POWER ERROR Item Description Explanation Switches the cooler on or off when the button is pressed for between one and two seconds POWER Status indication LED lights up green: Compressor is on LED lights up orange:...
- Page 11 XTM40 Function description Connection sockets 100-240V~AC 12/24V DC EMERGENCY OVERRIDE FUSE NORMAL USE Item in Description fig. 4 AC voltage supply inlet Fuse holder DC voltage supply inlet Emergency switch...
-
Page 12: Operation
Operation XTM40 Operation Before initial use NOTE Before starting your new cooler for the first time, you should clean it inside and outside with a damp cloth for hygienic reasons (please also refer to the chapter “Cleaning and maintenance” on page 20). - Page 13 XTM40 Operation ✓ The selected temperature units then appear in the display for a few seconds. The display flashes several times before it returns to the current temperature. Energy saving tips • Choose a well ventilated location which is protected from direct sunlight.
- Page 14 Operation XTM40 Connecting to an AC power supply (e.g. in the home or office) DANGER! Danger of electrocution! • Never handle plugs and switches with wet hands or if you are standing on a wet surface. • If you are operating your cooler on board a boat from a power supply connection of 100 –...
- Page 15 XTM40 Operation In “HIGH” mode, the battery monitor responds faster than at the levels “LOW” and “MED” (see the following table). Battery monitor mode HIGH 10.1 V 11.4 V 11.8 V Switch-off voltage at 12 V 11.1 V 12.2 V 12.6 V...
- Page 16 Operation XTM40 Using the cooler NOTICE! Danger of overheating! Ensure at all times that there is sufficient ventilation so that the heat that generated during operation can dissipate. Ensure that the ventilation slots are not covered. The cooler MUST maintain a MINIMUM of 50 mm away from walls or similar surfaces which could restrict important air flow requirements of the cooling system.
- Page 17 XTM40 Operation Latching the cooler lid ➤ Close the lid. ➤ Press the latch (fig. 2 1, page 9) down, until it latches in place audibly. Setting the temperature NOTICE! Danger from excessively low temperature! Ensure that the only those objects are placed in the cooler that are intended to be cooled at the selected temperature.
- Page 18 Operation XTM40 Defrosting the cooler Humidity can form frost in the interior of the cooling device or on the evaporator. This reduces the cooling capacity. Defrost the device in good time to avoid this. NOTICE! Danger of damage! Never use hard or pointed tools to remove ice or to loosen objects which have frozen in place.
- Page 19 XTM40 Operation 6.11 Replacing the DC plug fuse ➤ Pull the adapter sleeve (4) off of the plug. ➤ Unscrew the screw (5) out of the upper half of the housing (1). ➤ Carefully raise the upper half of the housing from the lower (6) half.
-
Page 20: Cleaning And Maintenance
Cleaning and maintenance XTM40 6.12 Replacing the light bulb ➤ Press the switch pin (2) downwards so that the transparent part (1) of the lamp can be removed at the front. ➤ Replace the light bulb. NOTE The LEDs in the light bulb must be facing the transparent part of the lamp. -
Page 21: Guarantee
XTM40 Guarantee Guarantee The XTM40 portable refrigerator comes with a Two (2) year warranty which is cov- ered by Dometic Australia Pty Ltd as per Dometic Australia‘s standard warranty terms and conditions and supported by Dometic Australia‘s service network. If the product is defective, call the number below or a Dometic service agent directly (see how to find your nearest service agent in the separate warranty card). -
Page 22: Disposal
Disposal XTM40 Fault Possible cause Suggested remedy When operating from The DC outlet is dirty. If the plug of your cooler becomes very the DC outlet: This results in a poor warm in the DC outlet, either the DC electrical contact. -
Page 23: Technical Data
XTM40 Technical data Technical data XTM40 Connection voltage: 12/24 Vg and 100 – 240 Vw Rated current – 12 Vg: 6.0 A – 24 Vg: 3.0 A – 100 – 240 Vw: 1.3 A to 0.7 A Cooling capacity: +10 °C to –18 °C (+50 °F to 0 °F) - Page 24 For service/technical enquiries: 1800 212121...
Need help?
Do you have a question about the XTM40 and is the answer not in the manual?
Questions and answers