Table of Contents
Advertisement
Quick Links
MANUAL FOR ANNUAL MAINTENANCE
Barbas wishes you many cosy evenings with your new fi re
Version number: 04 - 339439
Date: 04-07-2019
This product is not suitable for primary heating purposes
INSTALLATION INSTRUCTIONS
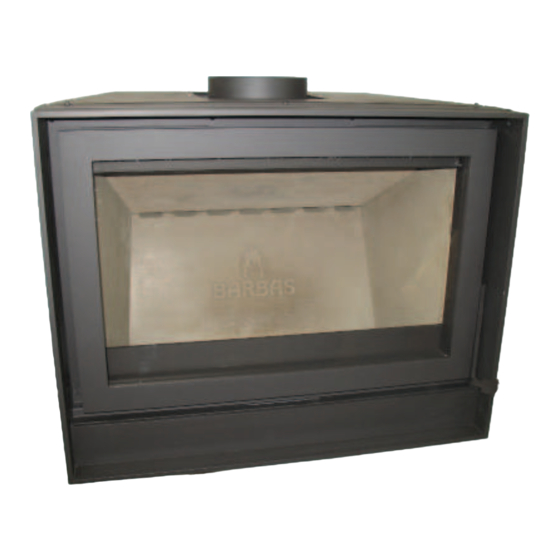
UNIVERSAL-6 85
Wood-burning insert appliance
This document is an essential part of your fi re.
Read it carefully before installation and maintenance
of the gas fi re and keep it in a safe place!
&
Serial number:
Production date:
Advertisement
Table of Contents

Subscribe to Our Youtube Channel
Related Manuals for barbas UNIVERSAL-6 85


Summary of Contents for barbas UNIVERSAL-6 85
- Page 1 MANUAL FOR ANNUAL MAINTENANCE UNIVERSAL-6 85 Wood-burning insert appliance Barbas wishes you many cosy evenings with your new fi re This document is an essential part of your fi re. Read it carefully before installation and maintenance of the gas fi re and keep it in a safe place!
- Page 3 Name, registered trade name or registered trade mark Barbas Bellfires BV; Hallenstraat 17; 5531 AB Bladel; The Netherlands and contact address of the manufacturer as required pursuant to Article 11(5)
- Page 4 UNIVERSAL-6 85 Installation instructions...
-
Page 5: Table Of Contents
UNIVERSAL-6 85 TABLE OF CONTENTS Page Introduction 1.1 General ....................Safety and installation instructions ............Placing 2.1 Included ....................2.2 Preparation for positioning ..............2.3 Accessories ..................2.4 Hearth requirements ................Installation 3.1 Instructions ................... 3.2 Flue gas channel .................. - Page 6 UNIVERSAL-6 85 Installation instructions...
-
Page 7: Introduction
UNIVERSAL-6 85 INTRODUCTION 1.1 GENERAL The appliance must be positioned and connected by a Barbas dealer/specialist in accordance with the following installation instructions, nationally and locally applicable regulations. This manual contains directions for both positioning the appliance and for its environmentally-friendly use. -
Page 8: Safety And Installation Instructions
• It is essential that the appliance, the fl ue and combustion air supply are cleaned and inspected annually by a Barbas dealer/specialist. The safe operation of the appliance will thus remain guaranteed. • The appliance is suitable and approved for periodical use. - Page 9 UNIVERSAL-6 85 • Wood and wood briquettes may be stoked in the appliance. Do not use any coal and liquid fuels or fuel gel in the appliance. The appliance is not intended for use of this fuels and can be dangerous and lead to damage to your health and may seriously damage the appliance.
-
Page 10: Included
UNIVERSAL-6 85 LOCATION INCLUDED Set documentation • Directions for use • Installation instructions Attributes • Glove (Heat resistant up to max. 95°C) • Operating hook / Poker • Cover plates N.B. If any part is missing, please contact your dealer. - Page 11 UNIVERSAL-6 85 Handle forwards: The door releases from its lock and can be opened forwards. For this, use the operating hook supplied. • Check whether the 2 retardant plates are located correctly in the supports. • Check the operation of the slider for the regulation of the combustion air intake (middle below the window).
- Page 12 UNIVERSAL-6 85 • Check whether the ashtray is completely empty. • Report any defects immediately to your dealer. • Remove enclosed documents and components from the appliance. • Decide how to install the appliance. Important: There are many possibilities ! See also chapter 3.3 Fitting.
- Page 13 UNIVERSAL-6 85 Connection Possibilities: Mounting as insert in an existing fi replace. In these situations the combustion air inlet is at the front of the appliance. A Insert, no open space in top of the fi replace. Ventilate the chimney...
- Page 14 UNIVERSAL-6 85 C Insert, with open space in top of fi replace. Convection air through the chimney breast. Installing as a build-in appliance in an existing or new fi replace. In this situation it is possible to fi t the appliance with a combustion air supply from the outside through the back or the underside of the appliance.
- Page 15 UNIVERSAL-6 85 B Build-in appliance, with convection set and convection fan. C Build-in appliance, with convection fan and convection air through the chimney breast. Installation instructions...
- Page 16 UNIVERSAL-6 85 = Closed (“break away” discs) = Open (“break away” discs) = Grate Ventilation openings chimney breast = Grate Combustion air supply via wall outlet Convection set: • Ventilation casing / chimney. Ensure that the casing/chimney has suffi cient ventilation openings...
- Page 17 UNIVERSAL-6 85 • Opening of 2 convection air outlets. Have the suitability of the area in which the fi re is to be fi tted (and the chimney) approved by a specialist. The space into which the appliance is to be fi tted must in no way be damaged.
- Page 18 UNIVERSAL-6 85 Cover plates convection air. Convection air outlet openings open. Convection air outlet openings closed. Installation instructions...
-
Page 19: Accessories
UNIVERSAL-6 85 ACCESSORIES The following accessories can be supplied by your dealer: Part. no Accessorie 338223 Convection set General: (for convection air extraction) Advice: • Appliance without convection fan: The use of a convection set is strongly recommended. • Appliance with convection fan: The use of a convection set is possible, but not mandatory. - Page 20 UNIVERSAL-6 85 A = Superimposed hearth B = Constructional hearth Figure 1: Minimum dimensions appliance The minimum depth of the constructional hearth is 500 mm. A superimposed hearth on top of the constructional hearth must have a minimum depth of 225 mm and must be free of any combustible material.
-
Page 21: Installation
UNIVERSAL-6 85 INSTALLATION 3.1 INSTRUCTIONS When fi tting one of these appliances local and/or national regulations relating to fi re safety must be followed. In case of doubt, consult the fi re safety department of the local fi re brigade, particularly if the fi re is to be fi tted in a home with walls and/or fl oors containing fl... -
Page 22: Fitting
UNIVERSAL-6 85 3.3 FITTING The appliance can be fi tted in the newly-built or existing chimney breast of an open fi re. When fi tting, both fi re safety and operational safety must be safeguarded. The fi tter is responsible for this. - Page 23 UNIVERSAL-6 85 3.3.1 Positioning of the appliance The appliance must be positioned on a concrete surface. If such a surface is not immediately available, a suffi ciently solid pedestal of noninfl ammable material should be built from the creeping space.
- Page 24 UNIVERSAL-6 85 Examples installation possibilities. A Appliance as an insert-appliance in an existing chimney. B Appliance as an insert-appliance in an existing chimney. Fitted with a convection set and ventilation of the chimney. Legend page 27 Installation instructions...
- Page 25 UNIVERSAL-6 85 C Appliance as an insert-appliance in an existing chimney. Convection air through the chimney breast. Fitted with ventilation of the chimney. II A Appliance as a build-in appliance in an existing or a new chimney. Fitted with ventilation of the chimney.
- Page 26 UNIVERSAL-6 85 II B Appliance as a build-in appliance in an existing or a new chimney. Fitted with a convection set and ventilation of the chimney. II C Appliance as a build-in appliance in an existing or a new chimney.
- Page 27 UNIVERSAL-6 85 Appliance: Inlet opening combustion air (front of appliance) Inlet opening combustion air (bottom / rear of appliance, Ø125 mm) with the aid of the air supply adapter (pre-mounted) Inlet opening convection air (front of appliance) Flue connection (topside of appliance, Ø180 mm)
- Page 28 UNIVERSAL-6 85 3.3.2 Aeration / ventilation The appliance generates: - convection air - combustion air Convection air is devoted to the convection of heat from the appliance to the room. The source of heat is in the room and stays there.
- Page 29 UNIVERSAL-6 85 3.3.3 Fitting in an existing chimney Do not use masking tape on the appliance when installing and plastering. Tape can damage the fi nish of the appliance. • Remove the existing fi re basket or stoking stones and remove the shut-off fl ap. The chimney must be intact and must not be damaged during fi...
- Page 30 UNIVERSAL-6 85 • Assembly convection set: ° Secure the 2 collar adaptors to the appliance. ° Now connect the fl exible hoses to the 2 collar adaptors (Ø125 mm) on the top of the fi re and to the metal fi tting box on the air exit grids that are being used (do not forget to fi...
- Page 31 UNIVERSAL-6 85 Referring to the electrical wiring diagram in fi gure 4, connect the dimmer to the fan. Brown Blue Blue Brown Earthed plug (with earth sleeve) 230 VAC Convection fan 230 VAC/50 Hz Adjustable dimmer Thermostat “Clickson” set at ± 40°C...
- Page 32 UNIVERSAL-6 85 Figure 5: Use of convection set and ventilation of the chimney (diagram) • Close up the front. Available BARBAS grids (option) for ventilating the chimney: COLOUR DIMENSION (cm) CLEAR OPENING (cm Brass or white 13.5 x 13.5 (incl. fi tting) Brass or white 27.0 x 13.5...
- Page 33 UNIVERSAL-6 85 • During installation of the appliance, a clearance of 3 mm should be maintained on all sides of the appliance to allow for expansion of the appliance during operation. • If the appliance is to be placed against a bearing wall or against a wall containing fl...
- Page 34 UNIVERSAL-6 85 • Pull the pipe of the appliance or the stainless steel (fl exible) pipe downwards through the appliance and secure it to the smoke outlet connection. Fix with hose clamp (Minimum 2 pieces per connection.) Installation instructions...
- Page 35 UNIVERSAL-6 85 Pipe of steel for the appliance • Push the smoke outlet connection back upwards and secure it in place. • Replace the brake plate and fl ue gas fl ap. Installation instructions...
-
Page 36: Combustion Air Supply System Surround
UNIVERSAL-6 85 3.4 COMBUSTION AIR SUPPLY SYSTEM SURROUND If the appliance is delivered by the dealer with the combustion air supply at the front of the appliance it is possible - before the appliance is built into to fi replace - to fi t an outside air connection. - Page 37 UNIVERSAL-6 85 Remove the air supply adapter by carefully pressing it down at the back and then at the front. Unscrew the screws a little more if the adapter cannot be removed. Move the top cover to the other side of the adapter with the aid of open-end wrench 8.
- Page 38 UNIVERSAL-6 85 Air supply through the underside of the appliance Use a hammer to hit the jaw plate out of the air supply adapter and place a collar in the hole that has been created. Screw the collar tight and bend the 3 fl anges outwards.
-
Page 39: Preparation / Function Check
UNIVERSAL-6 85 Air supply through the rear Reconnect the air supply to the appliance. Take the connection module for the back connection and hit the jaw plate out with a hammer. Place a collar in the opening that has been created. Tighten the collar and bend the 3 fl... -
Page 40: Operation
UNIVERSAL-6 85 OPERATION The appliance with fan set (option) and convection set (option) built into chimney Figure 6: Operation Handle Ceramic heat-proof glass Convection air outlet opening front (if there’s no convection set available) Natural convection air outlet opening (2x grate) (chimney) -
Page 41: Annual Maintenance
ANNUAL MAINTENANCE It is essential that the appliance, the chimney and the combustion air supply are cleaned and inspected annually, by a Barbas-dealer/expert. The safe operation of the appliance will thus remain guaranteed. Start with maintence 24 hours after the last burning period. - Page 42 Wait for the appliance to cool down suffi ciently before cleaning. Never use scouring powder, aggressive cleaners or fi re polish on the appliance. • Any lacquer damage can be repaired with a BARBAS heat resistant paint spray can. (Pay atention that the appliance is suffi ciently cooled down !) Ventilation house: †...
-
Page 43: Replacement Parts
UNIVERSAL-6 85 REPLACEMENT PARTS Pos no Article no Description 339414 Brake plate stainless steel 337872 338607 Stone brake plate 338523 Stone side left 338606 Stone rear 339417 Bottom 338074 Combustion grate 338524 Stone side right 339418 Wood rack 339394 Ceramic glass When ordering, please give the serial number. - Page 44 UNIVERSAL-6 85 SEQUENCE FOR REPLACING THE INTERIOR OF THE APPLIANCE • Remove the grate and the ashtray. Although the heat resistant panels have been manufactured with the greatest care, there is the possibility that some sharp parts may stick out, possibly causing injuries. We therefore urgently recommend wearing safety gloves when handling the panels.
- Page 45 UNIVERSAL-6 85 • Unscrew the locking pin with the aid of an Allen key and a wrench. You can now remove the top brake plate by pulling it forward slightly and then tipping it downwards The brake plate can now be pulled forwards and out.
- Page 46 UNIVERSAL-6 85 • Remove the bottom brake plate by lifting it slightly and removing it sloping to one side. • Remove carefully the left-hand side panel. Installation instructions...
- Page 47 UNIVERSAL-6 85 • Remove carefully the right-hand side panel. Make sure the rear panels do not fall forwards ! • Remove carefully the rear panel, by lifting it upwards and remove it diagonally forward. The entire interior is now disassembled.
- Page 48 UNIVERSAL-6 85 6.2 REMOVING THE FAN ATTENTION! Ensure that there is no current on the fan before removal starts. Pull the plug out of the socket or switch the switch on the electricity meter to zero. Unscrew the steel hatch that is visible on the back wall after the removal of the concrete panels.
- Page 49 UNIVERSAL-6 85 Carefully pull the small plugs off the fan. The fan can now be removed from the appliance together with the hatch Unscrewing the 4 screws on the hatch removes the fan from the hatch. Fitting the fan takes place in reverse order.
-
Page 50: Dimensions
UNIVERSAL-6 85 DIMENSIONS • without frame With the high adjustable feet, the appliance can be installed till 350 mm above the fl oor Installation instructions... - Page 51 UNIVERSAL-6 85 • with built-in frame With the high adjustable feet, the appliance can be installed till 350 mm above the fl oor Installation instructions...
- Page 52 UNIVERSAL-6 85 • with classic frame With the high adjustable feet, the appliance can be installed till 350 mm above the fl oor Installation instructions...
- Page 53 UNIVERSAL-6 85 • with deepened frame With the high adjustable feet, the appliance can be installed till 350 mm above the fl oor Installation instructions...
-
Page 54: Technical Data
UNIVERSAL-6 85 TECHNICAL DATA Combustion: Measured in compliance with EN 13229 : 2001 and EN 13229 - A2 : 2004 Fuel Wood Nominal output 12 kW Effi ciency Emissions Carbon monoxide (CO) 0.10%; 1210 mg/m (STP, bij 13% O Dust... - Page 55 UNIVERSAL-6 85 Combustion air supply: At least 150 cm opening in the room where the fi re is located or a outside air supply opening of Ø125 mm in wall/fl oor. • Convection fan 230 VAC / 39 W Options: Rev control by built-in fanspeed controller.
-
Page 56: Warranty Terms
1.1. If Barbas Bellfi res B.V. determines that the Barbas appliance you have purchased is defective as a result of a fl aw in the construction or material, Barbas Bellfi res B.V. guarantees to repair or replace the appliance free of charge, without charging any costs for labour or spare parts. - Page 57 Article 5: Warranty period 5.1. This warranty will only be granted during the warranty period. 5.2. The body of the Barbas appliance is guaranteed for a period of 10 years against construction and/or material faults, starting from the moment of purchase.
- Page 58 UNIVERSAL-6 85 Installation instructions...
- Page 60 Your Barbas dealer 04 - 040719 - 339439...
Need help?
Do you have a question about the UNIVERSAL-6 85 and is the answer not in the manual?
Questions and answers