Table of Contents
Advertisement
Advertisement
Table of Contents

Related Manuals for KOORUI 34E6UC


Summary of Contents for KOORUI 34E6UC
- Page 1 34E6UC User Manual KOORUI Monitor...
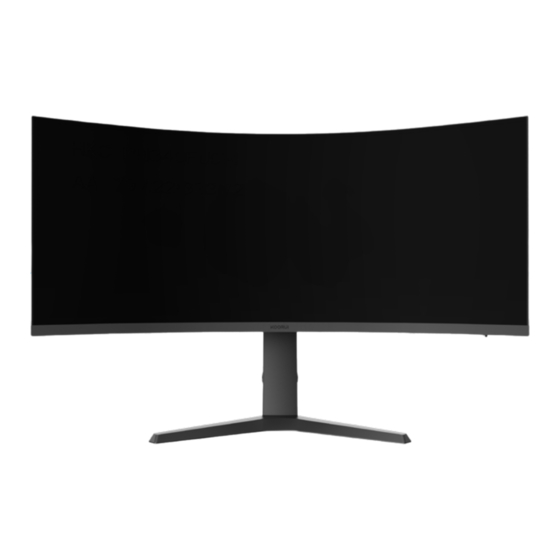
- Page 2 Product Specification MODEL 34E6UC Display Screen Form Curved surface 1000R , VA Screen Size 34 Inches Reaction Time 1ms(MPRT) Display Color 16.7M Colors Aspect Ratio 21:9 Perspective(typ.) 400cd/m Resolution 3440*1440 Pixel Distance 0.23175*0.23175mm Maximum Refresh Rate 165Hz Viewing Angle (H / V) 178°/178°...
-
Page 3: Table Of Contents
Contents ChapterⅠAttention ························································ 01 Safety Precautions ···························································· 01 Storage Precautions ·························································· 01 Product Placement Space ················································· 02 Protection Recommendations ··········································· 02 Product Pick-and-Place ···················································· 03 Chapter Ⅱ Preparation Before Use ························ 04 Product Accessories ························································· 04 Monitor Stand Installation ················································· 04 2.2.1 ······················································... -
Page 4: Chapterⅰattention
ChapterⅠAttention Safety Precautions WARNING: Serious or fatal injury may result if instructions are not followed. CAUTION: Personal injury or damage to properties may result if instructions are not followed. RISK OF ELECTRIC SHOCK. DON'T OPEN CAUTION: TO REDUCE THE RISK OF ELECTRIC SHOCK, DO NOT REMOVE COVER (OR BACK). -
Page 5: Product Placement Space
The power supply voltage range of the device operation is indicated on the label Ν on the rear case. If you are not sure about the supplied voltage, you can consult the local power company. Ν When the device is not used for a long time, please cut off the power supply to prevent damage to the motor and abnormal power supply voltage in thunderstorms. -
Page 6: Product Pick-And-Place
When taking a break, take your eyes off the monitor and focus on the distance Ν for 20 seconds. Ν When taking a break, stretch or soothe the neck, arms, back, and shoulders. Low blue light description The blue light wavelength is in the blue light band, and the display has the function of reducing blue light emission. -
Page 7: Chapter Ⅱ Preparation Before Use
Chapter Ⅱ Preparation Before Use Product Accessories: Your monitor comes with the following parts. Please check that all parts have been received and contact Koorui if any are missing. Power cable Monitor Stand neck Base (length 1.5m) DP data cable... -
Page 8: Vesa Mount Installation
Insert the base into the column according to the direction shown in the figure; Use 2# cross screwdriver to tighten the screws clockwise. Check whether the base and the column are firmly connected, and place the installed product on a stable platform according to figure 1.5 - monitor pick-and-place method. -
Page 9: Monitor Disassembly
Wall Mount Notes: Please purchase the VESA bracket device separately. Ν For more information, please refer to the user guide provided with your VESA Ν bracket device. Bracket Disassembly 2.3.1 Schematic diagram for VESA bracket changing to display bracket Replace the actual monitor color and the foot frame Remove VESA holder screws Remove the VESA screw post (If the screw post is not used, skip this step). -
Page 10: Monitor Stand Removal
2.3.2 Removal of the monitor bracket Place the foamed polystyrene (Mat) in the package on the floor and place the product face down on the foamed polystyrene as shown. If you don't have styrofoam, use a thick cushion. Push the base hook. One hand holds the lower part of the monitor, the other hand in the direction of the arrow drawing... -
Page 11: Interface Description
Interface and Data Cable Connection Instructions HDMI 2.0 HDMI 2.0 Audio Port Port Description Connect to audio output devices that support 3.5 mm headphones. Note: DVI and VGA do not support audio transmission. HDMI 2.0 Use HDMI cable to connect to your PC. HDMI 2.0 Use DP cable to connect to your PC. -
Page 12: Adjustment Of Product Tilt
If the original device signal is abnormal, it is recommended to contact the source device manufacturer rst. If you need Koorui’s assistance, please contact Koorui’s after-sales sta . Adjust Product Inclination The adjustment between front... -
Page 13: Anti-Theft Lock
Anti-theft Lock Anti-theft lock is an anti-theft device that allows users to lock the product so as to use the product safely in public places. Please buy the anti-theft lock device separately yourself. Ν For more information, please refer to the user guide provided with your Ν... -
Page 14: Chapter Ⅲ Osd Function
Chapter Ⅲ OSD Function See the OSD function information table. If you have any questions, please feel free to contact Koorui after-sales service team. Menu Select the Select the Right item left item Select this feature Push the button up or click the button to pop up the selection menu;... - Page 15 FreeSync Enable or disable FreeSync mode Premium Turn on or off the shadow mode, and games with Dark field bright effect low darkness will become brighter. Select the OD gear, and the grayscale response Response time time corresponds to the power on Open or close MPRT mode;...
- Page 16 Enables the standard mode (default) Standard mode You can set options freely in this mode. Enables the FPS mode. FPS mode This is the best experiences for FPS games. Enables the RPG mode. RPG mode This is the best experiences for RPG games. Enables the RCG mode.
-
Page 17: Chapter Ⅳ Common Applications
Chapter Ⅳ Common Applications Resolution and Refresh Rate Setting 4.1.1 Resolution settings Windows:Windows Settings > System > Screen > Display Resolution Mac:MAC System Preferences > Monitor > Optimization>Scaling 4.1.2 Refresh rate setting Windows:Windows Settings > System > Screen > Advanced Display Settings >... -
Page 18: Chapter Ⅴ Q&A
Chapter Ⅴ Q&A The following table lists some common monitor problems that you may Ν encounter and their solutions. If you can't solve your difficulties, please contact Koorui customer services. Ν http://www.koorui.net/ Official website: Ν support@koorui.net Ν E-mail: The blank that appears on the screen has nothing to do with our product. - Page 19 There is no image on the The product runs under the power-saving mode; screen, and the power Press any key on the keyboard or move the mouse to get back to the LED flashes every 0.5 normal operating mode; to 1 second. Use the Caps Lock on your PC keyboard to see if your computer is operating or rebooting your device.
Need help?
Do you have a question about the 34E6UC and is the answer not in the manual?
Questions and answers