Advertisement
Quick Links
Advertisement

Related Manuals for HIT FITNESS HIT00707


Summary of Contents for HIT FITNESS HIT00707
- Page 1 HIT00707 USERE MANUAL- Tyr Multi-Gym...
-
Page 2: Precautions For Use
Precautions for use 1.Please read this instruction carefully before using and installing the product. 2.Please consult your doctor before use this product correctly. If you have abnormal discomfort such as dizziness, chest tightness, physical discomfort and abnormal pain during exercise, please stop using it immediately. immediately. - Page 3 Step 1: ④Elbow cushions ② Main frame+handle (2 ① Foot tubes (1 pair) ③ Upper arms (1 pair) pairs) (1 pair)+ Elbow cushion screws ⑤Bottom foot sleeves ⑥ Foot tube connect ⑦ Horizontal bar ⑧ Connect pipes of (2 pairs) pipes (front and rear) the main frame (1pair)
- Page 4 Step 2: Install 4 foot ①Put foot tubes into the 4 bottom foot sleeves respectively (4 foot set parallel to the ground) Step 3: Mount the foot tube connecting pipes to connect left and right main frame ① Fasten the connect rods with the 8pcs Carriage Bolts(b.M8×65mm).
- Page 5 Step 5: Install the top connecting rod ① Use the external hexagon (c.M8x45mm) screws to pass out from the inside, put the fixed plate on, and fasten it with the nuts of M8. Step 6 : Install the elbow cu shion Tighten the plates with the built-in screws ( of elbow h.
- Page 6 Step 7 : Install back cushion ① Fasten the holes on the two ends of the back cushion to the aligned nails on the main frame with external hexagon screws (e.M8x12mm). Step 8: Install upper arms and ① Insert the upper arms into the top of the main frame directly, as shown in the figure. ②...
- Page 7 Step 9: Adjust the suitable angle and height ① When adjusting the hole position to the suitable height, you can use the screw of the plastic handle screws (d.M8x40) to pass through the main frame and lock with the upper arm. Step 10: Install the bench...
- Page 8 Install the ①Rotate the M8*55mm outer hexagonal screw to fix the foot rest, adjust the foot rest to a suitable position, and insert the 8*66 bolt. ② Insert carriage screw M10*80mm into the mounting hole as shown in the picture, and then use the plastic cover of the M10 to rotate and secure.
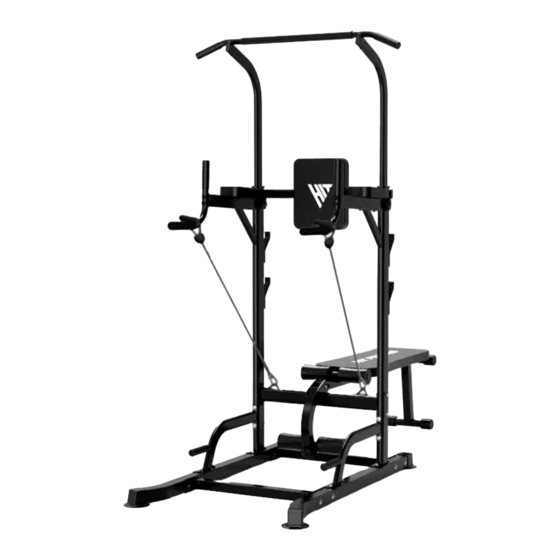
- Page 9 Installation complete as shown...
Need help?
Do you have a question about the HIT00707 and is the answer not in the manual?
Questions and answers