
Related Manuals for Phcbi MDF-MU549DH


Summary of Contents for Phcbi MDF-MU549DH
- Page 1 Operating Instructions Biomedical Freezer MDF-MU549DH Please read the operating instructions carefully before using this product, and keep the operating instructions for future use. See page 37 for model number.
-
Page 2: Table Of Contents
CONTENTS INTRODUCTION ꞏꞏꞏꞏꞏꞏꞏꞏꞏꞏꞏꞏꞏꞏꞏꞏꞏꞏꞏꞏꞏꞏꞏꞏꞏꞏꞏꞏꞏꞏꞏꞏꞏꞏꞏꞏꞏꞏꞏꞏꞏꞏꞏꞏꞏꞏꞏꞏꞏꞏꞏꞏꞏꞏꞏꞏꞏꞏꞏꞏꞏꞏꞏꞏꞏꞏꞏꞏꞏꞏꞏꞏꞏꞏꞏꞏ 3 INTENDED USE AND PRECAUTIONS ꞏꞏꞏꞏꞏꞏꞏꞏꞏꞏꞏꞏꞏꞏꞏꞏꞏꞏꞏꞏꞏꞏꞏꞏꞏꞏꞏꞏꞏꞏꞏꞏꞏꞏꞏꞏꞏꞏꞏꞏꞏꞏꞏꞏꞏꞏꞏꞏ 3 EMC PERFORMANCE ꞏꞏꞏꞏꞏꞏꞏꞏꞏꞏꞏꞏꞏꞏꞏꞏꞏꞏꞏꞏꞏꞏꞏꞏꞏꞏꞏꞏꞏꞏꞏꞏꞏꞏꞏꞏꞏꞏꞏꞏꞏꞏꞏꞏꞏꞏꞏꞏꞏꞏꞏꞏꞏꞏꞏꞏꞏꞏꞏꞏꞏꞏꞏꞏꞏꞏꞏꞏꞏ 3 PRECAUTIONS FOR SAFE OPERATION ꞏꞏꞏꞏꞏꞏꞏꞏꞏꞏꞏꞏꞏꞏꞏꞏꞏꞏꞏꞏꞏꞏꞏꞏꞏꞏꞏꞏꞏꞏꞏꞏꞏꞏꞏꞏꞏꞏꞏꞏꞏꞏꞏꞏ 4 Symbols on unit ꞏꞏꞏꞏꞏꞏꞏꞏꞏꞏꞏꞏꞏꞏꞏꞏꞏꞏꞏꞏꞏꞏꞏꞏꞏꞏꞏꞏꞏꞏꞏꞏꞏꞏꞏꞏꞏꞏꞏꞏꞏꞏꞏꞏꞏꞏꞏꞏꞏꞏꞏꞏꞏꞏꞏꞏꞏꞏꞏꞏꞏꞏꞏꞏꞏꞏꞏꞏꞏꞏꞏꞏꞏꞏ 4 LABELS ON UNIT ꞏꞏꞏꞏꞏꞏꞏꞏꞏꞏꞏꞏꞏꞏꞏꞏꞏꞏꞏꞏꞏꞏꞏꞏꞏꞏꞏꞏꞏꞏꞏꞏꞏꞏꞏꞏꞏꞏꞏꞏꞏꞏꞏꞏꞏꞏꞏꞏꞏꞏꞏꞏꞏꞏꞏꞏꞏꞏꞏꞏꞏꞏꞏꞏꞏꞏꞏꞏꞏꞏꞏꞏꞏꞏꞏ 9 ENVIRONMENTAL CONDITIONS ꞏꞏꞏꞏꞏꞏꞏꞏꞏꞏꞏꞏꞏꞏꞏꞏꞏꞏꞏꞏꞏꞏꞏꞏꞏꞏꞏꞏꞏꞏꞏꞏꞏꞏꞏꞏꞏꞏꞏꞏꞏꞏꞏꞏꞏꞏꞏꞏꞏꞏꞏꞏꞏꞏ 9 FREEZER COMPONENTS Main body ꞏꞏꞏꞏꞏꞏꞏꞏꞏꞏꞏꞏꞏꞏꞏꞏꞏꞏꞏꞏꞏꞏꞏꞏꞏꞏꞏꞏꞏꞏꞏꞏꞏꞏꞏꞏꞏꞏꞏꞏꞏꞏꞏꞏꞏꞏꞏꞏꞏꞏꞏꞏꞏꞏꞏꞏꞏꞏꞏꞏꞏꞏꞏꞏꞏꞏꞏꞏꞏꞏꞏꞏꞏꞏꞏꞏꞏꞏꞏ 10 Control panel ꞏꞏꞏꞏꞏꞏꞏꞏꞏꞏꞏꞏꞏꞏꞏꞏꞏꞏꞏꞏꞏꞏꞏꞏꞏꞏꞏꞏꞏꞏꞏꞏꞏꞏꞏꞏꞏꞏꞏꞏꞏꞏꞏꞏꞏꞏꞏꞏꞏꞏꞏꞏꞏꞏꞏꞏꞏꞏꞏꞏꞏꞏꞏꞏꞏꞏꞏꞏꞏꞏꞏꞏꞏꞏꞏ... -
Page 3: Introduction
INTRODUCTION ■ Read the operating instructions carefully before using the product and follow the instructions for safe operation. ■ PHC Corporation takes no responsibility for safety if the product is not used as intended or is used with any procedures other than those given in the operating instructions. ■... -
Page 4: Precautions For Safe Operation
PRECAUTIONS FOR SAFE OPERATION It is imperative that the user complies with the operating instructions as they contain important safety advice. Items and procedures are described so that you can use this unit correctly and safely. Following these precautions will prevent possible injury to the user and any other person. Precautions are illustrated in the following way: WARNING Warning indicates a potentially hazardous situation which, if not avoided,... - Page 5 PRECAUTIONS FOR SAFE OPERATION WARNING Do not use the unit outdoors. Exposure to rain may cause leakage and/or electric shock. Only qualified engineers or service personnel should install the unit. Installation by unqualified personnel may cause electric shock or fire. Install the unit in a location capable of bearing the total combined weight (product + optional accessories + stored items).
- Page 6 PRECAUTIONS FOR SAFE OPERATION WARNING When handling harmful samples (for example, those which consist of toxic, pathogenic or radioactive substances), install the unit inside a designated isolation facility. If the unit is installed in a location which is not an isolation facility, there may be detrimental effects on both people and the natural environment.
- Page 7 PRECAUTIONS FOR SAFE OPERATION WARNING Remove dust from the power supply plug periodically. Dust on the power supply plug may cause insulation failure due to moisture and thus cause a fire. Disconnect the power supply plug and wipe it with a dry cloth Disconnect the power supply plug before moving the unit.
- Page 8 PRECAUTIONS FOR SAFE OPERATION CAUTION Never install the unit in a location where corrosive materials such as sulphur compounds are likely to be generated (e.g. near a drainage facility). Corrosion of the copper pipes may result in the deterioration and consequently the failure of the cooling unit. This unit must be plugged into a dedicated circuit protected by a branch circuit-breaker.
-
Page 9: Labels On Unit
LABELS ON UNIT <Labels applied to the unit> To avoid accidents, users are advised to read carefully the hazard labels found at key locations on the interior and exterior of the unit. Possible Warning/Caution Type Warning/Caution Label Description of Danger Danger Location of Danger To prevent frostbite, wear... -
Page 10: Freezer Components
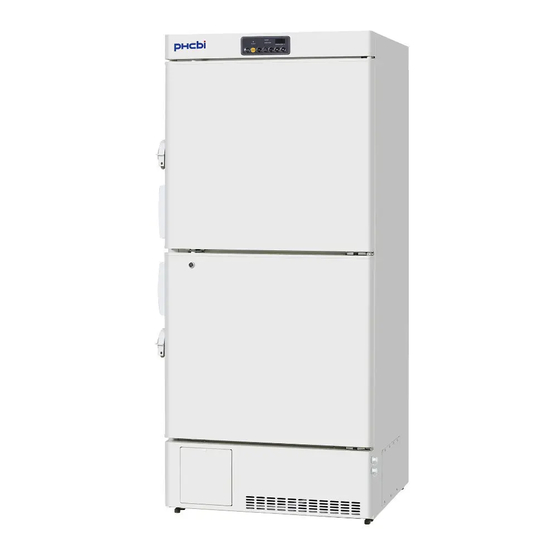
FREEZER COMPONENTS Main body <Front side> Drain port (Bottom of cabinet) Inlet <Back side> <Right side>... - Page 11 FREEZER COMPONENTS 1. Lock: Turn counterclockwise to 180 with a key and the outer door is securely locked. 2. Door: To open the door, grip the handle. 3. Handle: Always grip this handle to open and close the door. 4-1. Space for temperature recorder in bottom compartment : A temperature recorder (optional component) can be attached here.
-
Page 12: Control Panel
FREEZER COMPONENTS Control panel 1. Alarm lamp (ALARM): This lamp is flashed when the audible alarm is activated. 2. Bottom compartment lamp (BOTTOM): This lamp is turned on when the bottom compartment is selected. 3. Top compartment lamp (TOP): This lamp is turned on when the top compartment is selected. 4. -
Page 13: Installation Site
INSTALLATION SITE This unit must be installed in a location which meets all the conditions described below. • If the unit is installed in a location which does not meet the conditions, its specified performance may not be achieved or malfunctions and accidents may occur. ■... -
Page 14: Installation
INSTALLATION When installing the unit, follow the steps below to secure the unit properly, and also be absolutely sure to earth the unit. 1. Preparations after unpacking Remove all the tape used to secure the doors and interior parts, and leave the doors open for a short while for ventilation. - Page 15 INSTALLATION 5. Installation of shelves The shelves are packaged all together in the chamber. Set the shelves firmly in place on the shelf stoppers at the standard locations. (Fig. 3) Note: • Incomplete installation may cause injury or damage. Shelf stopper Standard locations mark Fig.
-
Page 16: Start-Up Of Unit
START-UP OF UNIT Use the following procedure to start trial operation or actual operation of the unit. 1. In the empty state, power supply plug the plug into a power supply outlet. Confirm that the temperature display on the control panel is blinking. 2. -
Page 17: Temperature Setting
TEMPERATURE SETTING Table 1 shows the basic procedure for setting the chamber temperature. Perform key operations in the sequence indicated in the table. The example in the table is based on the assumption that the desired temperature is -25 Note: The chamber temperature is set to -40 C at the factory. -
Page 18: Key Lock Function
KEY LOCK FUNCTION This unit is provided with the key lock function. When the key lock is ON, change of temperature setting through the key pad is not possible. The key lock is set to OFF at the factory. Display Mode Function Key lock is OFF... - Page 19 ALARM TEMPERATURE SETTING Table 3 Procedure for setting high temperature alarm (Top compartment) Description of operation Key operated Indication after operation The current chamber temperature is ----- ----- displayed. Press numerical value shift key for The display changes to F00 and the first digit blinks.
- Page 20 ALARM TEMPERATURE SETTING Table 5 Procedure for setting high temperature alarm (Bottom compartment) Description of operation Key operated Indication after operation The current chamber temperature is ----- ----- displayed. Press numerical value shift key for The display changes to F00 and the first digit blinks.
-
Page 21: Setting Of Alarm Delay Time
SETTING OF ALARM DELAY TIME The delay time of the buzzer and remote alarm for high and low temperature alarm can be set between 0 and 15 minutes. The procedure in table 7 shows the sequence to set the delay time to 10 minutes. The delay time is set to 15 minutes at the factory. -
Page 22: Setting Of Alarm Resume Time
SETTING OF ALARM RESUME TIME The buzzer is cancelled by pressing buzzer stop key (BUZZER) on the control panel during alarm condition. However, if the alarm condition is continued after the “alarm resume time” has passed, the buzzer sounds again. It is possible to change the alarm resume time by the procedure shown in the Table 8. -
Page 23: Setting Of Alarm Buzzer Link Mode
SETTING OF ALARM BUZZER LINK MODE Setting the alarm buzzer link mode enables the alarm buzzer and the remote buzzer to operate in conjunction / non- linking. Setting the alarm buzzer link mode is as follows in Table 9. Note: Factory setting;... -
Page 24: Change Of Compressor Delay Time
CHANGE OF COMPRESSOR DELAY TIME The delay time of the compressor can be changed to reduce the load on the power line and to facilitate the start-up (reset) of the freezer after power failure. The example in the table is based on the assumption that the delay time is changed to 4 minutes. The delay time is set in 3 minutes at the factory. -
Page 25: During/After Power Failure
DURING/AFTER POWER FAILURE ■ Display of chamber temperature during power failure By depressing the buzzer stop key (BUZZER) during “power failure alarm”, the buzzer stop and the chamber temperature is displayed on the temperature display for 5 seconds. • Check the chamber temperature as appropriate by depressing the buzzer stop key (BUZZER) during power failure. -
Page 26: Alarms & Safety Functions
ALARMS & SAFETY FUNCTIONS This unit has the alarms and safety functions shown in Table 11, and also self diagnostic functions. Table 11. Alarms and safety functions Indication Alarm Situation Safety functions Alarm buzzer Digital temp. indicator Alarm lamp If the chamber temperature is higher High temperature than the temperature at which the Intermittent... -
Page 27: Routine Maintenance
ROUTINE MAINTENANCE WARNING Always disconnect the power supply to the unit prior to any repair or maintenance of the unit in order to prevent electric shock or injury. Cleaning the exterior, interior, and accessories Use a dry cloth to wipe down the outside and inside of the unit and all accessories. If the outside panels are dirty, clean them with a diluted neutral dish-washing detergent. -
Page 28: Calibration
CALIBRATION During continuous operation, the following service tasks must be performed: • Perform a temperature calibration at least once a year. For temperature calibration, contact our sales representative or agent. REPLACEMENT OF WORN-OUT PARTS Replacement of the battery for the power failure alarm Replace the battery for the power failure alarm about every 3 years to ensure the alarm will operate in the event of a power failure. -
Page 29: Troubleshooting
TROUBLESHOOTING If the unit malfunctions, check out the following before calling for service. <Attention> If the malfunction is not resolved after checking the following items or if the malfunction is not shown in the table below, contact our sales representative or agent. Malfunction Check/Remedy Nothing operates even... -
Page 30: Disposal Of Unit
DISPOSAL OF UNIT WARNING If the unit is to be stored unused in an unsupervised area for an extended period ensure that children do not have access and doors cannot be closed completely. The disposal of the unit should be accomplished by appropriate personnel. Always remove doors to prevent accidents such as suffocation. - Page 31 DISPOSAL OF UNIT Disposal of Old Equipment and Batteries Likvidácia opotrebovaných zariadení a batérií Only for European Union and countries with recycling systems Len pre Európsku úniu a krajiny so systémom recyklácie These symbols on the products, packaging, and/or Tieto symboly uvádzané na výrobkoch, balení a/alebo v accompanying documents mean that used electrical and sprievodnej dokumentácii...
- Page 32 DISPOSAL OF UNIT Likvidace použitých zařízení a baterií Vanhojen laitteiden ja paristojen hävittäminen Jen pro státy Evropské unie a země s fungujícím systémem recyklace Vain EU-jäsenmaille ja kierrätysjärjestelmää käyttäville maille a zpracování odpadu. Tämä symboli tuotteissa, pakkauksessa ja/tai asiakirjoissa Tyto symboly na výrobcích, jejich obalech a v doprovodné tarkoittaa, että...
- Page 33 DISPOSAL OF UNIT Smaltimento di vecchie apparecchiature e batterie usate Eliminação de Equipamentos Usados e Baterias Solo per Unione Europea e Nazioni con sistemi di raccolta e Apenas para a União Europeia e países com sistemas de reciclagem smaltimento Estes símbolos produtos, embalagens,...
- Page 34 DISPOSAL OF UNIT Avfallshantering av produkter och batterier Brukerinformasjon om innsamling av gammelt utstyr og brukte Endast för Europeiska Unionen och länder med återvinningssystem batterier Dessa symboler på produkter, förpackningar och/eller Bare for EU og land med retursystemer medföljande dokument betyder att förbrukade elektriska Slike symboler på...
-
Page 35: Temperature Recorder (Option)
TEMPERATURE RECORDER (OPTION) The chamber temperature can be monitored and recorded by installing an optional temperature recorder. For the installation of a temperature recorder, an optional recorder fixing is necessary. • For the attachment of a temperature recorder, contact our sales representative or agent. •... -
Page 36: Specifications
SPECIFICATIONS Biomedical Freezer Product name MDF-MU549DH External dimensions W793 mm x D770 mm x H1802 mm Internal dimensions W649 mm x D614 mm x H600 mm (2 chambers) Effective capacity 479 L Exterior Painted steel Interior Painted steel Insulation Rigid polyurethane foamed-in place... -
Page 37: Performance
PERFORMANCE Biomedical Freezer Product name MDF-MU549DH Model number MDF-MU549DH-PE Cooling performance C (ambient temperature; 35 C, no load) Temperature control range C to -20 Rated voltage AC 220 V/230 V/240 V Rated frequency 50 Hz 215 W Rated power consumption Max.420 W... -
Page 38: Safety Check Sheet
CAUTION Please fill in this form before servicing. Hand over this form to the service engineer to keep for his and your safety. Safety check sheet 1. Freezer contents : □ □ Risk of infection: □ □ Risk of toxicity: □... - Page 39 MEMO...
- Page 40 Original Operating Instructions < EU countries only > 0123 Nijverheidsweg 120, 4879 AZ, Etten-Leur, The Netherlands 1-1-1 Sakada, Oizumi-machi, Ora-gun, Gunma 370-0596, Japan Printed in Indonesia LDCL062900-1 © PHC Corporation 2019 N0319-11019...
Need help?
Do you have a question about the MDF-MU549DH and is the answer not in the manual?
Questions and answers