Table of Contents
Advertisement
Quick Links
Yale Assure Lock
®
®
Touchscreen Deadbolt
®
Installation and Programming Instructions
(
YRD
226/YRD426)
Optional
Network Module
Before you begin
DOWNLOAD
THE BILT APP
for step-by-step installation
instructions & to register
your product
x3
#8-32 x 5/16"
Machine screws
x4
x2
#7 wood & #8-32
M6x59.5mm
machine x 20mm
Long through bolt
Combination screws
FAILURE TO FOLLOW THESE INSTRUCTIONS COULD RESULT IN DAMAGE TO
THE PRODUCT AND VOID THE FACTORY WARRANTY
1
P/N
YRL TSINSTL FUL
-
-
Rev F
Advertisement
Table of Contents

Related Manuals for Yale Assure Lock YRD426


Summary of Contents for Yale Assure Lock YRD426
- Page 1 Yale Assure Lock ® ® Touchscreen Deadbolt ® Installation and Programming Instructions 226/YRD426) Optional Network Module Before you begin DOWNLOAD THE BILT APP for step-by-step installation instructions & to register your product #8-32 x 5/16" Machine screws #7 wood & #8-32 M6x59.5mm...
- Page 2 Preparing Door YRL TSINSTL FUL Rev F...
- Page 3 Optional Fire Kit Parts For Model ONLY optional Installing Optional Fire Cup optional Inside of Door YRL TSINSTL FUL Rev F...
- Page 4 Installing Latch & Strike Plate 2-3/8" position d faut 2-3/4" position optional Pull Press Bolt must be in retracted (unlocked) position. Note horizontal orientation of mechanism. YRL TSINSTL FUL Rev F...
- Page 5 Installing Touchscreen Escutcheon Inside of Door Outside of Door Bolt must be in retracted (unlocked) position. Note horizontal orientation optional of mechanism. YRL TSINSTL FUL Rev F...
- Page 6 Installing Interior Mounting Plate Loosen screw to remove cover. optional YRL TSINSTL FUL Rev F...
- Page 7 Attaching the Cable Assembly YRL TSINSTL FUL Rev F...
- Page 8 Installing Interior Escutcheon YRL TSINSTL FUL Rev F...
-
Page 9: Testing Operation
Testing Operation Bolt must be in retracted (unlocked) position before installing batteries. YRL TSINSTL FUL Rev F... - Page 10 Testing Operation YRL TSINSTL FUL Rev F...
- Page 11 Installing Optional Network Module YRL TSINSTL FUL Rev F...
- Page 12 Installing Batteries & Cover "Welcome to Yale Real Living." Tighten screw to replace cover. Congratulations, you've installed the Yale Assure Lock ® ® Touchscreen Deadbolt ( 226/YRD426)! Continue with Programming Instructions to customize your product. YRL TSINSTL FUL Rev F...
-
Page 13: Programming Instructions
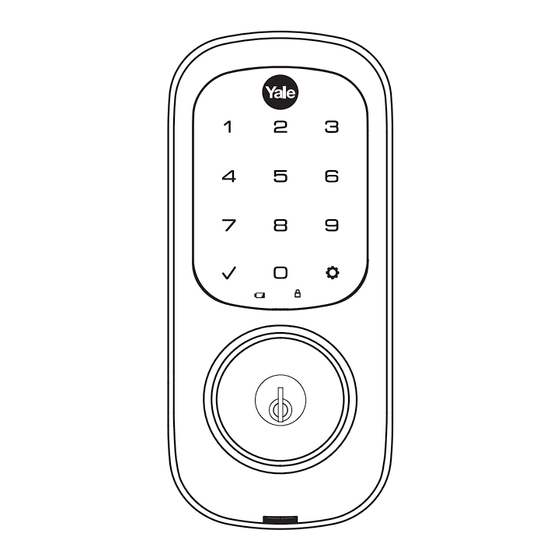
Programming Instructions Exterior Escutcheon "P" Key (Return to Previous) Interior Escutcheon Low Battery Indicator Lockout Mode Privacy Mode Button Speaker Master Code must be created before any further programming. Max User Codes = 250 with Z-Wave Plus or ZigBee network module Max User Codes = 25 without network module or with iM1 network module Nax User Codes = 12 with Bluetooth YRL TSINSTL FUL... - Page 14 Creating Master Code Creating a Master Code must be performed upon installation or after resetting the lock to factory default. Programming and use of lock is not possible until this step has been successfully completed. "Register Master Code. Press the gear key to continue."...
-
Page 15: Creating User
Creating User Codes Master code must be created first. *Max user codes = 250 with Z-Wave Plus or ZigBee network module Max user codes = 25 without network module or with iM1 network module Max user codes = 12 with Bluetooth "Menu Mode, enter number, press the gear key... -
Page 16: Code Chart
Unlocking Door with Code Enter Code Press Code Chart Duplicate if necessary PIN Code Management (With Network Module - Up to 250 Users) User Type User Name User # PIN Code Master User ___ User ___ User ___ User ___ User ___ User ___ User ___... - Page 17 Resetting Lock to Factory Default Interior Escutcheon When lock is reset to factory defaults all user codes (including the Master code*) are deleted and all programming features are reset to original default settings (see below). 1. Remove the battery cover and batteries. 2.
-
Page 18: Factory Settings
Factory Settings Settings Factory Setting Registration required* Master Code Automatic Re-lock Disabled Automatic Re-lock Time 30 Seconds Escape Return Mode (Model 620 only) Disabled Inside Indicator Light Disabled (Off) Language Setting English Disabled Lockout Mode One Touch Locking Enabled Privacy Setting Disabled Shutdown Time 60 Seconds... - Page 19 Definitions All Code Lockout Mode: This feature is enabled by the Master code. When enabled, it restricts all user (except Master) code access. When attempting to enter a code while the unit is in Lockout, the locked padlock will appear on the screen. Automatic Re-lock Time: After a successful code entry and the unit unlocks, it will automatically re-lock after thirty (30) seconds.
- Page 20 Model 226 Feature Programming Through Menu Mode Using Master code* 1. Touch screen with back of hand or palm to activate. 2. Enter 4-8 digit master code* followed by key. Lock Response: "Menu mode, enter number, press key to continue." 3.
- Page 21 Model 620 Feature Programming Through Menu Mode Using Master code* 1. Touch screen with back of hand or palm to activate. 2. Enter 4-8 digit master code* followed by key. Lock Response: "Menu mode, enter number, press key to continue." 3.
-
Page 22: Programming Troubleshooting
Programming Troubleshooting Symptom Suggested Action Touchscreen becomes active when pressed w/whole hand. Use a larger area of the hand or fingers and verify contact Lock does not respond – with at least 3 areas. door is open and If touchscreen numbers are visible, check to see if they accessible. -
Page 23: Hardware Troubleshooting
Hardware Troubleshooting Cycle lock in both the locked and unlocked positions. If problems are found: Bolt will not deadlock a. Check for sufficient clearance of the bolt within the strike-side jamb. Correct this by increasing the depth of the pocket for the bolt. b. - Page 24 ASSA ABLOY Group company. All rights reserved. Reproduction in whole or in part without the express written permission of Yale Security Inc. is prohibited. YALE, with its unique global reach and range of products, is the world's favorite lock – the preferred solution for securing your home, family and personal belongings.
- Page 25 Yale Z -Wave Plus Module ® ® ® Installation and Programming Instructions Installing the Z -Wave Plus Module ® IMPORTANT: the batteries must be removed prior to removing and/or inserting the network module: • Remove battery cover and batteries. • Remove and/or insert Network Module.
- Page 26 Copyright © 2017, Yale Security Inc., an ASSA ABLOY Group company. All rights reserved. Reproduction in whole or in part without the express written permission of Yale Security Inc. is prohibited. YALE, with its unique global reach and range of products, is the world's favorite lock –...
- Page 27 Yale ZigBee Module ® ® ® Installation and Programming Instructions Installing the ZigBee Module ® IMPORTANT: the batteries must be removed prior to removing and/or inserting the network module: • Remove battery cover. • Remove batteries. • Remove and/or insert network module.
- Page 28 Copyright © 2017, Yale Security Inc., an ASSA ABLOY Group company. All rights reserved. Reproduction in whole or in part without the express written permission of Yale Security Inc. is prohibited. YALE, with its unique global reach and range of products, is the world's favorite lock –...
Need help?
Do you have a question about the Assure Lock YRD426 and is the answer not in the manual?
Questions and answers